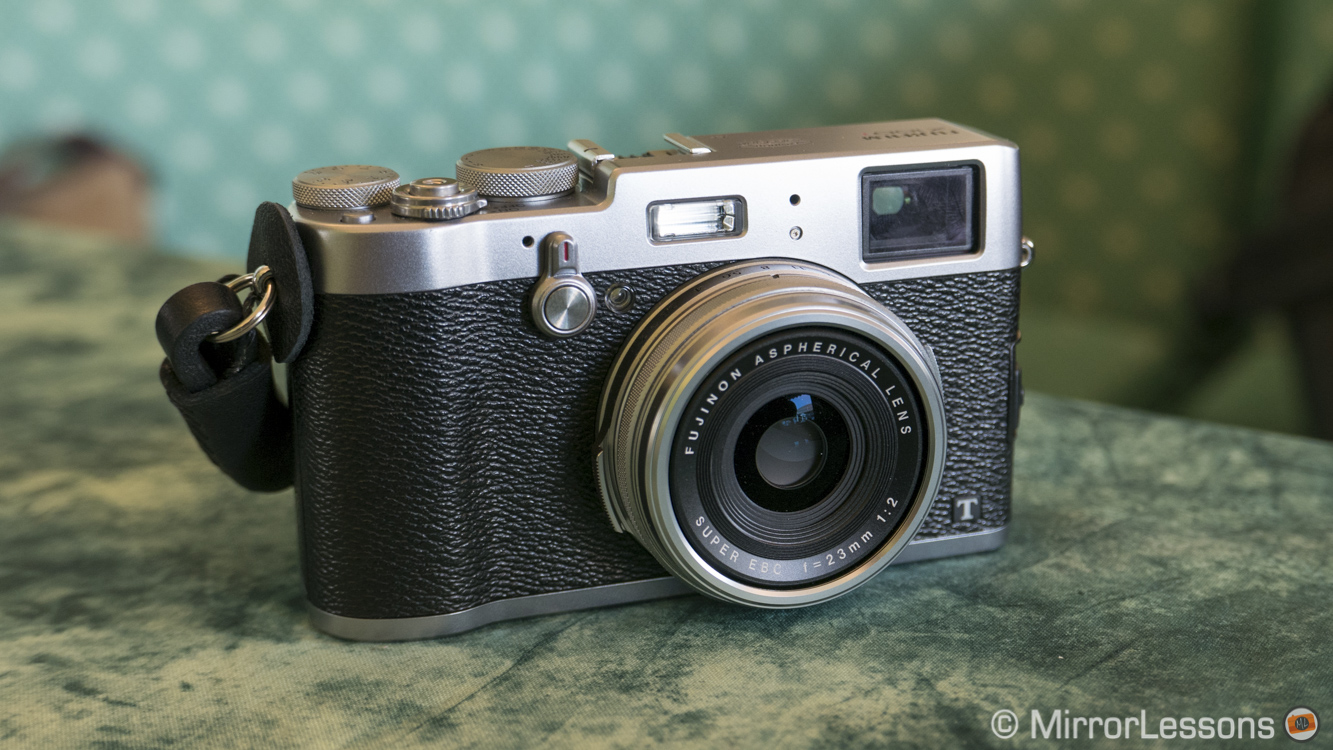
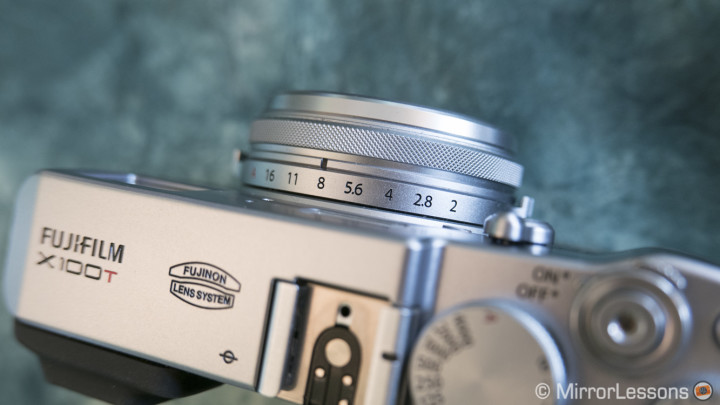
The Fujifilm X100T, the third camera in the X100 series, has attracted lots of attention much like its predecessors even if it doesn’t bring as many outstanding upgrades as the second in line, the X100s.
This new camera has the same sensor and the same lens as the precedent model. For those who already own the X100s, I can come out and say right away that I wouldn’t recommend a switch. However if you are interested in entering the Fujifilm X world for the first time, it is an entirely different story. Specifications aside, the X100T certainly demonstrates the maturity of a camera that in my humble opinion still holds the title of the best product in the X line-up.
Did Fujifilm perfect the X100 camera series with its latest release? Let’s find out!



Fujifilm X100T Main Specs
- Sensor: 16.3 million pixels APS-C X-Trans CMOS II
- Lens system: fixed 23mm f/2 (35mm equivalent on full frame format)
- Weatherproof: No
- Internal Stabilisation: None
- Autofocus: Hybrid AF (TTL contrast AF / TTL phase detection AF) with 49 points
- Continuous shooting: 6 fps (High), 3 fps (Low)
- ISO Sensitivity: 200 – 6400 ISO (extended up to 51200, JPG only)
- Shutter Speeds: 1/4000 to 30 seconds, 1/32000s to 1s with electronic shutter
- Viewfinder: Hybrid Viewfinder: LCD electronic viewfinder with 2,360k dots, approx. 100% FOV coverage and 0.65x magnification / Optical VF (Reverse Galilean type) with 92% FOV coverage with ERF (Electronic Rangefinder)
- LCD Screen: fixed 3″ LCD monitor (1040k dots)
- Movie recording: 1920 x 1080 pixels (60fps to 24fps), manual controls
- Built-in Flash: yes
- Extra Features: WiFi, Panorama, Interval Time Shooting, Multiple exposure, Silent Mode
- Dimensions: 126.5 x 74.4 x 52.4mm
- Weight: 440g (including battery and memory card)
[toc heading_levels=”3″]
Design and Ergonomics
The X100T is a compact camera. It won’t enter your jean pocket but will fit comfortably inside a coat pocket. My point here is that it is very portable and that is, without a doubt, one of its main advantages, especially when you consider that it includes an APS-C sensor, a fast aperture lens and an advanced viewfinder.
The compact and portable X100T has been designed to go wherever you go.
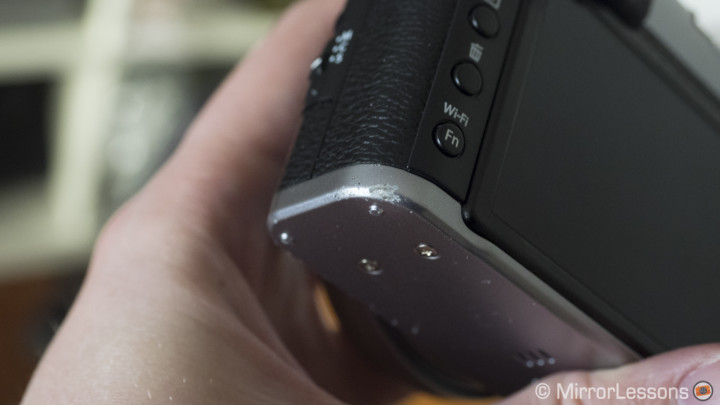
The camera has a robust build quality with magnesium alloy parts at the top and bottom. This time I also have concrete proof of its robustness and I’m not just talking about feeling. During my first days with the camera, I accidentally dropped it (first time ever) and it hit the cold tarmac 5cm away from green grass (irony at its best, I guess). As shown in the photo below, the body did suffer some scratches but nothing else. The camera still functions perfectly in every way. I am not trying to say that it is indestructible but it is a good sign of how robust it is. Of course I could be telling a whole different story right now if the camera had hit the ground at a different angle, so be more cautious than me and don’t put the X100T’s build to the test!
Holding the camera is nice but sometimes I feel the need for a more prominent grip, which is absent in the X100T’s design. What’s more, the lack of a thumb rest on the rear doesn’t help and the body feels a little bit slippery.
There are different solutions to get a better grip on the camera. The first is to buy an optional grip that you can screw onto the bottom. I recommend either the official MHG-X100 grip from Fujifilm or if you are willing to wait a little longer, the upcoming PhotoMADD grip designed for the X100T is also a good option. It will also be compatible with arca Swiss tripods so you don’t even need to mount the tripod plate.
Another option is to get a thumb grip you can mount onto the flash hot-shoe. Fujifilm announced official thumb grips for its X cameras including the X100T but they are only available in Japan for now. Lensmate is also working on a thumb grip for the camera. We tried the X-T1 version which is excellent (see the review here).
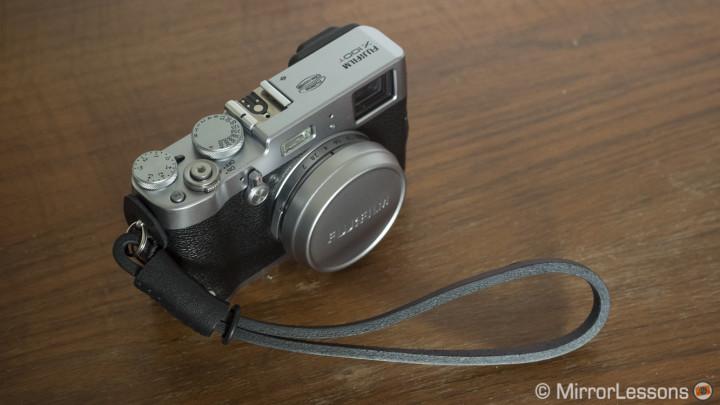
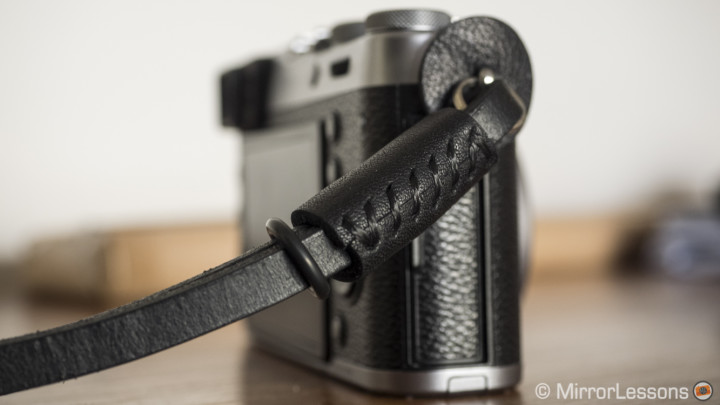
However if like me you like the design of the camera as it is and don’t want to add anything to it, then a good solution (apart from a classic neck strap) is a wrist strap. With the X100T, I use the DeadCameras wrist strap. It is very robust and easy to use thanks to its very flexible and soft leather. With such a camera, I prefer a wrist strap to a neck strap simply because I like to have it in my hand at all times, ready to capture decisive moments. I also prefer to have it at my side than lying on my stomach.
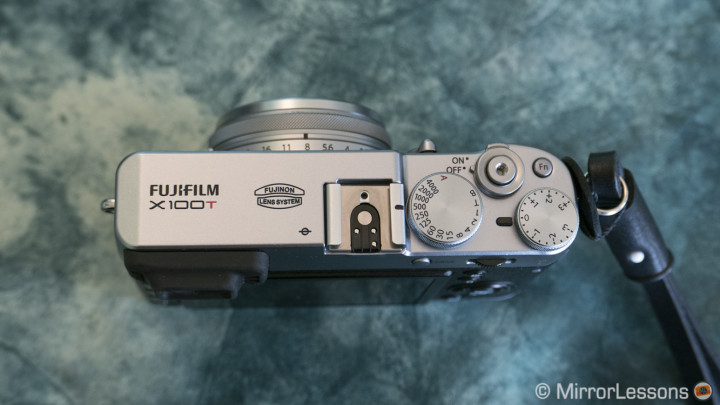
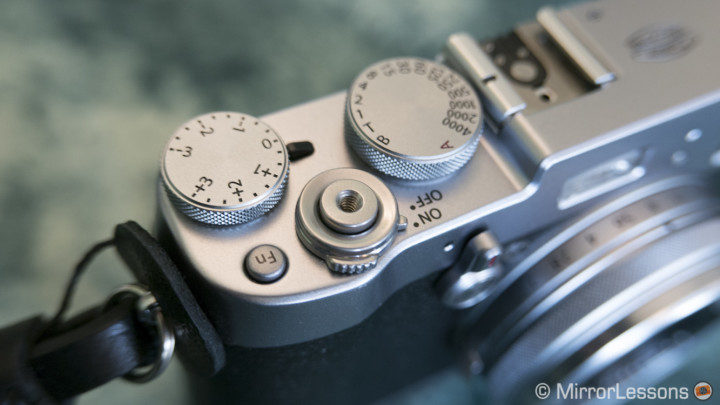
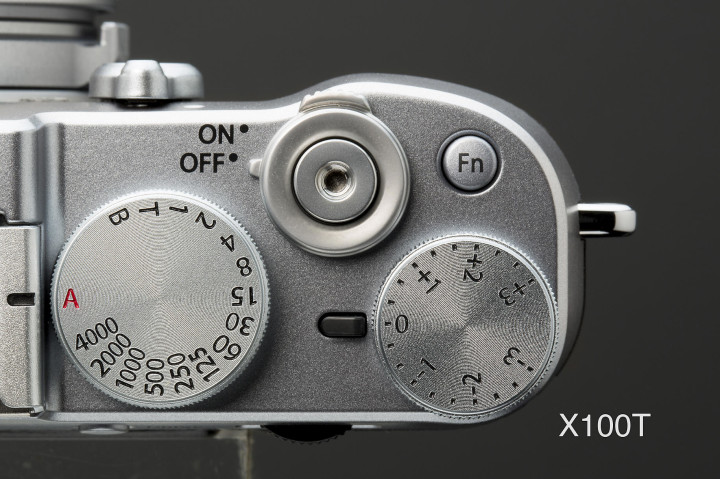
The dials and rings are superb in terms of both their quality and smoothness. The two top dials (shutter speed and exposure compensation) are easy to access even when looking through the viewfinder. The same cannot be said for the aperture ring. It has two small tabs on the side to make it easy to turn but when looking through the viewfinder, it often takes me a little while to find them depending on their position. This is due to the diminutive size of the lens itself and the fact that the ring is very close to the body.
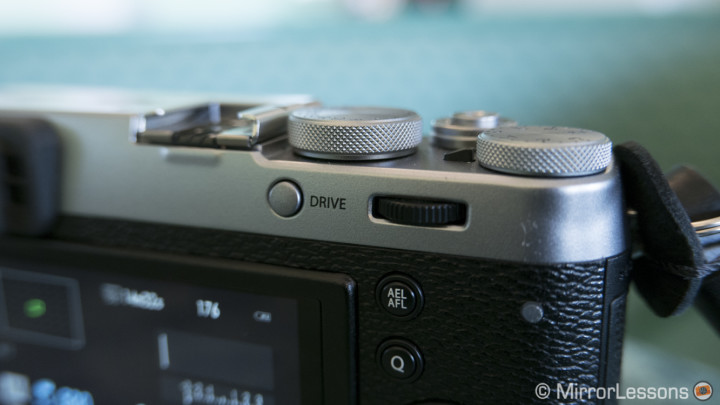
The on/off switch around the shutter release button is a little bit flimsy, meaning that you sometimes find the camera has turned itself on or off inadvertently. Another complaint I have regards the command dial on the rear–it is simply too sensitive. When working in manual mode, the command dial helps to fine-tune the shutter speed pre-selected with the dedicated top dial (you can also push it to activate magnification). Too many times I found my shutter speed had altered because I had skimmed the surface of the dial with my finger. I wish it were made of metal with the same smoothness as the top dials.
X100T vs X100s: design and ergonomics
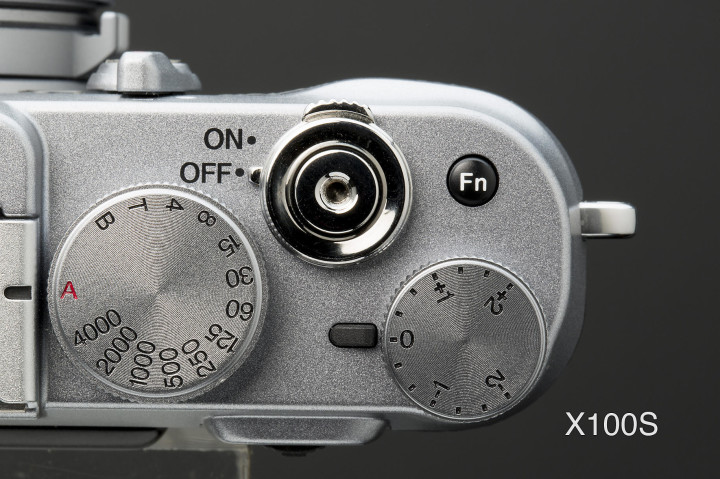
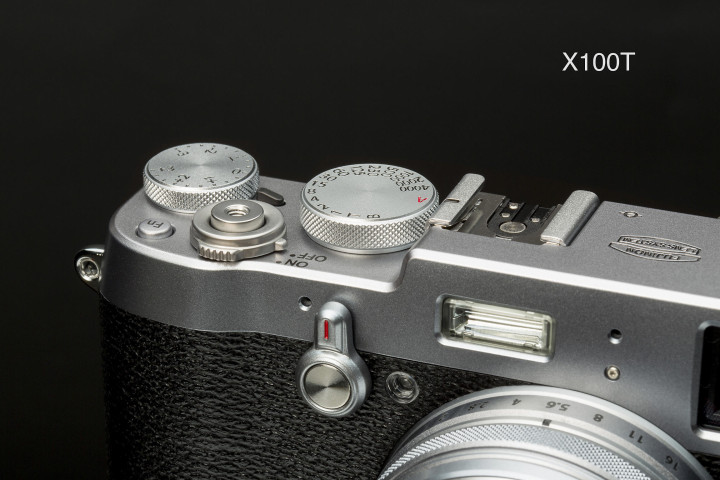
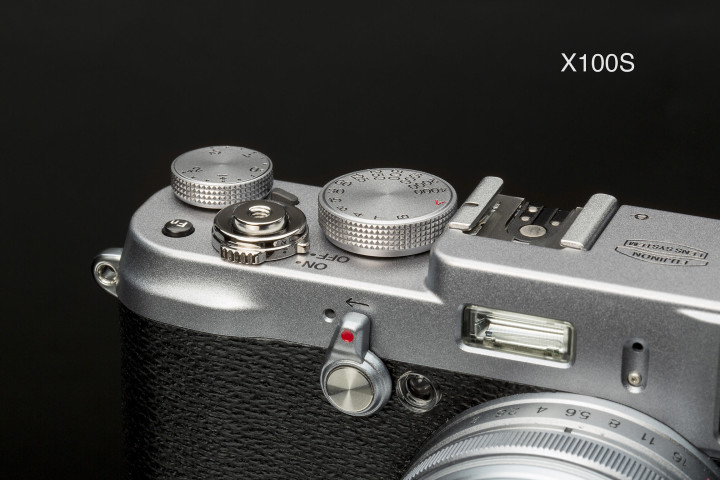
The differences between the X100T and the X100s are very subtle. The shutter release button and on/off switch are now opaque instead of glossy. The Fn button is now gray. The grip texture of the two metal dials and aperture ring have changed. The aperture ring now turns in 1/3 steps of Ev instead of 1Ev which eliminates the need to fine-tune the aperture with another dial. Personally I rarely use 1/3 values for my aperture so it isn’t an upgrade I am really interested in. The exposure compensation dial has 3 Ev steps instead of 2 as on the X100s. On the rear, the button layout is updated and the X100T has similar selector buttons as the X-T1. The connector cover is also more robust. Overall, the difference in design between the two camera is negligible. They both come in two different colours (silver and black).
Ease of use: customisation
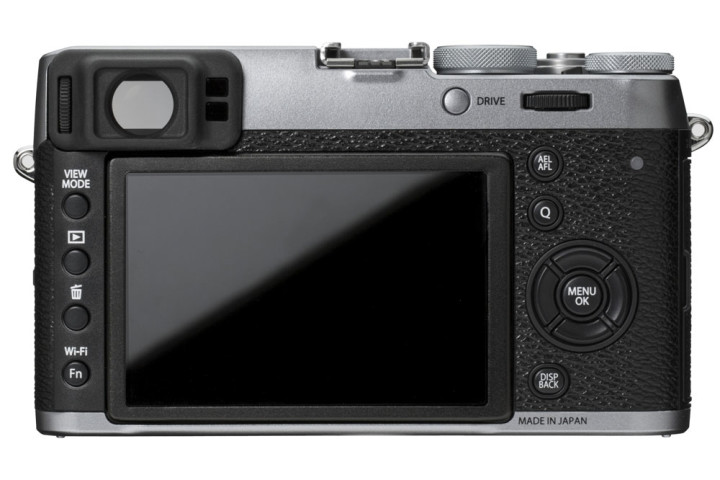
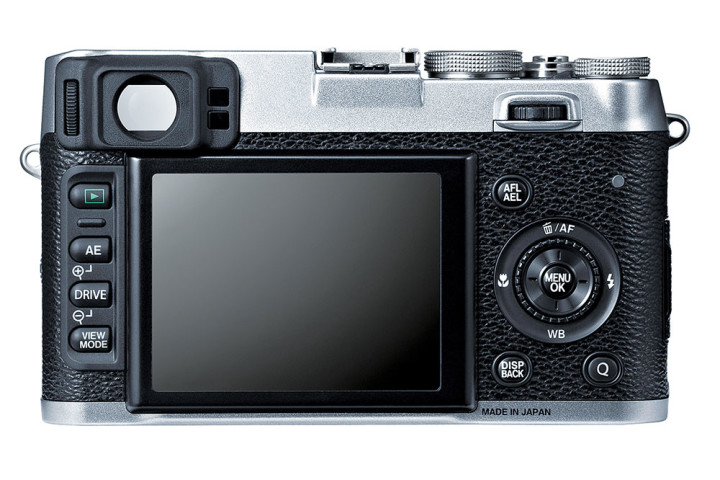
On the rear of the camera, there is an updated layout regarding the buttons and their placement. Overall I am comfortable with all of them as far as their quality and position are concerned, but I do find that there are some areas that could be filled with more function buttons, especially at the top between the finder and the drive button. There is a specific reason why I am mentioning this, and it is related to how you can configured the 7 Fn buttons on the X100T.
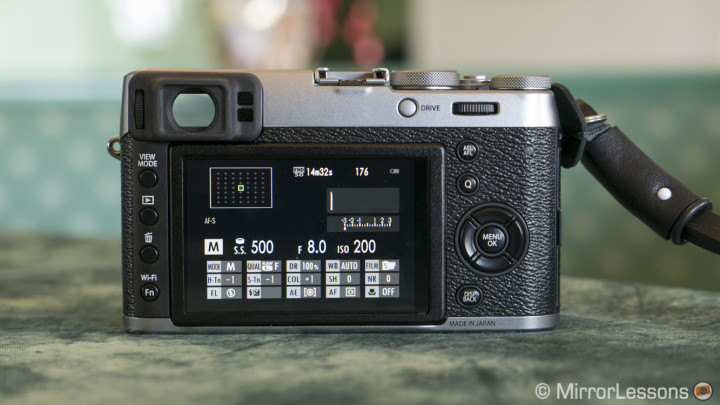
We have the four selector buttons that can be used individually for four different functionalities. They can also be assigned to the AF area only. The latter is very comfortable because it makes changing the AF position very quick but at the same time you lose four customisable buttons. This effectively leaves you with only three. As such, you have to assign some functions to the Quick menu (Q) even if it would be better to have a physical button for settings such as ISO sensitivity for example. What’s more, some functions like the silent mode cannot be configured to a physical button but only to the Quick menu. I don’t see why this should be since with the X100s I could activate that function by pressing and holding down the DISP/Back button (doing so now brings up the Function button settings).
Another thing is the absence of a dedicated movie button. One of the remaining Fn buttons must be assigned to movie recording if you are interested in that feature. That leaves us with two function buttons in the end. It’s not a lot. I would have liked at least two additional Fn buttons and a dedicated movie button. Of course I could simply choose not to assign the four selectors to Focus Area but then I would lose a very comfortable feature.
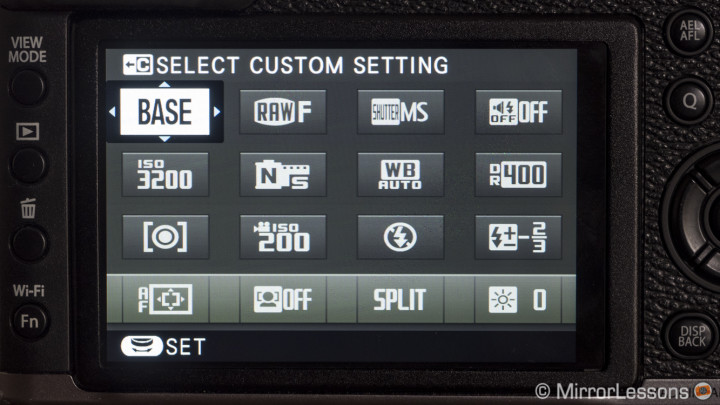
Like the X30 and recently the X-T1 via its firmware update, the Q menu of the X100T can be fully customised (press and hold the Q button to do so, no need to enter any menu). There are a total of 16 slots to which you can assign 29 different options. This is certainly a welcome feature but it takes some time to find the best combination when assigning the functions and rearranging them. I wish there were a way to move the slots from one place to another if for example I wanted the AF settings on the same row. That way it would be easier than reassigning each of them to get the order you want.
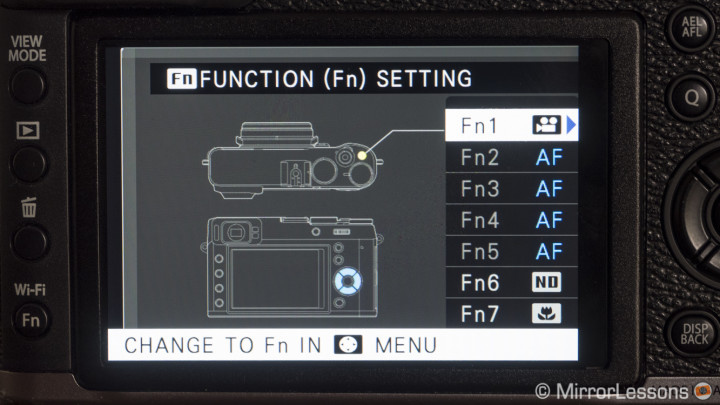
Below you can find two pictures with my favourite combinations for the Fn buttons and the Q menu. To configure the Q menu, I simply tried to have enough slots for the settings I wanted. I got rid of all the settings related to the JPG image (NR, highlights and shadows, color, sharpness) and instead I created different custom settings with my favourite values like colour or black and white or a specific film simulation mode.
Fn buttons:
- Fn1: movie recording
- Fn2 to Fn5: AF Area
- Fn6: ND filter
- Fn7: Macro AF
Q Menu:
- First row: Custom setting, Image Quality, Shutter type, Silent Mode
- Second row: ISO, Film Simulation, White Balance, D-Range
- Third row: Metering, Movie ISO, Flash Mode, Flash compensation
- Fourth row: AF Mode, Face Detection, MF Assist, Monitor Luminosity
X100T vs X100s: customisation
The Q menu on the X100s cannot be customised. It also has 1 customisable button instead of 7 with less functions to assign (15 instead of 29). None of the other buttons or the command wheel on the rear can be customised which makes the X100s far less customisable than the X100T.
Ease of use: EVF, OVF, ERF and LCD monitor
This is an important chapter because one of the main new features introduced with this camera is related to the optical viewfinder. I already wrote my in-depth thoughts about this in the first impression article and things have not changed a lot since. So let me summarise it for you, but first, a little legend to clarify our favourite acronyms:
- OVF: Optical ViewFinder
- EVF: Electronic ViewFinder
- ERF: Electronic RangeFinder
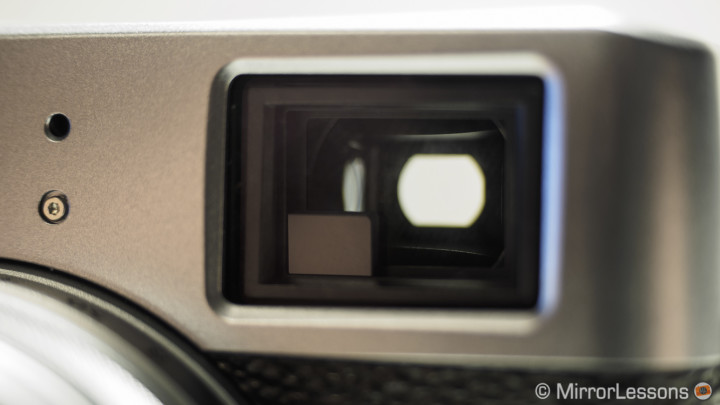
The X100T gives you the option of using two different viewfinders that you can alternate between by simply toggling the dedicated selector on the front of the camera. The first is an electronic viewfinder with excellent resolution, an improved frame rate and a reduced time lag that is noticeable especially in low light. But there is nothing here that other mirrorless cameras don’t have.
The real “pièce de résistance” of the X100T is the optical viewfinder. It is a Reverse Galilean type and gives you a much clearer and brighter view while still displaying all the shooting information as in the EVF. Like any rangefinder, it suffers from parallax issues which means that what you see in the OVF is not exactly what the lens and sensor see.
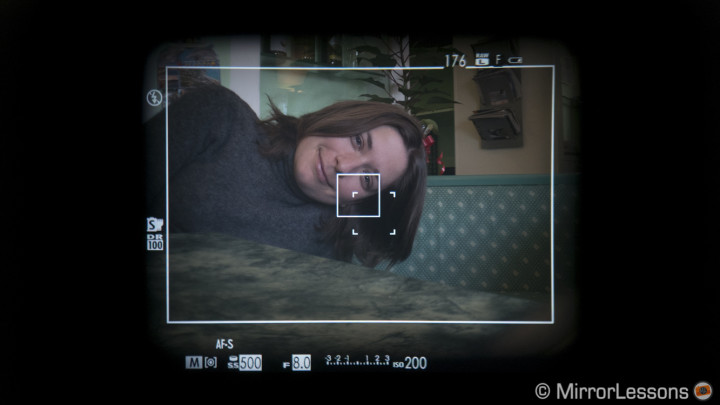
This is why this version of the optical viewfinder on the X100T is so advanced. First, it can automatically display a parallax correction for both the frame and AF area. Second and more importantly, you can activate a small electronic screen at the bottom right of the finder that will show you a magnified area that corresponds to the AF area. This will help you check the focus more accurately and also help you confirm that the camera is focusing on the exact element you want (useful especially when you are focusing close).
But the truth is that while the ERF is a nice addition that certainly enhances rangefinder technology, I don’t find it that comfortable to use.
First, it is small. Relying on it too much is tiring for the eyes and also defeats the purpose of a clear view that an optical finder can give you. The ERF serves more as a support to occasionally check my focus when the subject is close to me, a typical situation where the parallax issue becomes too serious to rely on the OVF alone. That way I don’t need to switch to the electronic viewfinder. Another good use is manual focus with the OVF (something almost impossible otherwise, unless you want to rely on a tiny distance scale). But here again, it works for something close to you. For everything else, it makes more sense to switch to the electronic viewfinder.
Perhaps the last sentence is a dilemma I will continue to have with the X100 series. I do like the optical viewfinder, and I do like having so many options for composing my image but the truth is that a good electronic viewfinder suits a mirrorless camera better in my opinion. What I mean here is that you get: real time exposure, an accurate idea of the colours the camera will record, the exact frame with no parallax surprises, and approximately 100% of field coverage.
Certainly the OVF has two advantages. The first is related to the use of the eye sensor that turns the LCD or viewfinder on and off. With the OVF the view is already there although it still needs to activate (bring up the displayed information) in order to take the shot. With the EVF it has to switch from optical to electronic (literally the OVF gets covered by the electronic screen) and the latter operation is slightly slower. The second advantage is the absence of any time lag, which will always be present on an electronic finder, even if it’s just a split second.
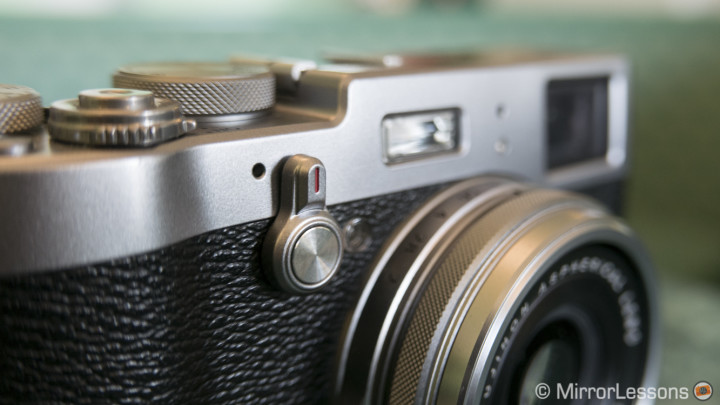
Choosing to use one or the other is also related to the device you are used to shooting with. Rangefinder shooters will probably choose the OVF more frequently while those who are already familiar with EVFs will lean towards the second.
In the end the X100T gives you many options. This is both its major strength but also a weakness.
It is positive because it lets you compose in different ways. The OVF, which shows you a wider area than your actual frame, can be very interesting for street photography for example. So you can use one type of finder or the other depending on the type of photos you want to take.
But there are also moments when having so many options is confusing more than anything else. And that’s where I switch back to the electronic viewfinder. Plus, when I grab another camera like the Fuji X-T1, the Sony A7s or the Samsung NX1, I don’t miss the optical viewfinder at all.
With live view (both the LCD monitor and the EVF) there is a new option called Preview Picture Effect that allows you to display both the colour and contrast of the film simulation mode (a.k.a. picture profile) chosen or to display a neutral look closer to the RAW file version. Basically, you display either the JPG preview or the RAW preview. I must say that I haven’t found this feature particularly valuable but it can be interesting in artificial light situations as it will give you a more balanced preview of the colours and contrast of a scene.
As for the screens, I don’t have much to add. They are both very good in terms of resolution and overall accuracy. They have many options to display all the information and tools while shooting. The information also rotates automatically when using the camera in portrait mode.
X100T vs X100s: viewfinders and monitor
The main difference is the absence of the ERF (Electronic Rangefinder) on the X100s. The EVFs have the same resolution on both cameras but the X100T has a better frame rate and reduced time lag. The OVF on the X100T covers 92% of the area instead of 90%. The LCD monitor has double the resolution on the X100T. The displayed information in the OVF/EVF doesn’t rotate in portrait mode on the X100s.
Image Quality: the usual suspects
This is a chapter I could easily skip because the X100T has the same sensor as the X-T1, the X100s and the X-E2, cameras that we’ve already tried and reviewed. But let’s pretend this is my first Fujifilm camera for the sake of the newcomers!

Shot merged in Photoshop
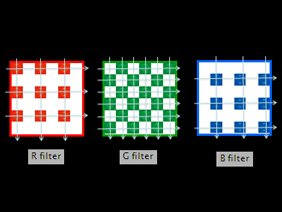
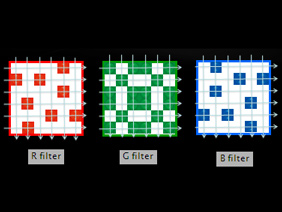
The X100T has an APS-C sensor with X-Trans technology. Simply put, the X-Trans sensor differs from the common bayer sensor you find in many other mirrorless cameras because its red, green and blue photosites are arranged more randomly on the surface. This eliminates the moiré effect and allows for the removal of the low pass filter, which increases both resolution and sharpness. This particular arrangement of photosites also ensures that all horizontal and vertical lines on the sensor contain at least one Red, Green and Blue pixel while on bayer sensors the lines can only contain two out of three. This also suggests better colour reproduction.
Translating this technical explanation into concrete results, to my eyes the X-trans sensor stands out especially for its colour reproduction, combined with the excellent Film Simulation modes (aka picture profiles). As I’ve stated many times before, the colour rendition feels somehow less digital than other cameras. I like especially the transition in the warm tones: the yellows, the oranges, the pinks and even the red/brown tones are very rich and delicate.
My favourite profiles are Astia, Pro Neg Standard and the recently introduced Classic Chrome. I always leave the White Balance to Auto as most of the time it is very accurate.
Another aspect that I really like about the image quality of the X100T are the monochrome profiles. There are four you can choose from with different filters (Red, Yellow and Blue) that will give slightly different results in terms of contrast and skin tones. I enjoyed these picture profiles especially during our early morning photo walk in the city of Turin surrounded by fog. I switched to the Monochrome Film mode and the results I got were very good. I just fine-tuned the contrast and shadows to get the result I wanted.
One of the main strengths of the X-trans sensor is also its vast dynamic range, and the X100T confirms this once again. The RAW files are very flexible and you have a margin of 3Ev to work with if you are in need. Also, by fine tuning the JPG settings you can get very good results straight out of the camera. I usually set highlights and shadows to -1 and sometimes use the Dynamic Range optimiser.
You can also change the value of the D-Range optimiser that works according to the ISO sensitivity:
- 100 for 200 ISO (here the value cannot be changed)
- 100 or 200 for 400 ISO
- 100, 200 or 400 for 800 ISO and above.
What the D-Range does is allow you to keep the same dynamic range you would obtain at 200 ISO up to 800 ISO. It works well but can sometimes increase noise in the shadows. I also noticed that the D-Range set at 400 can affect the RAW files a little at high ISOs like 5000 or 6400 (more noise and less details in the shadows). So while it can produce very good results at 800 ISO I prefer to turn it off for higher sensitivities.

A good example of how well the D-Range optimiser (set to 400) can work at 800 ISO.
As for low light capabilities, the X100T can produce very good results with well-contained noise that I sometimes like to call more organic than other cameras (with the RAW files). To me the X100T is usable up to 6400 ISO. I never go higher mainly because 12800, 25600 and 51200 are available for JPG only and the lack of detail becomes more severe. What also bothers me is the fact that I have to change my IQ settings just to get 1 step of higher sensitivity. I wish that the X100T, as well as all other Fuji cameras, would let you go to extreme ISO settings by automatically switching to JPG only, then switching back to JPG + RAW when selecting a lower value. That way I would probably use 12800 ISO more often (but no more than I really need to).
Below you can see some high ISO samples taken in Como. The first three are inside a church and the others show beautiful projections on the buildings at night at Christmas time.
The metering of the camera also works well. With the electronic viewfinder I tend to work more in shutter speed priority since I can see my real exposure live on the screen. That’s where the exposure compensation dial becomes my favourite part of the camera as I can easily compensate by 3 Ev up or down.
The most hot thread you can find on the internet is related to the X-trans sensor and Adobe Camera Raw. Many people complain about the lack of detail especially in the greens (like grass). While Adobe softwares are certainly less capable of handling Fuji RAW files concerning sharpness, it is also true that the same happens with other types of RAW files as well. You can bring back the sharpness by tweaking the settings in Lightroom (you can read a very good post about this here).
Personally I’ve never come across results that make me worry about the image quality of the X-Trans sensor. There are also third party software programs that can process the RAF (Fuji RAW file) better like Iridient Developer (Mac only) and PhotoNinja. So this issue isn’t without a solution and unless you print large format nature photographs hundreds of times per month, it is not a major issue. I personally stick with Lightroom for all my files, and with RAF files, I appreciate the possibility to reproduce the same exact colours of the JPG versions. That to me is more important.

X100T vs X100s: image quality
The only real differences are the new Film Simulation mode called Classic Chrome available on the X100T (but technically could come to the X100s via a firmware update) and the maximum ISO sensitivity of 51200.
Image Quality: lens and shutter types
The X100T has a non-removable prime lens of 23mm which corresponds to the classic reportage prime lens on full frame format (35mm). It has a fast aperture of f/2 and delivers good quality both at the centre and at the corners. As expected at f/2 it is a little bit softer but sharpness becomes excellent at f/2.8.
One element I am not crazy about is the bokeh rendering. It is okay overall but don’t expect a dreamy look. You also need to focus close to get a nice shallow depth of field and fortunately the lens has good close focussing capabilities with a minimum distance of 10cm. You need to activate the AF Macro mode, otherwise it won’t focus closer than 50cm.
The lens handles flares well even in direct sunlight. However it can suffer from more annoying flares coming from the side (around 45°) but this is due to the absence of a lens hood, which isn’t provided with the camera. The official hood from Fujifilm is very expensive. I recommend that you get the equivalent hood from JJC as it is made of metal and available in silver or black so it matches the colour of your camera.

The X100T shutter is a leaf shutter type positioned in front of the lens iris (you can see it very well when looking at the lens with the camera turned off). This type of shutter brings some interesting functionalities like the ability to use very high speeds with flash (up to 1/4000s), which is useful when you want to shoot outdoors with a fast aperture (the focal plane shutter usually limits the flash sync to 1/250s). One limitation is the out of focus rendering, as it becomes unpleasant with faster speeds than 1/1000s at f/2 and f/2.8. The reason for this is that the leaf shutter can’t cover the large aperture fast enough, causing the strange effect in the blurred areas. The camera will indicate in red the shutter speeds that will cause this issue. This is why the X100T features a built-in ND filter (3 Ev equivalent) that can be activated to keep the shutter speed slower without you having to change the aperture.
The X100T also has an electronic shutter option that is perhaps more interesting than the ND filter. They can be used simultaneously although you will rarely need to. The electronic shutter allows you to reach a faster shutter speed up to 1/32000s and you won’t have any issues with bokeh at faster speeds since the leaf shutter won’t be used. It works really well and also helps the camera to be completely silent. This way you can use fast apertures and very fast shutter speeds without any problem and the results are excellent.
I tried to take some comparison shots between the mechanical shutter with the ND filter activated versus the electronic shutter and there isn’t any noticeable difference regarding image quality or bokeh. The electronic shutter just gives you more flexibility and ease of use since you don’t even have to think about the shutter speed issue. The only thing to be careful of is rolling shutter, as it can affect vertical lines when there are fast moving elements in the composition (like a bus passing by). The X100T also has an Auto shutter option. The camera will automatically switch to electronic if you select a faster speed than 1/4000s or if you select a critical shutter speed according to the aperture.
X100T vs X100s: lens and shutter types
The X100s features the same lens, leaf shutter and ND filter but doesn’t have the electronic shutter option.
Autofocus, manual focus and performance
I covered the autofocus performances of the X100T in my first impression article and there are a couple of things I would like to add.
To summarise what I already wrote before, the X100T has good AF performance overall but isn’t 100% reliable especially in AF-Single mode. Instead of repeating myself, I’ll describe a concrete example.
The picture below is a simple landscape shot taken at Lake Como a couple of weeks ago. My focus area was set in the middle, so on the hills. If I placed the AF point on the brown area (trees), the camera would refuse to focus. If I moved it to the houses, then it would work just fine. One trick to enhance AF is to set a smaller AF point but there will still be some occasions where the camera refuses to focus in a unchallenging situation and you don’t really understand why.

Another thing is that the AF can sometimes be slow because the lens elements move back and forth before taking the shot. Add to this the eye sensor that has a certain time lag in activating the finder when you bring the camera to your eye (and the X100T won’t focus until the finder is activated) and you’ll find yourself very frustrated at times. It is a shame because often it works really well. It isn’t the fastest mirrorless camera for autofocus and if you suddenly see a decisive moment it can let you down.
That said, I found a couple of solutions to enhance the AF-S mode:
- as already said, use a smaller focus point
- disable the eye sensor
- disable the OVF power safe mode
- activate the Pre AF function as it will keep AF active all the time (but that drains the battery life quickly so I personally leave it off)
I also keep the camera to focus priority instead of release so that I won’t end up with out of focus photos after taking them. Another solution to keep the AF of the X100T on the ready is to use AF-C in situations with a little bit of movement (people and reportage for example).
In Macro mode, the AF performance remains at the same level and I didn’t find a substantial decrease in performances in good light (when using the LCD or the EVF). In low light, the performance decreases a little as with most mirrorless cameras.
With continuous autofocus, the camera performs well and I haven’t come across any negative points using either the OVF or EVF. The X100T inherits the same predictive AF function of the X-T1 and this is why I find it improved in comparison to the X100s. Unlike AF-S, I found that AF-C works better with larger AF point (the same as the X-T1).
Another pleasant surprise is the Multi AF mode that automatically determines the AF points suitable for the subject in the frame. Most of the time it guesses the positions and the number of focus points well. It was also really fast at focussing. This is why overall I say that the autofocus performance of the X100T is really good. It is a shame that sometimes it fails in situations that are supposed to be straightforward.
The X100T is perhaps the most well-endowed mirrorless camera (and digital camera for that matter) when it comes to manual focus.
You can do it with the optical viewfinder or the electronic viewfinder using no less than three different functionalities.
With the OVF and the electronic rangefinder, I found the digital split image to be my favourite. With this function enabled, you have a monochrome rectangle with three horizontal lines that are misaligned when the image is out of focus. The ERF is too small for peaking and too small to use without a MF assist, so digital split image is the most well-suited, also because it is a sort of digital version of the rangefinder focusing mechanism. I find it less effective with the electronic viewfinder because the horizontal stripes and misalignments are hard to detect unless the picture is clearly out of focus.
The EVF has enough resolution to focus even without peaking but the latter certainly helps. There is also the magnification function that can be activated when turning the focus ring.
There is also the option of using the digital distance scale with slow apertures like f/11 and f/16, knowing that everything will be in focus from infinity to 5 or 3 meters. That way you don’t even have to worry about AF and can fully concentrate on your scene. This is the combination I like the best when using the optical viewfinder. I also assign the AEL/AEF button to autofocus when I want to instantly activate the AF without using the switch button on the side.
The only feature that is missing on the X100T is stabilisation. The leaf shutter certainly helps to reduce vibrations in comparison to a focal plane shutter but I wouldn’t feel safe below 1/30s.
Finally the X100T has two continuous shooting modes, High (6fps) and Low (3fps), both of which work well combined with continuous autofocus but the buffer capabilities are quite limited (less than 10 frames with RAW).
X100T vs X100s: lens and shutter types
The two cameras share the same AF system: 49 points with the 9 central points having phase detection capabilities. The X100T also has predictive AF in continuous mode. With the OVF on the X100T accurate shooting area is displayed in real time while focusing. The X100s maximum burst is 5fps instead of 6fps.
Video features
Like the Fuji X30 and the X-T1 firmware update, the X100T has also received new functionalities such as variable frame rates and full manual controls. Let’s be honest, there is nothing exciting about this when other mirrorless cameras have had more advanced functionalities for years already. To give users manual control over the video settings is something Fujifilm should have done ages ago.
Anyway, you can now shoot in Full HD or HD ready at 24, 25, 30, 50 and 60fps and control settings such as aperture, ISO, and shutter speed. However the camera is still not designed for video use and I think the option is there more for marketing reasons than anything else.
Like I said before, there isn’t a dedicated movie button. Furthermore, to get the real preview of your video exposure, you have to start recording because the normal live view works only for stills which also means that the exposure on stills and video is not the same (1Ev of difference more or less). This is probably the reason why there is an ISO sensitivity setting for video. Setting your ISO value for stills won’t affect video, so you have to look for the Movie ISO setting in the menu or assign it to the Q menu.
The X100T has a socket for an external microphone but it isn’t a standard 3.5mm jack input but a smaller one that can also be used with a remote controller. This means that not all microphones will be compatible. The Mic level adjustments are very limited (4 steps only).
The video capabilities could certainly be improved. The video files have a good bitrate (approx. 35mb/s) and because of the latter they should also have a better compression than what it is in reality. The footage lacks sharpness, moiré is very visibile and the dynamic range is reduced. In short, there are more capable cameras for video use even without being designed for professional use.
X100T vs X100s: video features
The X100T allows you to control all the settings manually while the X100s will only let you choose the white balance and the film simulation mode. The X100s can shoot at 30fps and 60fps only.
Other features and additional notes

So, what’s left to be said? Not a lot really. The X100T has multiple exposure and panorama functions. Bracketing can be selected for exposure, white balance, film simulation mode, ISO or D-Range. I only ever use the first one but the bracketing function is still limited (1Ev and 3 shots max).

You can set the intervalometer to take a maximum of 999 shots but there isn’t any kind of option to create a movie timelapse so you will need to use a third party software on your computer.
The X100T can be really silent thanks to the leaf shutter, and even more so with the electronic shutter. You can also select a lower volume and different types of shutter sounds.
The camera has Wifi capabilities and uses the same mobile app as the X-T1 so you can remotely control the camera from a smartphone or tablet. It works well and the app interface is clear. Unfortunately you cannot access more advanced functionalities such as bracketing or interval shooting. You can of course transfer images as well as geotag them.
One final note on the battery life–it’s not great. To get through the day you will need two at least. The battery can be charged with the provided charger or with a USB. The camera can be powered on while charging meaning that the USB cable also serves as a power option, not just for charging.
X100T vs X100s: other features
The X100s doesn’t have Wifi or interval shooting capabilities. I haven’t found a huge difference between the silent modes even if the X100T also has an electronic shutter. Battery life is nearly the same but you cannot charge it on the X100s with a USB.
Conclusion

The Fujifilm X100T is a great camera. I don’t have a single doubt about it. To me it is the perfect B camera, no matter if you are shooting with medium format, DSLRs or mirrorless, digital or film. It is a camera you can always find something to shoot with and that you can always bring with you, knowing that despite its small size, it delivers great image quality that is on the same level as that produced by more expensive equipement.
Is it perfect? From an objective point of view, I would say almost. Fuji is almost there.
I think we will have to wait for the next generation, which will hopefully introduce a new and improved AF system among other things. From a subjective point of view, I am sure that it can be perfect for many users.
If you own the first x100, the gap between it and the “T” is considerable. If you own an X100s, I wouldn’t consider an upgrade. The new features are interesting but concretely speaking the feeling is the same. If you don’t own a Fuji camera yet, then the X100T is certainly one of the best choices right now, but you can probably find an x100s brand new (or used) for far less money.
 What I like about the Fujifilm X100T
- its design, size and robust build
- image quality
- electronic shutter
- Manual Focus assist
 What I don’t like about the Fujifilm X100T
- autofocus in AF-S can’t be 100% trusted
- battery life is weak
- video quality is still poor in comparison to competitors
 What can be debated about the Fujifilm X100T
- The hybrid viewfinder and electronic rangefinder are nice features but not essential
