Allow me to begin this article with a personal note. Three years ago, Heather and I attended our first press event in Ireland for the launch of the original E-M1. I remember the excitement we felt being there amongst some of the most important journalists, photographers and bloggers; the curiosity of learning how events like this work; the short sleeps; the impromptu stop at a service station the following night to publish the article. At the time, lots of things were new to us. Today MirrorLessons has grown more mature and there are other two websites, plus a YouTube channel to keep it company.
While travelling to Spain, I reflected on these past few years and realised how passionate we have become about these camera systems. Today I am glad to see that they have evolved into more mature, reliable and complete products.
2016 is definitely the year that kills some beliefs, including the most common one we’ve been hearing for years: “mirrorless camera aren’t fast enough”. That sentence is now dead.
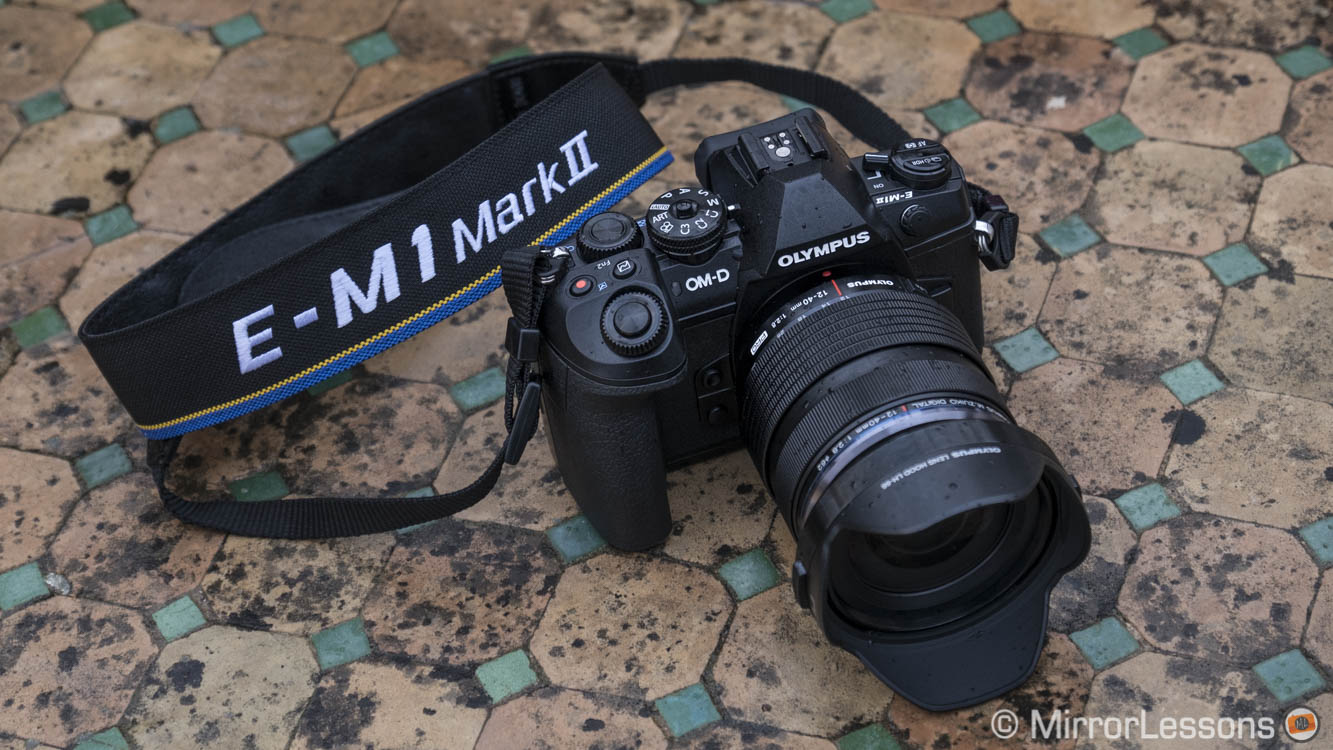
The new OM-D E-M1 II is the latest proof of this. I had the chance to use a final production version in Ronda, courtesy of another well-organised press event. Despite the capricious weather, we put the camera to the test with a focus on some of the most important features such as autofocus, continuous shooting speed and stabilisation.
Important note: before we begin, there are two things I want to make clear:
- I gathered as many images as I could and I took the time to write the most in-depth content possible based on the results I have. However this is not a complete review. One day with a camera is not enough to come to a final conclusion. At these events there isn’t the time to go through each setting and to test everything properly.
- I processed the RAW files with Iridient Developer which doesn’t officially support the E-M1 II yet at the time of publishing this article. The software underexposes the photos by two stops so I had to create a custom camera curve to bring the exposure back to normal. This means that some images could show a little more noise as a consequence. Also, some colours are a little off due to lack of complete compatibility. While processing high ISO files, I gave priority to details over noise reduction.
With that out of the way, let’s get started!
[toc heading_levels=”3″]
Autofocus performance
Let’s begin with one of the features that I and most of you were waiting for. The original E-M1 was a good step forward at the time and I’ve always managed to bring back decent results, even in difficult conditions. However Sony and Fujifilm recently raised the bar higher with the a6300 and X-T2, so it was natural to expect a similar improvement on Olympus’ new flagship camera.
I can say that what I saw on Saturday left me with a positive impression. However the results I got are not perfect and require more in-depth tests.
First, an overview of the performance in Single AF and I’ll be very brief: it’s really fast and it only slows down a little in low-light situations with poor contrast. But even so, I rarely encountered a lock failure or serious issues in getting my focus right. It’s reliable in all situations and during my time with the camera, I never had to switch to MF.

A good example of the quick AF: the guy was constantly moving the arrows and the tip was quite small.
The E-M1 II has 121 cross-type phase detection points that cover almost 80% of the sensor’s surface. Concerning the autofocus target areas, you can choose between four options.
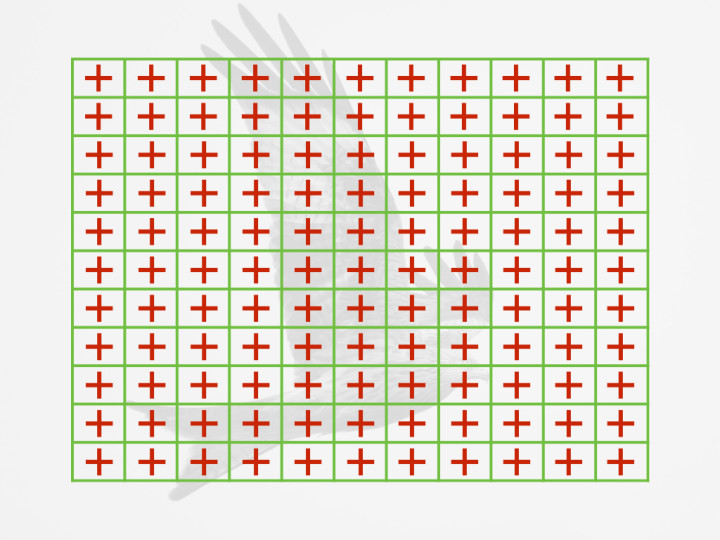
You can display the AF points as a green rectangle at all times, when half pressing the shutter button, or never. With the exception of single target, the camera picks the AF points automatically within the zone selected.
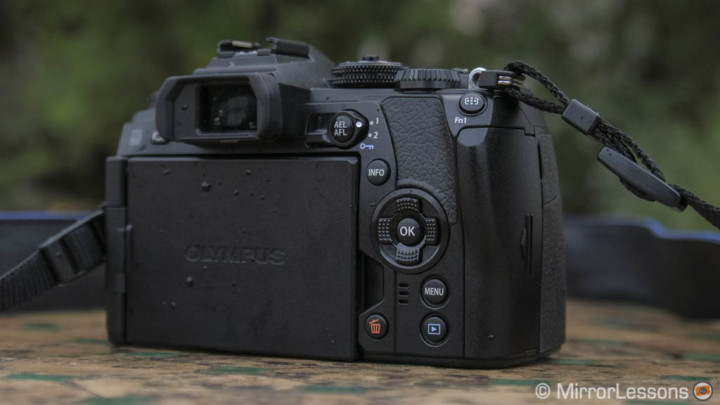
You move the AF point or AF zone with the Arrow Pad as you would do on the original E-M1. There is now a default button on top of the thumb rest to activate the area mode (Fn1) and select the one you prefer.
When I first saw the camera at Photokina, I was surprised not to see a dedicated AF joystick like the one on the Fuji X-Pro2/X-T2. Using the arrow pad is comfortable but you sacrifice extra function buttons. Plus, in some situations, I find a dedicated joystick more intuitive and easier to use.
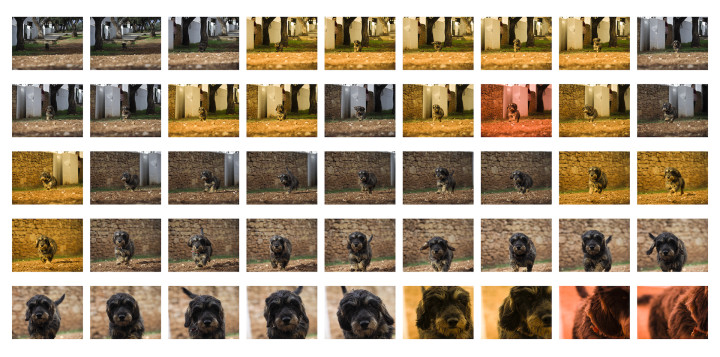
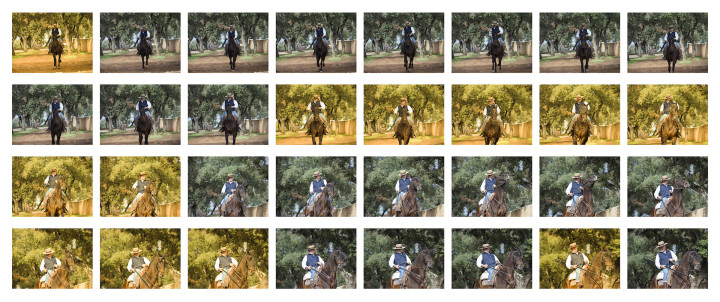
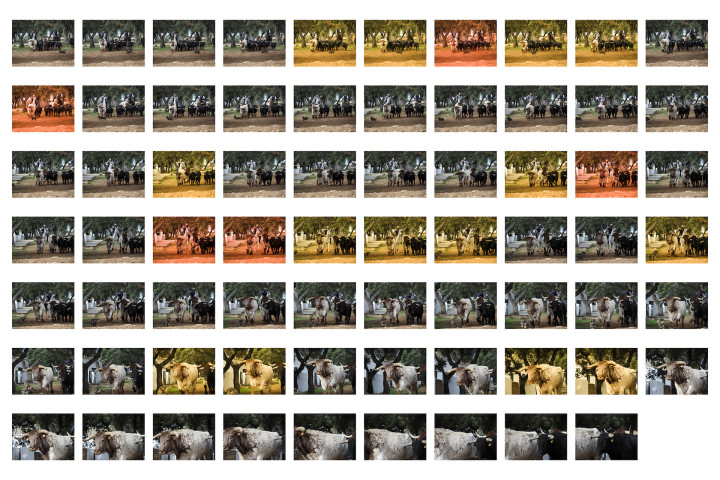
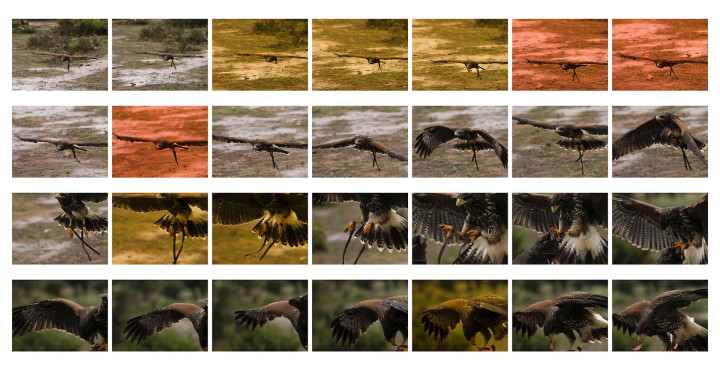
Now let’s analyse the continuous autofocus performance. For each sequence I will show you a thumbnail grid that explains what’s in focus and what’s not:
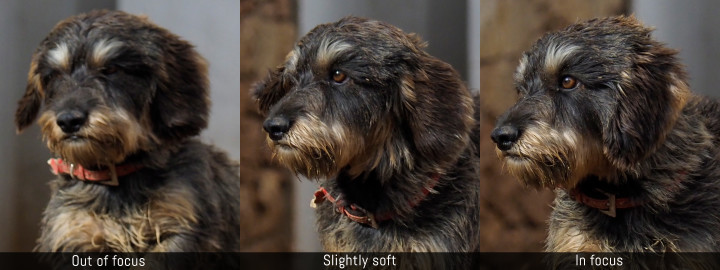
- Normal colour: the image is in focus
- Yellow colour tint: the image is slightly out of focus. The perception of detail is there but if you zoom in, you can notice softness.
- Red colour tint: the image is clearly out of focus or the lack of details is evident even without enlarging the image.
The first stage we started with was the bull run where the animals were coming towards us, only to turn right at the last minute. I used the [easyazon_link cloaking=”default” keywords=”M.Zuiko 12-100mm f/4 Pro” localization=”default” locale=”US” nofollow=”default” new_window=”default” tag=”easyazon-textlink-20″]M.Zuiko 12-100mm f/4 Pro[/easyazon_link] at 100mm.
Just before the demonstration, we had an unexpected subject to photograph: this funny little dog named Kiwi who helps make the bulls run. Here I used the 5-Area Target mode.

SOOC JPG sequence available here.
As you can see, when the dog is further away, the camera focuses in front of him in some frames, resulting in slightly out-of-focus images. There’s only one out-of-focus shot in the middle of the sequence and the last two don’t really count as the sequence had finished and the dog was too close.
While they were preparing the run, I also took a quick burst of one of the horseback riders. Here I didn’t get any out-of-focus shots but there are several shots that are slightly off. It looks like the camera was hesitating between the horse and the rider but again the focus is a little too short. I used the 9 Target mode.

SOOC JPG sequence available here.
This level of performance was confirmed with the bulls running. The camera had more trouble at the beginning, perhaps because it was confused by which subject to choose. Then when the white and brown bull clearly became the main subject in the frame, the keeper rate increased and I got nearly perfect results at the end. Here I used the All Target mode.

SOOC JPG sequence available here.
So while there are several shots that lack some precision, the number of out-of-focus shots is really low.
At the end of the day, we had the chance to see some birds in flight. It was the moment we encountered the heaviest rain so we were literally soaking wet. (Did I mention that the camera is weather sealed?! Well if not, it is, and it is very effective!).
The birds weren’t flying a lot because of the rain so we only got a short demonstration. I cranked the ISO up to 3200 to use a safe shutter speed. I wanted to make sure that I’d be able to analyse the AF performance without worrying about motion blur. Here is the first example.

SOOC JPG sequence available here.
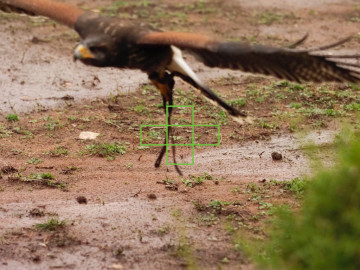
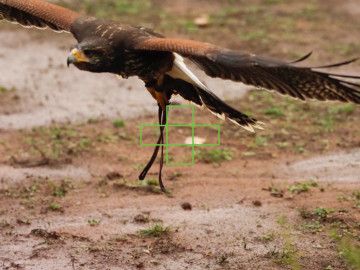
In this situation the ability of the photographer to track the subject is very important. I used the 5-target group as recommended by one of the Olympus ambassadors present at the stage. With that mode, you have to make sure to keep the bird at the centre of the frame, something that I didn’t do well at the very end. However you can notice how the E-M1 II still managed to focus on the wing and adjusted focus quickly once my composition was good again.

Here is another example with similar results.

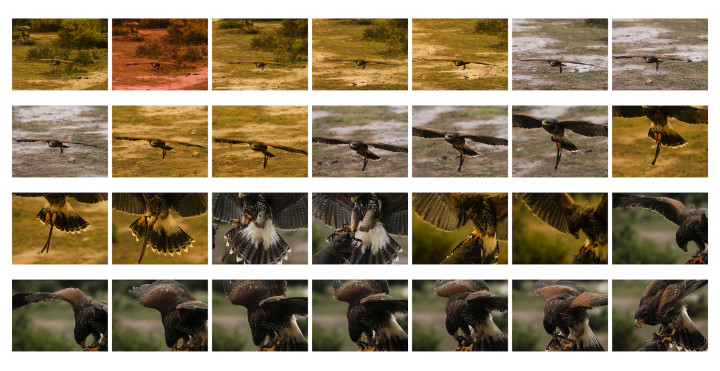
SOOC JPG sequence available here.
What once again left me with a positive impression was the ability of the camera to focus when the subject got really close.
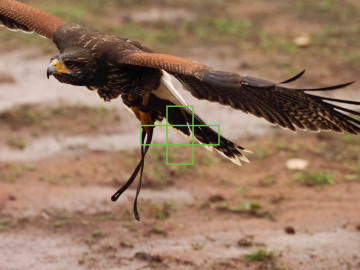
Another thing that I like is that the camera locks quickly and if it doesn’t, it corrects itself very fast. The image below was the first in an 18fps sequence. The bird is far away, low on the ground and its colours match the environment. The original E-M1 would have struggled more.

The AF also reacts quickly when it has to correct focus in the middle of the sequence. The example below first shows the bird completely out-of-focus and that was my fault: I wasn’t keeping the AF points on him precisely. However as soon as I started to recompose just enough for the camera to recuperate, two frames after, the bird is in focus again. The original E-M1 would have had more trouble regaining focus considering that the bird was getting very close.
Unfortunately because of the rain we didn’t have time to do more testing. I would have loved to try the multi AF target to see if it would have been more forgiving of my compositional mistakes.
One thing that I miss from this camera is the possibility to choose a larger AF Target area without switching to the All Target mode. I would love to work with a 25 or a 49 Zone as I think it would give us more leeway when photographing difficult subjects such as birds in flight.

The results above are not perfect but there are different things that I still need to test. First I forgot to check if I was in speed or focus priority and my guess is the former because it is usually the default setting when the camera is new.
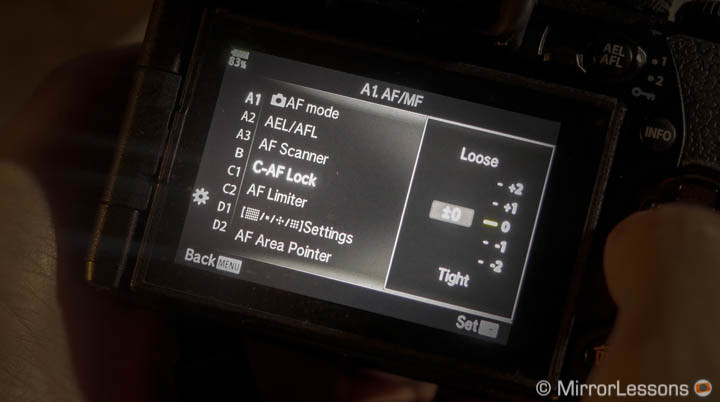
Then I have to see how effective some settings like AF Scanner and C-AF Lock can be when dealing with fast-moving subjects.
Long story short, the AF is very good but I believe I can get even more out of it with more time and experience.
Continuous shooting speed
The E-M1 II has some serious continuous shooting speed capabilities. With the focus locked on the first frame, you get 15fps with the mechanical shutter and an impressive 60fps with the electronic shutter. The maximum speed can be used with RAW or RAW+JPG and I put the buffer to the test with the Pro Capture mode.
This mode lets you record 14 frames before you start the actual burst. When you half-press the shutter button, the camera starts to load the frames in the buffer memory so that when you start to take pictures, you already have 14 frames saved, minimising the chance of missing the decisive moment.
Olympus demonstrated this with an arrow piercing a series of water balloons. Thanks to the high speed, you can get a precise frame showing when the arrow hit the balloon or when the five balloons explode at the same time.


Here my composition is not perfect but you can see the arrow just entering the balloon and the air is still inside.
I also tried to take a picture of the archer to see the arrow leaving the bow and it worked. This is a rather difficult shot to get without this kind of speed.

The arrow just left the bow!
The buffer capabilities of the camera are really impressive. It won’t hold for too long especially if you shoot RAW at 60fps but it is enough to capture action like this. At 18fps, I could capture several burst sequences for almost 5 seconds before experiencing any decrease in speed.
Even more interesting is the continuous speeds with AF tracking. With the mechanical shutter you have 10fps, which is excellent for most sports situations. The EVF shows you a live view of the scene with short blackouts, which helps in tracking the subject more accurately.
With the electronic shutter, you can go up to 18fps. Following a subject at 18fps without blackouts in the EVF make things surprisingly smooth and easy to do.
Here I was curious to see if there would be distortion when panning quickly with the camera. I did a quick test and as you can see, rolling shutter is there although it’s not as significant as I would have expected.


Surprisingly when shooting the falcon sequence seen in the previous chapter, I didn’t notice any particular distortion on the bird or the background. It looks like rolling shutter might not be an issue for wildlife shooting.


These results show a relevant improvement in sensor readout and not many other mirrorless cameras can claim such performance. What will be interesting to find out is when and how much rolling shutter can be present and in which situations you don’t have to worry about it.
4K video
Another pleasant surprise was the 4K video footage. I only shot in Cinema 4K mode because not many cameras have this feature and I was also curious to see the quality on the E-M1 II since the bitrate is 237mbps. Well, I was really impressed. It’s very sharp, movements are smooth and I didn’t notice any artefacts.
I kept the Picture Mode On in the video menu which is a picture profile designed for video and gives better dynamic range. It works well and I was positively impressed by the amount of detail I could keep in the shadows and how I was able to expose more for the shadows without too much clipping in the whites.
Low-light performance is good up to 1600 ISO. At 3200 I still find the footage acceptable but noise starts to become more visible. At 6400 ISO, which is the maximum available for video, noise is clearly visible.
One thing I didn’t have the time to check well enough was noise reduction for video. Like the JPGs, there are three levels: Off, Low, Standard and High. My impression is that it tends to soften details but more tests are required to see how effective it is.
As you can see in the video above, 5-axis stabilisation works really well alone or when combined with optical stabilisation (Sync IS). You can choose between two settings:
- M-IS1 adds software stabilisation in addition to hardware stabilisation and the field of view is slightly narrower
- M-IS2 uses sensor stabilisation only.
There seems to be less distortion and jello effect than the previous models when walking or doing complex movements with the camera, but there are still moments where it can be visible especially in the corners.
You can only record Cinema 4K in the first SD card slot which is UHS-II compatible.
Cinema 4K gives you a more widescreen aspect ratio in comparison to Full HD or regular 4K (ultra HD). Note that there is no sensor crop in either 4K mode. In UHD, the camera records at 102mbps.


The only disappointment I found with video was continuous autofocus. It is slow to react in most situations, even with a simple change from one static element to another.
One trick is to keep the shutter release button half-pressed to make it react faster but it can also create more breathing while correcting focus. Overall it seemed to have more issues with longer focal lengths and shorter focus distances. However when used for movements like walking or filming from inside a car at 12mm, I didn’t have any issues.
There are only two AF Target modes available with video: All and single. The latter is the one that gave me the most precise results.
Finally, rolling shutter is well-contained for video as well, even when panning fast.

Another small disappointment is the lack of a higher frame rate for video, at least in Full HD. It would have been nice to have 100 or 120fps in Full HD and given the fast performance of the camera, I found it strange that it hasn’t been implemented.
Stabilisation system and High Res Shot
Despite the various new features and improvements made to the camera, once again the stabilisation system stole the show as far as I am concerned.
I already talked about stabilisation for video in the chapter above. For stills, I pushed the camera and Sync IS to the limit. Inspired by The Phoblographer and 43rumors reporting crazy slow shutter speeds hand-held, I tried to do even better. Below are the best results I got, from the fastest to the slowest exposure. Prepare yourself to read the exif data of the fifth image.


It’s not a joke. The image above is a 20s exposure hand-held. Close your eyes and try to count up to 20 in your head. Actually, let me do it for you!
Of course, these are extreme examples. In a real-world shoot, there are lots of things that can influence your result: how stable you are, how cold you are, how tired you are, whether you’re a caffeine addict, etc. It is likely I might not be able to replicate the same results again (or who knows, maybe I’ll do better next time!). But these images show you how far this technology has come. When the original E-M5 came out, you were lucky if you could get near 1 second. Today the E-M1 II can managed 20 times slower than that.
The other test I was curious to perform is one that I knew wouldn’t turn out perfectly but I couldn’t resist.
Olympus has made improvements to the High Res Shot function, the one that takes 8 pictures and moves the sensor by a half-pixel in between shots to create a 50MP JPG or 80MP RAW image. The new processor readout allows the camera to correct imperfections created by little movements such as leaves or water in the background. But what about hand-held shooting? Well, out of 14 attempts, this is the best result I got. It’s not perfect and you can notice that the details are slightly soft if you enlarge the image.

Again this is an extreme test and it shows the camera is not ready for such use. But it is interesting to note how it is evolving and at this point I start to wonder when (not if) they will be able to perfect it for hand-held shooting. In our Photokina interview, Mr Kataoka told us that hand-held High Res Shot is the ultimate goal. Now I’m starting to believe that it might not be too far away.
Lately Sony and Panasonic have made interesting progress in the realm of image stabilisation and even Pentax implemented 5-axis on its K1. It looked like the one thing that was unique to OM-D and Pen cameras had been matched by other brands as well. Well, Olympus just came back to hit hard and remind us who’s leading in the sensor shift technology arena.
Silly tests aside, what about High Res Shot with a tripod? Well, I couldn’t test the feature properly for lack of time but I did a short test after noticing some moving leaves on a plant. The result is not perfect because I wasn’t stable enough. It was taken without a tripod but I was sitting with the camera on my lap. It’s interesting to notice that there are no longer any grid artefacts on the moving elements. However, if the movement increases, the camera creates some ghost images.


Image quality
The E-M1 II has a new 20MP sensor and TruePic VIII processor. The first is a newly-developed version in comparison to the one found on the Pen F, although it probably has more to do with phase detection than anything else.
Olympus claims more dynamic range in comparison to the original E-M1 but I have yet to compare them side-by-side. As of now, there isn’t any official support for the RAW files except viewer 3.2.1. Iridient Developer opens the files but underexposes them. I solved the problem by creating a custom camera curve to bring back the correct exposure. Then I made additional adjustments to increase dynamic range, saturation and details. It’s not perfect and the colours are a little bit off but the two images below give you a better preview than what the Olympus software can do. Once Iridient supports the camera officially, I should be able to get more precise and accurate colours and perhaps slightly less noise since I don’t have to recover the altered exposure in the first place.


The SOOC JPGs are excellent at low ISOs. They are crisp with lots of detail. However the more you raise the ISO, the more you get mushy details if noise reduction is set to Standard. If you keep it Off or to Low, you get better results but the RAW file will always be better.


One thing that has been fixed is noise for long exposures and noise reduction set to Off in comparison to the original E-M1.

Ergonomics and ease of use
The camera feels solid and very well-built but that was an impression I already got at Photokina. The complete weather sealing was put to the test in the rain during this press event so I can safely say it works well.
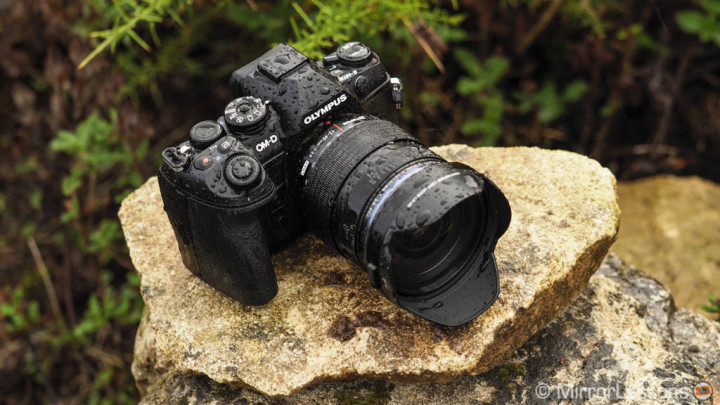
The larger grip is comfortable to use especially with larger lenses such as the 300mm Pro. I never felt the need for a battery grip. The camera is comfortable to use as it is.
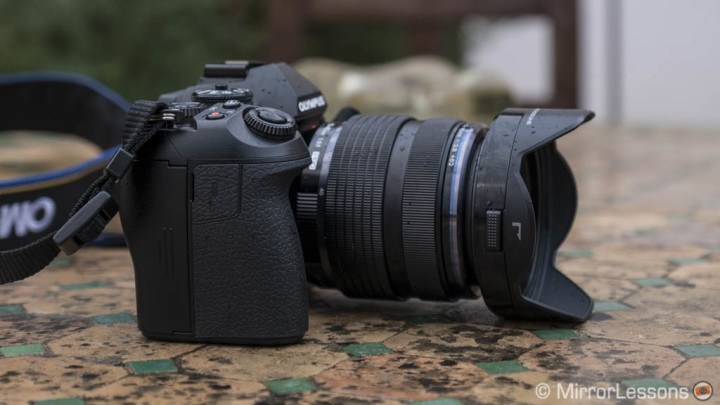
Most of the buttons and dials remain the same as the original E-M1. It is very good when it comes to ease of use with lots of customisation and function buttons available.
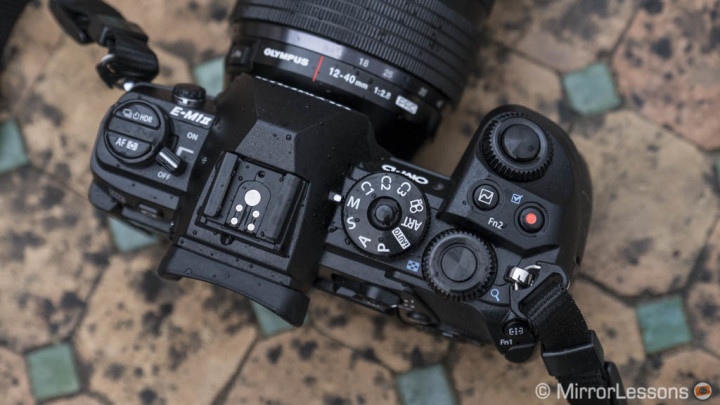
The EVF is excellent with great clarity and brightness while the 120fps refresh rate helps when working in low-light and for fast moving subjects.
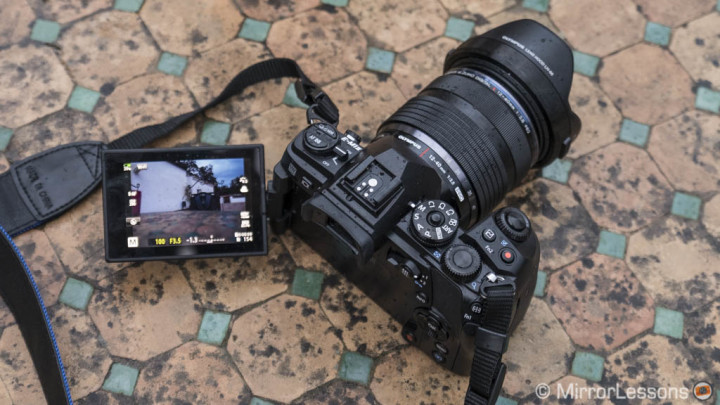
The rear monitor is a multi-angle type. The touch screen capabilities allow you to take a shot, change the focus point or use it as a virtual AF pad while composing with the EVF. I ended up disabling this feature however as my nose was always touching the monitor and changing the focus point as a result. You can also use touch sensitivity to highlight a setting in the Super Control Panel or double click it to enter in the sub-menu. However you can’t use touch sensitivity to navigate the main menu unless there is a setting I missed.
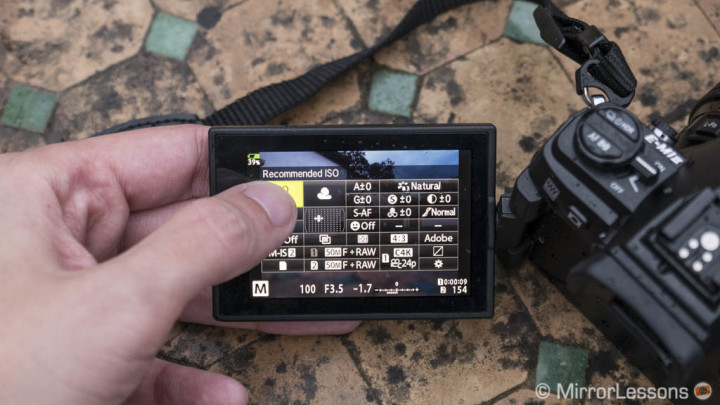
Talking about the new menu, I can confirm I don’t like it after my initial impressions at Photokina. Olympus got rid of the various colours that were helpful to identify which category you were in. Now it’s all monochrome and I find it less intuitive. Since the old one wasn’t the best either, I feel this is a step backward.
Battery life
I started to take pictures with the camera around 2PM. After 1160 shots, many burst sequences at 60, 18 and 10fps, Continuous AF often On and more than 30 clips recored in Cinema 4K, 38% of the battery life was left. I changed the battery at that time because I had the chance and I didn’t want to risk having it run out later on. The second battery was at 60% when I handed the camera back at the end of the evening at 11PM.
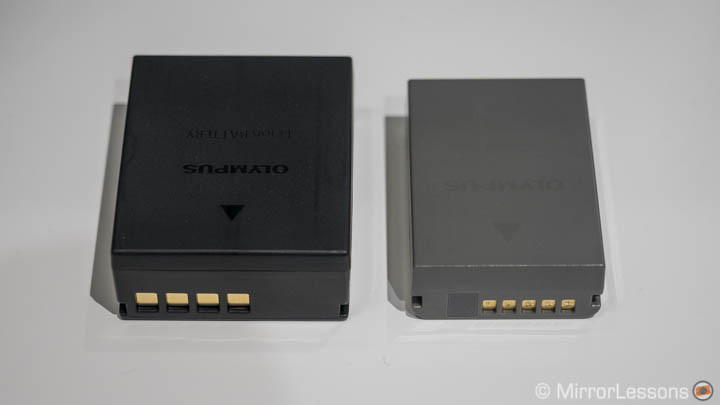
For normal shooting, I am sure that one battery can last an entire day and you might still have some juice left. Recording 4K or using the Capture Mode is what drains it faster.
It’s definitely a good step forward in comparison to the battery life of other Olympus cameras and mirrorless cameras in general.
Thoughts about price and value for the money
The price announcement has generated lots of disappointment in various social media groups, comment threads and forums. I admit I too was surprised when I saw the final number considering what Olympus said to us and many others at Photokina. The E-M1 II is not slightly more expensive that its predecessor at launch, it is 40% more expensive. The question becomes: is the camera worth such an investment?
I can’t answer this question completely after just one day of testing. For now I think it depends on how you look at it.
From a strict technological point of view, I can’t think of anything that gets close to what this camera has, and I am not just talking about the Micro Four Thirds system. I could easily expand this conversation to other mirrorless and DSLR systems. What you can do today with the stabilisation is impressive, what you might be able to do tomorrow with the High Res Shot even more.
I know that many people can’t understand the price because of the smaller sensor. The simple answer is: if image quality for you is the only priority when choosing a camera, then you will never be satisfied with the E-M1 II. If you believe that a larger sensor is better, then you won’t like the E-M1 II. If you like good image quality but also give priority to other things, then you can appreciate the E-M1 II.
Personally, I think that in an era where smartphones are improving so much that they are discouraging people from using a proper camera, the quality of the sensor is not a big deal anymore. It’s about the lenses and the features that motivate you to work in a better, more efficient way than before.
In this case, it’s all about sensor shift, 4K video that you can record hand-held, the impressive continuous shooting speed and buffer, the improved autofocus, the minimal rolling shutter and the improved battery life.
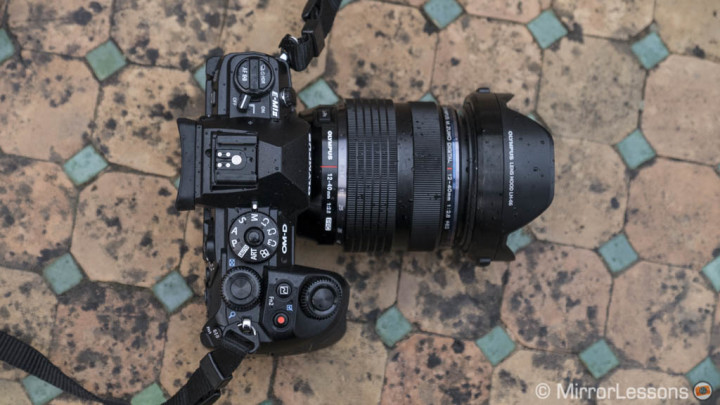
I don’t think the price issue is related to being a professional photographer or not. I’ve seen amateurs spend a fortune just to have the best gear available and pros shooting with mid-level DSLRs. It has more to do with your needs. If you are mainly a sports or wildlife photographer, you will enjoy the many improvements this new camera has to offer. If you are a travel or street photographer, the price might be more difficult to justify in comparison to other valid alternatives like the E-M5 II or the Pen F. And here comes my final point.
The price problem perhaps has less to do with the E-M1 II but more to do with the other Olympus cameras. It is clear than many users were waiting for and were ready to invest in the next generation OM-D. However, not all of them necessarily need all these features. As such, my hope is that Olympus will copy and paste some of them onto the next E-M5 III. I think it is important to have a mid/high level camera with phase detection AF and 4K video (even the basic 100mbps Ultra HD to be on par with the competition) to appeal to current Olympus users who wish to upgrade and have an even more competitive system.
Conclusion
I think I’ve run out of things to say for now. Not bad for one day of testing!
To summarise these second impressions after Photokina, I am impressed by how far Olympus has managed to push technology such as sensor shift. I can already envision even more improvements coming with the next generation. I am also impressed by the continuous shooting speed, as well as the minimal rolling shutter at 18fps with the electronic shutter which makes moving subjects possible to deal with.
The continuous autofocus gave me a positive impression as well but I need more time with the camera to understand how good it is. I think it is on the same level as other mirrorless such as the Fuji X-T2 and a6300/a6500 except for video where the focus is slower.
I don’t expect the image quality to be much better than what we’ve seen from the latest Micro Four Thirds cameras. From what I’ve seen so far, it seems to be at the top of its class, especially in terms of dynamic range and low-light performance.
Now we have to play the waiting game until we can start using the OM-D E-M1 II for an extended period of time. And I am really looking forward to it!
