Update: check out also our article about using the OM-D E-M5 as a primary camera for work!
N.B.: This article is a complete review of the Olympus OM-D E-M5 and includes excerpts from the First Impressions Review and the Low Light Performance Review.
When one writes a camera review, it is standard procedure to reveal the conclusion at the end of the article. In this case, however, I want to drop all suspense and start by saying that I really fell in love with the Olympus OM-D E-M5, so much that I would consider substituting my DSLR with it for some work I do. The reason is simple: it has great image quality (both dynamic range and low-light) in a compact body while remaining powerful in terms of speed, auto-focusing and processing. Think I’ve let my heart run away with my head? Read the article, and, as always, let the pictures be the judge!
Camera and lenses mentioned in this article:
- Olympus OM-D E-M5
- M. Zuiko 12mm f/2
- M. Zuiko 45mm f/1.8
- Voigtländer 25mm f/0.95
[toc heading_levels=”3″]
OM-D E-M5 Main Specs
- Micro Four Thirds interchangeable lens system camera
- 16.1 megapixels 4/3 Live MOS Sensor
- 200 – 25600 ISO sensitivity
- 5 axis image stabilisation
- Autofocus with image contrast detection system and 35 focusing points
- 9 fps continuous shooting with single AF mode
- Full HD: MOV (MPEG-4AVC/H.264 ) and AVI (Motion JPEG), interlaced, up to 20 mbps
- Eye-level electronic viewfinder, approx. 1.44M
- 3.0-inch tilting OLED monitor, approx. 610k dots, Touch control
- No built in flash
- Water and dust proof
- Supersonic Wave Filter (dust reduction system for image sensor)
- Dimensions: 4.8 inch (W) x 3.5 inch (H) x 1.7 inch (D)
- Weight: Approx. 15 ounces
Design, Ergonomics and Functionality
The OM-D E-M5 finds the origin of its name and design in the original Olympus OM line, which was a Film SLR system. I have never used one properly, but I once used an OM as a scene prop for a shooting session I did at the National Cinema Museum of Turin.

As a professional photographer, I’m used to working with heavy DSLRs and lenses. As such, I was very curious to see how I would adapt to the smaller body of the E-M5. There was something familiar when I held the E-M5 for the first time. It reminds me not only of the OM Film line but also of my first camera, the Yashica Fx2000. I have to say that first contact was very positive. Holding the camera felt natural and comfortable, even though an optional grip would be more agreeable for those with large hands such as myself. The camera feels solid and robust (it is water/dust resistant) as do the dials and buttons, save a few which I don’t want to push too hard for their fragile appearance.
The brightness and detail of both the LCD screen and the EVF (electronic viewfinder) left me with a positive impression. I noticed that the EVF colors by default tend to have a little bit of a green tint, but you can adjust the colour temperature of the EVF in the Menu.
Being used to the optical viewfinder of a DSLR, I was afraid that I would need some time to adapt to using the electronic version, but within a matter of a few shots, I quickly grew accustomed to it thanks to its high definition (1,440,000 pixels/LCD monitor with approximately 610,000 dots).
The LCD is orientable, which is very useful for high-angle photos.
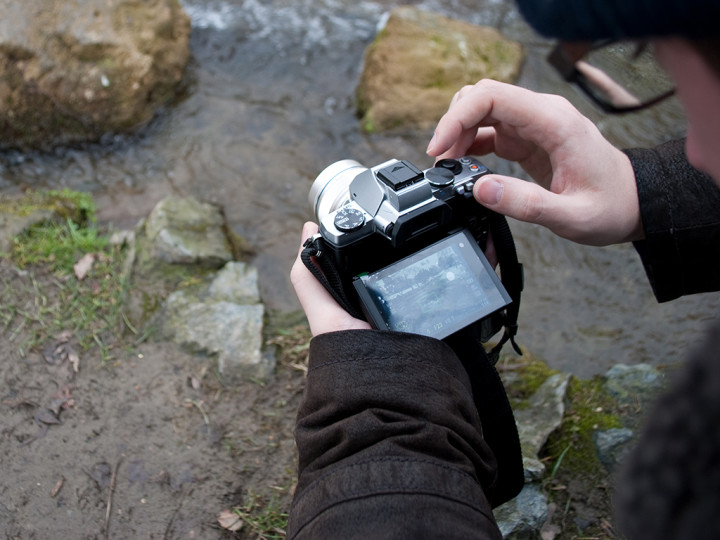
The camera has an eye sensor that switches automatically from the LCD to EVF when you put your eye in front of the viewfinder – a nice feature, but the switch is slightly delayed. More than once, I found myself in a situation where I saw suddenly something interesting, brought the camera to my eye, but had to wait a micro second to see my scene. In the case of street photography, you can really risk missing out on a great shot. On occasion, I disable the automatic switch and use the dedicated button when I need it. Below you can watch a quick hands-on with the OM-D E-M5 presented by my partner Heather.
To be completely honest, I am not a big fan of the Menu system. You often have to dig into it to find options that are more accessible in other cameras. That said, it isn’t terrible either and you get used to it after a while. I would also have preferred to have a dedicated ISO button and more Function buttons. (There are actually only two.) You can also customize the arrows on the arrow pad, but I find them less intuitive. Anyway, I’m talking about minor flaws here.
Image Quality, Part 1: Colors and Dynamic Range
N.B.: Olympus released a firmware update (version 2.0) in January 2014 that expands the ISO range to Low (100) on the low sensitivity side.
Having only ever shot RAW files, I never really considered JPEGs as a feasible alternative. I have always preferred the quality of RAW files and the adjustments in post-production you can make with them. However, I had heard so many positive reviews about the in-camera JPGs of E-M5 that I set the camera to shoot RAW + JPEG (fine) to draw a quick comparison.
Blimey – those JPEGS are some of the most beautiful I’ve ever seen.
Most of them are usable even without working the RAW files. Of course, shooting RAW has its advantages, the most important being that picture compression is far better than the JPEG version. However, with the E-M5, I feel that, for the first time, I could choose to shoot only in JPEG format without worrying too much about post-processing the pictures.
The pictures below have been converted from RAW files using Lightroom 4, but you can also open up the original JPG file recorded on the SD card.
Colors are the second aspect that really surprised me. I enjoy using both normal and vivid profile. The vivid profile, in particular, became my favorite of the two. Usually, I don’t like vivid profiles as cameras tend to over-saturate or simply lather on the contrast. The E-M5 saturates the colors just right, so the pictures remain brilliant with lots of detail in the shadows.
N.B.: If you are shooting RAW, the look of the picture profile chosen will only be visible in the Olympus Viewer 2 software. If you are using Lightroom 4, the software will apply a default preset that doesn’t correspond to the profile assigned on camera. My advice is to use picture profiles if you also shoot in JPG. Otherwise, stick with the natural profile and work your RAW files in post-production to get the result you want.
The E-M5 does a great job at capturing intense colors such as the red/pink of a flower or the blue sky of a wonderful sunny day, but I was also curious to see the realism of color reproduction in a more complex environment.
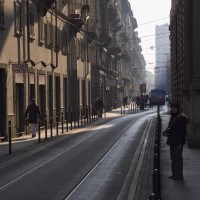
The entrance to Palazzo Reale (the ancient residence of Italian Kings) was an interesting scene where the unique royal atmosphere and the wide palette of colors and shades were the perfect test for the OM-D E-M5. It passed with flying colors!
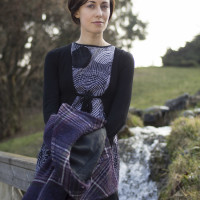
Skin tones were another aspect that I was interested in testing. While it is possible to adjust the skin tone very accurately in post-production with your favourite photo editing software, I like to have a camera that can capture the skin tones of my subject with substantial realism. In this way, I can direct my concentration towards other aspects when I post-process the photographs. In this case, I prefer to set the picture profile to natural instead of vivid.
Skin tones can vary a lot depending on the light condition, but I really like what I have achieved so far: there is a good balance in colour, and faces look natural without an excess of magenta or green tones.
Voigtländer 25mm f/0.95
M.Zuiko 45mm f/1.8
M.Zuiko 45mm f/1.8
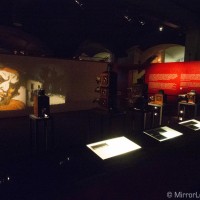
Finally, another great environment where I was able to test the camera was the National Cinema Museum in Turin, where I work. These photographs show the great colour reproduction of the E-M5 at high ISO.
When I first bought the camera, I was curious to test the dynamic range, knowing that I was testing a camera that has a sensor two times smaller than the DSLR I had always worked with. Again, I am very impressed with how the camera handles highlights while conserving all the details in the shadows.
I wouldn’t say that it is at the level of a full-frame sensor, but I didn’t really miss it while using the OM-D. I will talk more about this specific subject later on.
I only found once trace of colour moiré in the pictures below. Nothing serious, and it has been an isolated case so far.

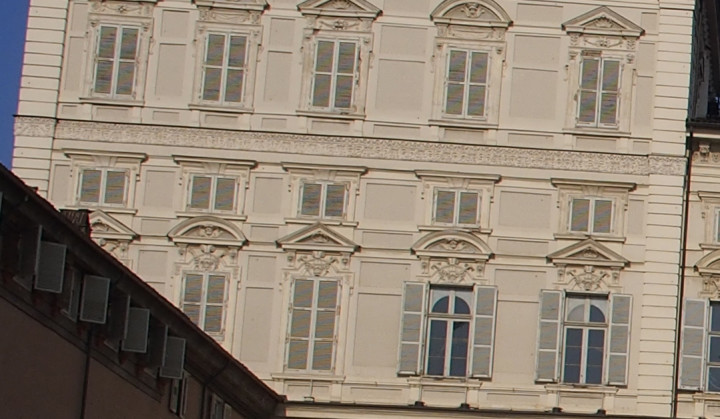
Image Quality, Part 2: Low-Light Performance
One of the first things I check when testing a new camera is the ISO sensitivity. Good low-light performance is something I need for my job as one of the two official photographers at the National Cinema Museum in Turin, Italy. It is a wonderful museum but it is often challenging to photograph due to the dim lighting conditions.
The standard procedure for taking professional shots in this case would involve putting the camera on a tripod, setting the ISO sensitivity to the minimal value, closing the aperture and setting a slow shutter speed to compensate. However, I thought it would be nice to test the high ISO sensitivity of the OM-D E-M5 in an environment I know very well and see if I was actually able to bring some good pictures home – and when I say “good pictures,” I mean even from a professional point of view. My objective was to keep a relatively closed aperture (between f/4 and f/5.6) to ensure good sharpness while compensating with ISO and a slow shutter speed to test the internal stabilisation of the camera. See the picture below. You can read the full low-light review and see all the pictures of the museum here.
I haven’t tested every camera out there and I’m sure that the Olympus OM-D E-M5 wouldn’t upstage the latest generation of DSLRs such as the Canon 5D mk III or the Nikon D4, but for what it’s worth, I am really surprised by the capacities of this camera and I feel that ISO performance is its strongest point. Considering the fact that its sensor is smaller than APS-C and Full Frame sensors, Olympus has done a great job here. I love the grain – it isn’t too invasive and doesn’t look ugly. Even some shots at 12800 ISO are usable.
From a professional point of view, I feel some of these shots above are perfectly usable if large-scale printing isn’t required, especially at 3200 and 6400 ISO.
This doesn’t mean that from now on I will be leaving my tripod at home. Quality comes first and I have to provide my clients with the best possible shot, period. But knowing that I can count on the sensitivity of the E-M5 regardless of the light conditions is certainly a big advantage.
Below some other pictures taken at 12800 and 25600 to push the limits of the camera!
Performance: Speed and Autofocus
N.B.: Olympus released a firmware update (version 2.0) in January 2014 that adds the Small AF target to the AF target settings.
Another point that pleased me is the speed of this camera! The continuous shooting mode gives you a speed of 9 fps when AF single mode is selected. We are talking professional DSLR performance here. To fully test both burst and autofocus, I brought the E-M5 to the Alps, to the village of Gressoney in Aosta Valley, where I took some shots of my cousin Nicola, a ski/telemark master.

It was also an opportunity for me to ski after four years, and for Heather to learn the ropes. A very nice weekend!


The 9fps really comes in handy in a high-speed situation like the slopes of the Alps. It’s hard to miss the shot you’re after.
When you shoot in burst mode, make sure to turn off the Rec View in the Camera Set-Up Menu. Otherwise, it will be hard to keep track of your subject because when you start shooting, the viewfinder will start to flash previous pictures you have taken before your eyes (thanks to Eric for the tip).
The autofocus latches onto the subject very quickly, and tracking/AF-C mode work very well for this kind of camera. In AF-C, it is advised to use the lowest sequence shooting mode (L) that reduce the speed to 4.2fps but won’t lock focus at the first frame like the H mode (9fps) does. Again, the E-M5 doesn’t rival the great autofocus system of Nikon or Canon DSLRs, but it didn’t disappoint. I also put the camera to the test as I was taking a series of pictures of a skier coming closer and closer to me on the slopes. I noticed that at some points, the camera lost its ability to focus on the skier and the last pictures of the burst are slightly out of focus. I used a Lumix 14-140 zoom lens for these shots, which probably isn’t the best lens out there.


The EM-5 also features a 5 axes stabilization system, whereby the sensor can literally “rotate” to avoid hand shake as much as possible. This is another feature that really surprised me.
Using it, I can easily take a picture at 1/5 without worrying too much about the picture turning out blurry.
Of course, it works better with small lenses and wide angles. And if you are using a slow shutter speed hand-held, use the viewfinder rather than the LCD. It will help steady your body while shooting. The last picture was taken at 0.4 seconds. Not bad at all!
Other Features
There isn’t much left to say about the OM-D E-M5. The camera doesn’t have a built-in-flash but Olympus has created an external FL-LM2 unit, a little flash unit that does the job. The OM-D has some extra features such as Multi Exposure and Panoramic Mode for example. The first is, in my opinion, useless if the camera is not on a tripod, as the alignment is very bad if you take pictures hand-held. (The GH3, in comparison, has an automatic alignment system with a built-in HDR option which works way better). Moreover, it is far better to use the bracketing function and merge the RAW files in Photoshop, which, I should mention, is also very good for merging hand-held shots. As for the Panoramic Mode, it isn’t performed inside the camera itself. You will need the Olympus Viewer 2 software, which is possibly the slowest photo software I have ever used. Again, use the photo merge option in Photoshop and you’ll save yourself a whole lot of frustration.
I didn’t dig into the motion capabilities of the camera. The quality isn’t bad, but it remains at the level of a consumer camera. Stabilisation works very well for video but it is noisy, which can become intrusive if you decide to record audio. Many have been waiting for a firmware update that will improve the video mode of the E-M5, but that hasn’t happened yet, and probably never will. The E-M5 is a photo camera and has not been designed to be a good alternative to a video camera. It is fine for amateur videos, and the quality is acceptable, but the codec and bit rate are nothing compared to the Sony Nex 7 or the Lumix GH3.
Micro Four Thirds System: Bokeh or no Bokeh
The most common criticism you’ll read about Micro Four Thirds cameras is that the sensor is too small, leading to reduced bokeh in the background, or a less “creamy” effect than that you see in full-frame cameras. Another complaint is that the dynamic range and high ISO aren’t up to par. Well, in my opinion, and being used to full-frame DSLRs, I can say that this camera proves that those assumptions aren’t entirely true. Does a full frame camera perform better than a Micro Four Thirds camera? For sure, but I am also sure that 90% of the pictures you take with one system, you can also take with the other. The E-M5 proves to have a great dynamic range, and a wonderful performance at high ISO.
As for the bokeh, we must remember that it isn’t only a question of sensor, but also the quality of the lenses you use. Put the right lens on a Micro Four Thirds camera, and you can obtain a very beautiful bokeh.
M.Zuiko 45mm f/1.8
No processed version
Voigtländer 25mm f/0.95
No processed version
Voigtländer 25mm f/0.95
M.Zuiko 45mm f/1.8
No processed version
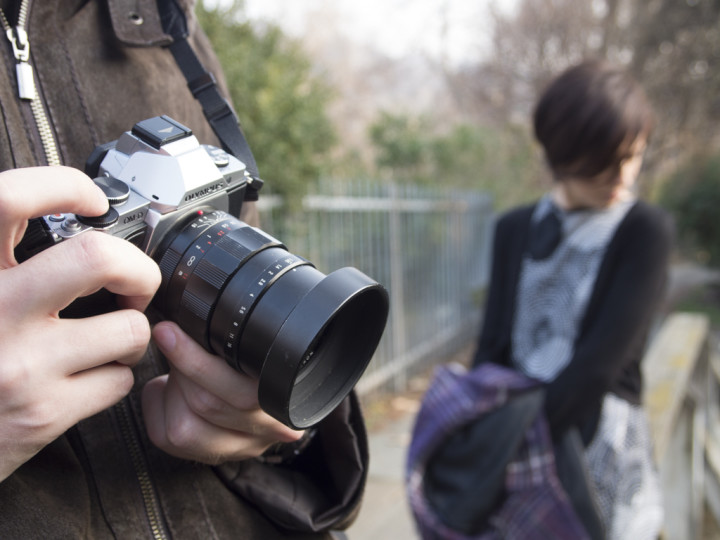
Now, the M43 system is the most versatile in the mirrorless camera category, offering a wide range of lenses, both from Panasonic and Olympus. More and more high quality fast primes are coming out, as well as the first professional f/2.8 constant zoom, something that can satisfy both advanced amateurs and professional photographers. Furthermore, you can mount almost any other kind of lens using adapters if you like to experiment.
Primes are very small and light and are, in my opinion, the perfect choice for this camera. Choose two or three primes that you like and you are set. I currently own the Zuiko 12mm f/2 and the 45mm f/1.8. The first is a great wide-angle lens, which is sharp at maximum aperture with a wonderful bokeh. The 45mm is a very good portrait lens more than worth its weight in gold. I will review both of them soon.
Conclusion
 What I like about the OM-D E-M5
- Great colour reproduction
- Great high ISO performance
- Very good dynamic range for this type of sensor
- Impressive continuous shooting speed
- Beautiful design
- Very detailed EVF/LCD
- Water/dust proof
- Small and lightweight
 What I don’t like about the OM-D E-M5
- You need the additional landscape grip for it to feel more comfortable in your hand
- Not the best menu system I have seen
- Some buttons look fragile…
- … and that’s it!

As I already revealed at the beginning, I love this camera. Some small things can be improved, but purely in terms of image quality, it continues to surprise me the more and more I use it. Once I get my hands on the f/2.8 constant zoom, I will seriously consider replacing my D700 and its 28-70 f/2.8/80-200 f/2.8 for some of my work, where having smaller and lightweight equipment is a plus. However, I will probably need the landscape additional grip as my hands are big and the compact OM-D body can be a little small if used all day.
What more can I say? Olympus has built a little masterpiece here, and I can’t wait to see the successor to the E-M5 that, according to rumours, could arrive at the end of this year. Will it be the killer queen of all mirrorless cameras? Certainly, the competition is fierce, and that makes us even happier. Feel free to ask any questions regarding the Olympus OM-D E-M5 – I would be more than pleased to answer them.
You can also download some RAW samples here.


