After using DSLRs for several years, and then switching to the Olympus Micro Four Thirds and Fuji X systems, I never would have thought that I would enjoy using a point-and-shoot camera so much, but the truth is that I really had fun testing the new Sony RX100 II. I also feel that I got it at the right time, which was right at the beginning of my summer holiday in Wales.
I love the country of Wales, and since 2010 I have spent all of my summer holidays there. It is the perfect place for me to escape from Italy and my hectic work regime. There, I can enjoy time with family, walks and breathtaking landscapes, and concentrate on improving my photography and of course our beloved blog, MirrorLessons. So, this is the spirit with which I embrace this small yet powerful camera, the perfect companion for my vacation!
Warning: This is a long review but with lots of beautiful images to see 🙂

DSC-RX100M2, 1/125, f/ 5.6, ISO 160 – Post Processed RAW file
The Sony Cybershot DSC-RX100M2 (also known as the RX100 II or RX100 mark II) is an update of its predecessor, the RX100. The original RX100 made a very good impression when it was released in 2012 because it was the first compact camera of its kind to feature a large 1-inch sensor. Sony puts it in a category called Professional Compacts or DSLR quality, alongside the RX1/RX1R, the first compact camera ever to feature a full-frame sensor. This helps clarify what kind of users this camera is aimed at.
That Sony made so many improvements on the RX100 is a surprise since Sony is known for producing numerous models of the same camera (i.e. the NEX series) without incorporating many significant upgrades.
The RX100 II features the same fast aperture Carl Zeiss zoom lens, improved low-light performance, better Autofocus and improved functionality thanks to the new tilting screen and hot-shoe for optional accessories. Below you can see a list of all the improvements over the RX100:
- An updated back-illuminated sensor that should improve both low-light performance by 40% and AF. The resolution is the same (20MP).
- An updated ISO performance, now going from 160 to 12800 and an extendable ISO of 100/125 and 25600;
- The addition of a hotshoe on the top of the camera for accessories such as an external viewfinder, stereo microphones etc.
- Wi-Fi and NFC wireless capabilities
- A tiltable LCD screen
- A multi-purpose socket where you can attach a remote control for example
- Video recording is now also in 24p/25p.
[toc heading_levels=”3″]
Sony RX100 II Main Specs
- Sensor: 20.2 megapixels 1 inch Exmor™ R CMOS Sensor
- Lens system: 3.6x Carl Zeiss Optical Zoom – 10.4-37.1mm (28-100mm equivalent on 35mm format) – f/1.8-4.9
- ISO Sensitivity: 160 – 12800 ISO (extendable to 100, 125, 25600)
- Min/Max. shutter speed: 4″ to 1/2000s
- Continuous shooting: approx. 10 fps in single AF mode
- Autofocus: Autofocus with contrast detection system
- Focus Peaking: Yes
- Internal Stabilisation: Yes (Sony Steadyshot)
- Viewfinder None (external VF can be mounted on the hotshoe)
- LCD Screen: 3.0-inches tilting LCD monitor, approx. 1,228k dots
- Movie recording: Full HD in AVCHD (up to 60p, 28MB/s), MP4 (1440×1080, 30p, 12MB/s) and VGA (30p SD)
- Weather-sealed: No
- Built-in Flash: Yes
- Built-in Wifi: Yes
- Extras: Pop Art Filters, panorama, Multi-Frame NR
- Dimensions: 101.6 x 58.1 x 35.9mm
- Weight: Approx. 281g
High quality that fits in your front jean pocket
Design, Ergonomics & Functionality
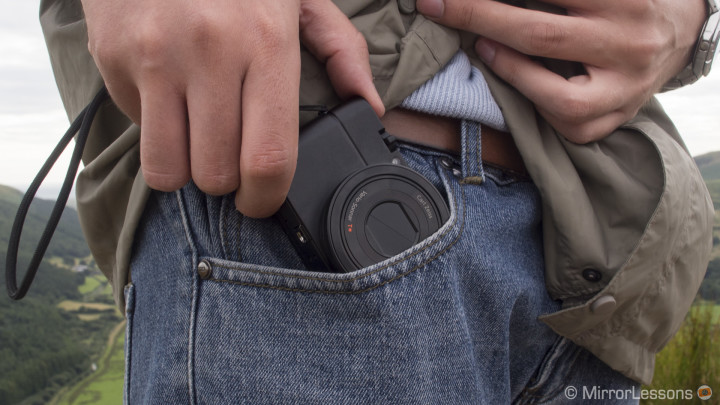
In appearance, the Sony RX100 II is a point-and-shoot camera that could easily be confused with others on a shelf full of compact cameras. The most expert users would perhaps notice that the lens part protrudes slightly from the body or the presence of a hot-shoe on top, but details aside, it has a true compact camera design when it comes to size and weight. And this of course means portability at its best, as the camera will easily fit into a small bag, your jacket pocket or even your jean pocket.
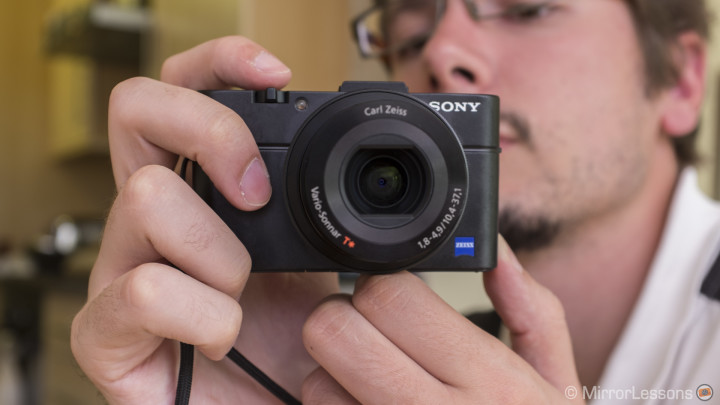
When you hold it, you realize that despite its small size, the Sony RX100M2 is different from the rest.
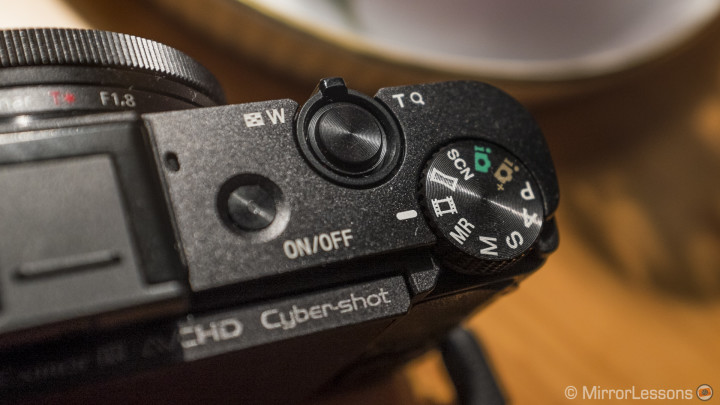
Its body, like the RX100 before it, is an all metal build, which gives that strong and well-built quality that we like to feel in our hands. You can appreciate its simple yet elegant design, solid dials, toggle, buttons on the top and rear and the finishing touches on the lens ring.
The only part that seems less solid to me is the tilting LCD screen (that the RX100 didn’t have). First, the monitor suffered some very thin micro scratches in the top right-hand corner. I always placed the camera either in my pocket (cotton or jeans) or in a small camera bag. It never fell out of my hands, and has never been in contact with keys or other potentially “scratchy” elements. They aren’t very visible but it is still proof of the LCD’s delicateness. Perhaps a screen protector such as the Expert Shield could be a good investment.
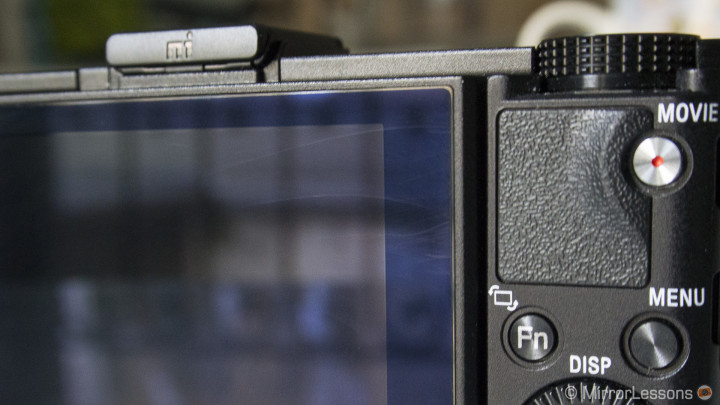
Second, when I pull the LCD out from the body, I get the feeling that it is better do so with caution, something that doesn’t come to my mind with tilting screens on other cameras. The hinge that attaches the LCD to the body is made of thin metal and seems robust, but I get the feeling that you don’t want to test its durability too much. But I’m also very very finicky!
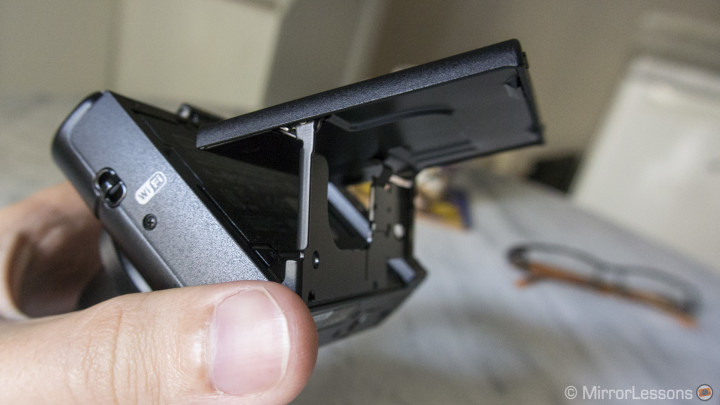
The camera is provided with a hand strap only, which is more than enough for this kind of camera, but if you prefer the classic neck strap, you have to purchase it separately. You also get one battery and of course the charger. Like many Sony cameras, you have to recharge it either by connecting the camera directly to the power supply or to a computer with a USB 2 port. Sony doesn’t include a charger for the battery alone, something that you might find irritating if you want to purchase a second battery. This is because, with a charger, you would be able to use the camera while charging the first battery. Of course, you have the choice of buying the optional battery charger as well.
Sony has always been like this, even with $4000 semi-professional camcorders, so what could I expect from a less-than-$1000 camera? Yes, that’s the finicky me again!
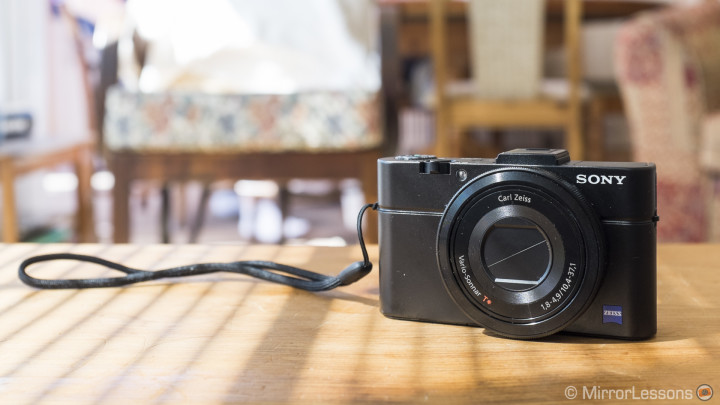
When you start to use the camera, you also feel that it has been designed to make the process as easy as possible.
The design and the placement of the buttons are identical to the original RX100. You have a commander dial on the rear which allows you to quickly access the burst mode and exposure compensation, activate and select the flash mode or select what information to display on the LCD screen. The Fn (Function) button situated just on its top-left is customisable and allows you to access up to 7 settings such as ISO, White Balance, Pop Art filters etc. In my experience, it is better to set three or four functions, otherwise pressing it repetitively to reach the desired setting can become tedious.
On the top-right of the camera rear you’ll find the REC button for video next to the little thumb grip. I wish it were more pronounced because there isn’t enough grip for how the camera has been designed. It is the same as the original RX100, so I guess only a few people complained about it, or simply Sony didn’t see the need to change it.
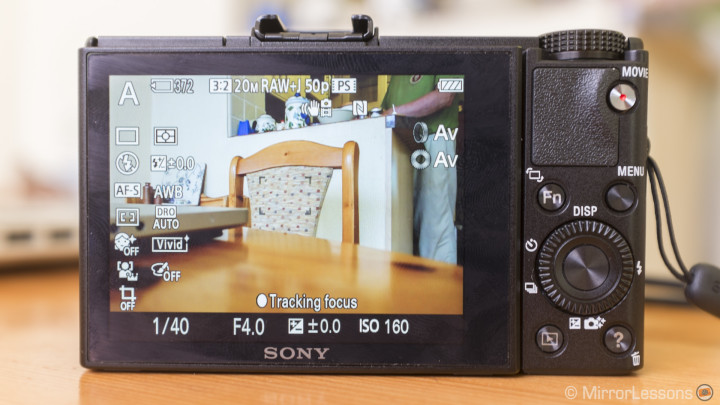
The “?” button is a quick tip & tricks guide for the different options and possibilities the cameras has to offer. I personally never used it or the paper manual, but it is a nice addition for beginners and proof that Sony wanted to build a camera that could satisfy both amateurs and pros. The menu is also easy to navigate thanks to the commander dial. I would have preferred to be able to select the main categories first, then the sub-categories, because if I want to reach the card settings, I have to scroll all the way though camera and video settings first. Also, if you exit the menu and go back, the camera won’t remember the last sub-menu you visited and will always start from the first one.
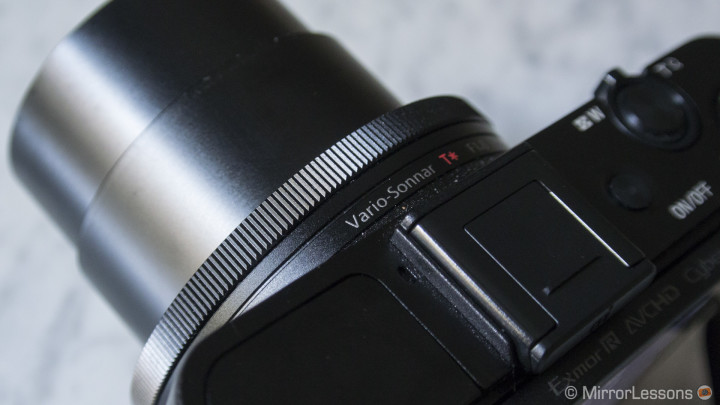
The only real complaint I actually have is toward the control ring located on the lens. You can customise its function by choosing zoom, aperture or shutter speed for example. I really like the idea but when you turn it, it has a delay and isn’t very precise when you stop turning it either. I used it for zooming in and out when I wanted to reach a precise focal length and create a given composition, but I always had to try two or three times to achieve what I wanted. If you are thinking of using it to speed up the picture-taking process, you could be quite disappointed. It only becomes useful for manual focusing.
The LCD isn’t touch sensitive, which is surprising but during one month of intensive usage, I never felt the need to have one anyway.
Despite these few weaknesses, the functionality of the RX100M2 is exceptional and some methods of quickly activating functions such as focus tracking are great (more on that later).
DSLR Quality isn’t a joke…
Colours, dynamic range & low-light performance
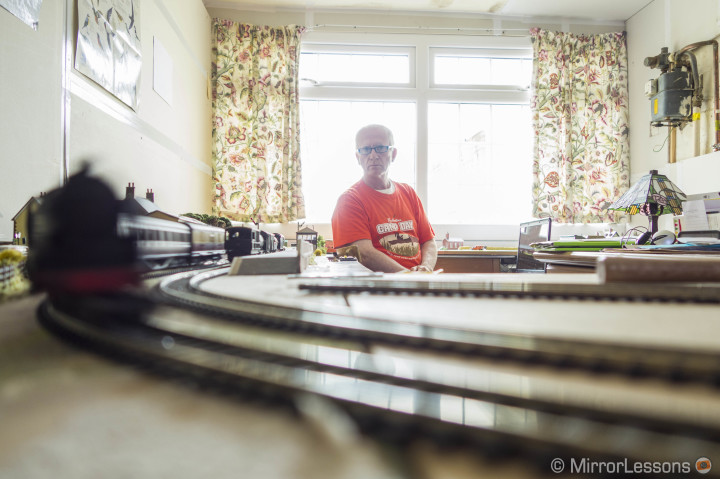
DSC-RX100M2, 1/13, f/ 2.8, ISO 160 – Post Processed RAW

DSC-RX100M2, 1/2000, f/ 8, ISO 100 – Post Processed RAW
Because I had read many enthusiastic reviews about the RX100, I knew that this second release would have great image quality, but as always, until I try a camera myself, it is difficult to predict how satisfied I’ll be. And I have to say that this little RX100 mark II surprised me indeed!
By force of habit, I almost always used the camera in Aperture priority mode. I also tried the Automatic modes (there are actually two) but I found that the metering system slightly overexposed the images at times. In Auto mode, you can compensate the exposure but it is trickier to use as the camera will give you a series of options such as blurring the background, adjusting the brightness etc. Basically, in Auto mode the camera speaks a different language more suited for beginners which also slows down the operation of the camera. If you are lazy like me, sometimes a good compromise can be the Scene modes where you choose the type of photo you want to take (portrait, low light, etc.) and the camera will choose the correct setting accordingly. But otherwise, I stick with Aperture priority as I can easily and quickly adjust my exposure compensation and shoot in this mode.

I always shot in both RAW+JPG Fine so that I could compare the two files. I found the JPGs out-of-camera good and usable but they don’t show the true potential of the camera. The vivid picture profile will tend to add too much contrast and I found the shadows too dark and almost clipped. I guess this is also a question of personal taste.
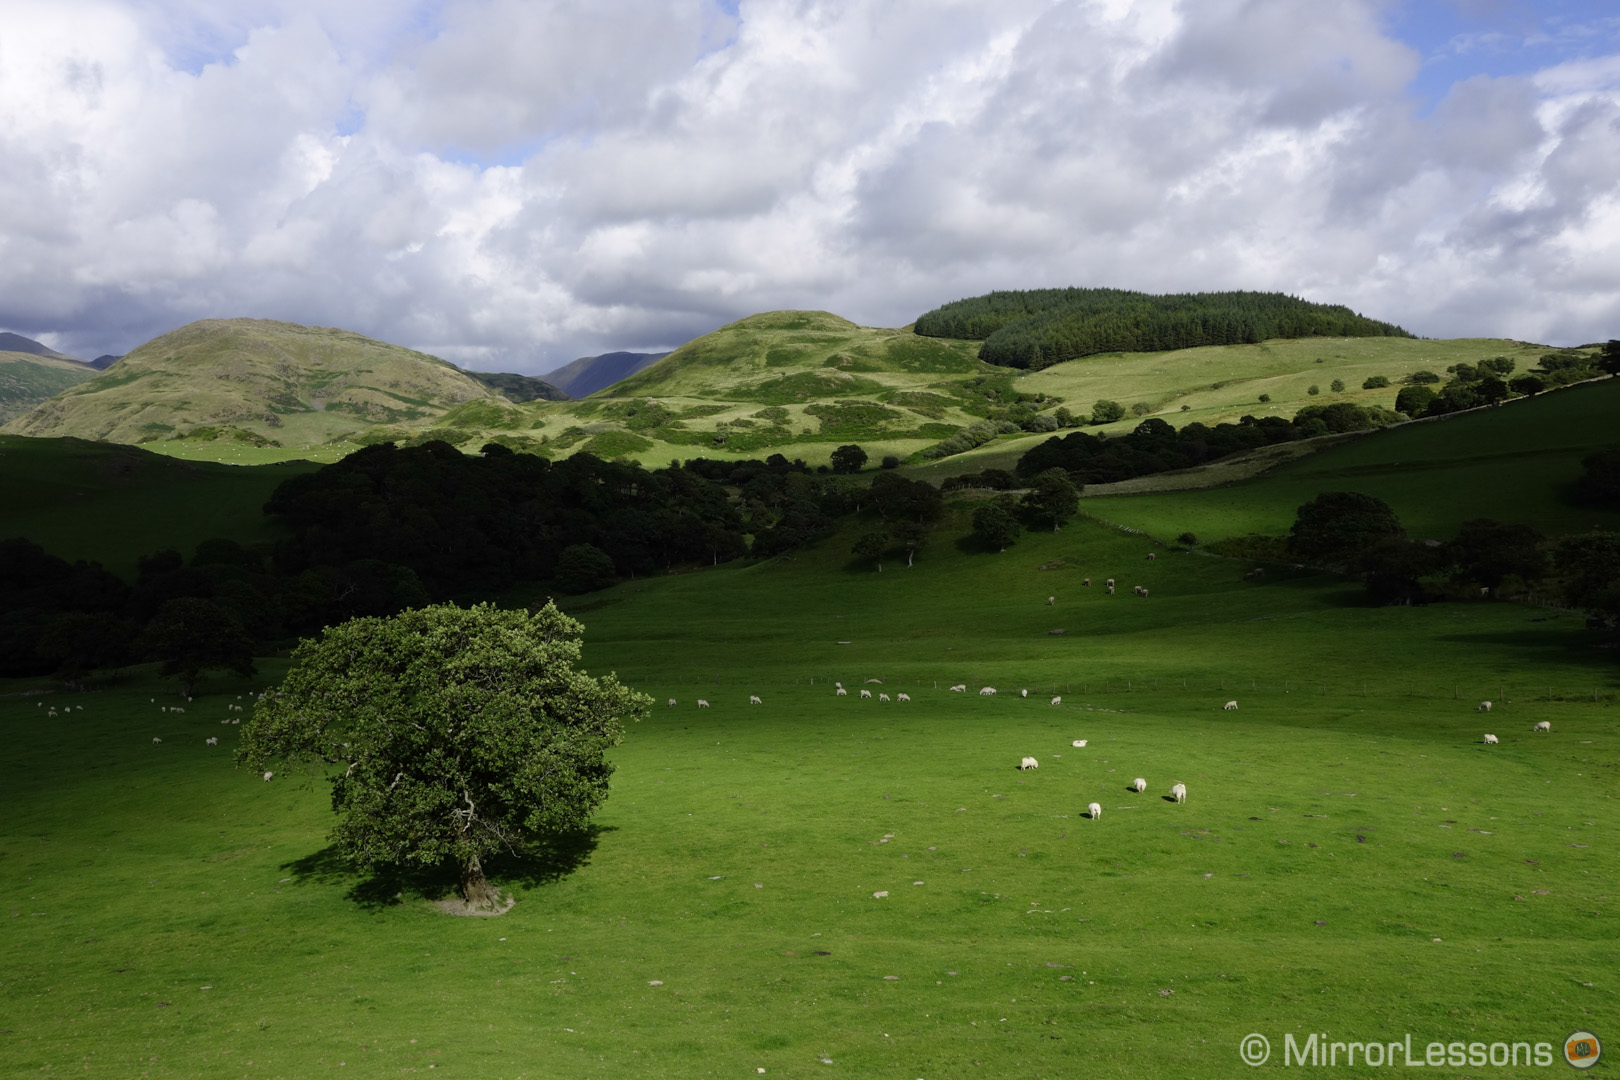
DSC-RX100M2, 1/400, f/ 8, ISO 160 – On Camera JPG – Vivid Profile

I also find the Vivid Profile often too “digital” when it comes to colour reproduction. It tends to really punch the colours. You will get better results with a more natural colour rendition by using the standard or portrait profile.

The great potential of this camera is revealed when your work with its RAW files and discover its dynamic range potential and colour reproduction. It often felt like I was working files coming from a high-end mirrorless camera or a mid-end DSLR.
When you work with this camera, either JPGs or RAW, you need to be careful with highlights. Despite the vast dynamic range, we are still talking about a sensor smaller than Micro Four Thirds so you won’t achieve miracles. If you blow out the highlights, you won’t recover anything from the JPGs, and you will recover only a small amount from the RAW file.
The RAW files conserve a lot of detail in the shadows that you can easily recover; that’s why if you are in doubt, it is better to slightly underexpose your images. If you use Adobe Lightroom, you will need to add some contrast and increase the vibrancy and saturation, as the software gives you a very flat image from the start.

DSC-RX100M2, 1/400, f/ 8, ISO 160

DSC-RX100M2, 1/800, f/ 5.6, ISO 160

DSC-RX100M2, 1/500, f/ 8, ISO 160
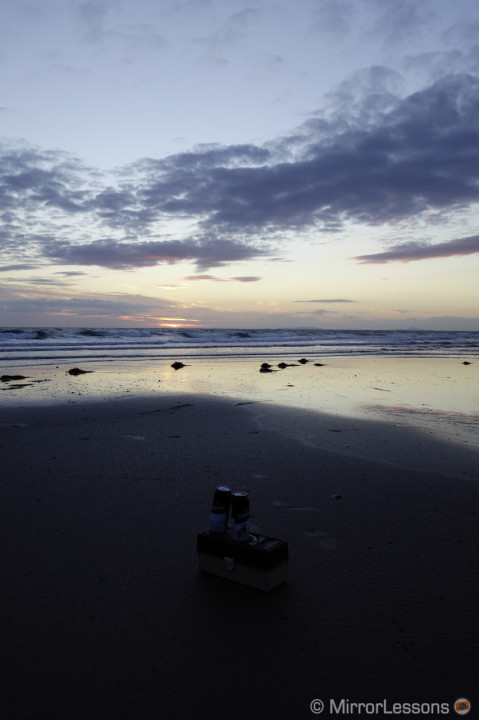
The camera also allows you to set the dynamic range up to 5 levels. It is only effective for JPGs but I like the results of Level 4 and 5. It is good if you want a larger dynamic range and a more natural look for your images. Again, you will obtain better results with RAW.
Move your mouse over the image below to see the difference, or click on the thumbnail at the bottom if you are reading this article on a smartphone/tablet.
The HDR function is one of the best I have ever seen on a digital camera. Usually the results look unnatural but the RX100 II does a wonderful job. Like the DR option, you can choose up to 6ev steps. The camera takes 6 consecutive pictures very quickly and merges them into one shot. Even when photographing people, I didn’t notice any misplaced alignment in the final result. This feature can almost allow you to skip post-processing HDR with Photoshop unless you want a very “dramatic” result.
Move your mouse over the image below to see the difference, or click on the thumbnail at the bottom if you are reading this article o a smartphone/tablet.

DSC-RX100M2, 1/250, f/ 2.8, ISO 160 – Standard > HDR
I also found the skin tones rendered nicely both for JPGs and RAW if you use either the standard or portrait profile in normal lighting conditions.

DSC-RX100M2, 1/1250, f/ 1.8, ISO 200
The camera also has a soft skin effect but I found it too extreme and you lose too many details. The skin starts to look less natural in different lighting conditions like a cloudy day or when there is a mix of natural and artificial light. In this case, it is better to work with the RAW files to have a more precise result. It also depends on the White Balance setting. I tend to leave it on Auto but this can add a slightly more green or magenta tint and also tends to give a cooler result.

DSC-RX100M2, 1/1600, f/ 2/1, ISO 160 – From RAW

DSC-RX100M2, 1/100, f/ 1.8, ISO 160 – Out-of-camera JPG
In some “extreme” situations the sensor actually does a good job of reproducing skin tones, like in the example below where a sparkle of the setting sun came in through the window. Of course, I jumped at the opportunity to take a quick portrait of Heather, and the colour rendition is a perfect replica of what I saw in real life. The JPG was more contrasted, but the RAW file turned out very well.

DSC-RX100M2, 1/80, f/ 2.8, ISO 800
The picture was taken at 800 ISO and is the perfect introduction to the last part of this chapter concerning image quality.
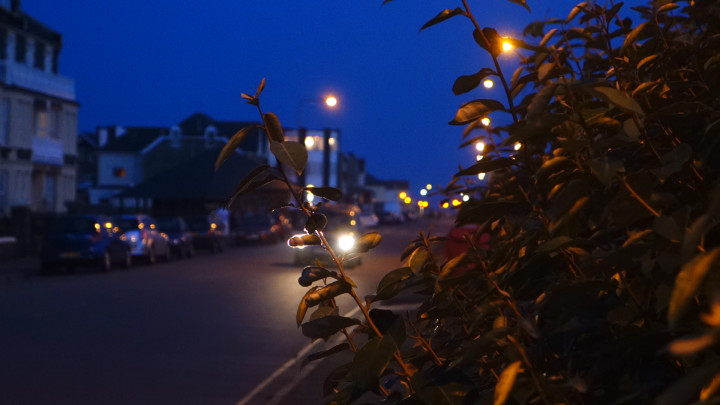
One of the strongest points of the RX100II is low-light performance.
A few weeks ago I had fun comparing its high ISO performance to that of the Fuji X100s, a battle that of course the Sony couldn’t win but this confrontation helped show what this small sensor can do. Up to 6400 I really need to view the photos at 100% to notice noise.
By the way, in the two pictures below you can also notice some inaccuracy from the Auto WB with artificial light. There is definitely too much green/yellow!
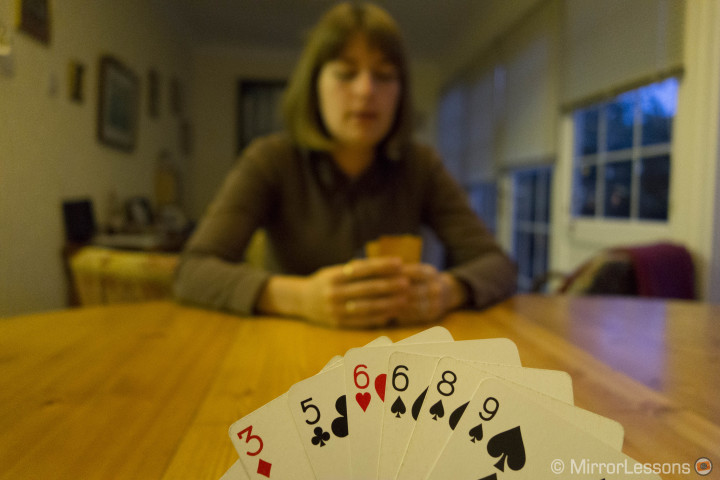
DSC-RX100M2, 1/60, f/ 2.5, ISO 1600
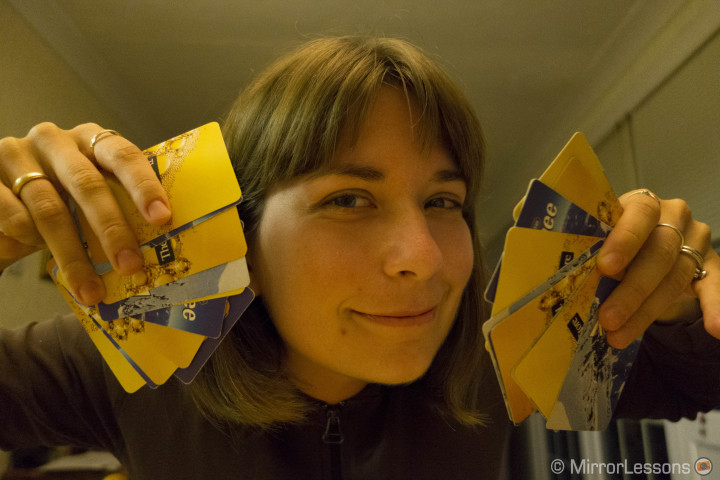
DSC-RX100M2, 1/100, f/ 1.8, ISO 3200
The camera goes up to 12800 ISO, which I still found usable in desperate situations. There is also an extended ISO 25600 that works only with JPGs. You actually may not see this option at first. You first need to select JPG only, then the Multi Frame NR ISO in the ISO settings, and finally 25600 ISO. In that mode, the camera takes multiple frames and merges them into a single shot and reduces the amount of noise during the process. And the results are impressive indeed.
Carl Zeiss is a synonym for quality
Bokeh & lens performance
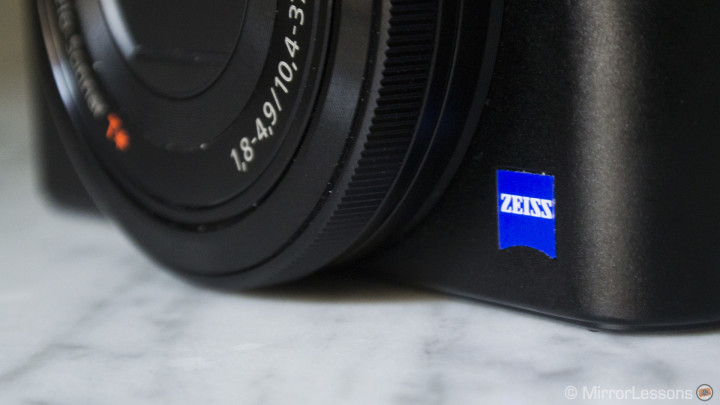
The Sony RX100M2 has a non-removable 3.6x zoom lens with a range going from 28mm to 100mm (35mm format equivalent). It is a very good lens in my opinion and gives you the possibility for more “artistic” experimentation with nice bokeh, something that is often limited on point-and-shoot cameras. There aren’t any important negative aspects to point out. The only thing that comes to my mind is the lack of longer telephoto capabilities, unless you want to digitally extend it, but in that case you’ll lose quality. I much prefer to crop my pictures in post-production.
The lens’ strong points are without a doubt its fast aperture of f/1.8 at its shortest focal length. Even though the zoom aperture isn’t constant (down to f/4.9), the possibility for a shallow depth of field is very real if you know how to use the camera inside and out. You won’t achieve a lot if your subject is far away or if you have a wider composition.

DSC-RX100M2, 1/2000, f/ 1.8, ISO 160

DSC-RX100M2, 1/500, f/ 4.9, ISO 160
If you focus close to your subject and use a wider focal length to keep your aperture at f/1.8, you can obtain a very nice bokeh for this kind of lens. It is a good example of the quality a Carl Zeiss lens can provide, despite having been designed for a compact camera.

DSC-RX100M2, 1/800, f/ 1.8, ISO 400


DSC-RX100M2, 1/80, f/ 1.8, ISO 160
If we have a closer look, we can find some tiny weaknesses. At f/1.8, the lens is a tiny bit soft but nothing you can’t correct with Lightroom or Photoshop. If you view the picture at 100% you might also notice some blurred halos around the edges of the elements in focus. Also, in the out-of-focus zone of a backlit scene such as a sunset, you might see some chromatic aberration if you want to increase the saturation and colour vibrancy in post-production.


As soon as you increase your aperture, around f/2.8 the lens becomes sharper and you will still have a decent depth of field especially if you stay at an equivalent focal length of 50mm.

Below some other examples showing bokeh and shallow depth of field.
I find the overall sharpness of the lens very good. I wouldn’t say it is perfectly razor-sharp but at an aperture such as f/8, the zoom manages to keep almost equal sharpness throughout the entire range, which is a positive aspect.
Another thing worth mentioning is that the lens can suffer in shots featuring direct light, showing a weird “rainbow” flare, so be careful when framing a composition with the sun in it for example. This is a minor weakness in my opinion–we cannot have it all, can we?

DSC-RX100M2, 1/400, f/ 8, ISO 160
Finally, the camera also features a macro mode that can be set from the Scene mode on the top main dial. The minimum focusing distance is 5cm (widest zoom length only), which isn’t bad but can’t compete with a Fuji X20 for example.

You can download some RAW & JPG samples here.
Little but wants to play like a pro!
Autofocus, burst & stabilisation
Overall image quality aside, the RX100M2 also offers many interesting features in terms of performance.
I found the autofocus very quick in AF-S (Single). It locks onto anything in normal lighting conditions but struggles more in low-light conditions or in acceptable light conditions but with a very busy background. I had a problem focusing inside an arcade for example, while trying to take a wide shot and focusing on the background. This is the only real complain as I find it is very good even in a dynamic situation like being on a moving train. The camera is very reactive so I can focus precisely on the element I want, quickly recompose and take the shot.

DSC-RX100M2, 1/100, f/ 4, ISO 400

DSC-RX100M2, 1/30, f/ 2.8, ISO 400
The camera offers a clever way to quickly access focus tracking at any time, regardless of the AF mode chosen. You just need to press the button placed in the centre of the control wheel to activate it, position it on the element you want to track and confirm by pressing the same button again. The camera will start tracking and it is very effective if you don’t move too quickly or too far from the point you chose. I often used it when I wanted to focus on an object wasn’t in the centre of the image. It also works well with a moving subject.

DSC-RX100M2, 1/800, f/ 4.9, ISO 160
Of course, tracking works in AF-C continuous mode as well. Every year in Tywyn there is a marathon called Race The Train that attracts expert and amateur runners from all over Europe. It was a good opportunity to test the continuous focusing, tracking and burst mode. The RX100 II can shoot up to 10fps in AF-S, but the speed decreases in AF-C mode depending on whether you choose to give priority to focus or speed. I took several pictures of the athletes running toward me or parallel to my camera axis.

DSC-RX100M2, 1/250, f/ 4.9, ISO 500
In AF-C mode, the continuous shooting is slower but still acceptable for sport pictures like this. The tracking and AF-C do the job, especially if your subject is wearing a distinctive colour that the camera won’t confuse with the background, but I did find some pictures slightly out of focus. Personally, I don’t really care as this isn’t a camera that I would use for this kind of picture. You will easily be able to bring home a substantial number of good pictures and that’s all that matters. Just remember that both AF-C and tracking will be more effective if the subject isn’t coming straight towards you.

DSC-RX100M2, 1/250, f/ 4, ISO 500
The camera also features internal stabilisation that Sony calls Steadyshot (same name shared by many other cameras and camcorders made by the same brand). In my testing, I found that the images remained clear and crisp up to 1/15 of a second. At 1/10s, the image is still usable but with a slower shutter speed you clearly start to see a decrease in sharpness. The RX100M2 is very light, therefore it isn’t easy to hold still when taking the shot. I actually find it more effective for video (more on that later).

DSC-RX100M2, 1/15, f/ 2.8, ISO 160
The RX100 II allows you to manually focus and has a focus peaking option. You can choose between three different colours (red, white or yellow) and select its level as well (high, mid, or low). In MF, the control ring is used to focus on your subject. You can also set the option to set the MF assist, which magnifies the image on the LCD screen to focus more precisely. I prefer leaving it off as the peaking is very good and the possibility to change colour is even better. I’ll be honest and say that you will rarely need to switch to MF with this camera unless you frequently use the movie function.
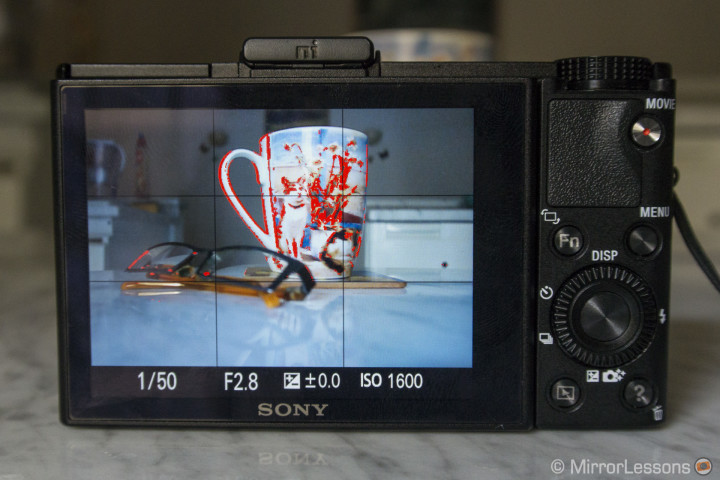
A quick and final word about the shutter speed: it has a maximum speed of 1/2000, which isn’t a lot considering the size of the sensor. The camera unfortunately doesn’t have a built-in ND filter and the aperture close up to f/11, so in some situations this can be a limit, especially if you want to use a faster aperture.
A camera to have fun with!
Pop Art filters & Panorama

Usually, I don’t look at extra features such as panorama or the “artistic” filters, but in this case I just thought:
To hell with it, I’m on holiday and this review doesn’t need to be too serious! 🙂
So I started to look at the Pop Art Filters and there are a lot. You can choose to add a vignetting retro style to your pictures, or a green, magenta or yellow tint, or a miniature effect by blurring part of the frame. There are also some ugly effects such as polarisation (seriously, who use this??) or others such a paint/drawing effect. Of course, there is a selection of monochrome effects that works nicely as well. You can either choose the filter inside the menu or assign it to the Fn button for quicker access. Remember that they work with JPGs only, so you have to choose that option, otherwise you won’t be able to use them.
I’m not going to describe them all but you can see some results in the gallery below. The quality of most of the effects is very good, and since this camera is not meant to be used professionally, you can find them fun to use if you let the serious side of yourself go!
Just don’t use the partial colour filter, it doesn’t really work that well… 🙂

Like many other cameras, you also have a Panorama mode that you can select from the mode dial on top. All settings become automatic and you can only set the exposure compensation. Once you press the shutter release button, the camera will start to take the shots while you pan to the left or right (the direction can be set inside the menu).
It is easy, quick and if you are careful about choosing the right spot to allow the camera to take a good exposure, the quality is very good as well. Below you can see some examples.


Pro looking videos
Video capabilities
The great image quality for stills can be found for video as well. Thanks to Sony’s experience in the field (one of the leaders in the amateur and pro camcorder market), the RX100MII features a professional video codec (AVCHD 2.0) and is capable of recording in full HD up to 50p at 28MB/s, which is impressive for a point-and-shoot camera. Its video capabilities are better than an Olympus E-P5 or a Fujifilm X-E1 for example, despite having a smaller sensor. The 50p (50 frames per second) option allows you to create very fluid and cinematic shots. (And this is coming from a professional filmmaker!)
Just be aware that when set to the highest quality, the video files will consume more space on the SD card. Having a class 6 or class 10 SD card is recommended as the camera records at a very high bit-rate per second.
The camera doesn’t suffer from visible rolling shutter or moiré artefacts and you will find the same great performance for still images in terms of dynamic range and low-light sensitivity. Colour rendition is nice and natural.

The lens performs in the same way described before. The only little concern regards the digital zoom option–that the camera automatically enables it when video mode is selected and can’t be turned off. If you don’t want it to affect your image, you have to be careful not to reach the border between optical and digital when zooming in (shown in the top right-hand corner of the LCD screen). It is something you could easily miss, and end up shooting with less quality without knowing it.
In video mode, ISO only goes up to 3200 but the amount of noise/detail is really impressive; the images remain very clean and usable.
I can absolutely confirm that this camera is a killer for low-light performance.
You can start recording video while using the camera at any time, regardless of the mode chosen on the dial. You just have to press the dedicated movie button on the rear of the camera and it will start almost immediately. Once it starts recording, all settings become automatic. If you want to have more control over your settings such as aperture, then you have to choose the appropriate movie mode on the main dial.
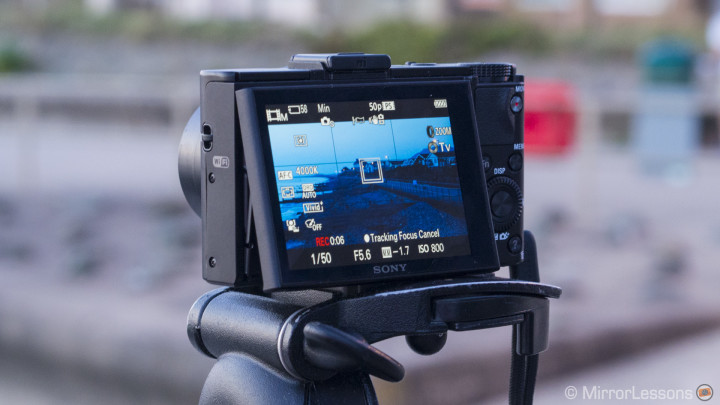
When video is enable, you can’t work with AF-S (single), but AF-C or manual focus only. I find this limitation very annoying because I can’t focus where I want, then re-compose and start shooting like I would for still. My only option is manual focus with the focus peaking option or to use focus tracking. Though it works fine for static shots, the tracking isn’t as effective for video when used to follow a subject. It is often slow to react and not always accurate.
The camera also has a built-in stereo microphone that will do the job but as with every built-in microphone, any contact you have with the camera, as well as the zoom motor, will be recorded as ambient noise.
Below you can watch a short video I filmed in Tywyn and its surrounding area.
Easy to connect, easy to use
Sharing capabilities, smile shutter and other features worth mentioning
Like most recently-released cameras, the Sony RX100M2 features wireless capabilities with both NFC (Near Field Communication) and Wi-Fi technology that can work with laptops, tablets and smartphones.
With NFC, all you need to do is touch the camera with a capable device such as the Samsung Galaxy S4 and the two devices will connect in a matter of seconds. With Wi-Fi, you will first need to select the camera network in the Smartphone Wi-Fi settings, then open the dedicated Sony App.
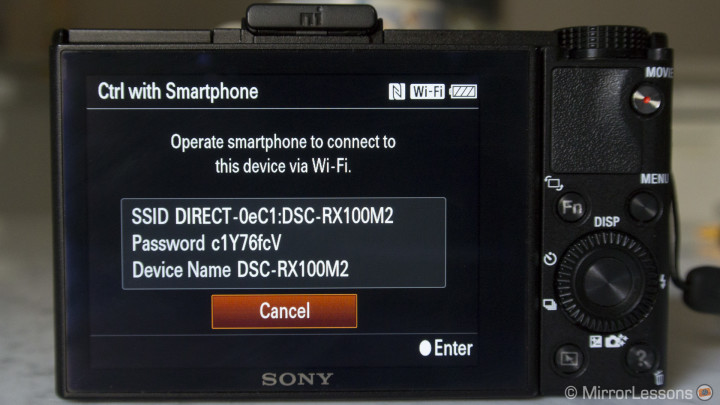
You will have the option to control the camera from a smart device and of course transfer pictures to it. One clever thing that is often missing on other Wi-Fi enabled cameras is the option to select the picture you want to transfer on the camera first. As soon as you open the Sony App, the picture will be transferred without any additional actions required. You can’t transfer RAW files or AVCHD files, only JPGs.
When controlling the camera with your smarphone, the shooting options are very basic. You can select still or movie, flash on or off, the self timer and of course zooming in or out.
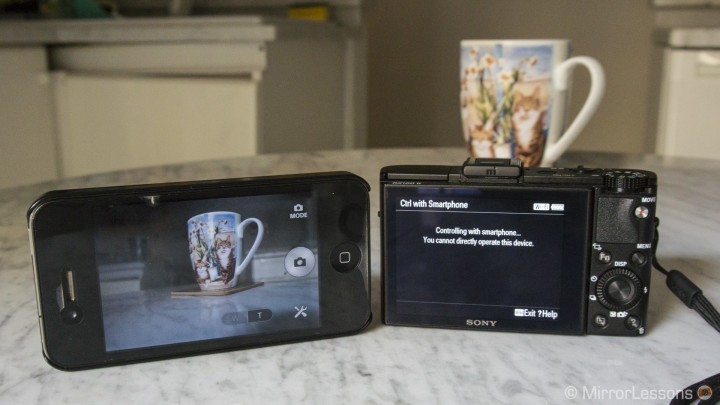
Personally, I am not an avid user of the Wi-Fi option on digital cameras. I can rarely see the need to take a picture and send it right away. Yes, it can be useful if you sitting in a café and want to share a nice picture you took a half an hour ago, but I wonder how often you’d actually do it.
The RX100M2 is also an intelligent camera, or perhaps tries to be.
It features a face detection system. Not only will the camera automatically adjust shutter speed and aperture but it will also take the shot automatically when it detects the person smiling. You can set the camera to slight, normal or big smile and it works about 40% of the time. The main problem is that the camera reacts too much to movement on the face, especially if the subject opens or closes his of her eyes.
Another thing worth mentioning is that on the Mode Dial, there is a MR (Memory Recall) option. The camera memorises the settings you use the most. You can also customise up to three different memory recalls if you want to quickly switch from your ideal daylight settings to your low-light settings for example.
One quick word about the battery life. I found it very good and in the same league as other cameras. If used intensively, it will last a day. If used intermittently throughout the day, it can easily last three days.
Oh, and it also has an airplane mode… 🙂
A compact camera in the league of giants
Conclusion
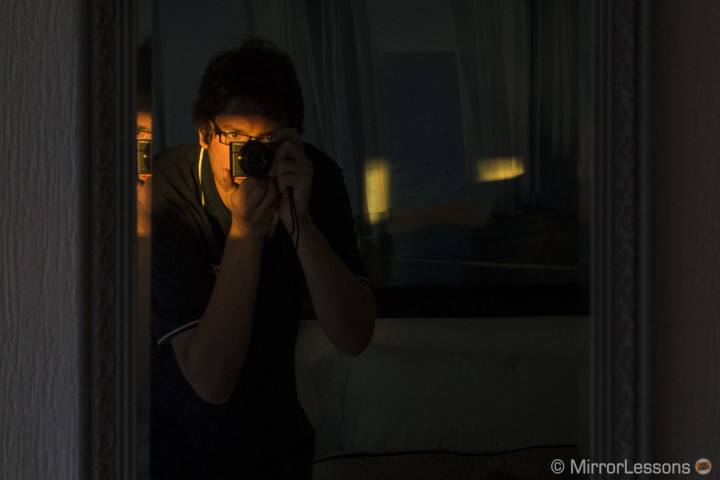
There are so many great cameras out there today, and to be honest, when you get the chance to review several as I do for MirrorLessons, it is also difficult not to keep them all! And the funny thing is that we have just begun. (I wonder what state we’ll be in once a full year has gone by!) But since I cannot afford to keep them all (yet), I have to make choices and those choices are relevant to my work.
So, I’m going to be honest and say that I won’t keep the Sony RX100 II, not because I don’t like it, but because my work for the blog requires me to move on to something else. But what I know for sure is that it is a camera that I can highly recommend. It is a wonderful piece of technology and probably one of the best I’ve had the chance to review. To be able to carry around great image quality in such tiny and friendly package is definitely a win for Sony and the photographer who buys it.

I rarely missed having an external viewfinder, which was something unexpected for me. I guess that as a photographer who usually doesn’t have a compact on hand, I was able to embrace it for what it is. An EVF could be a good accessory to lock onto the hot-shoe but it would also reduce the compactness of the camera. Personally, it is something that I can do without on a camera like this one.
I wouldn’t recommend the RX100 II for one reason only: its price. $750 is an investment that a casual amateur shooter probably wouldn’t make, and I would make a terrible mistake to advise him otherwise. As Sony clearly states, the RX100M2 is a professional compact camera.
If you are a professional or an advanced amateur who is looking for something small and easy to use on a holiday with family, and because of your work you are sensitive to image quality, then look no further. This is the camera for you.

 What I like about the Sony RX100 II:
- Great overall image quality
- Low-light performance
- Fast autofocus in AF-S mode
- Shoots video in AVCHD Full HD 50p
- Small but very well-built
- Great focus peaking
- Excellent HDR function
- The way you can activate focus tracking at any time
 What I don’t like about the Sony RX100 II:
- Some weird choices like excluding AF-S for video
- The control ring on the lens isn’t reactive enough
- The battery has to be charged through the camera

Additional links & gallery
You can download some RAW & JPG samples here.
You can also check the following articles about the Sony RX100M2:


