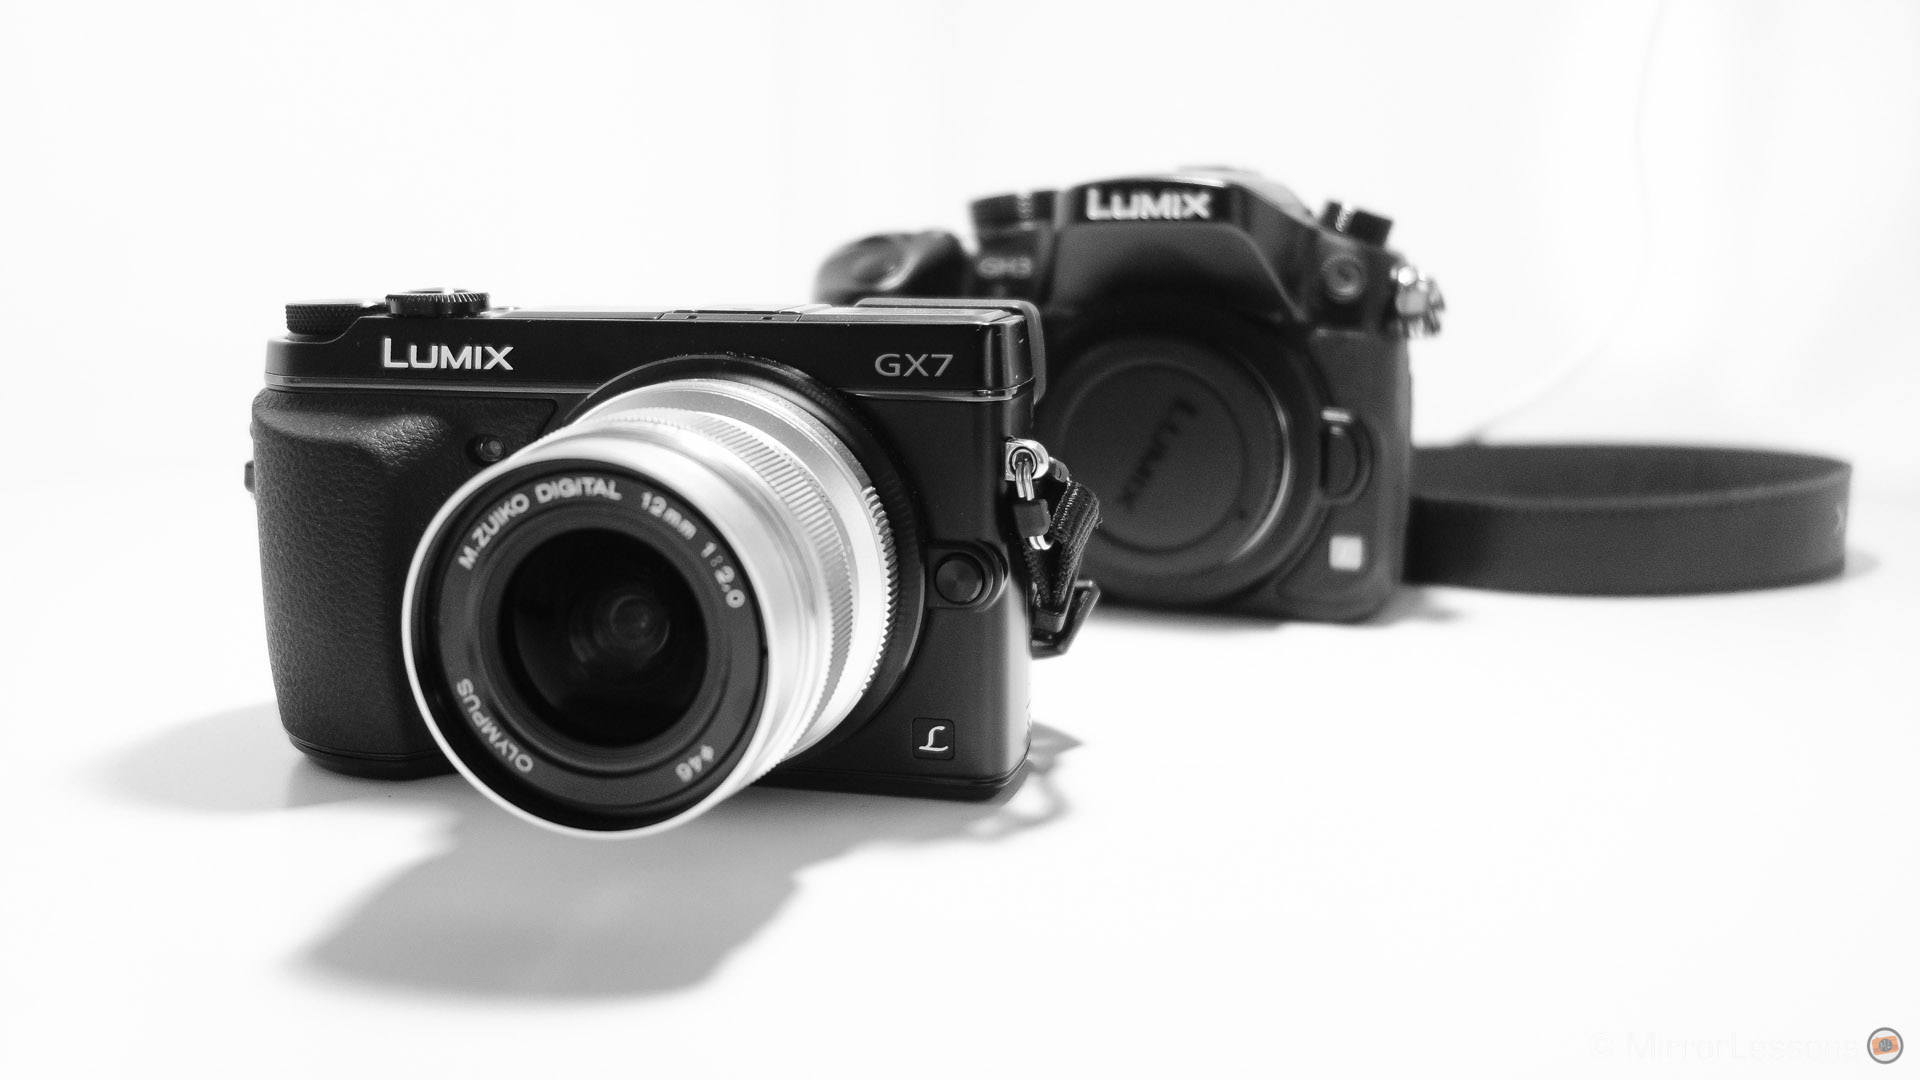
The Panasonic Lumix GH3 has been the undisputed flagship of the Lumix mirrorless series since November 2012. Though it is mirrorless, it bears a strong resemblance to low-end DSLRs in terms of size and design. The GH3’s thickset package is meant not just for stills but professional video making as well. In fact, it is widely considered one of the best compact bodies for video by professional videographers.
However, the GH3’s status as a “video camera rather than a stills camera” left a gaping hole in the Lumix mirrorless line-up for photography. While its Micro Four Thirds partner Olympus had already released the professional OM-D E-M5 months before the GH3, and was on the verge of releasing the high-end Pen E-P5, Panasonic still had very little to offer in terms of high-quality compact still bodies. Not providing one would result in being left behind by the competition.
Enter the Lumix GX7, Panasonic’s first serious contribution to the compact mirrorless camera market for professional photographers. It is the successor to the two-year-old Lumix GX1 in name only – everything else about this camera has been greatly improved or changed, hence the leap from 1 to 7. Having used it intensively for more than a month now, I can say with confidence that Panasonic has created the perfect professional body which can be used by photographers who are tired of carrying around a lot of excess gear.
Is it the best mirrorless camera on the market today for stills? You’ll have to read on to find out!

Panasonic Lumix GX7 Main Specs
- Sensor: 16 million pixels 17.3 x 13.0mm Live MOS sensor
- Lens System: micro four thirds interchangeable lens system
- ISO Sensitivity: 125 (Extended) / 200 / 400 / 800 / 1600 / 3200 / 6400 / 12800 / 25600
- Continuous shooting: Maximum 5.0 frames/sec (with AFS), 4.3 frames/sec (with AFC, In 1-area-focusing AF mode) with mechanical shutter; Maximum 40.0 frames/sec with electronic shutter
- Autofocus: Contrast AF system with 23 area focusing points
- Shutter speed: min 60′ – max. 1/8000 (1/16000 with motion images)
- Internal Stabilisation: Image Sensor Shift Type (2 axis)
- Viewfinder: tilting LCD Live View Finder (2,764,800 dots equivalent)
- LCD Screen: Tilt static LCD with touch monitor 1,040K dots
- Movie recording: Full HD 1920 x 1080 pixels, max. 60fps in AVCHD
- Water and dust proof: No
- Wifi: yes
- Built-in Flash: Yes
- Extras: Focus peaking, creative controls, creative video mode, stop motion animation
- Dimensions: 122.60 x 70.7 x 54.6 mm / 4.83 x 2.78 x 2.15 inches
- Weight: Approx. 402 g / 0.89 lb (SD card, Battery, Body)
Design, functionality & ergonomics
The GX7 is an extension of your hand…
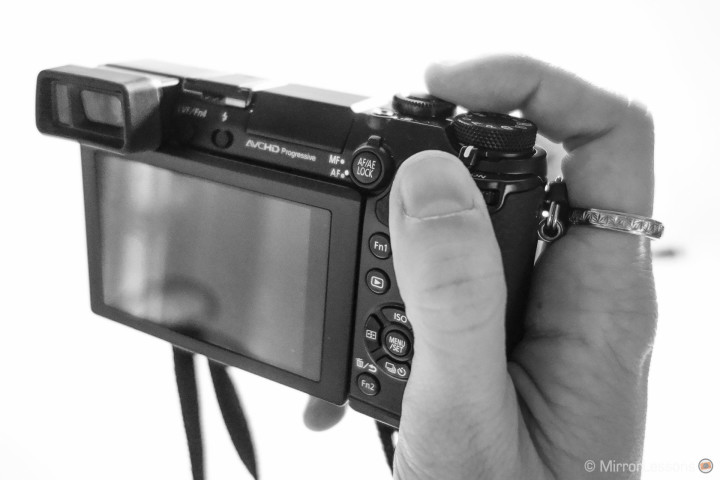
The first time you grab the Lumix GX7 out of the box, you really feel as if it is an extension of your hand. Your pointer finger lands comfortably on the front dial/shutter button, your other fingers slip snugly into the prominent grip, and your thumb settles nicely on the rear thumbwheel and the on/off switch. All dials, buttons and switches are in easy reach and have been thoughtfully positioned.
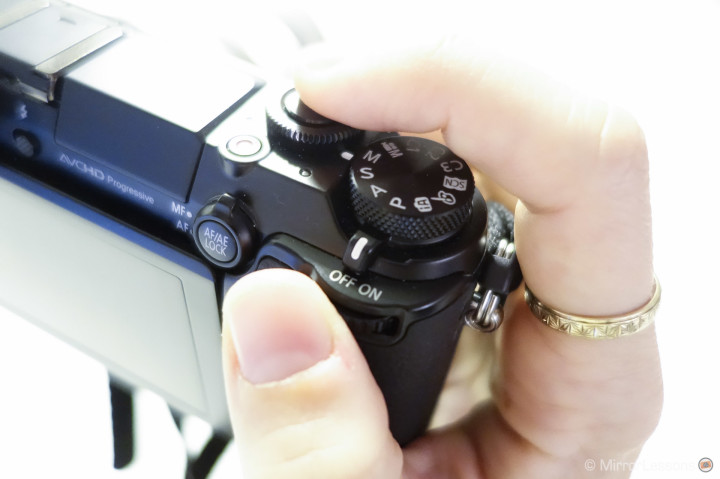
I won’t go into all the specifics as there is an official manual for that but I would like to touch upon a few buttons I really like using – mainly the AF-MF switch and the Fn1/Q menu button.
The former is allows you to easily switch between AF and MF mode without digging through the menu. The GX1 used to have an AF-MF button to change the focus mode but I find the switch more convenient and also more conveniently-placed on the rear of the camera. I often shoot butterflies and frequently find it necessary to jump to MF mode if the AF won’t lock onto a certain part of the butterfly.
The latter is the same found on the GH3. It gives you access to all the main functions of the camera on one well-organised screen. Again, this allows you to sidestep unnecessary menu digging if you’re in a hurry. (That said, I should mention that menu-digging isn’t really a chore on Lumix cameras, as their menus are among the best. The mix of specific eye-catching colours and large text makes them simple yet very clear to understand and navigate.)
You will notice that the camera has been designed with enthusiasts/professionals in mind: you’ll easily and I would say naturally find all the most important buttons such as White Balance, ISO sensitivity, and burst mode. There are also four function buttons that can be customised with your desired settings. The only button placement I didn’t like was the LVF/Fn4 button, as it is too close to the built-in viewfinder, making it awkward to reach with respect to the others buttons. But it is a minor flaw we are talking about here.
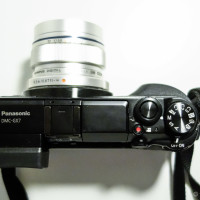
Since a picture (or three) speaks a thousand words, here are a few images of the GX7’s excellent build and button placement.
Despite being only a tad taller and longer than my iPhone 3G, everything has a place. Nothing is crowded and there aren’t any superfluous buttons or switches. It is the acme of a functional yet minimalistic design.
The best built-in EVF on a compact mirrorless?
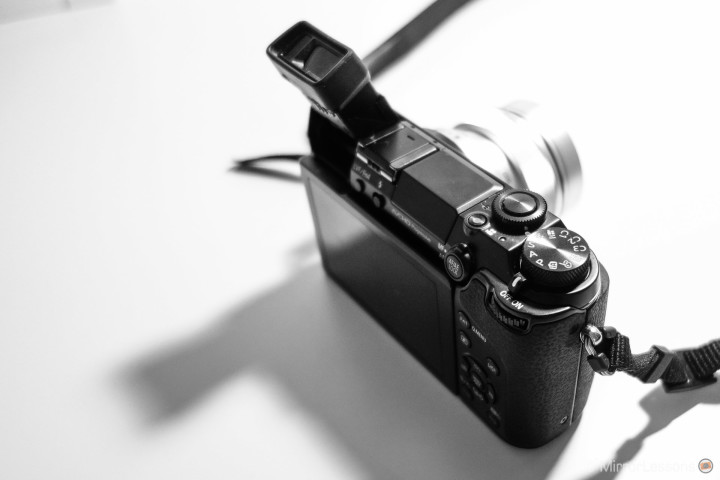
Mathieu and I have always been pretty divided on the subject of viewfinders. Personally speaking, I rarely use viewfinders on any camera except in situations where I want to keep the camera very steady. Mathieu, on the other hand, cannot be pulled away from a viewfinder if it is present on the camera.
In the case of the tilting EVF on the GX7, I was able to appreciate its excellent resolution, accurate colour reproduction, impressive refresh rate, 100% field of view and intelligent right-hand placement on the body. Most of all, I was amazed at how it didn’t impact the compactness of the GX7 body at all, unlike the Pen E-P5’s external VF-4 which, as wonderful as it is, protrudes like a sore thumb. However, I found no use whatsoever for the tilting function as I much preferred the tilt-touch LCD for awkward shots. (Let’s just say I’m not a fan of doing acrobatics in the name of photography!)
Mathieu will tell you a different story. He often found himself using the tilt function on the EVF especially when he was composing artistic shots or trying to remain discreet on the streets. He reminded me of a modern male-version of Vivian Maier, with his gaze constantly locked downwards into the viewfinder, in search of the perfect scene or moment.

In the end, I guess it all comes down to whether you are a fan of viewfinders or not. If you love them, you’ll really enjoy the EVF on the GX7. If you can live without them, you’ll find it a nice addition for extreme circumstances as I do. Either way, it’s a win-win situation.
Image Quality
Micro Four Thirds isn’t so ‘micro’ after all…
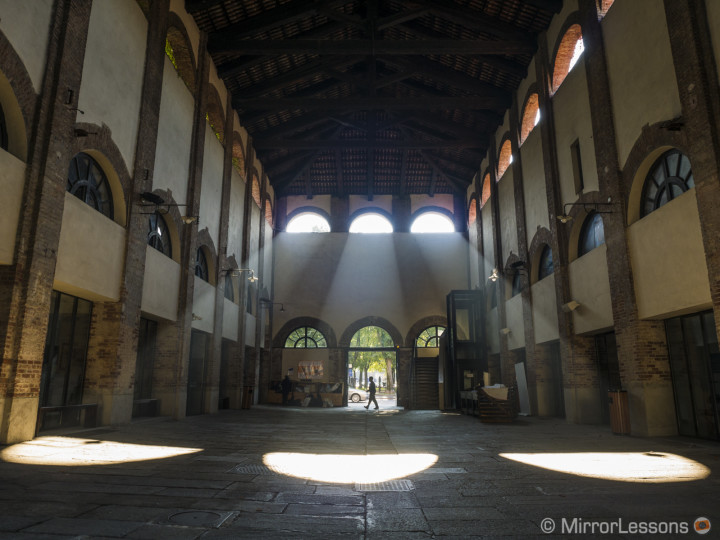
We all know that photographers tend to get really hung up on sensor size. “If it ain’t full-frame, it ain’t worth framing,” would be the adage. However, what a lot of professionals and advanced amateurs don’t know is that the Micro Four Thirds sensor has come a very long way in terms of image quality. Sure, it will never match the depth of field generated by a f/1.4 portrait lens on a full-frame Nikon D800 nor the low-light performance of a Nikon D4, but do most of us really need that for our day-to-day work anyway? (For a good read about this contentious subject, head over to this excellent post by Lindsay Dobson.)

The Lumix GX7 has really pleased us with its image quality so far. The sensor is new compared to the one found on the GH3. For those interested in technical details, this sensor has larger photo diodes compared to previous Panasonic MFT sensors. But what is a photo diode? It is the part of the sensor that converts light into an electronic signal. The sensor is composed of micro lenses on its surface and each ray going through the micro lenses hits the photo diodes. Being larger on the GX7, they can capture more light. This is why the GX7 should deliver better image quality in low-light conditions and have a better dynamic range.
How this can be translated in a real world situation?
Well, after several comparisons (combined with the innate feeling a photographer gets when using this kind of equipment daily), we can say that these improvements are hardly noticeable unless you view your images at 100% or find yourself in need of extreme ISO performance.
Starting with high ISO performance, we can see that the GX7 performs better at high ISO starting from 6400 and up in comparison to older sensors on other Panasonic and Olympus MFT cameras. With the GH3, the differences are minimal. At 6400 ISO, you will notice that the noise on the GX7 is finer and that it renders the shadows better.
In comparison to the E-P5, you may notice that the sensor has more sensitivity as the pictures are brighter with slightly more details in the shadows and a better colour rendition. Also note that the differences in colour between Lumix and Olympus cameras can be related on how the Auto white balance is calibrated. Of course, the differences regarding colour and contrast can be remedied in Lightroom or another RAW developer software.


You can check out more high ISO comparison shots between the GX7 and E-P5 here.
Compared to a newer sensor such as that in the OM-D E-M1, the performance appears practically identical regarding the amount of noise and details preserved. Overall, the GX7 tends to give a less yellow/greenish tint to its images.
So what you really need to know is that the GX7 has one of the best MFT sensors around today in terms of high ISO sensitivity. Its superiority to older MFT sensors becomes the most visible at 6400 ISO and above.
Below is a small gallery of images taken between 1600 and 3200 ISO of the festive ‘Luci D’Artista’ in Turin. I generally don’t go above these values since the internal stabilisation of the camera allows me to reach some fairly slow shutter speeds. (More about that below!)
Concerning Dynamic range, the improvement is less noticeable. You need to compare extreme situations but I didn’t notice a substantial improvement in comparison to other MFT cameras. What I can say is that the camera defends itself very well and the RAW files give you lots of flexibility if you want to increase the highlights or decrease the shadows. And that what really matters.
As with all MFT sensors, when in doubt it is better to underexpose, preserve the right exposure in the highlights, and open the shadows in post-processing.

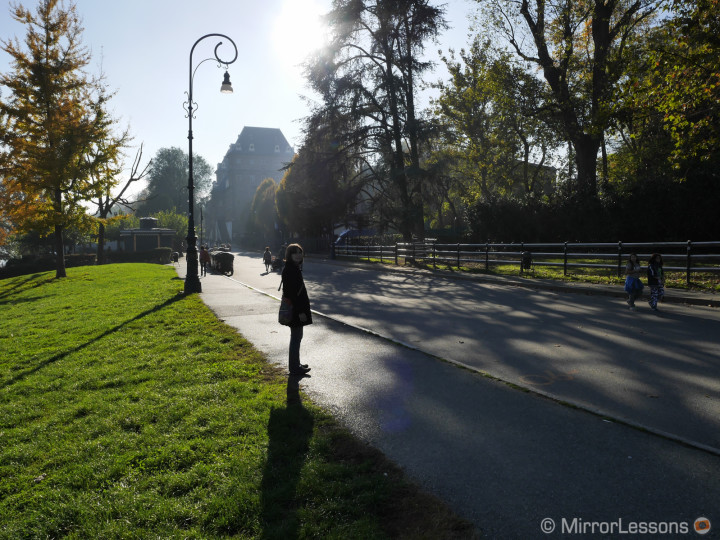


With regards to dynamic range, the GX7 offers some interesting settings that will only affect the JPGs. The first is the i.Dynamic option which, if set to On, will generate a JPG version with the highest detail available in both shadows and highlights. The result is a “flat” picture with less contrast.

The second is an easy option designed for adjusting highlights and shadows on-camera, reducing the need for laborious post-processing later on. By pressing the Fn2 button in Live View mode, you are taken to a series of small graphs which have varying highlight/shadow settings. The default is Standard, but you can also choose Higher Contrast, Lower Contrast, Brighten Shadows, and three Custom graphs for your preferred settings. You can change the curves by either using the touch screen or the aperture/shutter speed dials.
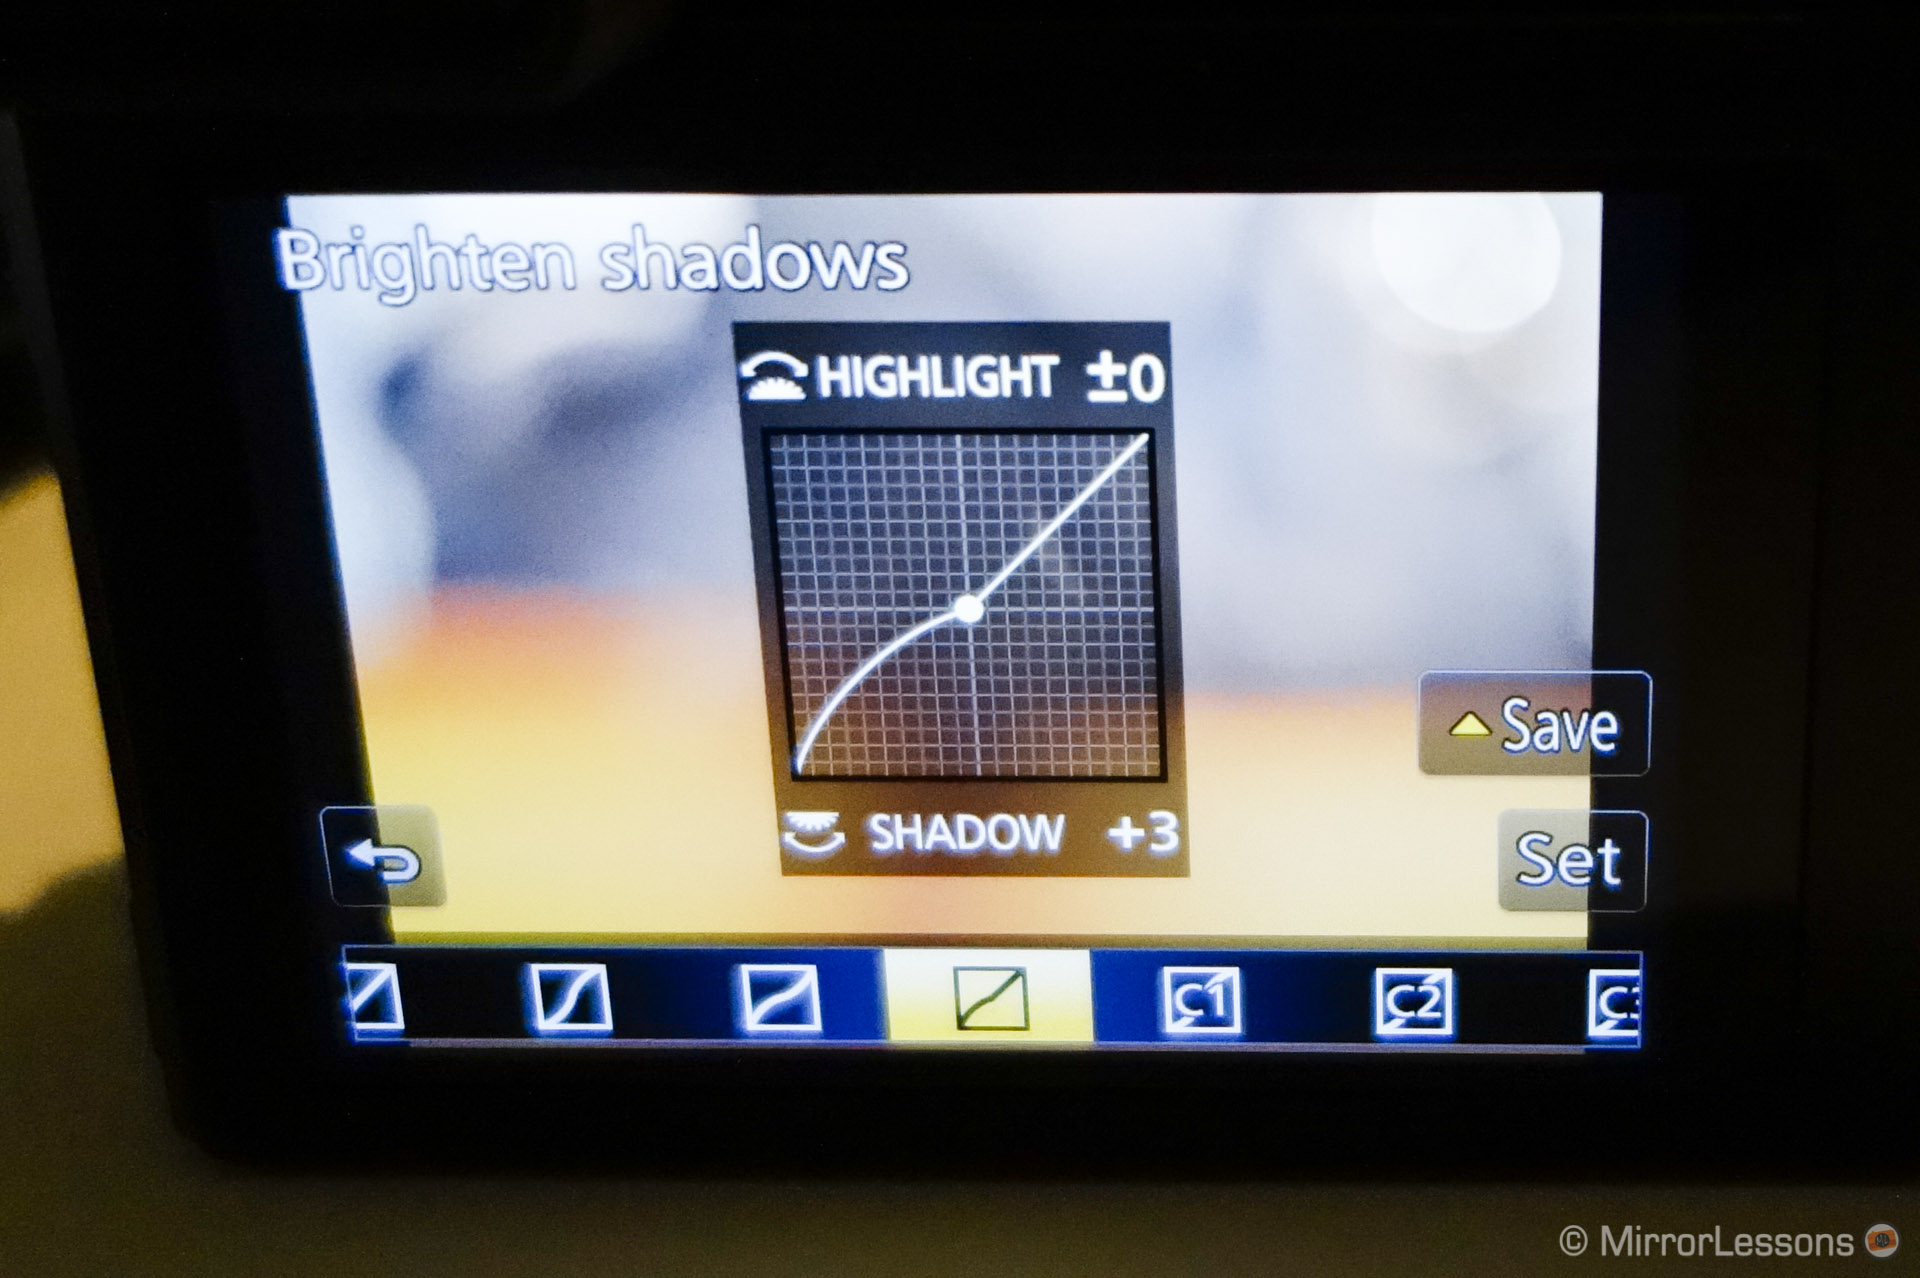
While I don’t think that photographers will spend a lot of time editing their settings during a shoot with this kind of feature, with time it can help customise picture profiles more accurately. For example, you can control the contrast of the vivid profile by slightly decreasing the shadows in situations where there is too much contrast.
As for colours, we found that the GX7 does a very good job of handling colour accuracy. Below are just a few examples of OOC JPGs from the GX7. The only editing performed was the addition of our website’s logo to the images:



The only thing I don’t like about the colours on the GX7 (and also the GH3) is the overall cold tint it produces when you use Auto White Balance. This can sometimes produce an undesired magenta tint on skin tones. If you like to use JPGs straight out of the camera, it is better to set WB manually or like our reader Tim said in the comments section, you can adjust the Auto WB by pressing the down arrow when you select it. You can then move the point to a warmer or colder area on the square colour spectrum.

Below, you can browse through some other examples of the GX7’s colour reproduction taken in various situations (sunny, cloudy, indoors).
Performance
Fast and furious autofocus…
The GX7 may not be lightning fast like the Olympus OM-D E-M5 in terms of autofocus, but it is pretty darn close. I experimented with focusing on various objects around the room in S-AF mode – some close, some far away, some highly contrasted, some not so much – and 95% of the time, the GX7 locked onto the subject immediately.
Even when my subject was moving like the squirrel below, the success rate of the GX7’s S-AF was quite surprising. Out of all the shots I took, about 50% were useable. Of course, capturing moving objects, especially ones that dart about like squirrels, is never easy on any camera, and it takes experience, reactiveness and a steady hand on the part of the photographer to keep an image perfectly in focus.

Continuous shooting and tracking…
I tried out the continuous shooting and tracking functions on one of the most mobile and unpredictable subjects you can find: my friend’s chipper five-year-old daughter – let’s call her Anna. The task was simple – I asked her to run towards me as fast as she could with one of my teddy bears in her hand. For each series, I placed the focus point on the teddy to see how the GX7 would handle keeping it in focus as she ran.
The first test was performed with High continuous shooting (5 frames per second), continuous AF and tracking activated. Overall, the GX7 did a pretty good job of predicting the elements that should remain in focus for seven of the eight shots. While the focus on the teddy was lost in the second shot due to Anna swinging him side-to-side, the camera was able to recuperate for the fourth shot. Anna herself remains in focus right up until the last two shots. The shots don’t become blurry until Anna gets very close to the camera.
I then decided to disactivate the tracking function to see if there were any notable differences. In this series, the teddy and Anna are in focus for every shot except the last one. (The teddy’s limbs are flailing but the body remains in focus.) Admittedly, in this set, Anna did not come as close to the camera so there was less chance of the C-AF losing its lock on its subjects.
While anything but a scientific lab test, these images show you that the GX7 is more than capable of tracking fast-moving subjects coming towards you in a real-world situation. This means photographing moving children, animals, cars, bikes and even floppy teddies. It is also quite good at keeping objects with unpredictable movements (i.e. the teddy bear moving forwards and side-to-side) in focus, and recuperating when possible.
The continuous shooting function is fast, though not as quick as an Olympus OM-D or Pen. I would have preferred at least 7 fps on a camera like this but 5 has proven enough for most situations. (In actual fact, I sometimes find that an exceedingly rapid frame per second rate can give you too many shots to sort through later on. Sometimes less is more!)
A word about the GX7 shutter…
Like the Olympus Pen E-P5 before it, the GX7 is one of the first mirrorless cameras to feature 1/8000 of a second mechanical shutter speed. Combined with its Low 125 ISO, you can easily shoot wide open in bright daylight. Below you can see a few OOC JPG examples taken with the M.Zuiko 45mm at its fastest aperture of f/1.8:
The GX7 also has the option of an electronic shutter, which is excellent for remaining discreet but doesn’t come without its share of flaws. First, it only works up to 3200 ISO so using it in extremely dark places may pose a challenge. Second, if you are shooting inside where neon or florescent lighting is used, you may end up with prominent banding across your image (both JPGs and RAW). This happened when I was photographing the children in my class at Halloween – I wasn’t able to shoot in certain areas of the class with the electronic shutter activated because the lighting produced this effect.
Just stick to using it in naturally-lit settings or rooms with incandescent light and you won’t have any issues.

On the bright side, the electronic shutter allows you to boost your continuous shooting up to a maximum of 40 frames per second (if you ever need a burst mode that fast!).
Keep your ISO down with internal stabilisation…
The GX7 is the very first Lumix mirrorless to include internal stabilisation. Up until its release, stabilisation was limited to the Lumix lenses which was all fine and dandy as long as you didn’t use M.Zuiko or other non-stabilised third party lenses with your Lumix camera. With the GX7, this problem has disappeared – you can now use any MFT lens with it and have stabilised images.
A few weeks ago, Mathieu and I decided to compare the internal stabilisation of the GX7 to the Pen E-P5. The E-P5 is in possession of the best IS mechanism on the market, the 5-axis stabilisation, so we knew it would be a challenge for the GX7 to keep up.
As it turned out, the IS of the GX7 is extremely good – not at the level of the E-P5 but certainly enough for most situations. At 1/10 of a second, the results from the two cameras are about equal, but from 1/5 of a second onwards, the GX7 begins to show some blurriness. At one second, there is a very clear difference between the two. To see a full comparison, check out the dedicated article!
Video Function
As good as it gets on a compact mirrorless…
At this point I’ll leave you with Mat as he is the video expert here!
I had the chance to bring the GX7 with me on a professional video shoot I did three weeks ago. Since the client required me to travel as light as possible, I decided to bring the GH3 and GX7 with me as they share the same kind of sensor and both record in AVCHD format.
The GX7 of course lacks some features you can find on the GH3, which is the high-end Lumix model for video. The main difference concerns audio. You won’t find a mic input nor a mini-jack output socket for your headphones. The camera has a built-in stereo microphone but for professional use it is not recommended. I have used the GH3 in the past with microphones connected directly and it works well, although a sound guy wouldn’t be to happy about it. In this case, my colleague recorded audio separately.
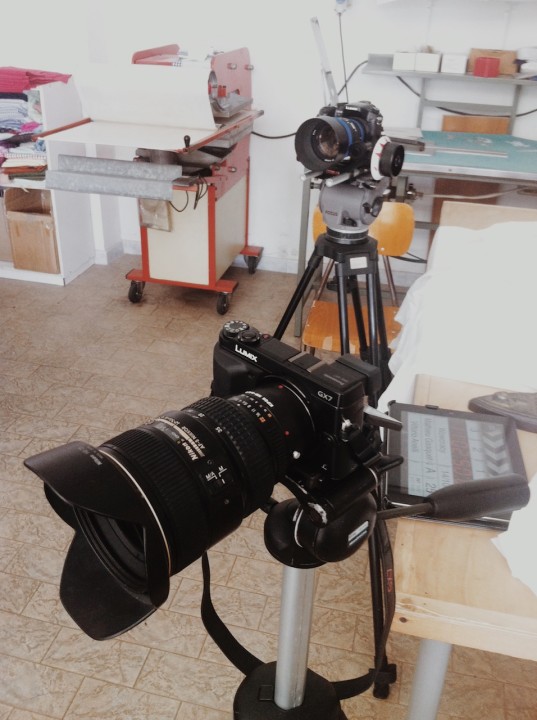
We had to shoot a series of interviews so I used two cameras for each person. The settings were exactly the same on both cameras. I chose AVHCD 25p as the GX7 lacks the ALL-I 72mbps codec the GH3 has. I used my Nikkor glass for this. I had the GX7 set for the wider shots with a 17-35mm f/2.8 attached, while the GH3 has the 85mm f/1.4 mounted for close-ups. We were working with natural light inside a tailor shop with a window behind the subjects, so the lighting conditions were a little bit challenging. In the end, I was really glad to see how well the cameras handled the dynamic range.
One thing that surprised me while editing the footage was that the colours produced by the two cameras were slightly different from each other. Of course they shared the same profile picture as well as the same custom white balance. The GH3 had a more magenta hue while the GX7 was greener, something you could not help but notice in the skin tone. A quick colour correction fixed that, but my only guess is that the sensors are probably calibrated differently, which is logical as the GX7 sensor is newer. I’m just surprised not to have found the same thing with stills.
Apart from that, they both deliver the same image quality and this is why the GX7 can work as a great second body to use side-by-side with the GH3.
I didn’t try the autofocus much on video. I used the Lumix 35-100mm for some hand-held shots and every time I focused it was quick and silent.
The GX7 battery ran out at around 5pm; thankfully, the shoot had just finished. We start to record at around 12pm. In comparison, the GH3 battery still showed three full bars!
Below you can watch the final version of the video.
Stop Motion Animation…
Another interesting option with the GX7 (that you won’t find on the GH3) is the stop motion animation feature. Once enabled, the camera allows you to take a series of pictures that you can then merge into a movie file (mp4 format only). You also have the option to create it by reversing the speed (the order of the images taken).
The camera also records both JPG and RAW files, something useful if you prefer to create the movie file manually with your favourite video editing software. When the feature is enabled, each time you take a picture, the screen will show an overlay on the live view. This allows you to see where your object was before and where it will be when you move it.
Below you can watch a short animation called “Pasta Ouverture” we did a couple of weeks ago by helping our friend Iryna for a project during her course. You can also check out our in-depth article where you’ll see how the video was created.
Additional Features
Staying social…
The simple presence of WiFi and NFC on digital cameras isn’t enough to make us go “wow” these days. Nearly every new model has it, so more than ever, we are interested in how well the internet connection works, how easy it is to activate, and the degree of control you have over your settings from your smart device.
Strangely, the app you need to connect the camera to your smart device isn’t the same as the one for the GH3. For the GX7, you need the Panasonic Image App, not the Lumix Link App. However, I must say that the app is very well done. If you choose to remotely control the camera, you can access all the main settings on your tablet such as ISO, white balance, and so on. You’ll even find the quick menu with the same options as you’ll find on the camera. You can also record video from the iPad but the images will be stored on the camera SD card.
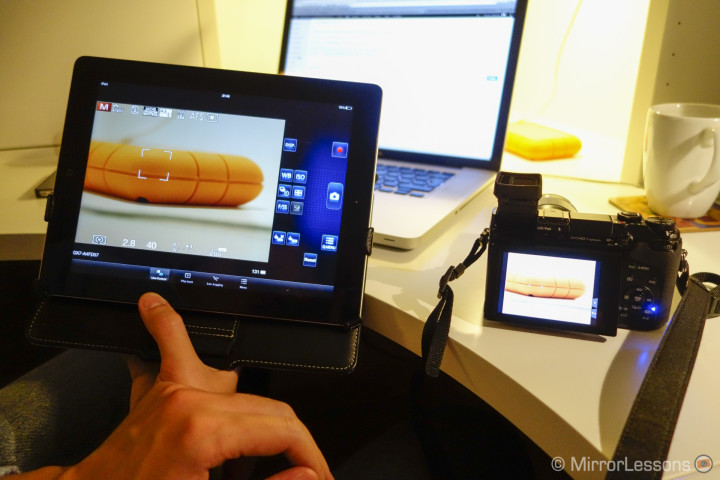
The Wi-fi function on Lumix cameras is very complete. You can playback your pictures and video on a TV screen, send them to your smart device or laptop, and even record them onto devices during still shooting and upload the images directly to a cloud service (Lumix Club only).
The way you connect the camera may vary depending on the task you want to accomplish and not all the options are easy to set at first but Panasonic without a doubt offers the most complete solution for WiFi in the mirroless camera segment.
Focus Peaking…
For a butterfly photographer such as myself, effective focus peaking can make the difference between a sharp and blurry shot in manual mode. I personally love the focus peaking on the GX7. You can choose between High and Low Detect Level and three display colours (light blue, yellow and green). I tend to stick with the default ‘light blue’ as I find it stands out the best. Even more helpful is the magnification box which gives you a closer view of the object you are focusing on. It can be activated and deactivated at any time on-screen with the touch of a finger.
Multiple Exposures…
Though I’ve only used it a few times, I really enjoy the multiple exposure mode on the GX7. Simply go to Mult. Exp. in the menu, click Overlay if you want to start from a photo you’ve already taken or Start if you want to start off fresh, and begin clicking. Each time you take an image, you will see the previous image as well as a semi-transparent Live View of your scene so you can choose where to overlap your images. When you take the second image, the camera will ask if you want to keep it or try again. In total, you can take up to four exposures in a row before the camera compresses the images into one.
Below is a quick example taken with the Lomography Wide Angle lens for Micro Four Thirds.

HDR
The camera has an HDR function that allows you to take a series of shots in a burst at different exposures and then merge them into a single JPG image. But as with the GH3 before it and many other cameras which include this function, I don’t like the results very much.

Actually, the only camera that has impressed me with on-board HDR is the little Sony RX100M2 (see our full review here). As we always say, you will achieve far better results by merging the RAW files with Photoshop or other editing softwares.
Where does the GX7 fail?
Coming from the Duracell Bunny-type battery of the GH3, we were a little disappointed to discover that the battery life of the GX7 is sub-par. If used intensively, it will last you about four hours but no more. The GH3, on the other hand, will keep you going throughout the day and still have some juice to spare. Granted, the GX7 battery is significantly smaller than that of the GH3, but we were hoping for a level of endurance similar to the E-M5 battery, which is about the same size. We’ll definitely be buying an extra battery, or at least keeping a second body on hand for any long outings.
Conclusion
So, who is this camera for?
Our reviews are never about classifying cameras on the spectrum of ‘good’ and ‘bad’ as truly bad cameras don’t really exist in this day in age. Rather, we try to suggest the ideal user for the cameras we review.
In the case of the GX7, we feel that it is a simple yet very complete package which could satisfy advanced amateurs and professional photographers who engage in a wide range of photography, including reportage, street, wedding, portrait and event. With its excellent video performance, it is an especially interesting option for those who also enjoy hybrid photography and video.
Perhaps due to its low-key appearance, it wouldn’t be the first camera you’d look at in a camera store, but it is jam-packed with all the latest and most useful features, and has a body that is so compact that it can neatly fit into your handbag with a small lens attached. Moreover, being a Micro Four Thirds body, there are dozens of high quality lenses that can be used with the system, and many of them will now be stabilised thanks to the GX7’s IS.

At this point you may be asking, “But what about the Olympus OM-D E-M1? Isn’t it supposed to be the highest performer amongst Micro Four Thirds cameras?”
Well, yes, it is currently the most advanced model out there, which is why Mathieu plans to swap it with the E-M5 as his primary work camera, but it lacks one thing – the compact and ergonomic nature of the GX7. With the E-M1, you notice that there is a camera in your hands. The GX7 feels like an extension of your body. If the combination of compactness and ergonomics is of very high importance to you, there isn’t any contest. Go with the GX7.
At the moment, Mathieu is seriously thinking of using the GX7 as a second body alongside the OM-D E-M1. The best MFT cameras in one bag? Sounds like a treat.
 What I liked about the Panasonic Lumix GX7:
- Ergonomically friendly
- Great image quality (ISO, dynamic range, colours and JPGs)
- Useful built-in tilting EVF
- High-end performance in a very compact package
- Easy to use and navigate
- Wide variety of excellent lenses available for the system
- Fast and accurate S-AF, C-AF and tracking
- High-quality video
- Good internal stabilisation
- Totally silent electronic shutter for discreetness
- Loads of extra features (focus peaking, time lapse, multiple exposures, etc.)
 What I don’t like about the Panasonic Lumix GX7:
- Poor battery life compared to the GH3
- Electronic shutter does not work in places with certain types of artificial lighting
You can also check out our GX7 Galleries:
