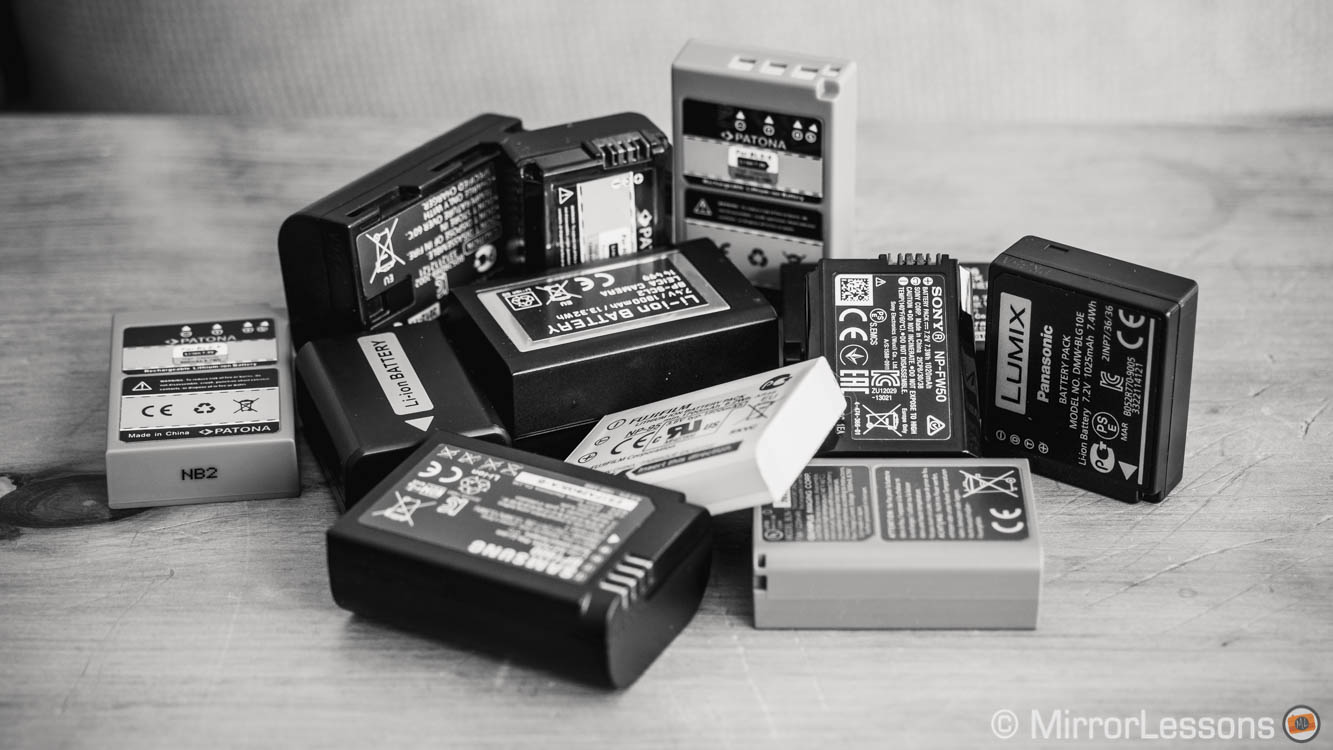
If there is one area where DSLRs are one-up on mirrorless cameras, it is battery life. While a select number of cameras have decent performance like the Panasonic GH3 or Samsung NX1, many MILCs need at least two batteries to get through the day. After more than two years of using various CSCs, I decided to share a list of tips and recommended accessories to improve the battery life of your camera and help you avoid unpleasant surprises.
[toc heading_levels=”3″]
Preface: why is battery life shorter on mirrorless cameras?
Before I explain the best tips and settings you can apply to your camera, let’s understand what causes the battery to drain so quickly in the first place.
First, mirrorless cameras are usually small so they have smaller batteries with less energy. Second, a mirrorless camera may have either an electronic viewfinder and a rear monitor, or just the latter. Both will give you a live view of your scene and all this is done electronically. What you see comes directly from the sensor, which is always active and thus consumes power. Though you can also activate a live view mode on the rear monitor of a DSLR, you generally use the optical viewfinder. What you see comes from a mirrored reflection, not an electronic component. A similar explanation applies to digital rangefinder cameras such as the Leica M but in this case there isn’t a mirror involved. Most of these cameras also have an advanced image processor and software to handle the various features you can use.
The way we use a camera can also affect battery life, especially if we use certain functions such as:
- video recording
- continuous shooting and autofocus
- WiFi functionalities
Basically, the more you put the camera to work, the faster your battery will drain. Unfortunately, most of these examples are linked to the main functions you are likely to use all the time on your camera. So how can you improve the battery life?
Tip #01: know your camera settings
The first thing to do is check your camera settings. Most models will have some sort of “energy saver” function somewhere in the menu. These functions are often related to how long the LCD remains active or how long the camera remains active when not in use. The appropriate duration depends on how frequently you use the camera. If you are out all day and plan to take only a few pictures, then I would simply recommend that you turn your gear off when you aren’t using it. If you take lots of pictures and always walk with your camera around your neck or wrist, then this “energy saver” function can be useful.
For active usage, I usually set 5/10 minutes for monitor standby mode and 30 minutes for camera standby mode. Note that not every camera gives you the same set of options. If you choose a very short time for both, you could end up reactivating your camera all the time. Not only will this constant on/off action eat up some extra power, but it can also be frustrating. If you are doing street photography for example you might not want to miss a moment. It is therefore better to set a longer time because some cameras are less reactive than others at waking up from the sleep/stand-by mode. In general it doesn’t make sense to worry if your camera stays active a minute or two more than necessary.
It is a question of figuring out the optimal settings so that you can enjoy the time with your camera instead of worrying about the battery.
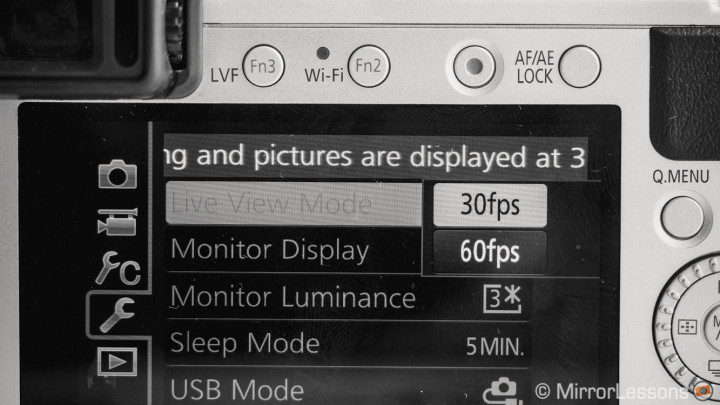
There are also other settings that can affect battery life:
- Performance: some cameras have the option of being more reactive for certain operations (Fujifilm especially). It will give a boost to AF and make the camera wake up quickly from sleep mode. Turn it off unless you need your camera to be as reactive as possible.
- High frame rate for the live view (EVF/LCD): a higher frame rate will give your EVF/LCD a more fluid appearance but it will drain more battery life. If you aren’t shooting action you can choose a lower setting.
- Monitor/EVF brightness: turn off the auto option if there is one and try not to keep the brightness at the maximum value. Some cameras also have a “Sunlight” (outdoor shooting) mode for the LCD screen but that usually drains battery life quickly. Try to use it only when necessary. If you have an EVF you can leave that setting off.
Each camera has its own extra settings so it’s up to you to check the menu or the user manual and make sure you have everything under control. For example, the Fujifilm X100 series has a specific Power Save mode for the optical viewfinder that can be useful.
All the settings mentioned in this first tip can certainly improve battery life but won’t make drastic changes. So let’s see what else you can do.
Tip #02: use your camera wisely
Mirrorless cameras have a wide variety of useful functions. That said, a good way to improve your battery life is to check if you really need all of them.
One thing I often do with cameras that include a viewfinder is either deactivate the LCD screen when I don’t need it or turn off the live view and only display the basic information. Some cameras have a dedicated button for this and doing so certainly helps to save some battery life. Often these cameras automatically reactivate the rear screen when you press the playback button to review your pictures.
If you work in manual or semi-automatic mode, you can choose between having the LCD/EVF preview your exposure or always have an optimal brightness regardless of your exposure settings. For example if your frame is underexposed by 3 Ev, the camera can either show you a dark live view so that you know your picture is underexposed or it can boost the live view to show you a brighter scene. Both solutions can be helpful. For example in a studio with strobes, the second option is better because otherwise you will always have a dark image in your live view. But if you don’t have specific needs, I would advise the first option because with the second option, the camera will always try to find an optimal preview for your image by moving the aperture iris of the lens or boosting the live view to display the optimal brightness.
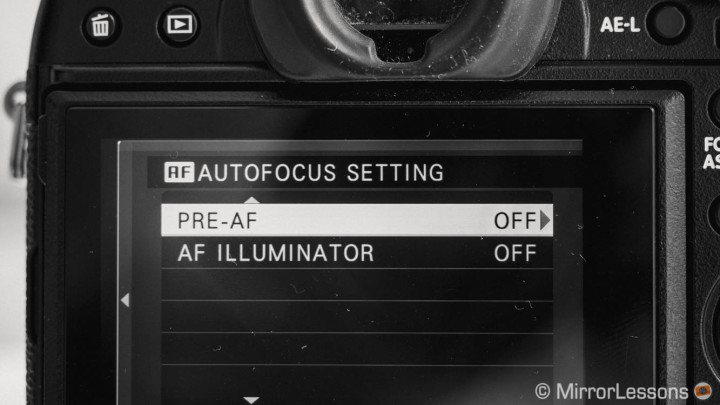
There are also some autofocus settings you can check. Some cameras have a “Pre AF” or “overtime AF” function that will make the camera focus even when you aren’t half-pressing the shutter release button. This can actually result in your camera moving the elements of the lens continuously when it is powered on. That can drain lots of battery life so I advise that you deactivate it. You can focus by half pressing the shutter button or with the eye sensor (on some cameras) if you have a viewfinder. Try to avoid using Continuous-AF if you don’t need it.
Some cameras have built-in stabilisation or rely on the optical stabilisation of the lens. If you are using very fast shutter speeds or a tripod, you can turn it off. This can improve the battery life on cameras such as the Olympus OM-D series or the Sony A7 mark II which use a very advanced sensor stabilisation mechanism.
Another function that can drain battery life very quickly is the continuous shooting mode. Of course there are specific situations where it is essential but in most situations you can rely on the single shooting mode.
There are also other functions that can be turned off. The ones I can think of are:
- Auto review: it displays the image you just took for a few seconds before going back to live view
- WiFi: some cameras such as the Samsung NX1 can be connected to a WiFi network in the background while using other camera functions. If you don’t need it, turn it off.
Finally, constantly playing back your pictures (chimping) can also reduce battery life especially if you are playing back videos as well. Try to resist the urge!
Tip #03: spare batteries and third party chargers

The various tips described in #01 and #02 are useful but what if you want to use your camera with all its bells and whistles? What if you want to shoot video (which is unfortunately the best way to drain your battery)? Should you renounce the things you enjoy due to battery life? Of course not! And the solution is simple: spare batteries.
Many people think that changing a battery can cause you to miss an important moment but it is just a matter of planning ahead.
For example, don’t wait until your battery drops to 5% to change it. Instead do it when it has 10% or 15% left or when the display has shown only one bar for some time. That way you can avoid changing it at an unexpected moment. Changing your battery is a quick and simple action if you have another one ready in your pocket. I do it all the time even when working on professional assignments. And I’ve never missed a moment.
Sadly most cameras only come with one battery. I wish that some brands would include two batteries, especially if they know that their cameras are power hungry (Sony for example). Official spare batteries are usually expensive. We are talking $50-$70 and some cameras will require two or three of them. For example I have four batteries for my Sony A7s.
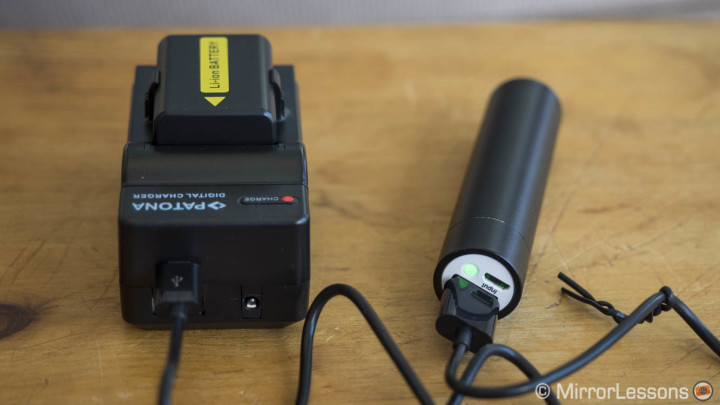
The good news is that there are third party battery manufacturers that are way cheaper and will last as long as the official version. If you live in Europe, a brand I can recommend is Patona. They have very cheap prices and the quality is excellent. What I also like is that you often come across deals such as $30 for two batteries and a charger. Now the latter is important because if you have many batteries, it is better to have multiple battery chargers to charge them more quickly. Also, it is more and more common for some brands to not include a battery charger, leaving you with only the USB option (Sony again, but also Samsung). Usually those third party chargers are designed to be smarter than the original charger because they sometimes include USB ports. This means that you can also charge through a computer or a portable charger.
If you live outside Europe, Patona isn’t as commonly available so it is better to check out Wasabi or ChiliPower battery. They have the same kind of deals as Patona at very similar price. A lot of users are satisfied with them as well. In general, I’ve always had good experiences with third party batteries. The only thing I noticed is that over time their performance may deteriorate a little. For example, I noticed that my Patona batteries performed worse on the A7 mark II than the original Sony batteries. That said, it is also true that the A7 II is probably one of the most power hungry mirrorless cameras out there at the moment.
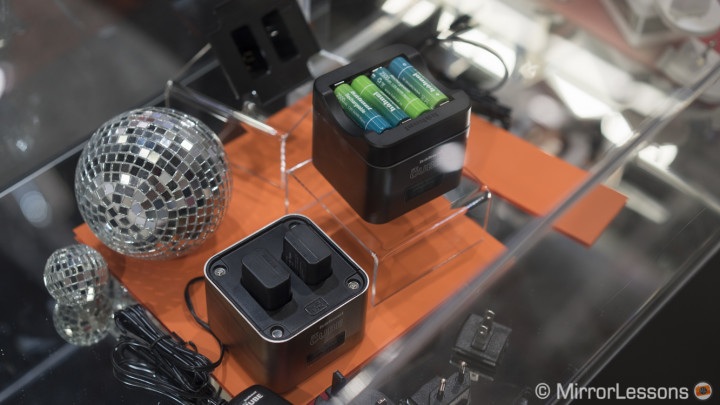
Another option is an all-in-one solution such as the Hänhel Procube Twin charger. It allows you to charge two batteries simultaneously plus four AA batteries that can be used with flash units for example. It’s a smart solution that circumvents carrying around many chargers. Unfortunately it is only compatible with Olympus (BLN-1 & BLS-5) or Sony batteries (NP-BX1, NP-FW50). You have to choose the version according to the battery type you want to charge.
Note that some cameras (NX1, X-T1, OM-D E-M5/1, A7) have an optional battery grip, a useful accessory to prolong the battery life of your camera without the need to swap batteries. However they will inevitably increase the size of your camera.
Tip #04: Mobile chargers
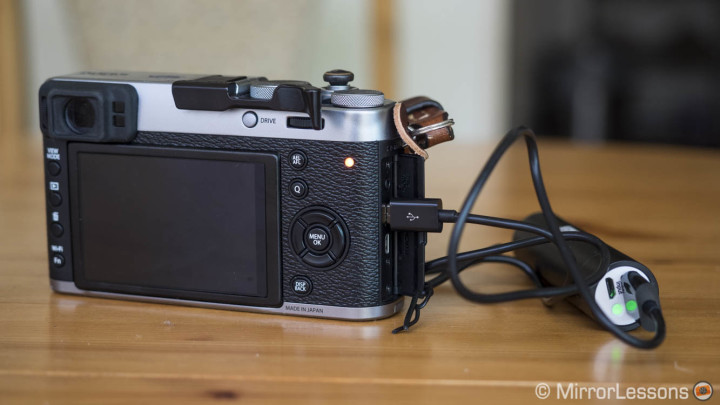
There is also the mobile solution to recharge your battery on the go. More and more cameras can now be charged via USB so if you can pause for an hour (your lunch break for example) you can recharge it with a mobile charger. If you want to charge a battery but need to continue using your camera, you can connect that mobile charger to a third party charger that accepts USB power. Most of these mobile chargers are designed for smart devices such as smartphones or tablets but can also work well for cameras.

I ran a few tests on the model I already own, which is the Anker Astro Mini. I chose it because most reviews are positive and despite its small size, it is quite capable. It is also one of the cheapest chargers. I can fit it anywhere including in my jean pocket. Usually, it helps to give my smartphone extra power when at the end of the day I need 3G/4G connection. It can charge my iPhone 5s from 16% to 80% in one hour. The Anker Astro mini has a 3200mAh battery. Most mirrorless cameras batteries have a charge of approximately 1100mAh which may lead us to think that the Astro Mini could charge almost three of them. Unfortunately, this isn’t the case because while charging the Astro also drains its own battery. But it can still prove useful. Below is a list of tests I conducted with various cameras and batteries:
- Samsung NX1 (1860mAh battery connected directly to the camera). The Astro Mini charged the NX1 from 0% to 53% in 50 minutes. Then it took another hour to reach 70%. 20 minutes later, as it was about to reach 74%, the Astro Mini had no more juice.
- Sony A7s (1020mAh battery connected to the Patona charger). After one hour, the battery was charged from 17% to 85%. For a complete charge from 0% to 100%, it took 4 hours and a half. After that, the Astro had almost no power left.
- Fujifilm X100T (1700mAh battery connected to the camera). In one hour, it charged the battery from 1 bar to 3 bars. After an additional 3 hours, the battery was completely charged.
As you can see, my Astro Mini can charge most batteries that have a charge capacity of 1000/1200mAh and can charge them up to 50% in roughly an hour if they are completely dead. This way, your camera can last long enough to get you through the remainder of the day.
Now the good news is that the Anker Astro Mini is one of the less powerful models. You can get more powerful devices at a reasonable price and size.
Some models are more powerful, others can charge multiple devices at the same time. Choosing the right one depends on a number of things. Remember that the mobile charger needs to be charged as well when it is empty. The mAh (milliAmpere-hour) is the most important spec you want to look for. For example, if you camp in the desert for two nights, you want enough energy to charge two batteries both nights without having to charge the mobile charger too. Check the mAh of your battery, multiply by two at least (safe margin) and then multiply it for the number of batteries you have and the number of nights.
Using the desert example, let’s say you own an Sony A7s:
- 1100mAh battery, so you need approximately 2200mAh to reach 70/80%
- Two batteries for two night means 8800 mAh.
- I would choose a model than can last at least 12000mAh so that there is room for error, as this calculation is just a rough estimate.
You can also consider a smaller/cheaper one and buy two of them. Anker seems to be one of the most reliable brands but of course there are others.
As you can see there are many solutions, the last being a good hotel room where you can charge the batteries the traditional way (but this could prove difficult in the middle of the desert!).
Conclusion
While battery life is a weak point for CSCs, I’ll admit that I’ve rarely had serious problems with it. Usually a second battery has always been enough for most situations. Three or four batteries are advisable if you work 12/14 hour days or shoot video intensively. There are different charging options to meet different needs so it is safe to say that this isn’t a problem lacking a solution.
I’ll finish off with a non-exhaustive list of the most popular mirrorless cameras I’ve used ranked from the best battery life performer to the worst. Not surprisingly, those with a bigger battery rank first.
- Panasonic GH3: I can shoot a video all afternoon and still have two bars out of three left on the battery indicator at the end. Simply unbeatable.
- Panasonic GH4: Slightly worse than the GH3 because of the new processor, but still very good.
- Samsung NX1: For what the camera does, the battery last quite long. Excellent.
- Olympus OM-D E-M1/E-M5: One battery can last a day but as soon as you put the camera under more stress it drops quickly. A second battery is strongly advised. For work make it three. Acceptable.
- Fujifilm X-T1: If you follow some of the advice in tips #01 and #02, the battery life is more than acceptable. I only have two batteries for mine and have never really needed a third unless I work long hours with it.
- Sony a6000: Depending on how intense your shooting day is, you can easily end up with two dead batteries at the end of the day. Acceptable.
- Panasonic GX7: The camera has lots of functions and is a great performer but the battery is too small. Having two is the minimum. Disappointing.
- Fujifilm X100S/X100T: Let’s say you are out all day in Venice on a holiday but by 4pm your battery is dead. (True story.)
- Sony A7 mark II: Such high image quality and advanced technology come at a power hungry price. The worst CSC I’ve ever tested in terms of battery life. The other A7 cameras aren’t that much better either. Battery killer.
Do you know of any other good solutions that will prolong the battery life of a mirrorless camera? Share your ideas below!
