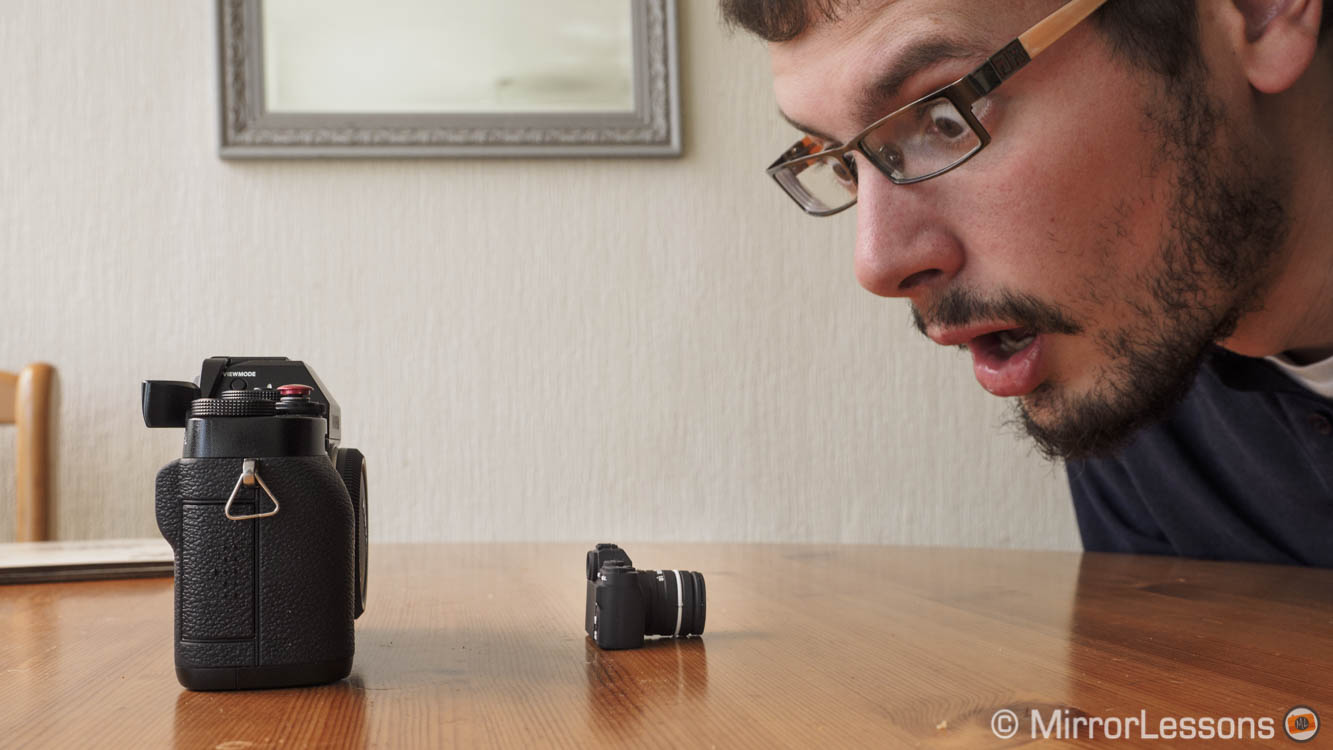
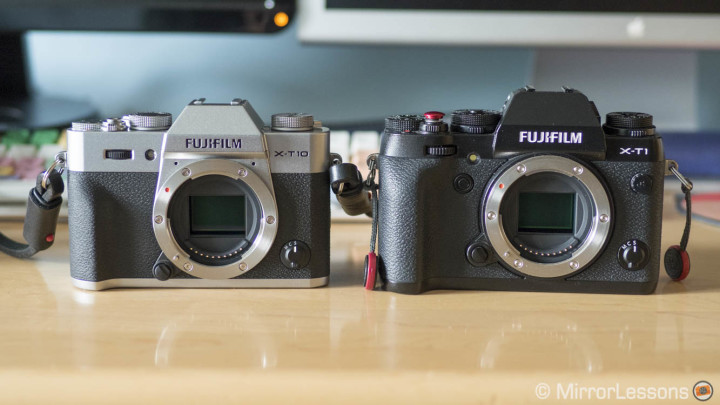
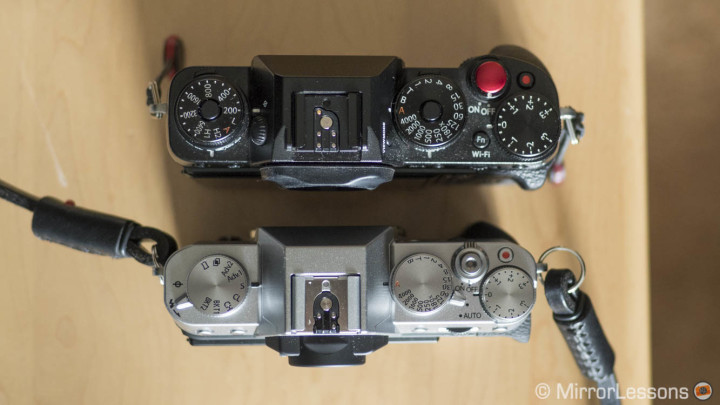
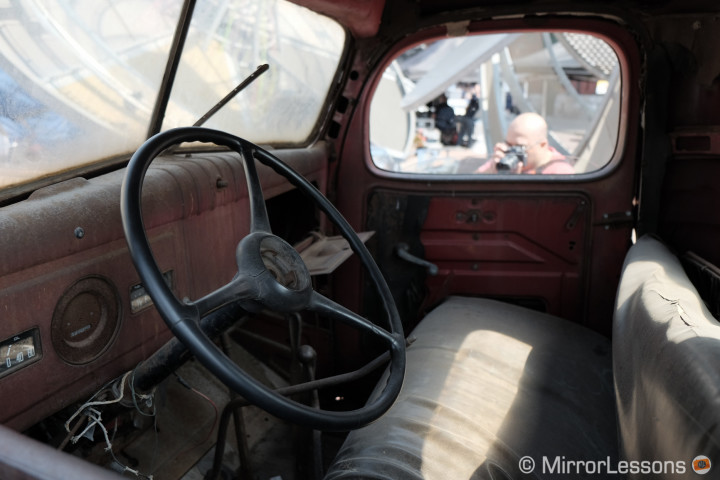
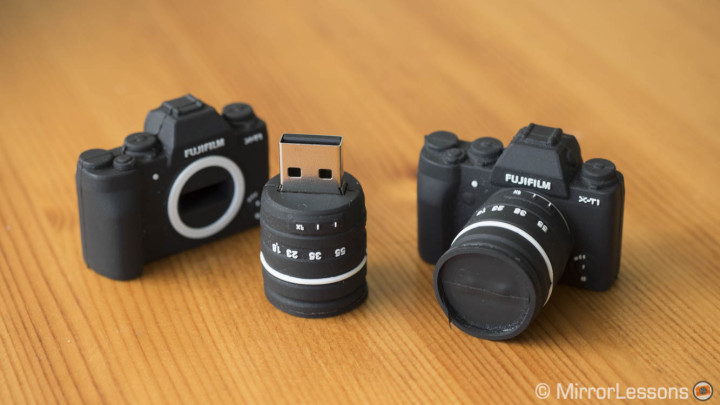
If you haven’t heard of the Disney movie “Honey, I shrunk the kids,” you probably didn’t grow up in the nineties. I watched that movie so many times when I was little that I wore out a VHS copy. So, how does this movie relate to the brand new Fuji X-T10? Well, you must admit that this new camera really does resemble a shrunken version of the X-T1! (By the way, if you wonder what the tiny camera in the cover picture is, it is a USB key).
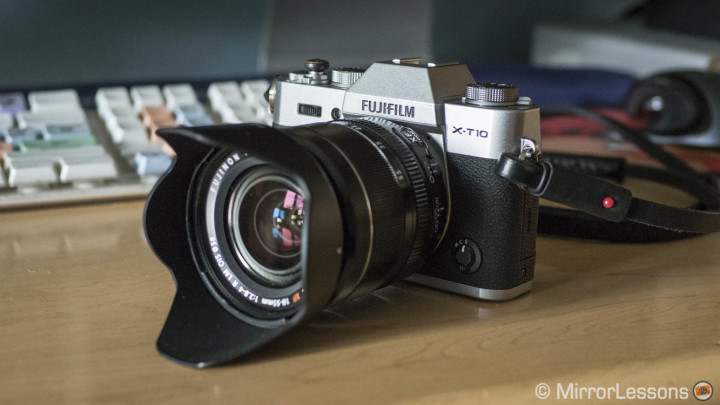
I got the chance to use the new X-T10 during our stay in Toronto thanks to the team at Fujifilm Canada. While four days wasn’t long enough to write an in-depth review of the camera, it was sufficient to get a good impression especially if you consider that many characteristics are the same as other Fujifilm cameras.
The X-T10 doesn’t feel totally new and while this is a good thing for users who are already familiar with other X cameras, it is also the reason it didn’t strike me on a personal level. It has nothing to do with the camera itself but more with the fact that I am so used to Fujifilm cameras now (I own an X-T1 and an X100T). I find them very similar and the shutter speed dial/retro design aren’t really a novelty anymore. Another personal thought is that I prefer the X-T1 for two reasons: it has a bigger electronic viewfinder (the best on the market) and its grip is better thanks to its larger body.
However if I analyse this new camera from a new user’s perspective, things certainly get more attractive. The X-T10 is, in short, a smaller and lighter version of the flagship X-T1. It comes at a more attractive price, lacks a few features found on its big brother, but in essence remains identical: same sensor, same image quality and same autofocus capabilities. It is also clear that this camera was born to garner more sales. The X-T1 is the most successful camera to date for Fujifilm but the company, like many others on the mirrorless market, is still looking for their “killer camera”: that specific model capable of flying off the shelves faster than any other product.
Not only is the X-T10 a logical marketing choice, but it is also one of the most interesting options for those who desire to enter the X system or the mirrorless camera world.


Fujifilm X-T10 Main Specs
- Sensor: 16 megapixel APS-C X-Trans II CMOS
- Lens system: X-mount
- Weatherproof: No
- Internal Stabilisation: None
- Autofocus: Hybrid Phase/Contrast detection with 49 AF areas
- Continuous shooting: Max. 8 fps (AF-C)
- ISO Sensitivity: 200 – 6400 ISO (extended 100, 12800 and 51200 in JPG only)
- Shutter Speeds: 1/4000 to 30 seconds, up to 1/32000s with electronic shutter
- Viewfinder: 0.39in OLED electronic viewfinder with 2,360k dots, approx. 100% FOV coverage and 0.62x magnification
- LCD Screen: tilting 3″ LCD monitor (920k dots)
- Movie recording: Full HD up to 60fps
- Built-in Flash: Yes
- Extra Features: WiFi, Panorama, Timelapse, Multiple exposure
- Dimensions: 118.4 x 82.8 x 40.8mm
- Weight: 381g (including battery and memory card)
[toc heading_levels=”3″]
Below you can watch a quick hands-on video that summarises our Fujifilm X-T10 review.
Design, ergonomics and ease of use
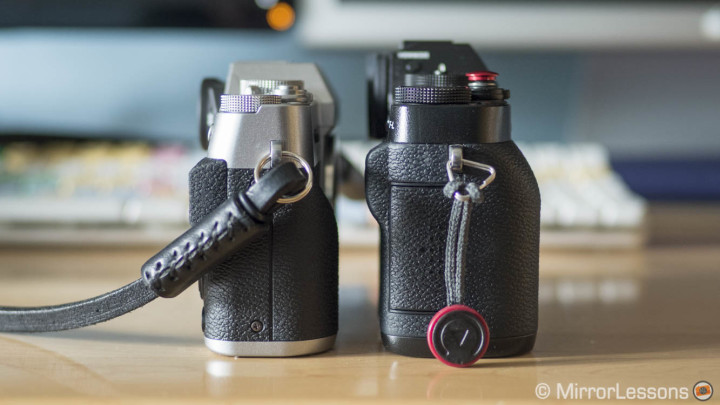
The Fujifilm X-T10 has a good build quality but is definitely more “plasticky” than the X-T1. This isn’t necessarily a negative aspect but it isn’t the strongest construction I’ve seen from a Fuji X camera and it isn’t weather sealed either. On the other hand, it is very light and becomes really portable with small lenses. I already considered the X-T1 a small camera and I was surprised to see how Fujifilm managed to shrink the body even more. If you get rid of the fake pentaprism on top, the camera is almost the same size as the X30, which is a 2/3” sensor compact camera. I didn’t have one with me but below you can see the camera next to my Fujifilm X100T.
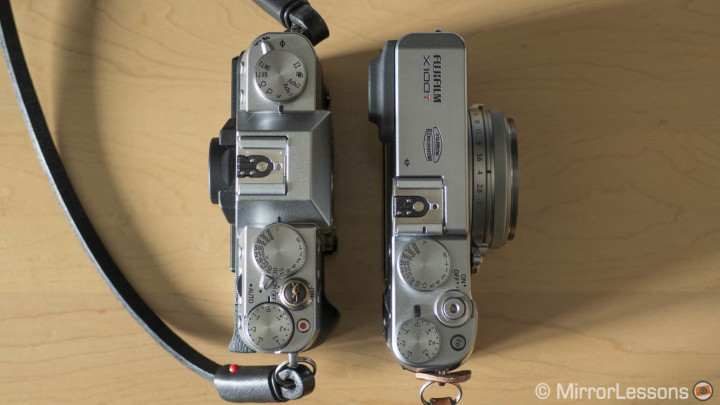
The small size of the Fuji X-T10 is both an asset and a drawback.
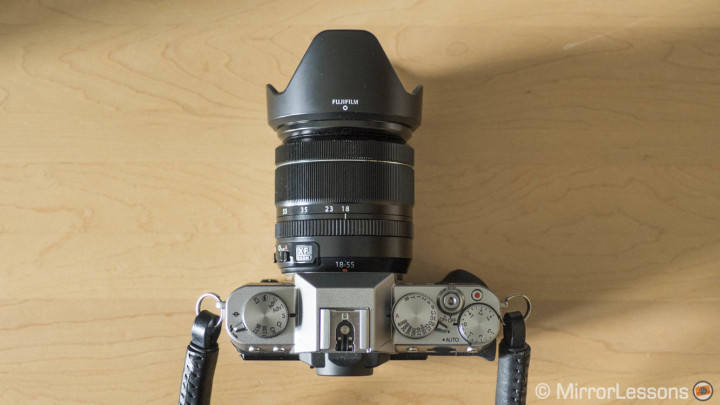
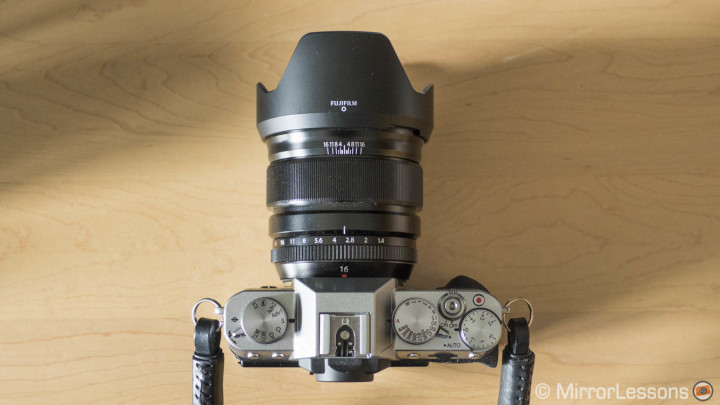
The positive aspect is that it can become really compact especially with some prime lenses like the 27mm f/2.8 pancake lens. It can fit anywhere including your jacket pocket. I used the camera with one of the two kit lenses, the XF 18-55mm f/2.8-4, and the new 16mm f/1.4. The size of these two lenses is similar (the 16mm is slightly larger in diameter) and represent what I consider the limit for an optimal grip and balance when using this camera.
Bigger lenses, especially some telephoto lenses, can throw off the balance somewhat. This leads me to the aspect I like the least about the X-T10: I don’t find the grip exceptional. Sometimes you really have to tighten your hold on the camera, especially the thumb grip on the rear. A few times I also inadvertently pressed some of the rear button with the palm of my hand because I couldn’t get a good grip on the camera. This is partially because I have relatively large hands, as I’m sure many other potential users do. Fujifilm has designed a landscape grip for this camera and I would definitely consider it for extensive use.
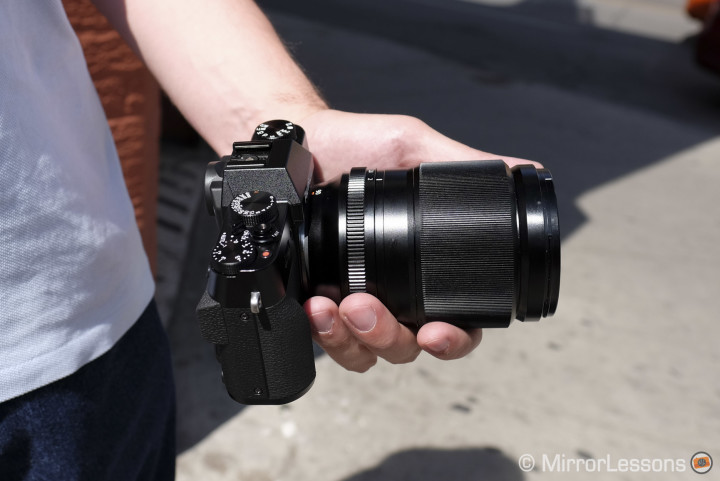
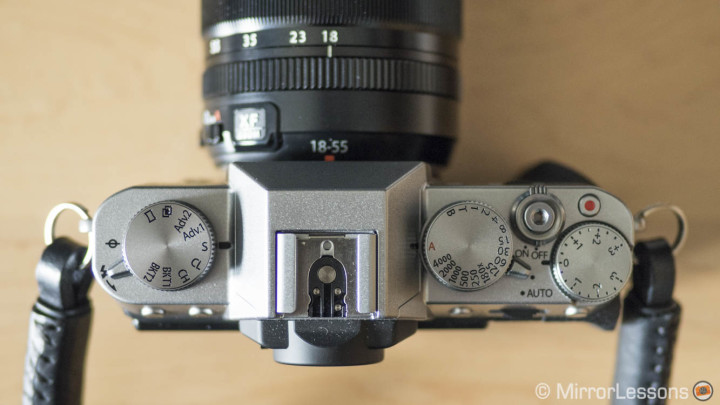
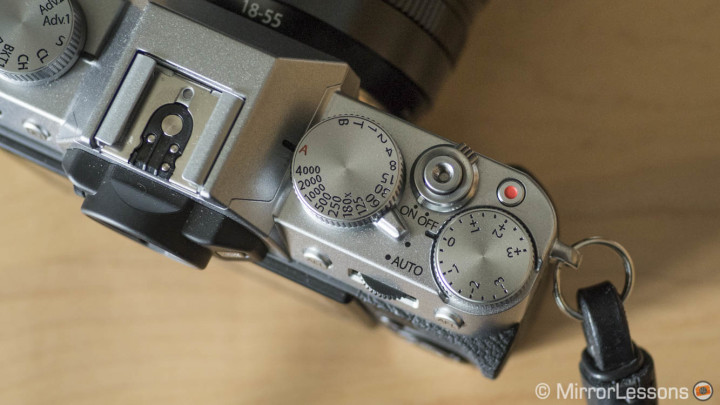
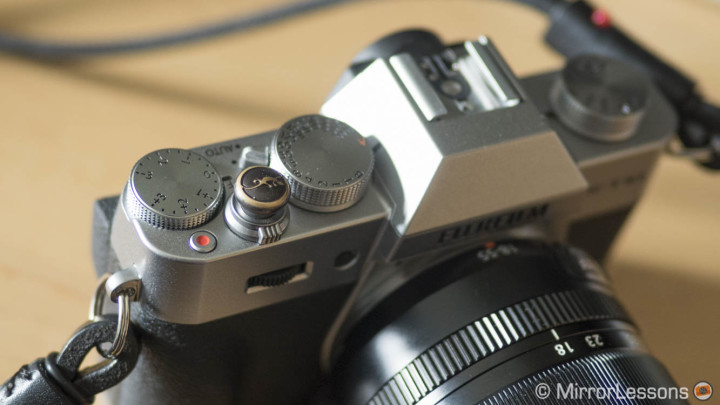
On top you won’t find the default shooting mode dial but instead a handy drive dial on the left where you can quickly change between Single, Continuous, Advanced, Bracketing, Panorama and Multiple exposure. The dial has two bracketing positions that you can configure in the menu. For example you can set BKT1 to exposure bracketing and BKT2 to white balance bracketing. The same applies to the two Advanced (Adv.) modes that allow you to choose different filters such as Toy Camera or Partial Color.
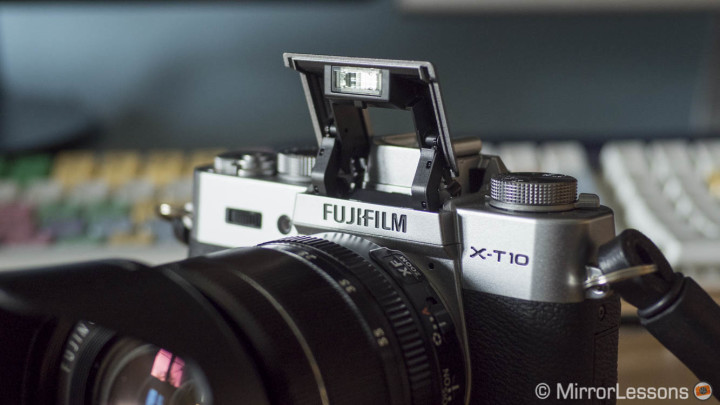
Next to the Drive dial you also find a lever to release the pop-up flash. It has been designed really well because you can hardly tell that there is a built-in flash inside the fake pentaprism when it is closed. However, the lamp isn’t very powerful and with larger lenses like the 16mm and its petal shaped hood, the light emitted is partially blocked.

On the top right, you can find the traditional shutter speed dial that most X series cameras have, as well as the exposure compensation dial. The latter is the only dial I didn’t find as smooth. The shutter release button is threaded and allows you to attach an optional soft release button. Next to the shutter speed dial there is a lever that switches the camera to Auto shooting mode. It is a handy feature that lets you to quickly switch from manual or semi-manual mode into a complete auto mode, which an inexperienced photographer might find very useful.
This Auto lever also suggests that the X-T10, despite not being an entry level camera, targets more than just enthusiasts.
The X-T10 could be the perfect solution for a beginner interested in investing in better equipment and improving his or her photography. The various dials are easy to use but when a photographer doesn’t feel confident with the manual controls, he/she can quickly switch to Auto. In Auto mode, you can use the rear dial to select different scene modes according to the type of scenery you are shooting (night, sports, landscape, etc.).
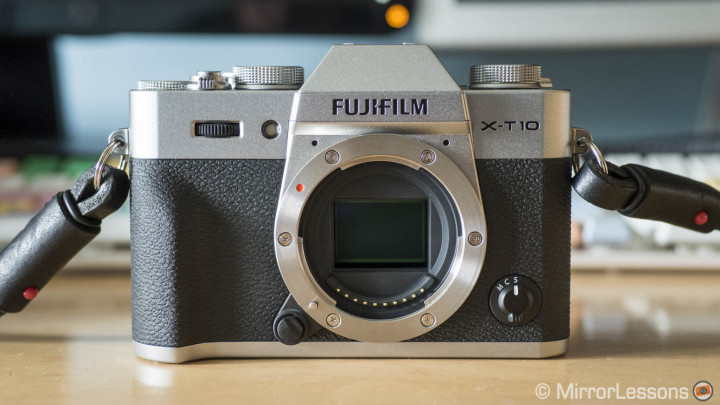
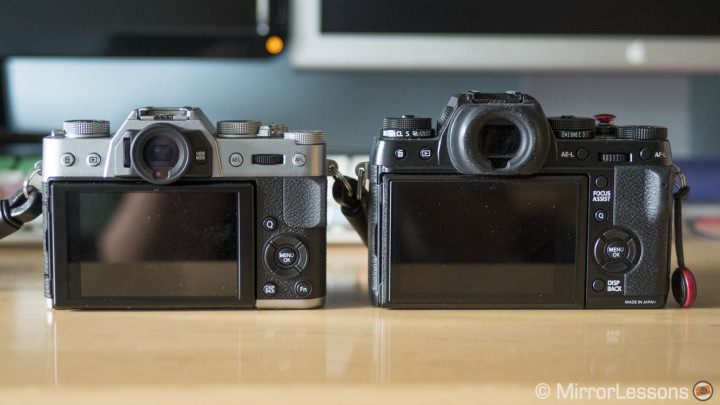
On the front you will find the focus selector that lets you choose between Single, Continuous or Manual. On the rear, you get a 3 inch LCD screen that can be tilted up 90° and down 45°. The buttons on top and on the right side are easy to access. You also have two plastic dials: one on the front and one on the rear that allow you to control different settings depending on the shooting mode you’re in. They are easy to access and turn as well. They can also be pressed and turned, and the front dial is one of the 7 function buttons that can be customised via the menu (that includes the movie recording button on top). You can also choose to assign the AF points to the four-way D-Pad on the rear, which makes the operation very fast.
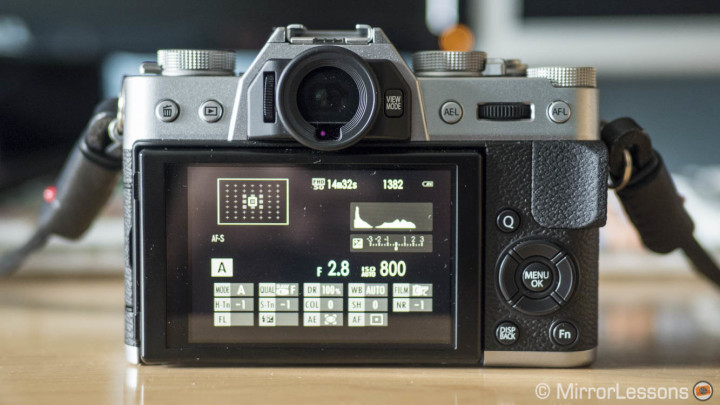
The viewfinder is the same as the one found on the X-E2 which is a good viewfinder with enough resolution and a short time lag of only 0.005s that remains constant even in low light. However in more critical light situations colour noise can increase. You can choose to set an Auto Luminance option so you get constant brightness and colour.
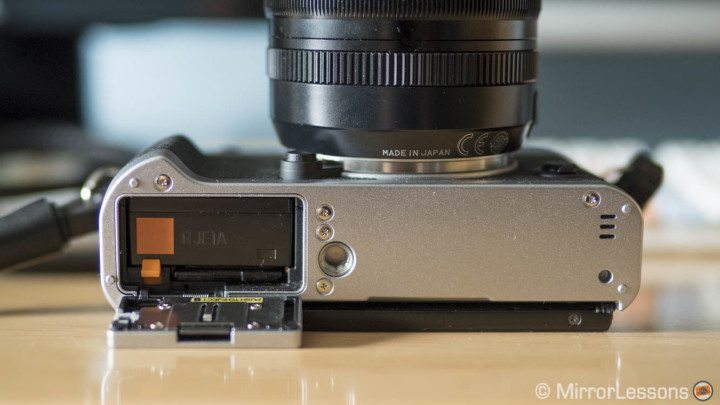
The SD card is inserted from the bottom where the battery compartment is. One complaint I have is that the tripod mount is too close to the battery compartment door, so if you use a tripod and need to swap batteries, you will have to unscrew the tripod plate first. The same problem exists on the X-T1 but on the X-T10, the mount is even closer to the door.
X-T10 vs X-T1: design, ergonomics and ease of use
Below I’ve highlighted the most important differences that I found between the two cameras.
- Size and build quality: The X-T10 feels more “plasticky” in comparison to the X-T1, which has a stronger build quality, a magnesium alloy body and is also weather sealed. The X-T1 is also slightly bigger and has a more prominent grip on the front.
- Dials and buttons: What I love about the flagship X-T camera is that all its dials allow you to work without having to enter any menu. With the X-T10 you lose some of these dials and subdials, including the ISO and metering dials. The X-T10 also lacks the flash sync socket and a function button on the front. On the rear, it lacks the Focus Assist button that I find very useful on the X-T1. The four selectors have been improved on the X-T10: the buttons are now more prominent and easier to press. You won’t find an Auto mode switch on the X-T1.
- Function buttons: The movie recording button on the X-T1 can’t be customised so the camera has one less function button (6 instead of 7 on the X-T10).
- Viewfinder and LCD screen: The X-T1 electronic viewfinder is the best on the market right now and is also the largest. It is the closest performance you can find to an optical viewfinder, so with the smaller EVF of the X-T10 you inevitably perceive the difference. As for the LCD screen, the one on the X-T10 has slightly less resolution (920k vs 1040k on the X-T1).
- Various things: there isn’t a threaded shutter release button on the X-T1 which makes it less compatible with third party soft release buttons. The SD card is inserted on the right on the X-T1 and is compatible with the UHS-II type. The X-T1 doesn’t have a built-in flash but rather an external small unit that is provided with the camera. There isn’t a battery grip designed for the X-T10.
Image Quality
If you are already familiar with Fujifilm X series cameras, you can simply skip this chapter. The X-T10 has the same 16mp X-Trans CMOS II sensor and EXR II processor found in many other cameras including the X-E2, X-T1, X100s and X100T. You can check our reviews of these different cameras to find out more. Here I will summarise what I think about the X-T10 sensor and Fujifilm’s image quality in general.
Note: the RAW files of the X-T10 can’t be opened with the Adobe software at the time of publishing this article. However, using the exiftool plugin, I changed the exif data (camera name = X-T1 instead) and opened them as X-T1 files in Lightroom.
- Colours: probably my favourite aspect of the X-Trans sensor. Fujifilm has designed interesting and more original picture profiles called Film Simulation modes that often have a slightly more organic look than other traditional digital cameras. My favourite is the new Classic Chrome which is interesting for reportage and documentary photography because it doesn’t saturate colours too much and keeps an excellent level of contrast. Astia is my other go-to profile as it has good contrast and a soft colour palette. Pro Neg standard is good for portraits and there is also an excellent selection of Black and White profiles.
- Dynamic range: another valid aspect of Fujifilm cameras. If you shoot Raw, you get a 14 bit uncompressed file that has impressed me more than once with its ability to retain not only details in the shadows but in the highlights too. If you shoot JPG, you have the option of increasing/decreasing shadows and highlights. There is also the DR option that will keep the same dynamic range when using ISOs higher than 200.
- Low light: The X-T10 can go up to 6400 ISO when shooting Raw and up to 51200 when shooting JPG. Personally I always shoot in Raw and I’ve always found 6400 ISO enough for my needs. The noise isn’t too invasive and has a slight organic look that looks less digital. As the ISO increases, you’ll observe a lack in sharpness and detail in the JPGs even when you keep the noise reduction to the minimum, so I prefer to work with the Raw files. A handy feature are the three different options for Auto-ISO (so you can set different limits and switch between the 3 auto ISOs).
- Sharpness and details: you can get excellent results with the X-T10 in part because many of the XF lenses are high quality glass. The only thing worth considering is that you can get varying results from the Raw files depending on the software used. Lightroom and Adobe Camera RAW are known for their limited ability to develop Fujifilm Raw files especially when dealing with natural elements like grass or trees. It is nothing to panic about because I use Lightroom all the time but for specific photos it is worth looking into an alternative software like Iridient Developer.


X-T10 vs X-T1: Image Quality
There is nothing to declare here except that the X-T10 produces slightly bigger JPG files than the X-T1, which simply means that there is less compression. But in most scenarios you won’t notice the difference in image quality.
Autofocus and performance
Autofocus is perhaps the most interesting chapter in this review of the X-T10 because it is the sole upgrade the camera brings to the X series line-up, and one that we’ll soon see via a firmware update on the X-T1.
But let’s start with the basics. Once again, the X-T10 shares the same technology found on other X cameras (X-E2, X100s/t, X-T1). There are 49 AF points in total, with 9 central phase detection points being surrounded by contrast detection points. The phase detection points will give you the best performance and accuracy as long as your subject is in the centre of the frame.
In Single focus mode, the camera operates quickly but like on the X100T and the X-T1, I sometimes wish that the AF could be a little more reactive. If you work with a single AF point, you can change its size. In single focus mode I usually find it more effective with a smaller point. In low-light situations, such as during The Retrievers concert, I found the AF fast and reactive. Focus precision wasn’t as accurate as in daylight but I also shot a lot at fast apertures like f/1.4, which can challenge the AF.

As for the improvements to the AF system, I’ll start by saying that they are on a software level with the implementation of new algorithms. Two new AF modes called Zone AF and Wide/Tracking have been introduced. You can select each of them in addition to the single AF point by pressing the front command dial. In these two modes, the camera use a subdivision of 77 areas instead of the 49 mentioned earlier (each area is subdivided). The new modes can be used in Single and Continuous focus mode as well as Single and Continuous shooting mode. In Continuous High (CH = 8fps), be aware that only the central AF points (phase detection) are used.
Note: I didn’t have enough time to perform an in-depth test with relevant situations such as a sporting event. I analysed the new features with the elements I could find around the city of Toronto and at some events. Once the X-T1 firmware is out, I will perform a more in-depth test.
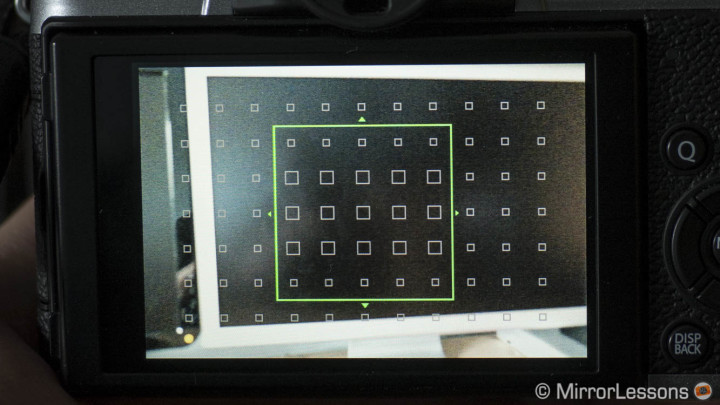
The Zone AF allows you to select a group of points instead of a single one. You have the choice of a set of 3×3, 5×3 or 5×5 points that you select by using the rear command dial. You can then move the selected group within the frame. Once your subject is within this group of AF points, the camera will automatically pick the best points according to the subject’s position and movement. In other words, your subject is being tracked by the camera within that zone.
Zone AF is the mode I enjoyed the most on the X-T10. I actually used it more than the Single area mode.
It is quick to focus, quick to react and quick at tracking. I was also impressed by the performance in low light and used it several times during the rock concert I shot.

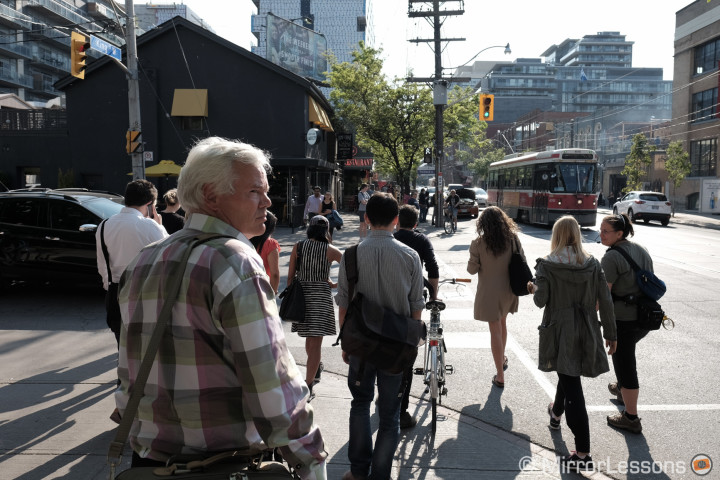
One of the nights in Toronto, we stood on Young street until 11pm because some sequences of Suicide Squad were being shot, and we were hoping to see some action. Unfortunately nothing exciting happened but I grabbed the opportunity to test the Zone AF by tracking some cars on the street at night. I had the kit lens which made it even more difficult because of the slower aperture. While not every attempt was successful, in part due to the shutter speed not being fast enough, the X-T10 did manage to track some of the vehicles quite well.

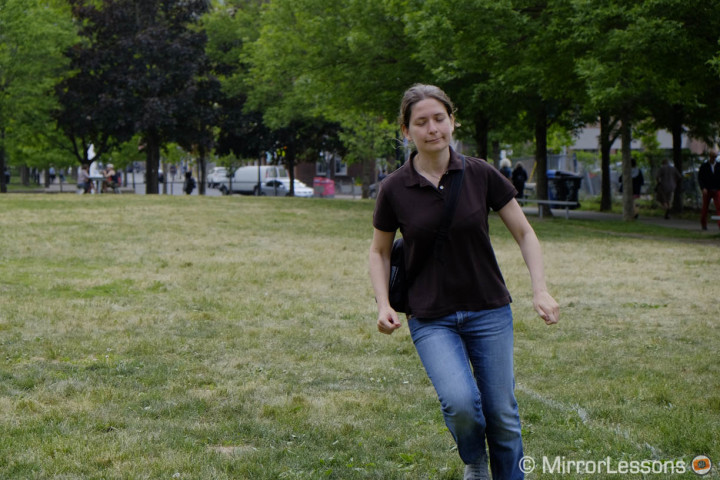
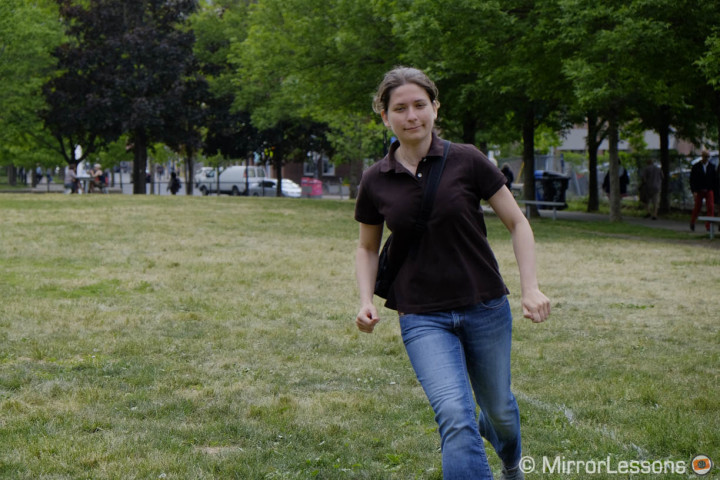
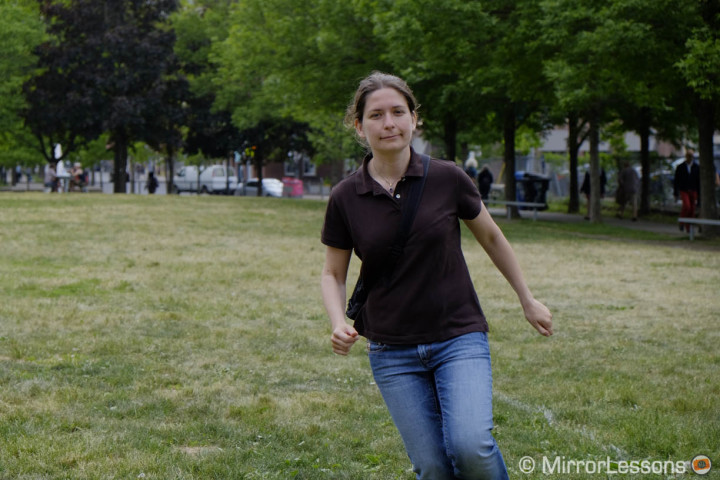
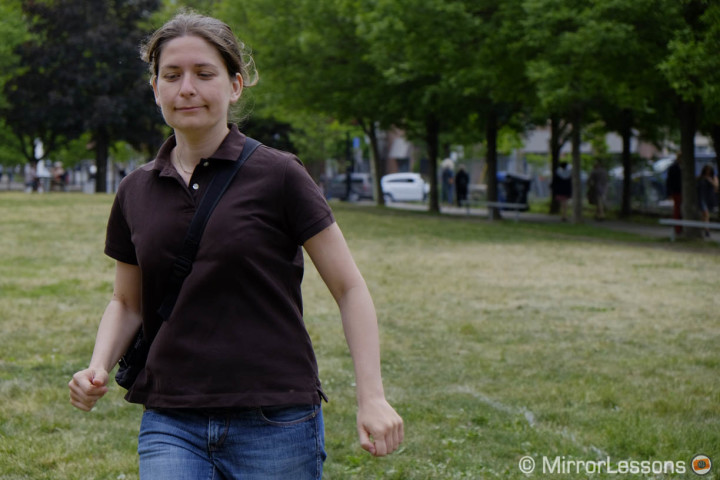
The Zone AF mode is also interesting when used with continuous autofocus and continuous shooting even at the highest mode (8fps). During my previous sports photography test with the X-T1, I found that the best compromise was to use the single AF point at its largest size and positioned in the centre. This means that I had to be very precise in keeping my subject on that focus point which, despite being at its largest size, was still giving me a very low margin for error. With the Zone AF, I can work with a larger area. I therefore have more versatility with my movement since I know that the camera will compensate and keep my subject tracked and in focus.
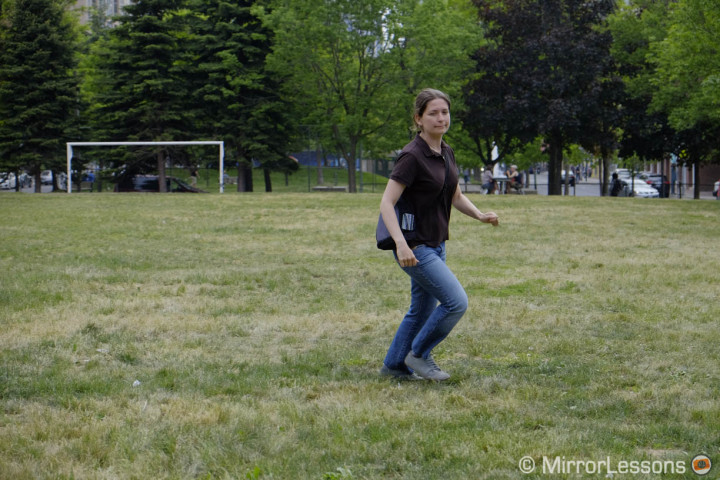
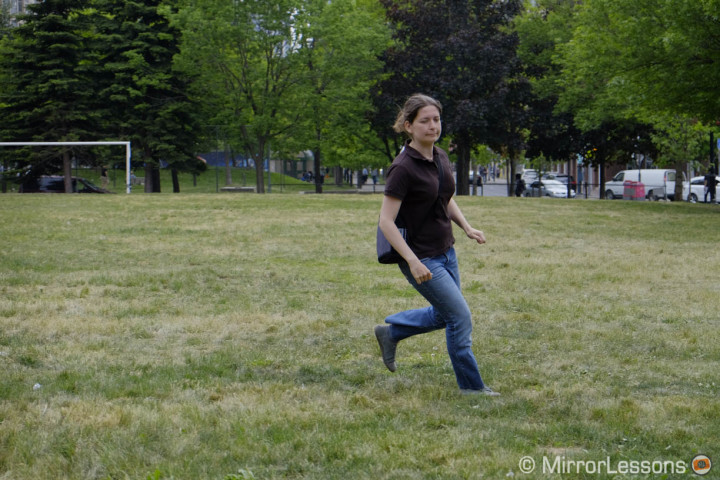
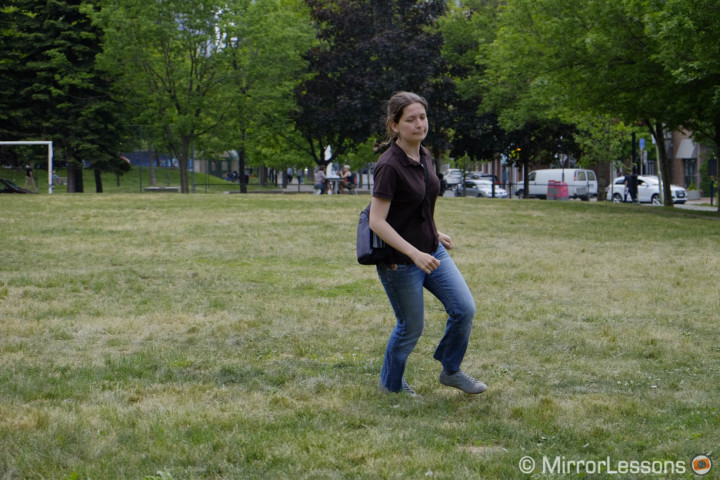
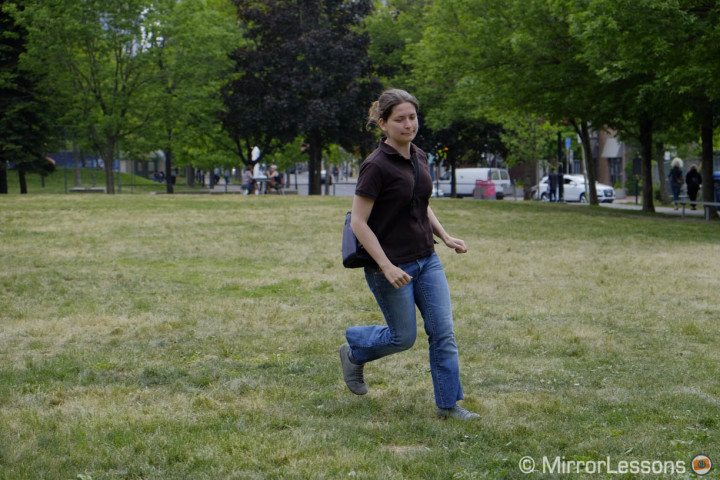
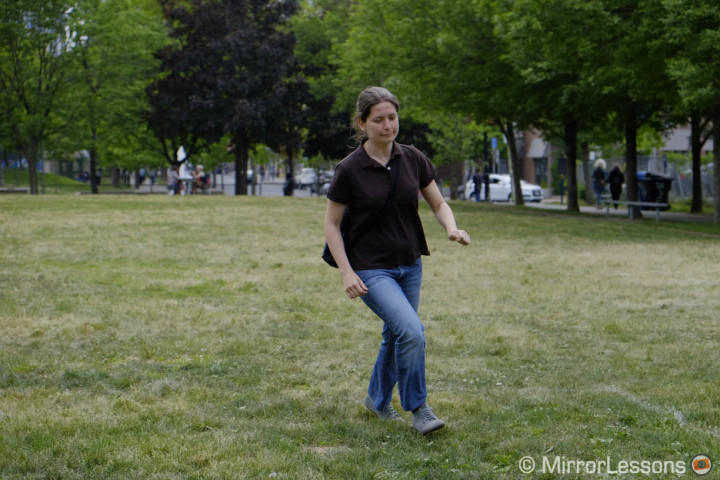
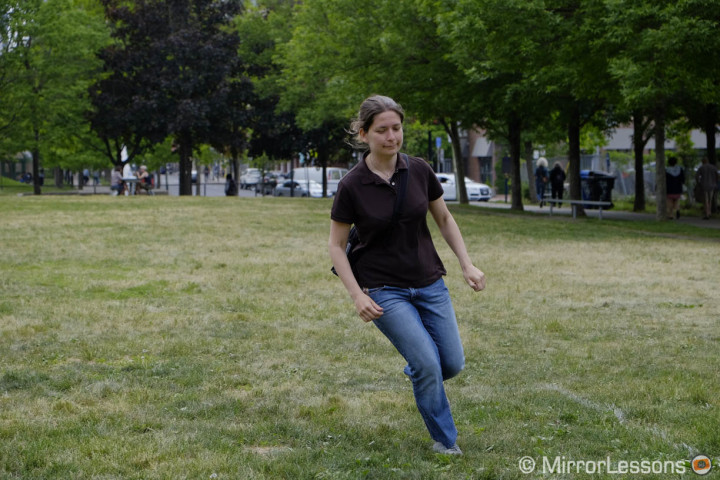
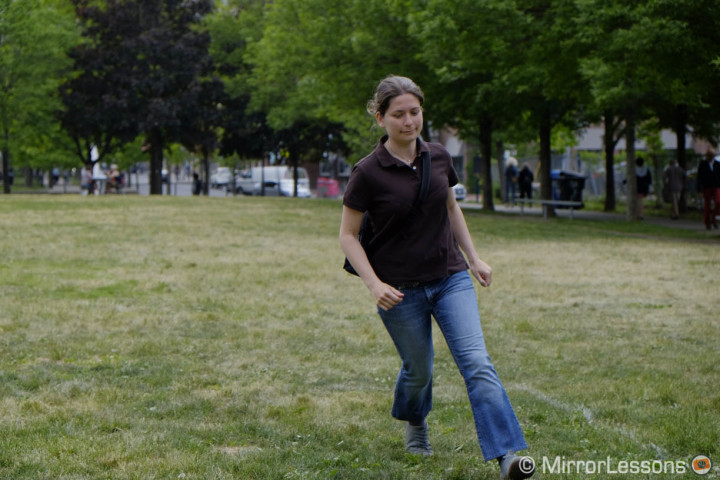
Below you can see a simple example where I asked Heather to run towards me. We repeated the test several times and the X-T10 did a good job of keeping track of the subject. The focus accuracy is not 100% precise however – a few shots were slightly out of focus. I actually have a series that is slightly better than the one below but at a certain point I didn’t follow Heather well and she was out of the Zone AF, so of course the X-T10 focused on the background.
Wide/Tracking is the second new AF mode introduced on the X-T10. If you use it in Single focus mode, the performance is similar to the Multi+ mode found on other X cameras. The camera automatically picks one or multiple AF points in the frame. Things get more interesting when you switch to Continuous focus mode because you get the possibility to choose where the AF should start tracking. You simply move the single AF point until it is on the element you want the camera to start tracking. Then by half pressing the shutter button, the camera will concentrate on that element. If you change your composition or if the subject moves inside the frame, the camera will track the subject on three axes (x,y,z). Basically, this mode is very similar to the 3D tracking AF mode found on other mirrorless cameras and DSLRs. It is a mode that Fuji cameras were missing and shall we say, was a long time coming.
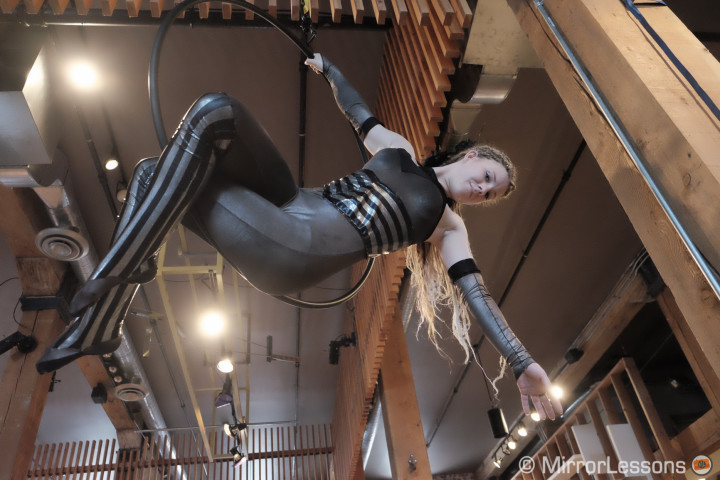
In this example, I tracked this young artist using the Wide/Tracking mode and the X-T10 never lost track of her.
During my testing, I was surprised to see how accurate this Wide/Tracking mode was. Since it can use any of the 77 AF points on the screen, I was curious to see if there were some issues when switching from a contrast detection point at the edges to one of the phase detection points at the centre but there is nothing to report. I used a streetcar and Heather as my test subjects. The Wide/Tracking isn’t perfect and will sometimes confuse the subject with colours or contrasting elements in the background. But what I saw is definitely encouraging. In the example below, you will notice that focus is lost only on the final shots. Of course it would be more interesting to test it further on faster and more unpredictable subjects.
With these new improvements we could assume that the X-T1 and X-T10 are now as good as DSLRs when it comes to autofocus capabilities. However I think that there is still some more work that needs to be done.
Regarding the X-T10, there is one negative aspect that can easily handicap the AF, and that is the memory buffer. When shooting in Continuous High (8fps), the buffer fills up very quickly even when in JPG mode. After the the 7th or 8th consecutive shot, the camera will significantly slow down or stop. The X-T10 isn’t compatible with UHS-II SD cards that have faster writing capabilities but I’ve never used them on the X-T1 either. I have a Lexar 64GB 400x card which is quite good and I’ve used it successfully many times with the X-T1. It is with the same SD card that I found these limitations on the X-T10. I don’t understand the reason for this. Why can’t the X-T10 have the same buffer capabilities as the X-T1 if the hardware is technically the same?
You have a camera with an excellent autofocus system for action and sports that is hampered by the limits of the memory buffer.
Another addition is eye detection in addition to face detection. You need to have the latter activated first and then there is a second option in the Autofocus menu where you can choose between Auto, Left or Right eye. I admit that this is the only function I didn’t test properly. From what I saw, it makes sense to use it only for close-ups of a person. It allows the camera to focus precisely on the eye while with the default AF point or face detection only, you often end up with the focus point on the nose or the ear. When you shoot with a fast aperture like 1.4 or 1.2, it can be annoying.
One last note about autofocus has to do with an option you will find under the Power Management section. If you set the High Performance to on, you will get slightly better performance but the battery life decreases more rapidly.
X-T1 vs X-T10: autofocus
Once the X-T1 gets its firmware update (version 4.0, available in mid-June), the two cameras will have the same performance but the X-T1 will have an advantage in continuous shooting mode because of its memory buffer (approximately 48 frames in JPG mode on the X-T1 in comparison to the 8 frames of the X-T10). So despite having the same autofocus system, the X-T1 is better for sports photography.
Other features
I won’t dwell on this last section since I couldn’t test everything in four days. The X-T10 has many of the same options and features found on the most advanced X cameras. The most relevant are the following:
- Electronic shutter: the camera can shoot in silent mode and sync at the maximum speed of 1/32000s which is very interesting when shooting outdoor with fast apertures
- Manual focus assist: you can choose between magnification, peaking and digital-split image
- Panorama and multiple exposure: Panorama works in JPG mode only. Multiple exposure will work with two frames only.
- Movie mode: you can shoot in Full HD with various frame rates (from 24 to 60fps) but the video quality still needs improvements (lots of aliasing and moiré). There is also a dedicated ISO setting for video that is really annoying and you can’t get a proper video preview of your exposure until you start recording.
- Wifi capabilities: with the Fujifilm Camera Remote app (iOS, Android compatible) you can remotely control the camera and transfer images to you mobile device.
Conclusion

Like the X-T1 before it, the X-T10 is proof of a system that is reaching maturity. Many of us know and love the image quality (whereas others don’t, but that’s the beauty of variety), and the autofocus system has received a worthwhile update with the new Zone and Wide/Tracking modes. The camera shares all the most important aspects as the flagship X-T1 including image quality and performance (except for memory buffer). That the X-T10 lacks weather sealing, a bigger viewfinder and a higher build quality is justification for its position as a enthusiast’s model and the lower price.
As I said at the beginning, the camera is here to build upon the success of the original X-T1. Photographers who already use Fujifilm cameras might not be interested in it unless they plan to buy a second body. In my opinion, the camera will be more interesting to those in search of a great Fujifilm/mirrorless camera to start with, and aren’t against the idea of investing a little extra money in a good system.
I also think that the time has come for Fujifilm to update the primary hardware: the sensor and processor.
In terms of pure image quality, the current sensor is fine for most applications. The problem however is that all these cameras are too similar to one another. The X-T10 has the viewfinder at the center while the X-E2 has the viewfinder on the left. Yes, there are some differences in terms of the buttons, ergonomics and other features but if you take a step back, you realise that these cameras perform very similarly. This makes it more difficult for the user to choose if there aren’t any relevant differences. Looking at the competition, a good example is the OM-D series by Olympus. There is more to say about the differences between the E-M10, E-M5 mark II and E-M1 than between the X-E2, X-T10 and X-T1.
There is also the question of firmware updates. I think that Fujifilm is finding itself in a difficult position, where it wants to continue to prolong the lifespan of its products (in other words, keep current clients happy) but at the same time can’t compromise the sales of its new products. This is another reason the next camera should have some major upgrades, both in terms of the hardware and software. Considering that Fujifilm has managed to improve its autofocus concretely via firmware updates, I can’t wait to see what they will do with the next generation of hardware/software.
 What I like about the Fuji X-T10:
- Small and compact retro design. Works best with small prime lenses.
- Image quality is the same as the other X cameras, which means it is excellent
- The new autofocus modes are a great addition
- It shares all the most important specs with the flagship X-T1
 What I don’t like about the Fuji X-T10:
- Hard to get a good grip on the small body unless you want to invest in some accessories
- Memory buffer is really low when shooting in continuous mode which limits the great AF and tracking capabilities this camera
- Movie mode will satisfy casual shooter but isn’t good for more serious shooting (especially compared to the competitors)
- Battery life decreases rapidly if you want the best performance
- Tripod mount too close to the battery compartment
