The first encounter we had with the Sony FE 90mm f2.8 macro G OSS was at last year’s Photokina, a mere prototype sitting inside a glass display alongside the other upcoming FE lens prototypes. Now, nearly a full year later, the lens is finally on the market and ready to be enjoyed by the macro-loving community.
Thanks to the good people at Hireacamera, we were able to test the lens for a number of applications over the weekend in locations as varied as the flowery meadows of Llanymynech, the bustling Oswestry Food Festival and Chirk Castle where a half-marathon was taking place.
Design and Build
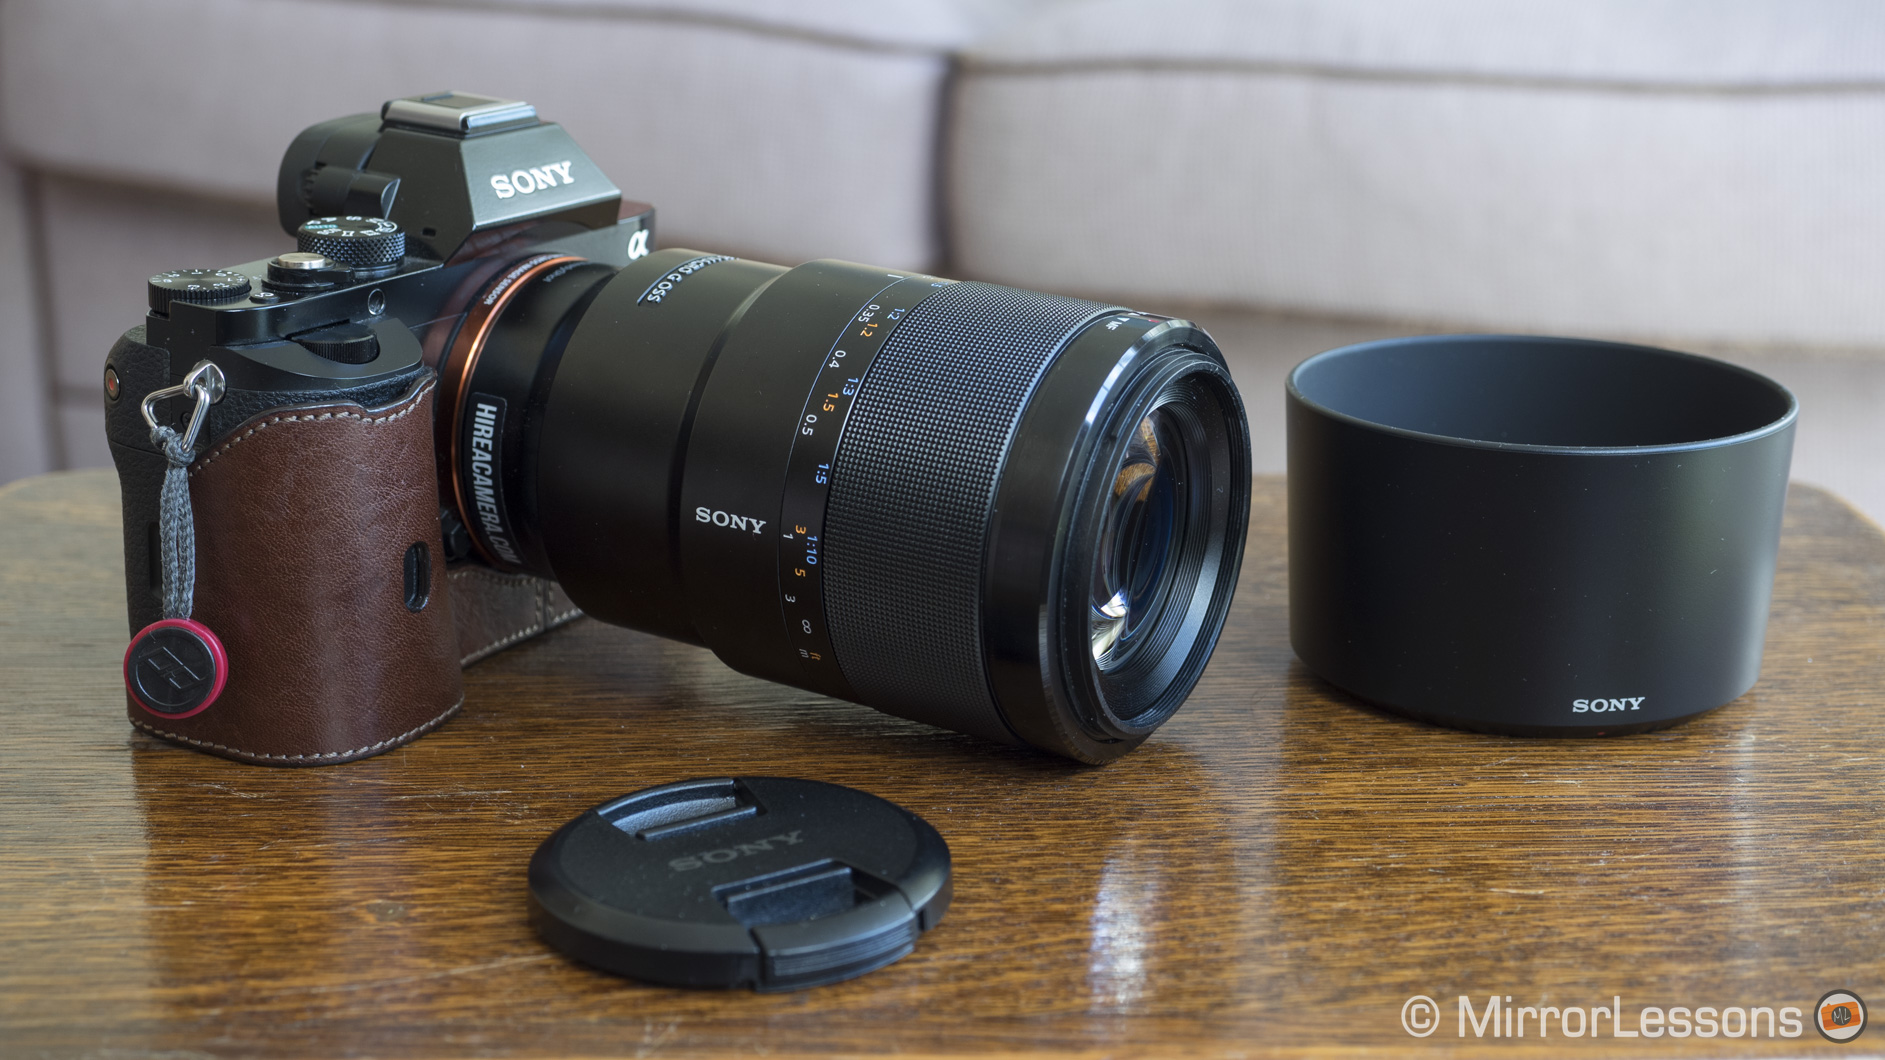
I’m going to get this part out of the way and say it: the 90mm macro is big. At 130.5mm in length, 79mm in width and 602 grams in weight, it is both larger and heavier than the well-loved Tamron 90mm macro and is about the same size and weight as the Canon 100mm f/2.8. With this lens and others like the FE 35mm f/1.4, it seems that Sony come up against a brick wall in their attempt to create top quality lenses that are compact – one desirable characteristic or the other ultimately winds up being sacrificed.
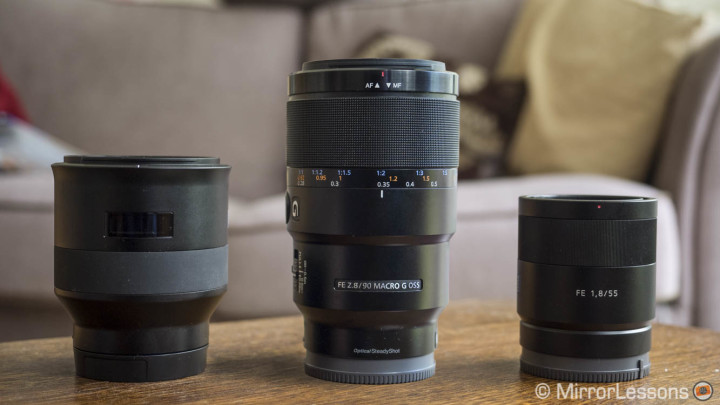
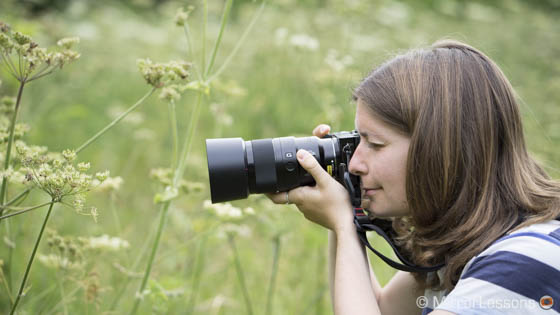
That said, the 90mm is perfectly useable and is lighter than its size would suggest. Being so large, it balances better on the A7s and A7r than on the A6000, and would probably be an even better match for the A7 II or A7r II with their prominent grips.
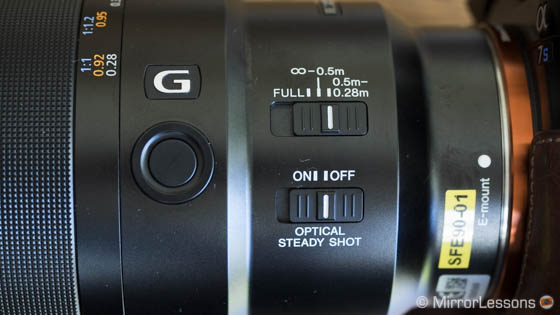
The design of the 90mm macro is flawless. I really appreciated the attention to detail, from the ribbed rubber covering on the manual focus ring to the well-marked distance and reproduction scales. It features a dust and moisture resistant build, and has a number of physical controls on the barrel such as a focus limiter switch, which allows you to limit the lens’ focus capabilities to three different distance ranges (full, infinity to 0.5m and 0.5m to 0.28m), an optical stabilisation switch, a focus hold button, and my favourite, a sliding focus ring. This final control lets you rapidly switch between AF and MF without the need to remove your eye from the viewfinder. When you are out in the field, it is incredibly useful, as you can go from manually focussing on a static object to auto-focussing on a moving subject in the blink of an eye.
Since only the middle groups of the optical system move, the front element does not protrude when you focus. It can focus as close as 11 inches / 28cm and has a 1:1 magnification ratio.
The lens comes with an additional plastic lens hood, which makes the lens look even bigger than it actually is. It does a good job of protecting the front element but can cast a shadow on your subject if you get too close. At a very close range, I prefer to remove the lens hood altogether. I must say that I’m glad Sony chose to make it plastic rather than metal, as that would have only added to the weight.
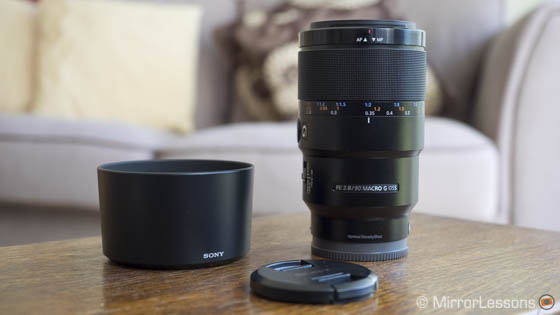
Image Quality: Through the lens

Where the lens lacks in compactness, it excels in optical performance. This lens is a crown jewel in the FE line-up and is a must-have for any serious macro shooter with a Sony E-mount camera, be it full-frame or APS-C.
During my time with the lens, I had the fortune of being able to use it on three Sony bodies: the A7s, A7r and A6000.
On the a7r: sharpness / vignetting
The logical first choice to test the sharpness of the lens was the A7r with its 36MP full-frame sensor. In my findings, the lens was very sharp from f/2.8 all the way up to f/11 with the best performance occurring between f/5.6 and f/8. Diffraction starts to set it at around f/16, which is perfectly normal. The extremely shallow depth of field at f/2.8 might lead you to believe that it isn’t as sharp at this aperture but the small sliver that does end up in focus is always tack sharp. I observed some very slight vignetting at f/2.8 but it is easily fixable in post-production.


In all honesty, the A7r would not be my first camera of choice as a macro photographer who mainly shoots moving subjects and moves around a lot. The mix of some minor shutter shock between 1/100 and 1/200, the very high megapixel count, the slow-ish AF system, the long focal length of the lens and the highly magnified view all pose a challenge for hand-held shooting of moving subjects. For static subjects, on the other hand, it is an excellent combo, especially if you use a tripod.


The combination of the lens’ excellent sharpness at f/2.8, the 90mm focal length and its beautiful out of focus rendering (which I’ll discuss more below) also make the combo ideal for portraiture. While visiting the Oswestry Food Festival, I took a few portraits of the vendors with the a7r and was very impressed by the results.


On the a7s: flare / chromatic aberration / bokeh
Most of my shooting was actually done with the A7s and its 12MP full-frame sensor. For those who don’t care about eye-slicing sharpness, there are two main reasons this camera makes more sense for shooting moving subjects with the 90mm macro.

First of all, its incredible high ISO performance makes it possible to shoot at high shutter speeds and slow apertures, both of which are desirable to keep your subject in focus and increase the depth of field. When I was taking insect pictures on a cloudy day, for example, I set the ISO to Auto with a limit of ISO 3200 and manually adjusted the aperture and shutter speed according to the movement of the subject, the amount of available light, and the angle at which I was taking the photo. On this camera, even the results at ISO 3200 look clean and relatively noise-free.


Second, the silent shutter all but eliminates the occurrence of shutter shock, with the added bonus that there is no clacking sound to scare off the critters you’re photographing.

It was with this camera that I performed a few flare and chromatic aberration tests as well. The former is very well-controlled due to the Nano AR coating on the glass. The worst example I have shows some minor sensor flare around the light source and some greenish veiling flare but it isn’t anything to write home about. Chromatic aberration didn’t appear in any of my examples, which is probably owing to the extra-low dispersion glass and the camera’s built-in correction of chromatic aberration.

As for the background blur, it is nothing short of stunning. The specular highlights are perfectly round right up until you reach the extreme edges of your image thanks to the 9 circular aperture blades, and there is nothing busy or distracting about the rendering. You can also achieve very good subject isolation.


On the a6000: additional experiments
The final camera I used with the 90mm macro was the a6000, the most recent iteration in Sony’s APS-C series of cameras. Due to the crop factor of 1.5x, the lens became the equivalent of a 135mm. With this combo, I had more control over the depth of field and the advantage of the a6000’s blazing autofocus system. It also allowed me to get a little closer to my subjects than with the two full-frame cameras.


I have to say I liked this combo almost as much as the A7s and 90mm. The lack of extreme high ISO performance aside, it locked onto moving subjects more quickly and gave me more resolution thanks to the a6000’s 24MP sensor.

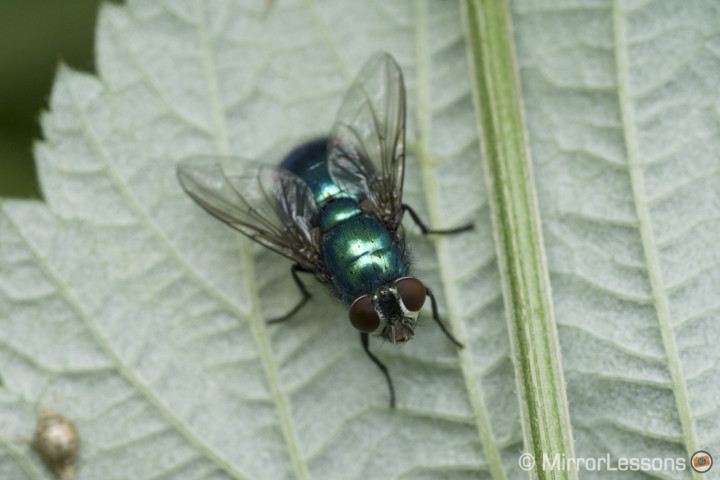
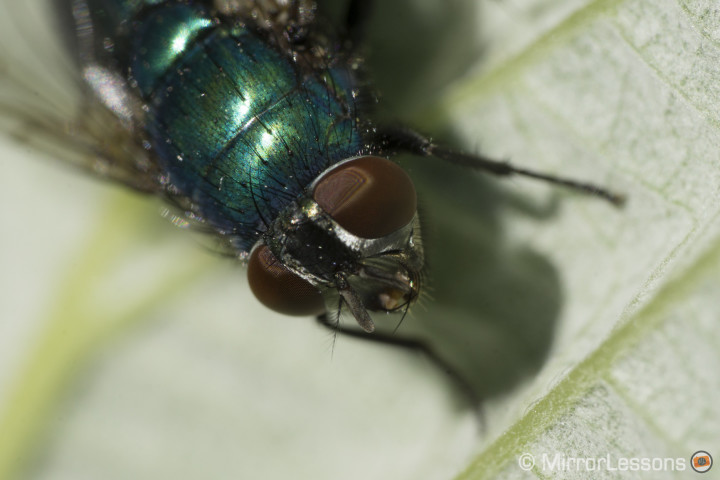
It was with this combo that I also tried the Raynox 250, a macro conversion lens I recently reviewed on a number of telephone lenses. This was the first time I’d used it with a dedicated macro lens with 1:1 magnification, so I was curious to see the results. As it turns out, you can get very close to your subject. For example, a fly taken at 1:1 magnification will fill about 1/8th of your frame, but if you add the Raynox, you can fill the frame with about half of the fly’s body. Of course, at this level of magnification, it helps to have a tripod or flash to keep your image perfectly in focus.
Finally, the 135mm focal length also proved useful for head shots. Mathieu took a few portraits of me at this focal length and the results were excellent. (If you are interested in seeing more portrait samples with this lens, be sure to check out our Batis 85mm vs 90mm macro vs 55mm f1.8 gallery!)

Performance
The FE 90mm macro performs very well, though it is much faster on the a6000 than on the two full-frame bodies. If I’d been able to test it on the A7 II or A7r II, I’m sure I would have noticed an increase in autofocus speed as well. I found that the autofocus tends to be faster when I use the medium AF point on the camera than the small AF point, even for very tiny subjects.

The image stabilisation is also very effective. I was able to take in-focus shots down to about 1/6 of a second, which isn’t bad at all considering the focal length.

Since we were spectators at a half-marathon at Crick Castle on Sunday, I thought it could be fun to test out the autofocus for action shooting on the a6000. Once again, I wasn’t disappointed by the performance considering that this isn’t an action lens. It usually took the lens a moment to focus on the runners, but once it locked focus, it was very quick. To stop the lens from hunting, I simply set the focus limiter to “infinity to 0.5m” (as opposed to Full) and fired away.


As for the magnification, I had honestly been expecting to be able to get a little closer to my subjects at 1:1 reproduction but upon reflection, 28 cm isn’t too shabby for this focal length. With a full-frame camera, you can fill your frame with an object about the size of a quarter. Anything smaller, like a ladybug or fly, will not fill your frame unless you use an additional lens converter like the Raynox 250 or an extension tube.
To see more images taken with the FE 90mm macro, head over to our SmugMug gallery!
You can also check out our hands-on video review of the lens below:
Conclusion

We strongly believe, as regular readers of our website know all too well, that the best mirrorless systems are those that achieve the perfect balance between compactness and quality. It is the spirit with which mirrorless systems came into existence, and companies like Olympus, Panasonic and Fujifilm have proven time and time again that it is possible to achieve outstanding image quality from sensors smaller than full-frame and optics that can fit inside your jacket pocket.
Lenses like the FE 90mm macro certainly call into question this philosophy. As Yasuyuki Nagata (Sony General Manager – Lens and Peripheral Business) stated in an interview with us at Photokina, consumers are looking for three things from their lenses – compactness, quality and a good price – and with a full-frame sensor, it isn’t easy to deliver on all three fronts. In the case of the 90mm, Sony has prioritised optical quality and performance above all, and it shows in the resulting images.

Would I recommend the FE 90mm f/2.8 macro? Absolutely. The size and weight issue aside, I can only shower praise upon this lens for its beautiful optics and functional design.
For those who have already invested in the Sony full-frame system and love macro photography, this lens is a must-have. It is the only native macro lens for the system, and should prove an excellent match for the new A7 II and A7r II (and, dare I say, the A7s successor if and when it comes out). If you own an APS-C camera from Sony such as the a6000, there are already a couple of other 1:1 macro options in the form of the excellent Zeiss Touit 50mm and the more economical E 30mm f/3.5, but nothing that will give you the equivalent of 135mm. It all depends on whether you want or need that extra reach.

 What I like about the FE 90mm f/2.8 macro:
- Excellent build quality
- Perfect design with lots of external controls
- Stunning image quality and sharpness
- Good close focussing capabilities and 1:1 magnification
- Works with both Sony full-frame and APS-C cameras
- A versatile focal length (good for portraits and some simple action as well)
 What I don’t like about the FE 90mm f/2.8 macro:
- As big and heavy as equivalent DSLR lenses
Many thanks to Hireacamera for lending us the 90mm macro over the weekend. If you too are interested in trying this lens, be sure to check out their website!
