One year ago, I wrote an in-depth article about the autofocus capabilities of the Fujifilm X-T1 for action photography. At the time, the X-T1 was the fastest camera in the Fujifilm X series but was still considered inferior to many of its competitors, something with which I agreed. In spite of its imperfections, however, the camera was able to do the job as long as you chose the right settings.
One year later, I began to observe a small yet relevant increase in photographers using the X-T1 for sports, not just weddings, street and portraits. In addition to striving to produce good lenses with better AF motors, Fujifilm also released a firmware update a few weeks ago that incorporates several new autofocus settings.
I had a fleeting chance to try the firmware 4.0 on the X-T10 during my trip to Canada and my first impressions were positive. But since I wanted to write a new article with the same criteria as the first one, I decided to update my X-T1 and attend a number of sports events here in Wales to see how the new AF update would behave in various situations.
Fujifilm is certainly known for its substantial software improvements and this new one is definitely worth the upgrade.
Even more important than the individual new features themselves, is the fact that Fujifilm is catching up with the competition. Zone AF, Tracking and Eye detection are all settings that other mirrorless cameras have had for two years, if not more.
The names are different but their purpose is similar. For example, Olympus has a setting called “Group Target” which is what “Zone AF” does on the X-T1 and X-T10. As I mentioned in my first article, the X-T1 performance wasn’t bad before but it lacked several options. Firmware 4.0 simply makes the X-T1 a more complete camera for continuous shooting and subject tracking. The question is: does it also deliver better results?


[toc heading_levels=”3″]
Intro: Recap and the status quo up to now
Before showing you examples and sharing my personal experience, I would like to summarise the different settings that are now available to X-T1 and X-T10 users. Knowing your camera settings is important if you want to get the best performance out of it. If you are familiar with these specs already, you can skip to the next chapter.
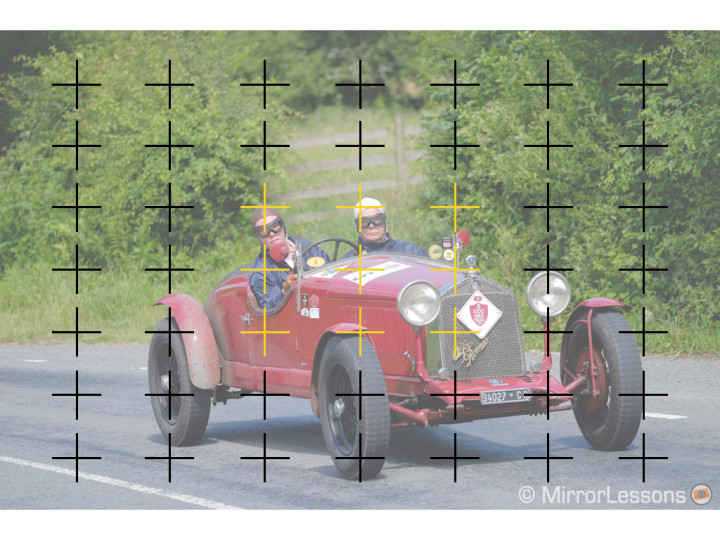
The X-T1, X-T10 and X-E2 all have the same AF structure with 40 contrast detection and 9 phase detection areas. The phase detection points are positioned at the centre of the sensor.
Settings and tips
Below is a list of information and tips on how to get the best performance out of these cameras:
- When set to High continuous shooting (the fastest burst) and Continuous Autofocus, the cameras will only use the 9 central AF points (phase detection) only.
- Despite having the same AF system, for now the X-E2 doesn’t benefit from the same upgrade as the X-T1 (so no Zone AF, Wide/Tracking and Eye detection).
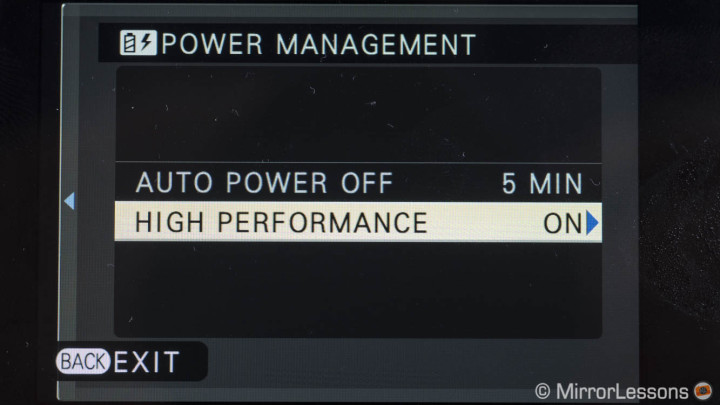
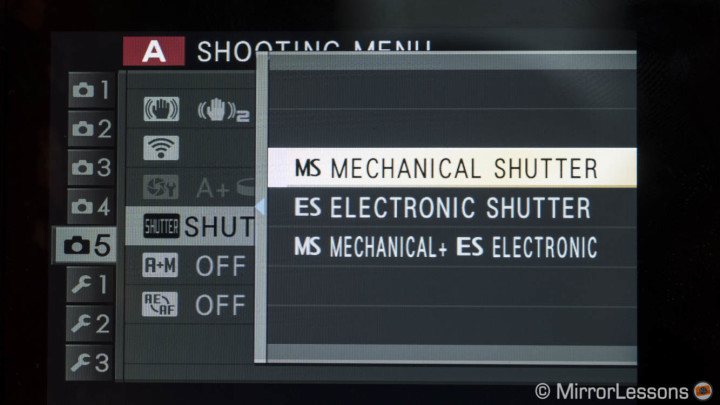
- For the best performance, it is better to use the Mechanical Shutter and turn the High Performance setting to ON. Keep in mind that the latter will drain the battery life more quickly.
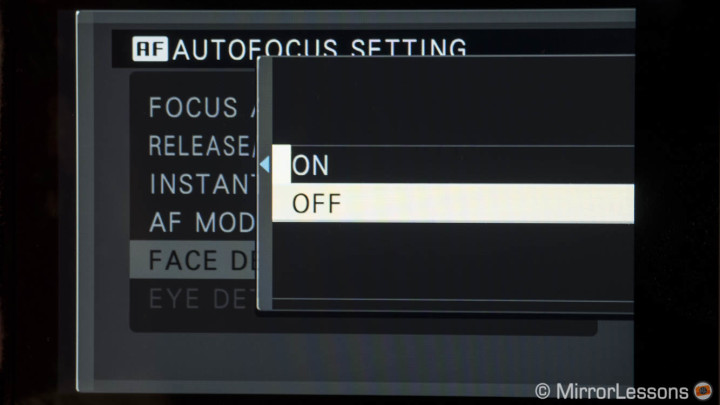
- Face detection is disabled when using Continuous-AF and the fastest burst mode (CH) but it is better to turn it off even in CL and in general when shooting action.
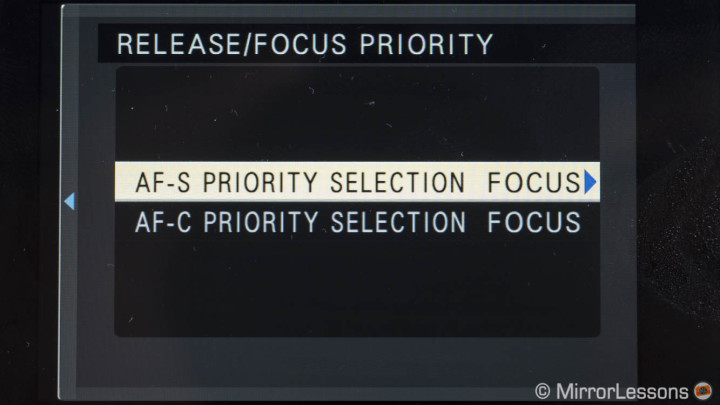
- Make sure to have Focus priority selected for both S-AF and C-AF.
- You can also activate the Pre AF option which means that the camera will focus even when the shutter release button is not half pressed. This is another setting that will drain more battery life. In my opinion, it is useful mainly with the single AF point.
- To have better buffer performance, it is best to shoot in JPG. With Raw enabled, the continuous shooting slows down and the buffer memory is more limited. You can increase the writing speed by using UHS-II SD cards but they are more expensive.
- Make sure to always have the latest firmware for the lenses and not just the camera. Fujifilm often releases updates that enhance the autofocus of its lenses as well.
All these autofocus settings can create some confusion in terminology because the X-T1/X-T10 have two types of AF Modes. The first mode is related to how the autofocus motor operates:
- Single: focus locks while the shutter button is pressed halfway
- Continuous: focus is continually adjusted according to the subject’s distance while the shutter button is pressed halfway
- Manual: focus is adjusted manually by rotating the focus ring on the lens.
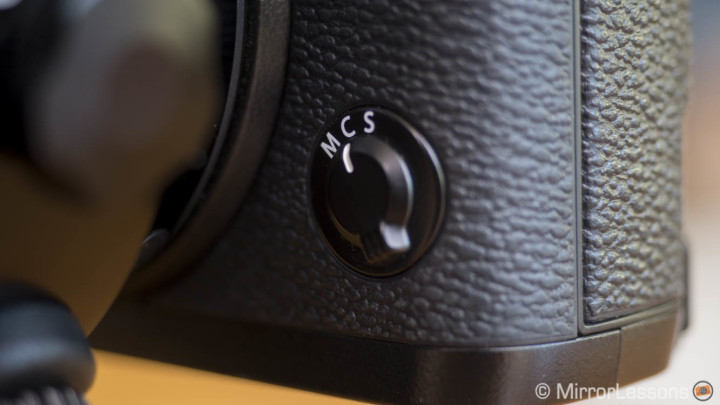
You switch between the three options with the dedicated selector on the front of the camera. In this article, of course, there will be no mention of manual focus, just Single-AF and Continuous-AF.
The second AF mode refers to how many AF points (or areas) you can use. Here there is also another point to highlight. Though the camera has 49 autofocus areas, the camera uses a subdivision of 77 areas instead of 49 with the two new features introduced with Firmware 4.0.
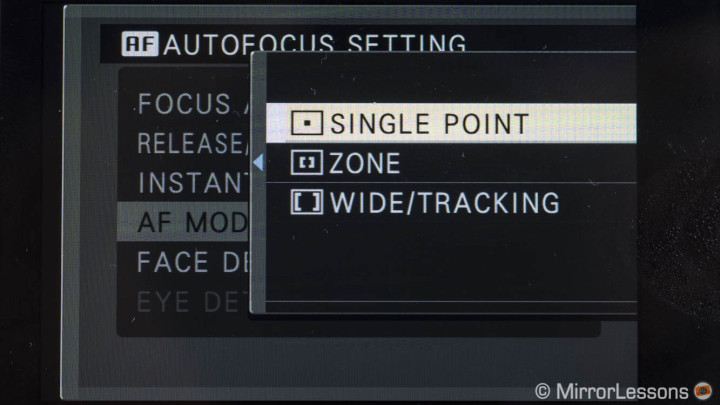
The three options available are the following:
- Single point: you can move the single AF point around the whole frame and the 49 available areas. The single AF point comes in five different sizes.
- Zone AF: you can select a group of 9 points (3×3), 15 points (5×3) or 25 points (5×5) out of the 77 subdivided areas. The camera will automatically use one or more points to focus on your subject. Any of these groups of AF points can be moved across the frame.
- Wide/Tracking: the camera will automatically choose a point out of the 77 available. In Single-AF, it behaves exactly like the Multi+ AF mode prior to firmware 4.0. In Continuous AF, you can choose where to start focussing and track your subject.
Gear I used specifically for this review:
- Fujifilm X-T1 (the X-T10 is mentioned based on my experience with it)
- Fujinon XF 50-140mm f/2.8
- Fujinon XF 18-135mm f/3.5-5.6
- Fujifilm XF 35mm f/1.4 (mainly to check AF speed improvements with the new firmware)
Overall, both zoom lenses performed well for continuous autofocus and tracking. The 50-140mm is the faster and more reliable lens.
Zone AF: the best new option
Out of all the new features introduced via firmware 4.0, Zone AF is by far my favourite. It sits between the single AF point, which is often not wide enough, and the Wide/Tracking mode, which uses the entire surface of the sensor.
Let’s see the first example from the Chirk Half Marathon that took place on July 12th. I used all three AF area modes available and I found Zone AF the most useful especially when I had one or a small group of runners to track. It also proved useful when they weren’t running straight towards me but more on a diagonal, as I had to pan more to keep the runner(s) in the frame. Here my favourite setting was the 3×3 group. It gave me more versatility than the single AF point because I was able to use a larger area without the risk of the AF point jumping around the screen. It also fit the size of my subject well.


The second example is from the 1000 Mile Trial Historic Car Rally. I found out that they were passing through Wales near Lake Vyrnwy. Thanks to their very efficient press office, I received information about the exact route they would take, and thanks to Google Maps, I found the perfect spot at a large 180° bend in the road.
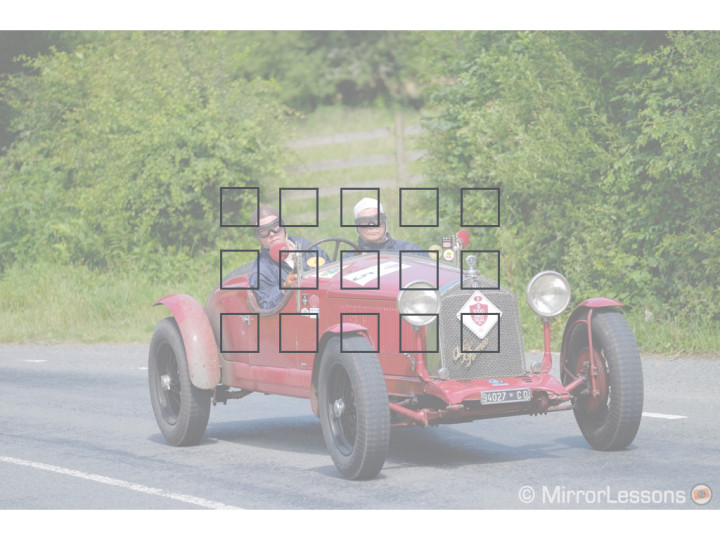
Here I tracked the cars approaching, turning, then continuing on the ascending B road. Having a group of points covering a larger area than just the single AF point is definitely more reassuring when tracking larger subjects like cars. I used both the 3×3 group and the 5×3 group, with the latter often being the perfect size for the cars, especially when they turned at the bend in the road.
This is perhaps the most important thing about Zone AF: always choose the number of AF points according to the size of your subject.


When the car came very close to me, the Zone AF would often focus on the front of the car instead of the pilots. This made for a less effective image, as the drivers weren’t at the centre of attention. Having an aperture of f/2.8 most of the time didn’t help either. I chose this setting so that I could easily detect the images that were slightly out of focus but otherwise a slower aperture is recommended.

Here the focus stayed locked on the front of the car and the drivers are out of focus
When the car is farther away, the camera detects the whole vehicle as being the subject but when the car is really close, the drivers inside become the main subject. Unfortunately, the camera tends to be more attracted to the colour of the car instead of the pilots. I also noticed that the camera’s ability to focus on the right subject was related to the speed of the car as well (some were very fast, other less).
Slide left/right to see the loss of focus between these two consecutive shots. In this case the X-T1 decided to change its focus point from the two drivers to the front wheel (Zone AF, 3×3).
[twentytwenty]


[/twentytwenty]
Another good example was when I had an unwanted element inside my frame in the foreground. The road wasn’t closed for the race which meant that other moving vehicles could interfere. In the example below, the cyclist entered my frame while I was shooting the car behind him. The X-T1 started to focus on the biker instead. Once he was out of the frame, it took several shots for the camera to refocus on the car.
Most of the time I set the Continuous shooting mode to High to get the advantage of the 8fps speed of the X-T1. As stated at the beginning, when this mode is combined with Continuous-AF, only the 9 phase detection points at the centre are available, meaning that you can’t move your Zone AF group that much. What’s more, 5×5 is not available because that would imply the use of some contrast detection points at the top and bottom.
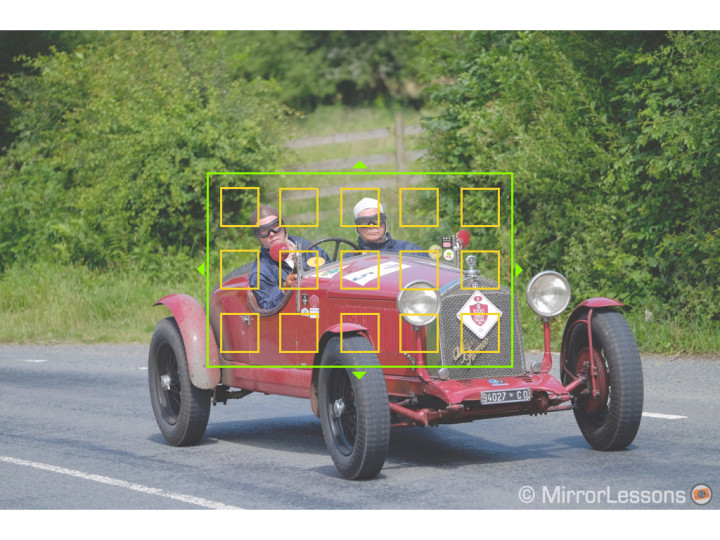
I tried a few shots using the Low continuous shooting burst. It is significantly slower but allows me to move the Zone AF group around the entire frame. I was curious to see how the AF would behave when dealing with both contrast and phase detection points. Overall the performance isn’t bad but I did notice less focus accuracy. The number of slightly blurry images was also higher.

A car is often easier to track as its trajectory on the road is more predictable. With the Mountain Bike race I attended in Llangollen, speed and direction are more random.
I found a challenging spot for the Zone AF. There the bikers had the opportunity to jump but not all of them decided to do so. The best spot was already taken by one of the official photographers so I had to find an alternative. I followed the bikers as they approached in a straight line, turned to the left, jumped, and then turned to the right again. All this was happening very fast and I had lots of elements in the foreground (grass, dirt, tape, poles). I set the 3×3 group and did my best to keep the bikers in my frame. Here the number of images in focus was definitely lower (I would say 50-50) because of the various elements in the foreground that distracted the camera. But I did get some nice shots.


The camera kept the focus despite the grass in the foreground, which shows that its behaviour is not always consistent.

Lots of elements around the biker can easily confuse the autofocus: people in the background, grass and other elements in the foreground.
Below you can see a simple example of one of the many changes in focus distance that occured in this particular spot.
[twentytwenty]


[/twentytwenty]
Quick Tip
If I were only interested in the jump, I could have chosen my composition, pre-focused on the area where they were jumping, used the camera in either Single-AF or Manual focus mode and used a slower aperture such as f/5.6. Shooting at 8fps in CH would have guaranteed the perfect shot.
In another spot, the bikers were riding along one of the last bends before the finish line. It was under a big tree which meant that there was also less light available. The camera had more issues handling the difference in light between the rider and the lighter background. When the sky clouded over a few minutes later, the light was more balanced and I got better results.

Finally, a word about low light and Single-AF. I had a good experience with Zone AF for The Retrievers concert I shot in Toronto with the X-T10, which has the same exact settings. The musicians were more dynamic – especially the lead singer. Zone AF gave me more versatility and I didn’t have to worry about moving the single AF point or focussing and recomposing. With a moving subject, Zone AF is definitely more effective especially when shooting at fast apertures.

Wide/Tracking: for specific situations
Wide/Tracking is a more advanced option than the Multi AF mode found on most Fuji cameras and the X-T1 prior to the firmware update. When set to Single-AF, this new Wide/Tracking mode behaves exactly the same way as the old Multi AF mode. The camera automatically detects your subject and chooses the AF points accordingly. The difference with this upgrade is that it now chooses the AF points from 77 areas instead of only 49. I admit I rarely use this mode. While it can be effective, there will always be a situation where the camera picks the wrong point and focuses on something else. I like to have more control and I think that Zone AF makes more sense.
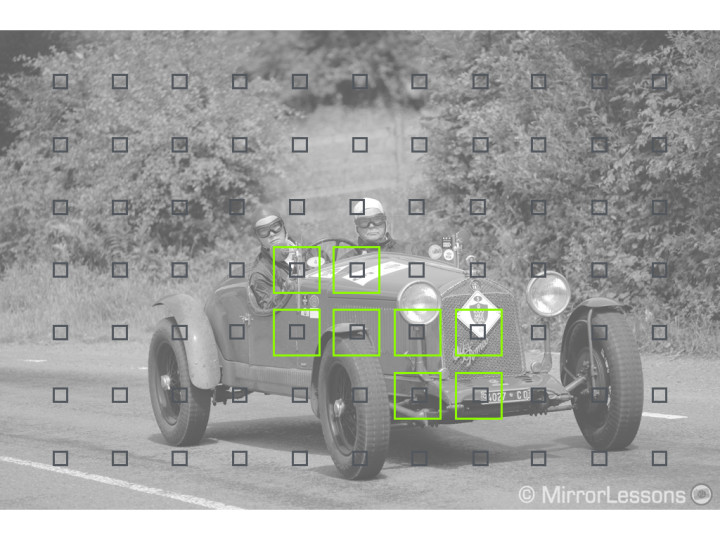
Wide/Tracking becomes interesting when using Continuous-AF. Here you can manually choose a starting AF point from the 77 points across the frame. Once the shutter release button is half pressed, the camera will start tracking the subject even when it is moving away from the initial point you chose.
Basically this option equates to 3D Tracking across the entire frame. But it has a limitation that I find quite frustrating: you can only use it on the entire sensor’s surface with the lower setting (3fps).
For fast action, it is more limiting not only because you capture fewer images per second but also because the lower burst gives you a slower frame rate in the electronic viewfinder. The EVF blackout that happens when the shutter opens/closes doesn’t last as long with the High mode and its 8fps. Unfortunately, if I select the latter, Wide/tracking will only use the central points, which is no different from Zone AF with a 5×3 group.
I tried the Wide/Tracking mode in different situations but in the case of the marathon and 1000 mile trial, it was more for my testing purposes. Otherwise I would not have used it because it wasn’t necessary. With the runners, I first used it to track them while they were running perpendicularly to me. The camera often focused on the background if the colours they were wearing weren’t showy enough.


This is the only sharp shot I had of this particular runner (out of 9 shots).
Then at the finish line, I started focusing on the right and let them slowly come toward the centre of my frame to see if the camera would track them appropriately. I had mixed results – the image below for example could have been a great shot.

With the 1000 Mile car race, I had better results but I did notice slightly less focus accuracy. More shots were slightly out of focus than with Zone AF.


I found the function more useful with the mountain bikers. At one of the final bends, I used the 18-135mm at a relatively wide focal length to capture them against the backdrop of the racing grounds. I started tracking when the subject was coming toward me from a distance. Then I simply panned and let him fill the frame at the centre without trying to keep him in a precise AF zone. I must say that this new tracking seems to do a good job of selecting the correct AF points on the whole frame despite the speed of the subject and me not always being precise with my panning. It also did well despite the subject being in a darker area. Then I decided to take more dramatic shots using the panning technique (slow shutter speeds). After several attempts, I switched to the CH mode and used only the central area because the 8fps burst allowed me to follow them better.


A tip about panning
Given the constant change of light, I had to use a mix of shutter speeds and apertures from f/5.6 to f/11. However, in good light conditions, you will often need to use f/11 or f/16. That way your depth of field becomes deeper, especially when using a short focal length and a non-fast lens such as the 18-135mm f/3.5-5.6. In fact, you could almost skip autofocus completely and use manual focus and the hyperfocal distance.
Wide/Tracking is useful when the subject has more unpredictable behaviour but it struggled to follow a bird in flight on a cloudy day. I took some shots of seagulls flying close to the pier on a windy day in the little town of Aberdyfi but most of my shots ended up blurry. I guess that the white body of the bird and the grey clouds behind didn’t provide enough contrast for the autofocus system to work properly.

The only times I really used a similar 3D Tracking function in the past on other cameras was for contemporary dance performances where it was difficult to predict the dancers’ next move. Usually the background is dark meaning there is less chance for the camera to confuse the subject with the background. Sadly, this is the only real world test I was not able to do with the new firmware 4.0. I did a similar test for my first article by using the single AF point, and the X-T1 behaved better than expected. I am confident that this new Wide/Tracking feature would prove to be useful in these situations as well.
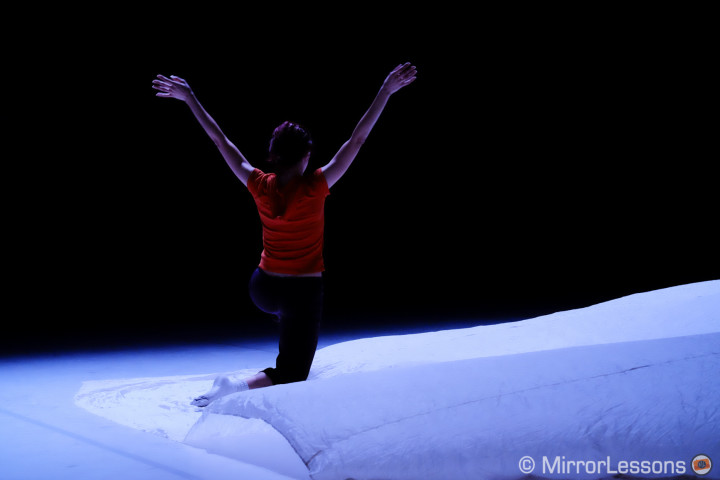
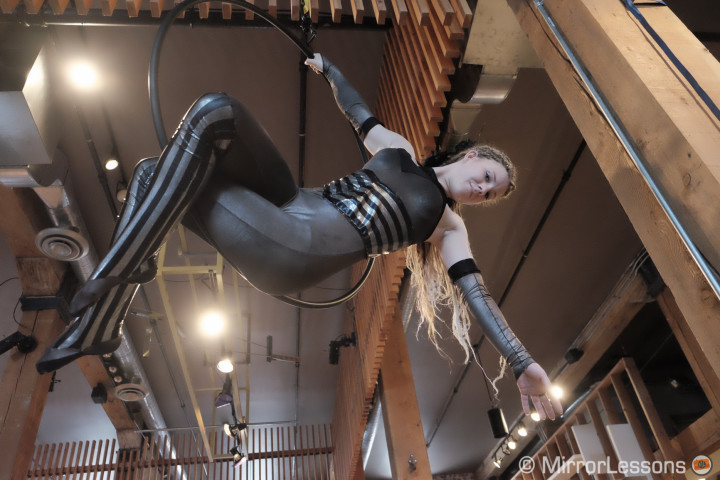
When I was using the X-T10 in Toronto, I had the chance to test the Wide/Tracking mode on some circus artists like the performer below. The performance was excellent, though admittedly the light conditions weren’t too bad.
Single AF point: still a relevant choice
After shooting with the X-T10 first, then the X-T1 and its latest firmware, I must say that I didn’t find any relevant improvement in Single-AF mode with a single AF point. My conclusion is the same as always: it is fast and works well but sometimes the camera won’t lock in situations that don’t seem to present any particular challenges. However a relevant improvement has been made to Fujifilm’s older lenses. For example, my XF 35mm 1.4 certainly focuses faster with less “breathing” than before.
Quick Tip
In Single-AF, I prefer to choose a small or medium sized single AF point. I find it more reliable than the largest size and it reduces the occasional chance of the AF lock failing.
Until firmware 4.0, my favourite settings for tracking a subject with the X-T1 were the following: Continuous-Af, High burst mode, single AF point at its largest size and at the centre of the frame. Unlike Single-AF, with Continuous-AF I found the largest size to work better.
The new features such as Zone AF and Wide/Tracking could lead us to think that the single AF point is now obsolete but the truth is that I still find it useful for certain situations. Let’s see a few examples.
The picture below displays one of the runners arriving at the finish line. In this particular shot, I had one distinct subject to track and with the use of a telephoto lens (XF 18-135mm), I could easily isolate him in my frame. It is a subject following a straight and predictable path and he is running towards me. I kept my single AF point at the centre and the X-T1 performed very well. I could have used Zone AF with a 3×3 group but here the single point can do as good a job as the Zone AF in terms of AF accuracy.

Another example where the single AF makes sense is with groups of people. In the examples below at the beginning of the marathon, I used Zone AF 3×3 and 5×3. While in some bursts it behaved quite well, on other occasions the camera often changed the focus between the different runners. It is more difficult to predict how Zone AF will behave while with one single AF point, the tracking would have been more consistent.
See below an example on how the AF switches between runner nb 270 and the one behind him.
[twentytwenty]


[/twentytwenty]
Another example is from the 1000 Mile Trial that I photographed a week ago. It involved capturing the car coming out from behind a bend from the right. I had a nice composition at 140mm with the car at the centre but also many elements like grass in the foreground. By using the Zone AF 3×3 group, the camera kept jumping between the car, the grass in the foreground and the grass in the background. This is because the 3×3 group was slightly too large to concentrate on the car alone. Here the single AF point would have been a better choice.
Finally let’s see a third example, this time in Single-AF with a static group of singers. I photographed the performance of the Côr Meibion Bro Dysynni male choir. When I wanted to frame only a few members, the single point gave me more precision. Zone AF once again worked fine but tended to switch from one member to another on occasion. Also, since there wasn’t any action involved here, I had time to set my single AF point within the frame.

Face and Eye detection: for portraits only
The final addition that came with the new firmware 4.0 was Eye Detection AF. It can be selected once Face Detection is activated. The camera will detect a face by showing a green rectangle around the face and a smaller green rectangle around the eye when it is detected. You can choose between Auto, Left eye, Right eye.

In our testing, we found that Eye detection works better when you manually set left or right rather than Auto, as the camera will often choose the wrong eye or not detect it. But sometimes even when selecting the right eye, it would go for the left instead. It can also confuse the eye with other parts of the face such as noses or lips. It is a good upgrade but can certainly be improved.

Personally I only find it useful for portraits and when the subject’s face fills a large portion of the frame. If the face is too far away, it will cease to work and the camera will stick to face detection.
You can also use face detection to track a person but personally I don’t find it more precise than single AF or Zone AF and with fast action it is simply useless.
Conclusion
The improvements brought by firmware 4.0 to the Fujifilm X-T1 are certainly worth the upgrade. It gives more options and more control to the photographer. That to me is the main benefit of the new Zone AF, Wide/Tracking and Eye detection features. Furthermore, it is free and that can only be a positive thing. Let’s hope that Fujifilm brings the same update to the X-E2 as well, since the sensor and the autofocus system is basically the same. Even though the X-T1 is faster and perhaps more comfortable to use for action, Zone AF or Eye detection could be useful to X-E2 photographers as well.
But all this aside, does firmware 4.0 really improve the speed and accuracy of the Fujifilm X-T1 as well?
As far as speed is concern, there is a good improvement in Single-AF with older XF lenses. AF accuracy in Continuous-AF is better when using Zone AF, particularly the 3×3 group. This is where I had the highest percentage of in-focus shots especially with the car race (average of 80%). However when there are some elements in the background or foreground that the camera can confuse with the subject, the hit rate decreases. Wide Tracking would be more useful if I could use the entire AF area in Continuous-AF and High Continuous shooting. Eye detection is a nice addition for portraits as long as your subject’s face fills a large portion of the frame.

We are not yet at high-end DSLR standards but this is an improvement that puts the X-T1 and X-T10 more on par with the other offerings on the mirrorless market.
When it comes to moving subjects, good autofocus performance is very important, and many mirrorless cameras now deliver excellent performance in this regard. You can check out our interview with 10 professional sports photographers that use mirrorless cameras on the job to find out more.
A special thanks to Kev Haworth of Hero Events Ltd. as well as the organisers of the other events we attended to perform these tests.
Haven’t yet updated your Fuji X-T1 with firmware update 4.0? You can do so by visiting the official Fujifilm website.

