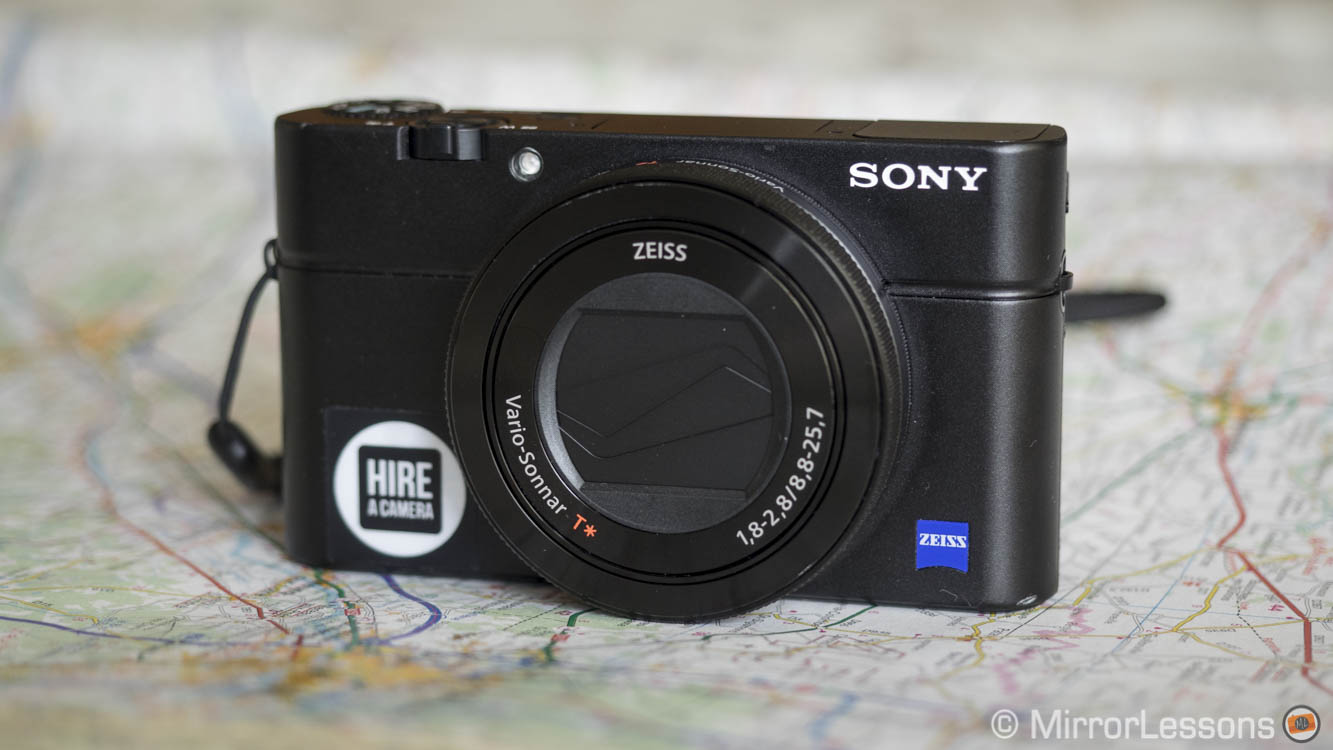
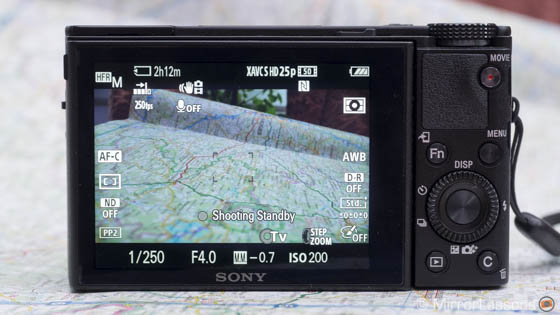
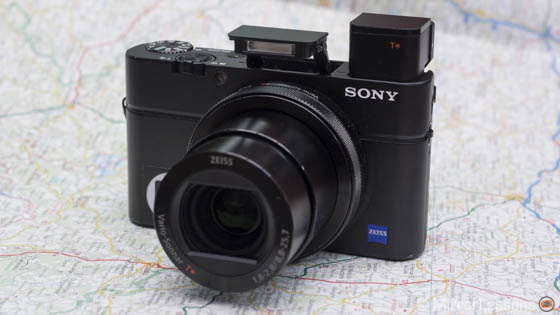
It seems that Sony enjoys putting amazing technology in as many of its cameras as possible. It doesn’t matter if it is a high-end or entry-level product, or if it is a professional interchangeable-lens camera or a compact camera. Sony likes to impress. With the RX100 series, they’ve done exactly that since the beginning. First it was all about creating a truly pocketable camera with a large sensor and great image quality. Then they managed to put a pop-up EVF inside that tiny body with the mark III. And now we have the fourth generation, which has inherited some stunning performance and video capabilities: 4K recording and slow motion up to 1000fps alone should be enough to grab your attention.
I spent the past weekend playing with this new camera thanks to HireaCamera. Though I didn’t have enough time with it to give you an in-depth review, my hope is to show you the potential of the RX100 IV, while highlighting the differences between the III and IV models. I should also mention that I’m quite familiar with the RX100 series, having used both the RX100 II and the RX100 III extensively. In a way, using the mark IV was like reuniting with an old friend.
Can the new RX100 IV be considered a game changer thanks to its video capabilities? Let’s find out!


Sony RX100 mark IV Main Specs
- Sensor: 20 megapixel 1.0 inch stacked CMOS Exmor RS
- Lens system: 8.8-25.7mm (24-70mm full frame equivalent) f/1.8-2.8 Vario-Sonnar T lens
- Weatherproof: None
- Internal Stabilisation: Yes (Optical Steadyshot)
- Autofocus: Contrast detection AF
- Continuous shooting: 16 fps (AF-S), 5,5 fps (AF-C)
- ISO Sensitivity: 125 – 12800 ISO (25600 with Multi-NR)
- Shutter Speeds: 1/2000 to 30 seconds, up to 1/32000s with electronic shutter
- Viewfinder: Popup XGA OLED 0.39 inch electronic viewfinder with 2,359k dots, approx. 100% FOV coverage and 0.59x magnification
- LCD Screen: 180° articulated 3″ LCD monitor (1,228k dots)
- Movie recording: XAVC S in 4K (up to 30fps), Full HD up to 120fps, High Frame Rate (250, 500, 1000fps)
- Built-in Flash: Yes
- Extra Features: WiFi, NFC, Panorama, Timelapse, HDR
- Dimensions: 101.6 x 58.1 x 41.0mm
- Weight: 298g (including battery and memory card)
[toc heading_levels=”3″]
Design and ergonomics
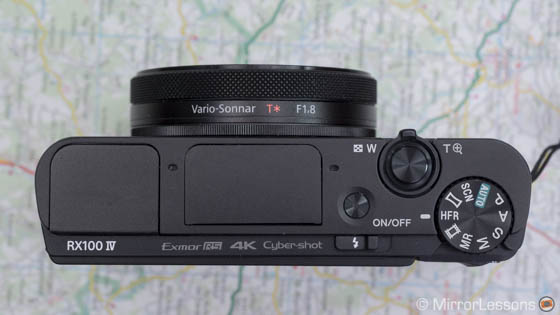
The RX100 mark IV has the same design as its predecessors. The dimensions and weight are the same.
It fits inside your jean pocket, which is one of the nicest characteristics of this cameras.
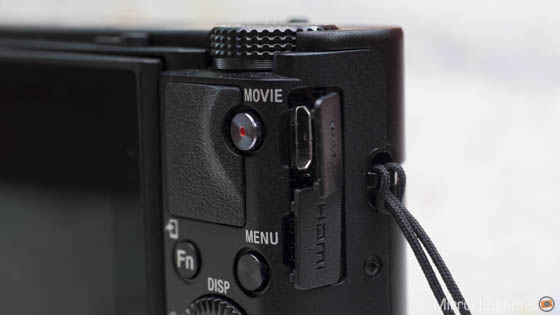
The grip is good, or as good as it can be for such a small camera. If you have big hands like me, you might find it difficult to operate with one hand. It can also feel slippery since there isn’t much to hold except a diminutive thumb grip on the rear.
About the grip
There are several solutions to enhance the grip of the camera. There is the dedicated Sony AG-R2 front grip or the Lensmate Richard Franiec’s Custom Grip. They both stick on the front of the body. The Gariz half case HG-RX100M3B and XS-RX100M3BR are also excellent, albeit a more expensive solution. The latter allows you to use the camera with the AG-R2 grip. Please note that I haven’t personally tested these accessories on the RX100 mk4. I have experience with the Gariz cases on other cameras and I would probably choose that solution if it were my personal camera.
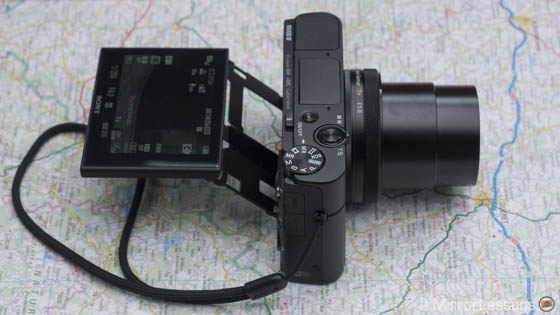
The build quality is good, though it isn’t weather sealed and some parts feel fragile. For example, the titling mechanism for the LCD screen feels delicate – a bump or a small fall could easily distort the little metal plate on the rear. The LCD can also be scratched quite easily, which is something I already experienced with the RX100 II as well. A good screen protector like the Expert Shield is a cheap and robust solution worth looking into. Finally, the HDMI and Multi port’s plastic seals can also break easily.
The camera has a dark metal finish, giving it a premium feel. The various buttons and dials feel solid and are easy to use. Only the control wheel on the rear is sometimes a little too sensitive.
Sony RX100 III vs IV: Design and ergonomics
The only update to the mark IV is the texture on the function ring and the presence of an HFR mode on the main dial.
Ease of use
The RX100 mk4 offers good usability considering that it is such a small camera. The Fn button is probably the most useful feature as it activates a Quick Menu with 12 different settings that you can choose and customise. There is also the C button that can activate your favourite setting. The control wheel will let you change your shutter speed, aperture or both depending on the shooting mode selected. You also have the MR mode (selectable from the main dial) that allows you to quickly access various settings you previously saved.
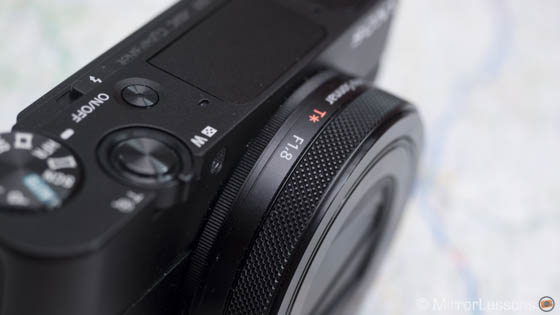
The lens has an electronic function ring that can be used for several things. By default, it will change your aperture but you can use it to zoom in/out or to change other settings such as shutter speed, ISO, etc. The ring is smoother and more precise to use than the one on the previous RX100 cameras. I used it mainly to zoom in and out between the main focal lengths (24, 28, 35, 50 and 70mm).
After using the camera intensively for a few days and constantly changing options and shooting modes, I must say that it isn’t the most straightforward camera to use out of the box.
It takes some time to figure out the best configuration for the various settings to which you want immediate access.
Also, the menu, like all Sony cameras, is a little bit confusing. That said, once you figure out the right customisation, the user experience definitely improves and the camera is very reactive.
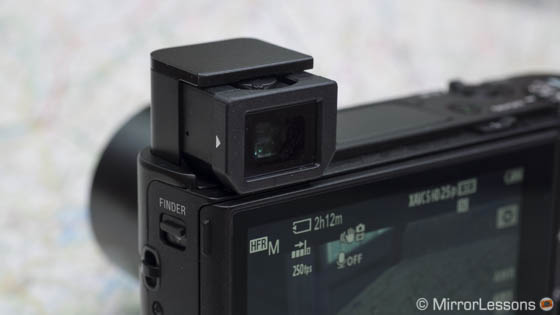
The pop-up electronic viewfinder is a nice addition and can prove very useful when shooting in bright sunlight or when you can’t see your composition very well with the LCD screen. You activate it in two steps, first by releasing the pop-up mechanism (button on the side), and then pulling it out towards you. It has an excellent resolution of 2,359k dots. However, it is very small so I only use it when I really need to. Often, when my glasses are against the EVF, I will accidentally push it in slightly, which throws the image out of focus, and I have to extract it again. You can use it to power on the camera when you pop it up and turn off the camera when you push it down. The second option can be disabled.
Sony RX100 III vs IV: Ease of use
The button layout and various functionalities are basically the same on the two cameras. Below you can find the most relevant differences:
- The EVF on the mk4 model has more resolution (2,359k vs 1,440k dots). You can also decide to deactivate the Automatic Power Off action when you close it, something that can be very annoying on the RX100 mk3.
- The function ring on the mark IV is smoother and more precise to use.
- The Zoom function on the ring now has three options instead of two: standard, quick or step.
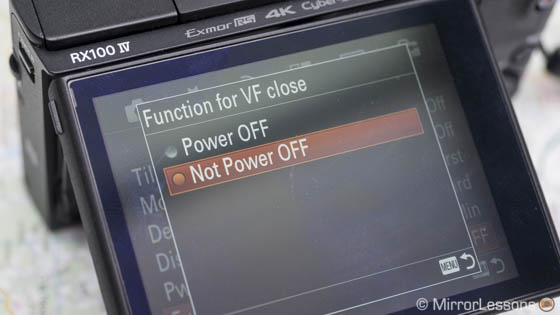
Image Quality
Like its predecessors, the Sony RX100 IV delivers great image quality: dynamic range and low light are excellent for a compact camera. The Raw files are versatile and allow for good shadow recovery. At the time of publishing this article, the RX100 IV Raw files aren’t compatible with Adobe software but you can download the free Raw Therapee app that will open them.
Update: Adobe just released the new Lightroom (2015.1.1) and ACR (9.1.1) versions that include compatibility with the RX100 mk4 and RX10 mk2 Raw files.

Low-light performance is also very good. The images are excellent up to 3200 ISO. At 6400 ISO, noise starts to become more invasive but the images are still usable. You get the best performance out of the Raw files but if you set Noise Reduction to Low, you can have good results with the JPGs as well.


12800 is the highest ISO sensitivity available in both JPG and Raw. You can shoot at 25600 by using the Multi-NR function that is only available in JPG quality. The camera takes 3 pictures in a row and merges them to get rid of noise. However you also loose a lot of detail.
A more advanced Auto ISO mode
The RX100 mark IV also incorporates a welcome feature in Auto ISO mode called ISO Auto Min. SS. When you are in Program or Aperture priority, you can now tell the camera the shutter speed at which it should start changing the ISO value. You can either select it manually or choose one of the five pre-configured options (slower, slow, standard, fast and faster). Standard is the reference and is a shutter speed the camera chooses according to the 1/focal length rule.
I never shoot in P mode but I found this function useful in Aperture priority, which is often my preferred mode. Now I can decide to keep a higher shutter speed (for example, if I have moving elements in my composition) or a slower shutter speed if I don’t have moving elements and want to take advantage of optical stabilisation to keep my image sharp with a lower ISO value (and therefore less noise). This also precludes the camera from being stuck at one shutter speed in A priority, which often happens with Sony cameras.
The colours can be very vibrant and saturated. Personally speaking, Sony’s colour palette isn’t my favourite but I recognise that it is also a matter of personal taste. You can choose between 13 different profiles (called Creative Style) and you can also use the Picture Profiles, which are primarily designed for video but work for stills too. (They only affect JPGs.)


The lens has an equivalent zoom range of 24 to 70mm and a fastest aperture that goes from f/1.8 to f/2.8. Overall the performance is good in terms of sharpness and distortion. You can get a nice shallow depth of field when focusing close at f/1.8 and f/2.8. However you will have less shallow depth of field when taking portraits.


While having a fast aperture zoom lens can be handy in low-light situation, I admit that I would have liked more telephoto reach on some occasions.
With this kind of compact camera, you are tempted to zoom in and look for details at a distance more often.
If you want a more in-depth look at the image quality, you can check out my complete review of RX100 II. As far as the sensor is concern, the image quality for stills is basically the same. Just note that the mark II has a different lens (more telephoto but not as fast).
Sony RX100 III vs IV: Image quality
It is not officially specified whether the RX100 mk4 has an updated sensor in comparison to the RX100 mk3. The specs are the same: 20MP of resolution and the same native ISO range of 125 to 12800. Personally I haven’t noticed any improvements regarding dynamic range or ISO performance. The lens is exactly the same as well. The mark III doesn’t have the ISO Auto Min. SS. function.
Below you can check out a direct ISO comparison between the RX100 mk3 and mk4. All Raw files have been developed with Raw Therapy without any noise reduction. The results are basically the same.

Click the image to open the comparison gallery.

Click the image to open the comparison gallery.
Autofocus and performance
The RX100 mk4 received a substantial continuous autofocus and continuous shooting upgrade. This is due primarily to the sensor technology that now incorporates a RAM (Random Access Memory) chip.
Technology: understanding the new Exmor RS CMOS sensor
Before proceeding further, I thought it could be interesting to do a recap of one of the primary new characteristics of the RX100 mark IV. The camera has a sensor called Exmor RS and its unique characteristic is a RAM memory (Sony calls it VRAM) stacked behind the image sensor. This allows the camera not only to process data faster but also to process more data.
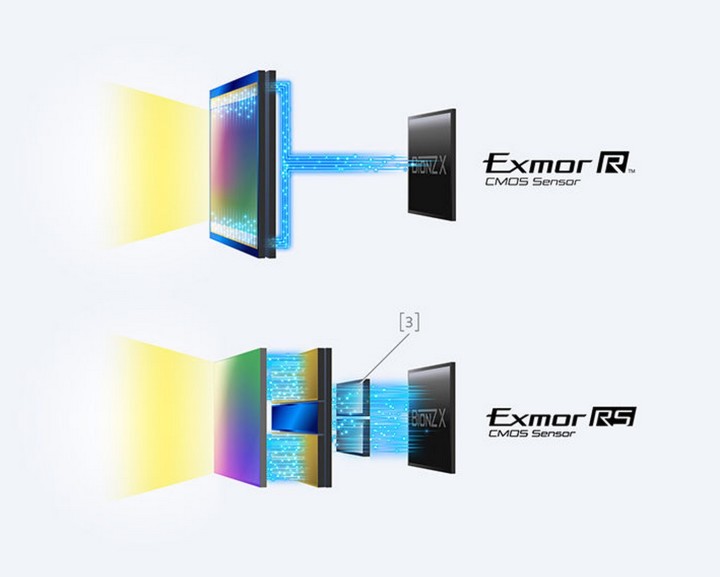
As a result the RX100 mk4 has some very interesting burst mode and buffer memory capabilities. The VRAM also allows for 4K video recording with full pixel readout, slow motion capabilities and an anti-distortion shutter to eliminate rolling shutter issues.
The RX100 mark IV has a contrast detection autofocus system with 25 areas. In good light conditions, it is fast and reliable even in backlit situations. Performance decreases a little bit in low light where the camera tends to hunt more before locking focus.
You can choose between Multi, central or flexible point. I often use the central point or flexible point if I need to move it around or require a smaller point.
There is also the option of using face detection, smile detection and eye AF. Smile detection fails at least 50% of the time if not more. I did notice an improvement in face and eye AF but I admit I rarely use this option unless I’m shooting a lot of portraits.
In video mode, Single AF is disabled. I’ll never understand why Sony cameras doesn’t allow for the usage of S-AF for video. The options therefore are C-AF or MF. Continuous AF is good, fast and reactive overall. Unlike for stills, it does struggle in backlit situations and can occasionally be slow at refocusing on another subject.
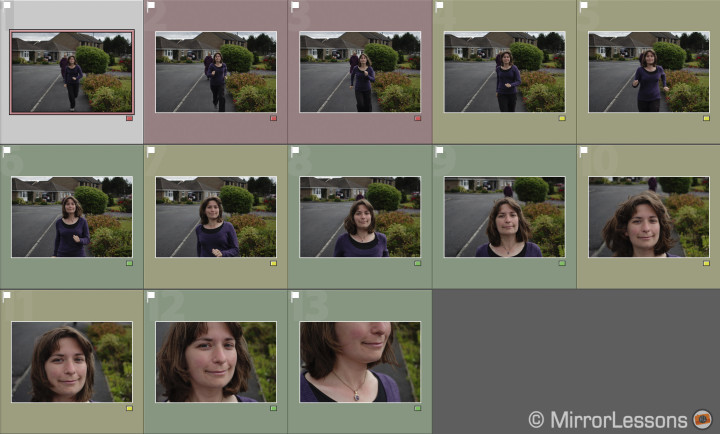
In Single AF mode, the camera can take 16fps which is quite a fast rate. In continuous autofocus, the speed falls to around 5.5fps which is still enough to capture some action while tracking the subject. You won’t get 100% focus accuracy and I found that it can take a few shots for the camera to bring the subject into focus. The performance is not bad but you don’t always get consistent results. Below you can see a series of test shots. Red indicates that the pictures are out of focus, yellow means slightly blurry and green means they are in focus. I also managed to get better results with more “green” pictures during a different burst but this is just to show you that it isn’t perfect.
Note about continuous shooting
The camera has two continuous shooting modes: normal and speed priority. With the latter, the focus will be locked at the first frame even if C-AF is selected.
Perhaps the most interesting improvement is the buffer memory (or how many shots the camera can take before it begins to slow down or stop taking photos). Note that a memory card with fast writing speed can help to maintain the burst a little longer. I performed a few tests to see how long the camera would shoot. Below are the results I found using a Lexar 400x SD card:
- Speed priority (16fps), Raw+JPG and Raw only: lasts almost 4s, then stops recording
- Focus priority (5.5fps), Raw+JPG: lasts almost 6s then slows down considerably (around 2.5fps) but keeps shooting
- Speed priority (16fps), JPG extra fine: lasts 8s, then slows down significantly, probably around 3fps but keeps shooting
- Focus priority (5.5fps), JPG extra fine: after 10s, slows down to around 3fps as well but keeps shooting
- Speed priority (16fps), JPG fine: lasts 4s, then slows down (probably around 6fps) but never stops. After 60 seconds, the camera was still shooting at the same speed.
- Focus priority (5.5fps), JPG fine: it never stops, the speed slows down slightly after 30 seconds. Past 60 seconds, the camera is still shooting.
From the results above, the most important aspect is the one I highlighted in bold.
In Continuous AF with focus priority at 5.5fps and quality set to JPG Fine, the camera never stops shooting and slows down just a little after 30 seconds. That’s quite an impressive accomplishment, and one that you usually see only on high-end DSLRs.
With speed priority, 16fps is pretty impressive. However I wish you could have the possibility to choose a slower speed like 10 or 8fps. You don’t always need such a high speed and as a result you can end up with a huge number of photos to select and deal with at home.
If you shoot Raw in continuous shooting mode, it takes a longer time to write the files to the memory card and by that time the camera won’t let you access the menu or the playback mode.
Below you can see two quick videos published on our Instagram channel that show the burst mode at 16fps and 5.5fps.
https://instagram.com/p/5mzTj_wePR/
https://instagram.com/p/5mz1QkQeAa/
The RX100 mark IV also has an electronic shutter and the option of a completely silent mode. You can get past the limit of 1/2000s with the mechanical shutter and shoot up to 1/32000s. If you add to this the built-in ND filter, the camera allows for exposures in up to 19EV light. In the limited time I had with the camera, I never found myself in such a situation.
The VRAM chip also allows the camera to have a faster pixel readout with the electronic shutter and incorporates a feature called anti-distortion shutter that prevent rolling shutter issues. It is very effective for stills but less so for video.
Finally, a word about the optical stabilisation. It works very well – I can easily take sharp shots at 1/8s and I found the limit to be around 1/3s.
Sony RX100 III vs IV: Autofocus and performance
Overall I didn’t find a substantial difference as far as the autofocus is concern. There is some slight advantage with the mark IV in Continuous AF and also face/eye detection have improved. But the real advantage of the mark IV is a faster continuous shooting speed especially in C-AF. The buffer capabilities are also impressive. The optical stabilisation gives you a similar performance on both cameras. The mark III doesn’t have the VRAM chip so won’t get the anti-distortion shutter as well.
Video: 4K
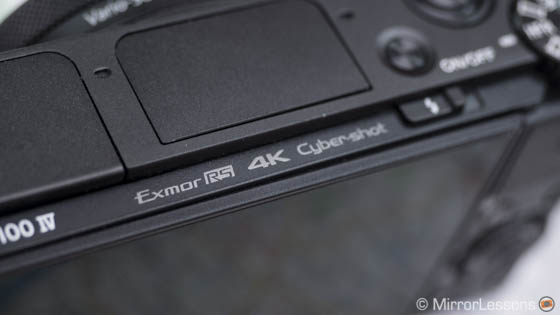
The RX100 mark IV can shoot 4k video up to 25fps (PAL) or 30fps (NTSC) with a bitrate of 60 or 100mbps with full pixel readout without pixel binning. The entire sensor’s resolution of 20MP (5472 x 3080) is read out, then downsampled to 4K resolution (3840×2160) or Full HD (1920×1080). This means that the 4K or HD footage is created out of the entire pixel area instead of getting rid of data in order to create the video file. This results in less moiré and aliasing artefacts.
In a real world environment, I found the 4K footage really nice. It is sharp and retains lots of details. I haven’t found any relevant issues concerning aliasing and moiré. However, there is a lot of rolling shutter.
The anti-distortion shutter is supposed to reduce it for video but it doesn’t seem to work as well as it does for stills with the electronic shutter.
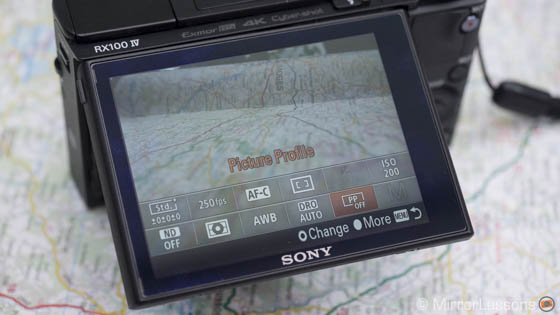
The camera includes different settings that can enhance the quality of your video footage. The most interesting are certainly the picture profiles that are mainly designed for video. They first appeared on the Sony A7s, and can provide softer gamma curves and a less saturated colour palette that suits motion footage better. With the creative style profiles for stills, images have more contrast and saturation and can look more digital. With the picture profiles, you can fine-tune saturation, shadows, highlights, colour phase, black levels and other settings. I also find it produces better results in terms of dynamic range. The RX100 mk4 can easily clip highlights. With the picture profiles, you can prevent that from happening.
You can also choose to shoot with the widest dynamic range possible by selecting the S-log2 gamma and the S-Gamut colour mode. It will give you a very flat image (no contrast at all) with the highest amount of data in both the highlights and shadows. You will need to colour grade your footage in a video editing software but that’s where you can get the best dynamic range out of the 4K video. Note that with S-Log2, the minimum ISO value available is 1600. That’s where the Built-in ND filter comes in handy, as you can avoid using an excessively fast shutter speed.
Note about the S-Log2 gamma
Keep in mind that while S-Log2 is a nice profile, I advise that you use it only if you have a specific colour grading style in mind and, even more importantly, some experience with it. You won’t be able to bring back the same look the standard profile can give you so don’t use it just to get better DR. Also, we are still talking about a 1 inch sensor and a compressed video file (H264). You do get some noise since it works at a minimum of 1600 ISO. If you post process the file too much, it will become very visible.
The other picture profile options can still give you excellent results without going to the extreme as you would with the S-Log2.
Below you can see a comparison with two grabbed frames from the 4k footage:
- Slide to the right to reveal the shot with the standard Creative Style profile
- Slide to the left to reveal the shot with the S-Log2 picture profile
[twentytwenty]


[/twentytwenty]
Below you can see a second comparison showing the S-Log2 version:
- Slide to the right to reveal the ungraded S-Log2 shot
- Slide to the left to reveal the graded S-Log2 shot (using the Lumetri panel in Premiere CC 2015)
[twentytwenty]


[/twentytwenty]
The optical steady shot also works for video and the results are good. Note that the movie steady shot is a mix of optical and software stabilisation and can result in a “jello” effect. There are three settings to choose between: intelligent, active and standard. The first two are more effective with action while the latter is better for stable hand-held shots.
Below you can watch a short video shot in 4K at the Carnival parade in Aberystwyth. Most of the shots were recorded with a custom picture profile. (I chose the Movie gamma and Movie colour mode.) You will notice some rolling shutter and clipped highlights. That said, the overall dynamic range of the camera isn’t bad especially when dealing with a darker street and a brighter background. After all, it remains a 1 inch sensor and records a compressed H264 4:2:0 video file. All the shots were taken hand-held. Also note that when zooming in and out during recording, the zoom speed is automatically switched to slow for smoother results.
Note about overheating:
While shooting in 4K, several times an overheating warning displayed on the LCD screen (a small orange icon) but the camera never stopped recording. In 4K, movie recording is limited to 5 minutes which I believe is to circumvent this very issue. I wonder if the warning is only a safety precaution or if recording could suddenly stop after using the camera extensively. The camera does indeed get warmer when recording 4K.
Indoors, the amount of available light will of course affect the image quality. Up to 1600 ISO, the images are clean. Below you can see a 4K grabbed frame of Heather drinking her tea inside a coffee shop. There is some slight light coming in from the main window but the location wasn’t very bright. The image is very clean.

Of course in darker conditions, noise will be more present but up to 3200 ISO, I find the footage more than usable. At 6400 ISO, noise starts to become more invasive and at 12800, you will also get some flickering with artificial lights.
The RX100 mk IV also has two dual rec functions. The first is called “Dual Video Rec” and allows you to save both an X AVC S and MP4 file or an AVCHD and MP4 file. The other mode is called Dual Rec and allows you to save a 17MP JPG anytime while recording. You just need to press the shutter release button and the camera writes the JPG file without interrupting the video footage. However this function seems to have some bugs that I hope will be fixed with a firmware update. The RX100 IV user manual states that “Dual Rec may be unavailable depending on the recording setting or mode setting” which is kind of vague. The only setting that actually allowed me to record a still picture while recording a movie was Full HD. Actually it took me ages to find out which settings was disabling this feature. Then, after going back and forth in the menu and starting to forget which settings I had changed, the Dual Rec function started to work. But who knows what setting in the endless menu triggered it.
This a good example of how the menu and functions of this camera can be confusing and frustrating.
If an option is not available for a certain setting, there should be a message that tells you which setting to turn off to activate the desired feature. As a matter of fact, I am not sure how the “Dual Video Rec” function can be useful. The only logical purpose would be to record both a 4K clip and a Full HD clip at the same time, but with 4K selected, it wouldn’t work. I am curious to see if other users had the same problem with these two functions.
As for audio, the camera has a built-in stereo mic that will do a decent job. You can manually set the recording volume. There isn’t an audio input socket so for better quality you will need to rely on an external recorder.
Sony RX100 III vs IV: Video
The RX100 mk3 can record video up to Full HD and 60p. There is no full pixel readout, no 4k option and no picture profiles as well as others useful video features such as timecode. Both cameras have a clean 4:2:2 8bit HDMI output.
Video: Slow Motion capabilities
Perhaps the most stunning feature this camera are its slow motion capabilities.
Just 5 or 6 years ago, 500 or 1000fps were characteristics you could only find on very expensive cinema cameras. Today, a small camera like this one can handle the same super fast frame rate. While image quality certainly differs, the fact that even top professional features are now available on consumer products is a sign of how fast technology is evolving.
There are two ways to record slow motion videos with the Sony RX100 IV. The first method is to use the normal video mode, set the File Format to XAVC S HD and choose the highest frame rate available. If you are in PAL mode, it will be 100fps. If you are in NTSC mode, it will be 120fps. The camera records video with the usual limitation of 29.59 minutes per clip. To get the slow motion effect, you will need to interpret the footage as 25 or 30 fps in your video editing software. The camera won’t do it by default and will record a 100/120fps video file with sound and not a 25/30fps video file.
This is definitely the solution that will give you the highest quality. The camera records natively in Full HD (1920×1080) and you can also choose between a bitrate of 60 and 100mbps. Sharpness is excellent, and moiré and aliasing are well contained.
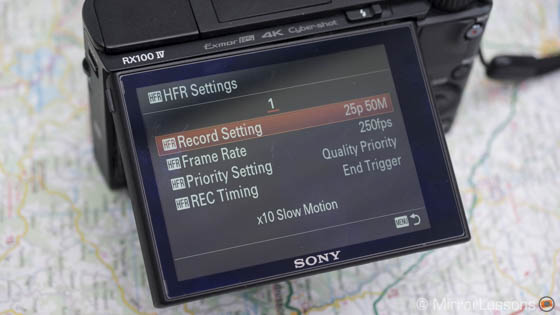
If 100 or 120 frames per second are not enough, you can use the HFR (High Frame Rate) mode and choose between 250, 500 and 1000fps. The camera has a dedicated HFR Menu where you can select different settings:
- Record settings: you can choose the final frame rate output, which means the frame rate to which the camera will conform the slow motion footage. You can choose between 25fps and 50fps. To get the slowest motion possible, set it to 25. In NTSC, it is 30 or 60fps.
- Frame Rate: choose between 250, 500 and 1000fps in PAL or 240, 480 and 960fps in NTSC. The higher the number, the slower the footage will be.
- Priority setting: Quality or Shoot Time priority. The former will record for 2 seconds while the latter will record for 4 seconds. With Time priority, the resolution decreases.
- REC Timing: choose when to start or finish recording when you press the movie record button (more on this below).
The HFR menu also tells you how much slower your footage will be according to the options selected.
The final output of the HFR video files are in Full HD (1920×1080). However the actual resolution at which the camera records the different frame rates is lower. This means that the footage is then upscaled to Full HD. Below you can see the various resolutions according to the settings selected:
- 250fps: 1824×1026 (Quality), 1676×566 (Time)
- 500fps: 1676×566 (Quality), 1136×384 (Time)
- 1000fps: 1136×384 (Quality), 800×270 (Time)
250fps is of course the best option when it comes to quality and most of the time it can also be more than enough to get nice slow motion footage. Resolution doesn’t decrease too much which means that sharpness is maintained. There is some moiré but it isn’t too invasive. On the other hand, 1000fps will give you lots of aliasing and moiré. If you shoot in Time priority, the camera basically upscales more than twice as much to conform it to Full HD.
Below you can see a short video that shows the different frame rates and qualities. You will also note that the higher the frame rate is, the more the camera crops the sensor.
When you set the main dial to HFR, the camera is in movie mode and you can choose your settings manually, such as aperture, shutter speed, ISO, ND filter and even the Picture Profiles. Then you press the centre button on the control wheel and the camera enters in HFR stand-by mode. Once there, you cannot change your settings anymore – you can’t even zoom in or out. Manual and autofocus are also disabled. If you want to change another setting, you have to press the centre button again and exit stand-by mode. This is annoying especially for focus accuracy when shooting small subjects such as insects. The best way is to use manual focus, leave the peaking activated and once in stand-by mode, move your body back and forth with the camera to get the subject in focus. Peaking remains available in the live view but isn’t always accurate. The mid level works the best in my opinion.
The option you select for REC Timing can also be crucial. If you select Start, the camera will load the 2s or 4s clip to the virtual memory once you press the movie recording button, then writes the file to the memory card. If you choose End, the camera constantly pre-loads the last 2s or 4s you see in the standby mode live view. So when you hit the record button, the camera will automatically write the last 2s or 4s onto the SD card. The End mode is definitely better if you want to catch unpredictable movements such a butterfly flying away.
Overall the quality of the HFR modes are good considering the slow motion capabilities. It should also be said that no other camera in this price range can do as much. Come to think of it, not even expensive camcorders and cinema cameras are capable.
Keep in mind that quality can also decrease according to the exposure setting limitation when shooting at higher frame rates. For example, at 1000fps, the minimum shutter speed is of course 1/1000s, and the same thing goes for the other speeds (1/250s and 1/500s). That takes away a lot of light. If you shoot a tiny object, you might need a slower aperture to have more details in focus and as a result, you will need to raise the ISO to 800 or even higher, even if you are outside in on a cloudy day. Of course, the higher your ISO, the more noise you will get, especially at 500 and 1000fps.
Another thing that I noticed is that the dynamic range decreases and highlights can be clipped more easily. It is better to find a good combination with the picture profiles instead of using the creative style profiles, and to underexpose a little. S-log2 is available but the minimum ISO value becomes 1600 and you will encounter more noise. Finally, keep in mind that the HFR won’t give you good results in artificial light because the frame rate doesn’t match the light frequency. As a result you will have lots of flickering.
Below you can see a 3 minute video with various shots taken at 100, 250, 500 and 1000fps. I used the Quality priority setting, which is in my opinion more than enough and maintains higher quality. (For example, 2 seconds shot at 1000fps will give you an 80 second length video file at 25p.) Also, the amount of time I have to wait between one shot and the next is reduced. You can’t shoot two videos one immediately after the other because each time you will need to wait for the camera to write it to the SD card. With Quality priority (2s), you wait less.
Most of the time I found 250fps to be enough to have beautiful slow motion footage. 500 and 1000fps are good for specific subjects. There’s little doubt that observing a bee flapping its wings at 1000fps is a beautiful thing!
Sony RX100 III vs IV: Slow Motion
The RX100 mark III can only do 50 or 60fps in normal HD mode which is fairly poor compared to what the mark IV can do.
Other features
Due to my limited time with the camera, I couldn’t do an in-depth test of the other features such as Panorama, Bracketing or Wifi. However, I have compiled a list of the most interesting features:
- Wifi/NFC: you can remotely control your camera from your smartphone and save JPGs to your mobile device. It only works for stills.
- Intelligent and Superior Auto: the first automatically chooses a scene (example night or landscape) while the latter is designed for low light or backlit situations.
- Sweep Panorama: you can’t manually set your exposure and can only choose the angle. Images are saved in JPG format.
- Bracketing: you can choose from 9 frames at 1Ev to 5 frames at 3Ev. You can choose between Single and Continuous bracketing. With the former you have to press the shutter button for each photo while with the latter you press and hold the shutter button. You also have WB and DRO bracketing.
- Selfies: if you flip the LCD screen up by 180°, the camera automatically sets off a self timer of 3s.
- Auto HDR: you can merge several different exposures (between 1Ev and 6Ev) into one single JPG. No Raw option available.
- Picture Effect: some fun effects such as Toy Camera, Retro, Partial colour, etc.
A final word about the battery life: when dealing with still images, the performance isn’t bad. It can last you a day as long as you don’t use continuous shooting much.
However as soon as you start to record 4K videos or HFR videos, it will decrease very quickly.
Here is a concrete example: after wandering around the town of Aberystwyth for two hours shooting a mix of stills (70), 4K footage (12 clips) and HFR video (15 clips), the first battery was dead. So two batteries are the minimum to survive one day. I also brought the Anker Mini charger with me. Since the camera can be charged via USB, I used it while driving back home to recharge one battery. In a half an hour, it recharged by 60% more or less.
Sony RX100 III vs IV: Image quality
The RX100 mark III has the same extra features as the mark IV. The battery life is better mainly because it has a less powerful processor that consumes less power. With bracketing at 1Ev, the max amount of photos is 5 instead of 9.
Price and the other RX100 models
Perhaps the only truly negative comment I can make about this camera is the price: at nearly $1000, it is very expensive for a compact camera. Certainly we can argue that it incorporates a lot of features that even more expensive cameras don’t have. That said, 4K video is not essential unless you want to use this camera for some specific shots on, say, a drone for example. Slow motion is nice but if you don’t have specific ideas in mind, it is one of those features that you might wind up not using at all once the first days of excitement have passed.
Finally, there are the other RX100 cameras. The mark II and mark III models are still on the market and cost less. If you don’t care about video or even an EVF, the RX100 II is a good deal. The RX100 III will give you the built-in EVF, a tilting screen and the same image quality at a lower price.
Conclusion
The RX100 mark IV is very close to perfection. It offers so much in such a tiny little body that it is almost overwhelming. The image quality for stills hasn’t improved but is still the best in its category. The 4K footage is excellent but suffers from rolling shutter, while HFR/Slow motion is without a doubt the most interesting feature out of all the new additions. Add to this the improvements made to Continuous AF, Continous shooting and the buffer capabilities, and the RX100 IV becomes a winner in almost any situation.

On the negative side, it is expensive and very small, which can be both positive (its pocketable) and negative (the grip and controls aren’t the best you can find). I also missed a longer telephoto reach on occasion. Personally, I would only recommend this camera for its video features. Otherwise, the RX100 mark III is as good and is less expensive. And while the mark IV has better continuous shooting capabilities, this isn’t the kind of camera you’d buy just for shooting sports anyway.
 What I like about the Sony RX100 mark IV:
- The most advanced “Pocketable” camera
- Great image quality for a 1 inch sensor
- Stunning buffer and continuous shooting performance in focus priority
- Excellent 4K video
- Stunning slow motion capabilities
 What I don’t like about the Sony RX100 mark IV:
- Expensive for a compact camera
- The telephoto reach is not enough for this kind of camera
- Significant decrease in quality when using 1000fps
- Battery life runs out very fast when shooting video
- Some parts like the LCD screen are fragile
