One of the criticisms or hesitations many users have about the Micro Four Thirds system is the lack of shallow depth of field in comparison to APS-C and full frame sensors especially when using wide angle or standard lenses. While the physical difference in sensor size will always present an obstacle, there are various solutions to help you achieve more shallow depth of field with your Olympus or Panasonic camera.
The first and most obvious method is to take advantage of your lens’ characteristics: fast prime lenses with a 1.8, 1.4 or even 0.95 aperture like the Voigtlander Nokton series are useful, and it helps to focus as close to your subject as possible (check our our first article about m4/3 and DoF here). Another solution is to use a telephoto prime lens but this might not suit everyone’s taste.
But what about having an attractive shallow depth of field with a wide angle of view? Is it really impossible?
Well, actually, it isn’t impossible and some of you might already be familiar with the technique mentioned in the title of this article. It is called the Brenizer method and it is nothing new. Actually, many articles about the topic have already been published by the most popular online magazines and blogs (I particularly recommend that you read the piece on Photography Life). It is used by many photographers with various cameras including full-frame cameras.
As for me, I’d heard about this technique before but had never taken the time to experiment with it until now. Out of all the mirrorless systems out there, I felt that Micro Four Thirds could certainly be the ideal candidate to a reap the benefits of this method, as it would help to surpass the limitations of the system. So, without further ado, here are my findings and feedback about this technique.
[stextbox id=”text-box”]
Gear used for this test:
- Olympus OM-D E-M1
- Olympus 45mm f/1.8
- Olympus 75mm f/1.8
- Photoshop CC 2015
[/stextbox]
The Brenizer method: what is it?
The Brenizer method is essentially the same technique as the well know Panorama function: you take multiple images and tie them together in post production to create a larger image than the single image your camera can take.

With Panorama, you usually take a sequence of shots by panning left to right or vice versa. You can also take a sequence on multiple levels to create an even larger file not only in width but also height. The latter is often referred to as a Gigapixel Panorama because the final composition can be a 200/300 MP image. There are many software programs that can automatically combine the different shots together. For this article I used Photoshop. Most mirrorless cameras today can also take in-camera panoramas and output a JPG file as a result but for the Brenizer method that specific camera feature doesn’t interest us.
While being similar, the Brenizer technique has a different aim: you build a series of images around your subject. The goal is to have a final composition that has a wide angle of view and a shallow depth of field.
[stextbox id=”text-box2″]
Origins: who is Ryan Brenizer?
Ryan Brenizer is a long-time experienced photo-journalist and wedding photographer based in New York City. While it is difficult to assess if he was the very first to come up with this technique, he was the first to use it intensively for his wedding work and to inspire many other photographers to apply the same method. This is why the technique has been named after him. You can see Ryan’s work on his official website.
[/stextbox]
The Brenizer method: how does it work?
First you are going to need a fast standard or medium-telephoto lens. You want to use it at its fastest aperture to get the narrowest depth of field possible. Second, you have to find an appropriate location and try to imagine your final composition. Let’s see our first example using the Olympus 45mm f/1.8.
We went to Nant Gwernol and found an appropriate spot with some nice trees and water flowing in the background. There were also some interesting rocks and other natural elements that helped to give the final image a good 3D appearance.
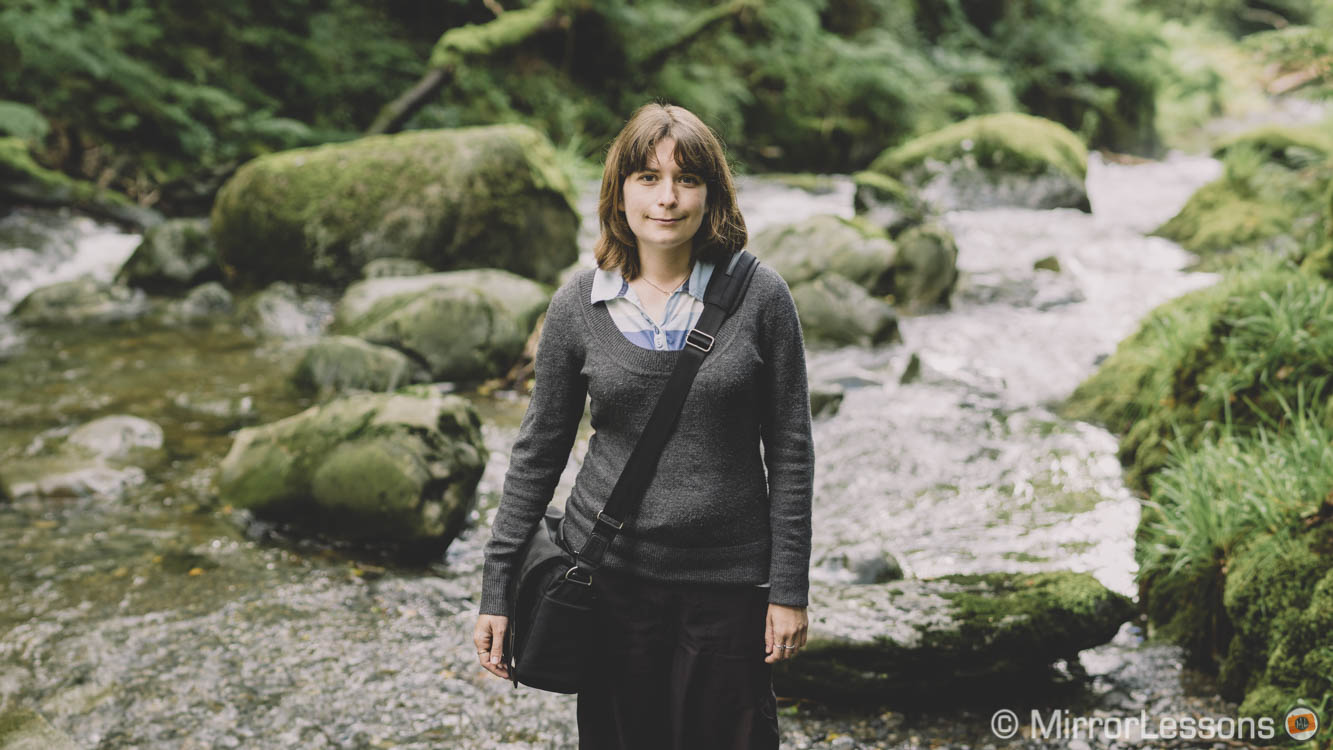
I started by taking my reference image, which is an upper-body picture of Heather shot at 1.8. I used full manual exposure, manual white balance and manual focus with the help of the magnification assist. That way I was sure that my settings wouldn’t change between one image and another.

My reference shot
From there, I took several shots around Heather without changing any settings or the focus distance. I started to take shots to the left of my reference image, then right, then up and down. Is it important that your subject remain as still as possible. You basically take 3/4 rows of images that you will merge later on. Also you don’t want the different images to overlap too much (no more than 40-50%), otherwise the software will have more difficulty merging them together. Being my first experience with this technique, I took a lot of shots for each composition. In this example the total amount was 73 Raw files.
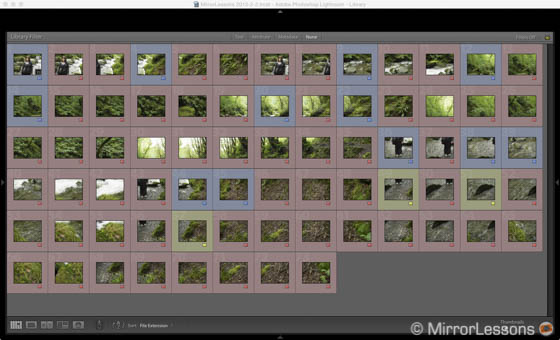
However I learned that too many shots can make it difficult for Photoshop to correctly stitch the Panorama. While working on location, taking more shots is helpful because you then have more versatility in choosing what to exclude and what to keep. But this also means it will take more time in post-production to figure out which shots to eliminate from the final selection. I found out that even one or two extra shots can cause Photoshop to merge the images incorrectly.
So after much trial and error in front of my computer screen, I finally came up with the right number of images for this example: 15. As you can see, I decreased the number considerably. I realise now that I didn’t need that many shots in the first place but this was all part of the learning process.
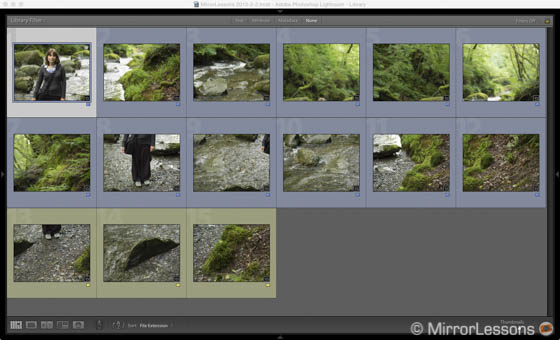
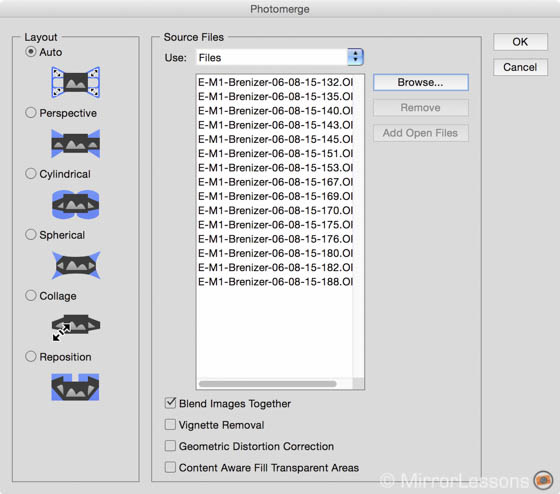
Note that it doesn’t matter if you don’t take the shots in the order of the final composition starting from the top left. Photoshop always manages to rearrange them correctly. To merge the images, you go to File/Automate/Photomerge. A window opens and you can import the images and select different options. Now here is another important step to understand: there isn’t a standard setting that will always work. In my experience, I got the best results by leaving the Layout to Auto and ticking the “Blend images together” box. Sometimes, the Perspective or Reposition layout worked better. It is, as I mentioned before, a matter of trial and error to understand what works best. Often it will differ from one panorama to another.
Depending on the number of images you need to stick together, it can take some time for the software to render the Panorama especially at the beginning when you try to merge as many shots as you can. A good tip here is to work with the JPG versions first, then once you have your final selection, you can use the Raw files. The more powerful your computer is, the faster Photoshop will work. I have a MacBook Pro Retina with an Intel Quad Core processor and 16GB of RAM but when merging more than 30 shots, I sometimes had to force quit Photoshop and re-start it.
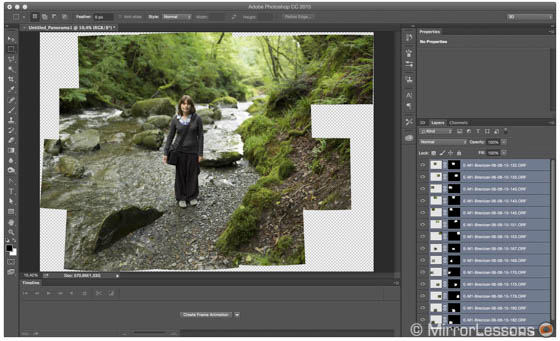
Once the shots have been merged, you will have to crop to get rid of the superfluous areas at the edges of your frame. Once you’ve done this, you can make the final adjustments to colour and contrast (here I applied one of Rebecca Lily’s presets) and voilà, you have your final Brenizer image.

16mm f/0.65 (simulation)
You might have noticed that I indicated two focal lengths and two apertures below the Brenizer shots. The first is referring to the lens/aperture used and the second is the “emulated” lens in the final panorama. I didn’t input the second result casually but rather thanks to Brett Maxwell’s calculator that I found via the article on Photography Life. Brett is a fan of the Brenizer method and created this calculator to find the equivalent focal length and aperture your final panorama image is emulating.
If you use less images, you might end up with a result that is not so far from lenses that already exist on the market. For example below you can see the same Panorama but I used 12 images instead of 15. The simulated focal length is very close to the Nokton 25mm f/0.95.

25mm f/1.0 (simulation)
Below you can see another panorama example with the 45mm.

21mm f/0.8 (simulation)
The Brenizer method: trial and error, tips and tricks for better results
With my various attempts I got different results depending on the focal length used, the specific location, the distance from the subject and the amount of images used for the final merge.
Certainly some of the issues I had were related to the lack of experience I have with this technique, which I only began using recently. It takes time and numerous attempts to figure out the best way to do it. So below is a list of different things I learned that may prove useful to someone wanting to experiment with the Brenizer method as well.
- Be patient: it takes time to capture the different shots you need, and it takes even more time to merge them correctly. This is not a quick technique especially at the beginning.
- Distortion and perspective: depending on the number of images you want to merge, the final shot might have distortion and can give your subject an unpleasant look. In this case I find better to merge fewer images and to avoid complete body shots of your subject.

- Distortion on architectural elements: some architectural elements can be a problem if you try to merge too many shots. You either try to find the perfect number of images to stitch together or simply use fewer of them.

- Choosing the right focal length and the right reference image: I got my best results with the 45mm focal length. I also tried one with the 75mm. However if you are too close to your subject when shooting with a telephoto lens (such as a headshot) you can have a harder time taking multiple shots without missing a portion or overlaying too much. With my 75mm example, I wasn’t able to stick more than 3/4 images together and I didn’t get the result I wanted. Also, being so close to my subject, the stitching produced lots of distortion that was more difficult to remove.

50mm f/1.2 (Simulation)
- Beware of merge errors: even if a final Panorama looks okay, you could find some errors by looking closely at your image. In the example below, one of Heather’s hands is missing a finger. To fix this, I imported the single shot into the stitched Panorama, isolated the hand on a separate level, then used a mask to merge it properly. Also check your subject’s face to make sure that there isn’t anything weird thing going on.
[twentytwenty]


[/twentytwenty]
- Use only very fast apertures: as I mentioned at the beginning, you need fast lenses to get relevant results. The 45mm 1.8 or the Lumix 42.5mm 1.7 are not expensive and can work well. The Nocticron 42.5mm f/1.2 or the Nokton 42.5mm f/0.95 would be even more interesting for this method but they are more expensive. Anything slower than f/2 won’t give you exciting results. For example, the image below was taken with the 12-40mm Pro at 2.8 and 40mm. The results I got is basically the equivalent of the M.Zuiko 17mm 1.8..

17mm f/1.8 (simulated)
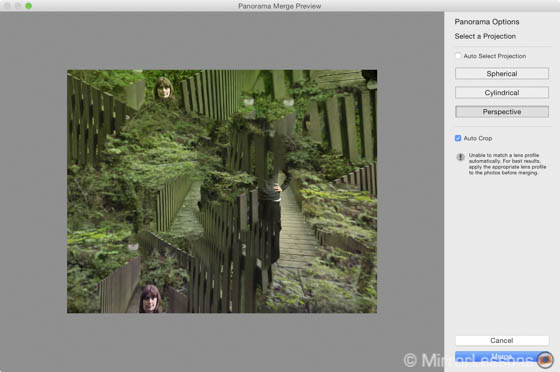
- Since Lightroom recently implemented Panorama options, I tried using it to see how well it would work. With one shot I got good results, but often I got a complete mess like the one below. However it could work for some “abstract” projects I guess!
Conclusion
Is the Brenizer method worth using?
Well it depends. It certainly requires a lot of work from the initial shoot to the post-processing stage. You want to experiment with it before using it regularly, especially if you are thinking of implementing the technique into some of your work.
The aspect I found the most difficult is to achieve the composition you envisioned at the beginning. In my example, I had to cut out a lot of images around my subject to be able to achieve a correctly stitched panorama which means that I ended up with a narrower angle of view. I didn’t publish a few extra examples because the results gave me an equivalent focal length/aperture that was close to lenses that are already available for the MFT mount. Also distortion and perspective can be difficult to handle.
But when you get it right, it certainly gives you an interesting result. It isn’t a permanent solution to have more shallow depth of field but it can be a nice technique to use sometimes for specific projects or ideas.
Are you already familiar with the Brenizer technique? Do you have any suggestions or questions? Feel free to leave a comment below.
