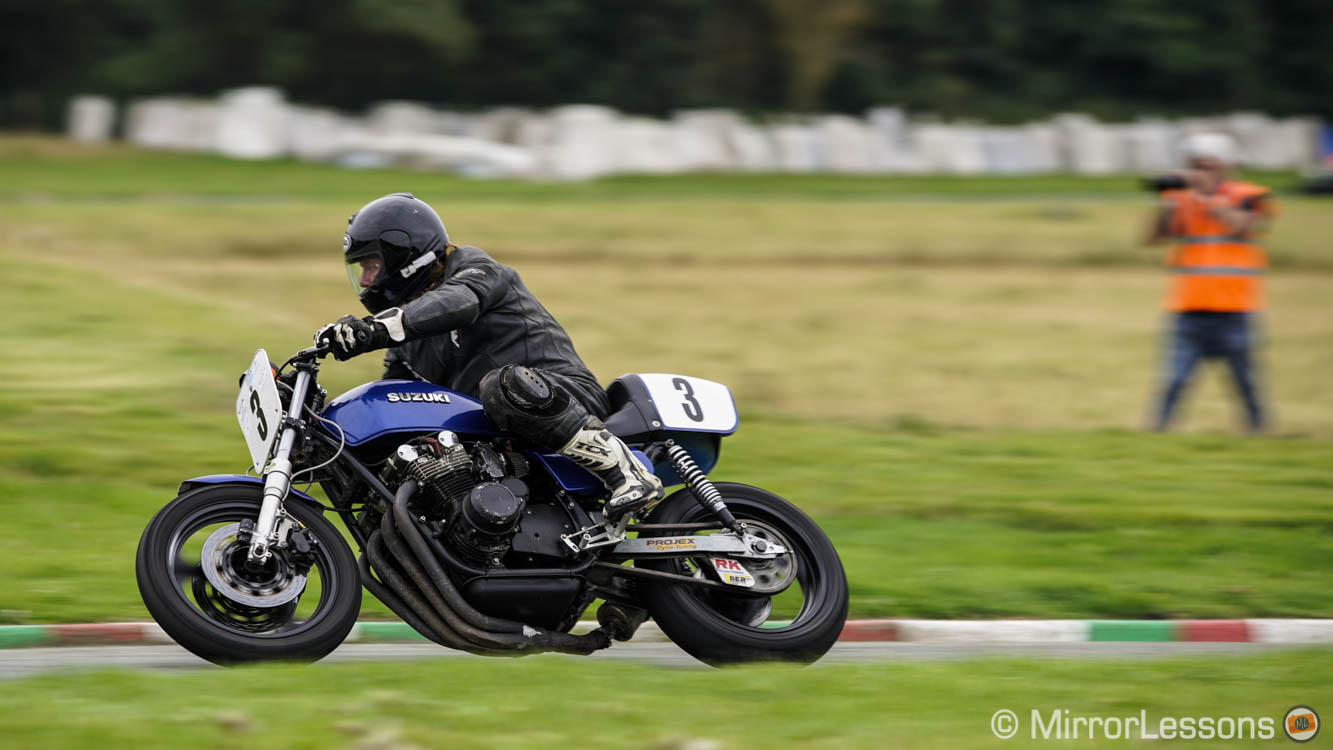
Cover photo shot with the A7r II and Sigma 150-600mm f/5-6.3 C
More than a month has gone by since I started using the A7r II intensively. My review is still a “work in progress” because there is a lot to say about this camera. Given the interest in and enthusiasm for Sony’s new flagship model, I decided to take my time to gather as much information as possible. I also decided to split my findings into several articles rather than publishing only one so as to avoid making the article too long.
Our Sony A7r II coverage:
- First Impressions (Sony’s press event)
- Lantern Parade (Low-light image gallery)
- Bird Photography (with the Sigma 150-600mm EF mount)
- Zeiss Milvus (Sample images)
- Voigtländer VM lenses (12mm f/5.6 & 21mm f/1.8 – 35mm f/1.7)
- Complete Autofocus Test (FE, A, EF lenses)
- Compressed vs uncompressed RAW
- Complete Image Quality test and final conclusion
If I had to pick a favourite feature on the A7r mark II, it would be the autofocus system. It is not just a question of speed or accuracy but its ability to work with third-party lenses. Adapting lenses from other brands to a different camera body has always been a possibility but up until a few years ago, it was rare if not impossible to have good autofocus performance. The rapid development of advanced adapters soon allowed mirrorless camera users to use autofocus but the performance remained sluggish.
In my first impressions article, I wondered whether the A7r II could become the first “real hybrid camera” to work seamlessly with both native and third party lenses. My opinion after spending nearly two months with the camera is that yes, it can, as you’ll discover below.
In this article, I begin by covering my experience using native FE lenses, the most logical point of reference for testing the AF performance of the A7rII. Then I move on to Sony A-mount and Canon EF mount lenses.
While I feel that I’ve had enough experience to complete this article, I will be sure to update it if I come across additional relevant information.

[toc heading_levels=”3″]
Preface I: AF modes explained with some tips and tricks
Before delving into the AF performance with the different lenses, I want to summarise the various settings available on the A7r mark II and explain which ones I find the most useful and reliable. I will refer to most of these settings throughout the article so you can return to this chapter if you need clarification.
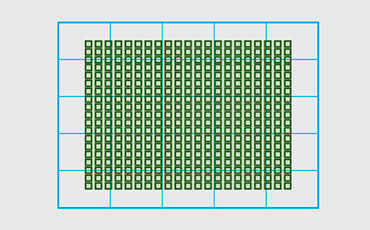
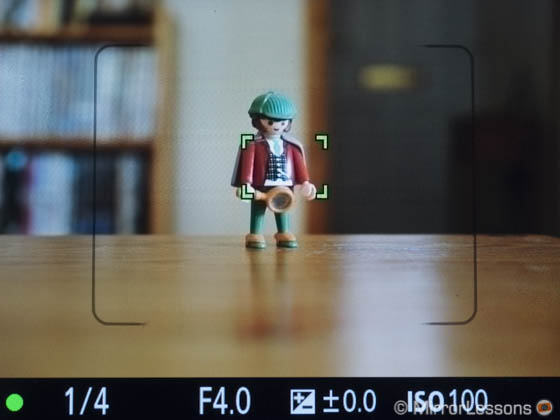
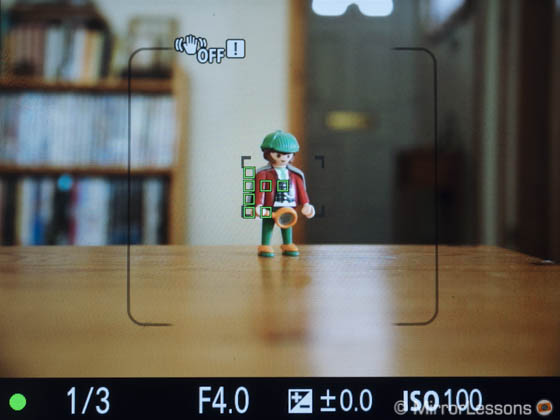
As a reminder, the A7r mark II uses 25 contrast detection points and 399 phase detection points across 45% of the sensor surface. The latter will give you the most accurate results when shooting sports or using DSLR lenses. You know that the camera is using phase detection points when you lock onto a subject and the little green squares appear on the LCD/EVF.
The camera includes Single, Continuous and Manual focus, the classic focusing modes. There are also two other modes that can be interesting in some situations but are limited to the native FE lenses:
- AF-A: the camera automatically switches between single and continuous AF depending on the scene and the subject. I tried it a few times and it works well even for action. For instance, it can be useful for animal or wildlife photography where the subject alternates between a static and moving state. However I prefer to use C-AF because it is efficient and faster with the FE lenses.
- DMF: it allows you to fine-tune your focus manually after the camera has locked the AF point. It can be useful for macro shots where the AF quickly locks onto the subject and you use MF to make precise adjustments.
The A7r mark II has many Focus Areas options to choose between. Below is the complete list with my thoughts about each one:
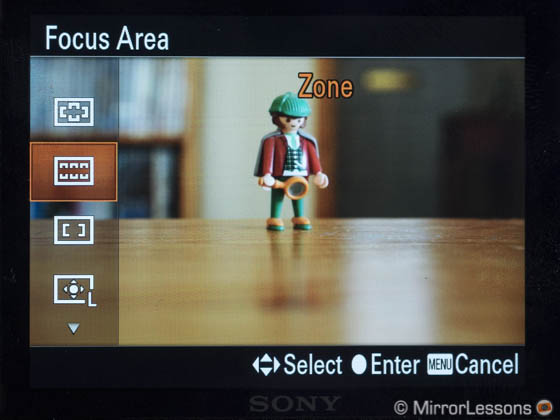
- Wide Area: The camera automatically picks one or multiple AF points within the entire frame. With a distinctive subject and a lack of other elements that can interfere with the composition, it works well. However I generally don’t use this kind of mode on any camera because there is always the chance it will lock onto something that isn’t your subject. The A7r II is no exception.
- Zone Area: Excellent in Continuous AF for action and sports where there isn’t too much confusion or too many subjects close to one other (for example, the start of a marathon or cycling race). I just wish that it were possible to choose different groups of AF areas instead of having only a 3×3 group. I would love to use a 2×2 or 3×2 AF group in some situations. Like Wide Area, the Zone area may tend to focus on something that isn’t your subject.

A good example of a busy scene where both Wide and Zone areas frequently jump between the foreground and background.
- Centre Area: I use this mode mainly when I want to quickly bring my single AF point back to the centre of the frame. I often find this method quicker than activating the flexible spot and moving it to the centre. It also allows me to switch between the Centre Area and a flexible spot already positioned on the left or right.
Note: another method to bring back the flexible spot area to the centre quickly is press the C4 button while adjusting the flexible spot’s position.
- Flexible Spot: My go-to mode. I find the large or medium sizes the best in terms of speed and accuracy even in low-light. I use the smallest size when focusing really close or for macro shots. The large spot is very useful for sports if you are tracking a single subject such as a marathon runner.

Here the Small Flexible Spot allowed me to lock onto the candle’s flame.
- Expand Flexible Spot: This is an interesting option for Continuous AF that basically uses the smallest spot size, but if that fails, it will automatically switch to the largest. I haven’t come across many situations where I’ve really needed it but if you are in doubt about which flexible spot size to use, this mode could prove handy.
- Lock-On AF Expand Flexible Spot: it allows you to start tracking a subject (Lock-On mode) by half pressing the shutter release button instead of using the Control Wheel Centre button. It works only in AF-C.
The A7r II also features three different tracking modes:
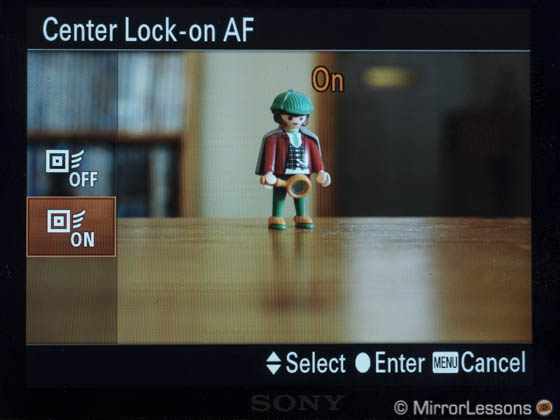
- Lock-On AF: This is the 3D Tracking mode. The camera will automatically follow the subject inside the frame according to its colour and contrast. It also adjusts the size of the tracking area automatically depending on the subject’s size within the frame. In Single AF the best setting is the Centre mode because you can activate tracking at any time by pressing the Control Wheel Centre button. In Continuous AF, it is better to use the Lock-On AF Expand Flexible Spot to start tracking directly by half pressing the shutter release button.
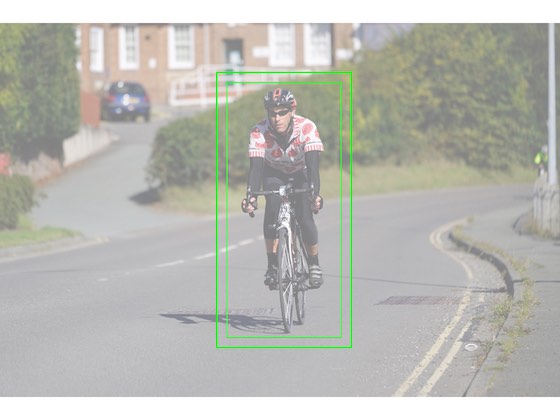
- Face detection: the camera detects a face and tracks the subject. I rarely use it to be honest simply because I am always happy with the Spot area mode. It doesn’t track well if the subject is moving fast. The camera can also record faces to detect them more rapidly later. There is also a smile-shutter option which prompts the camera to shoot when the person is smiling. In good light conditions and with the face close enough to fill most of the frame, I have to admit it works well.

Taken with the “Smile Shutter” function
- Eye-AF: This is a function that works surprisingly well and can be very useful for portrait photography because it allows you to nail the focus precisely on the eyes. The only thing I find uncomfortable is that you cannot use it by half pressing the shutter release button. You need to assign it to a custom button and hold it down to activate it. So, in short, using Eye AF is a two-step operation. It is more effective in Continuous AF and works well as long as the entire face is in the frame and there aren’t some elements that can confuse the camera.
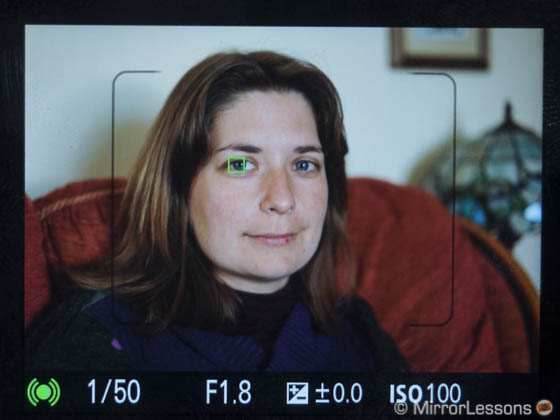

A shot that caused the Eye-AF to struggle (I used the smallest Flexible Spot instead).
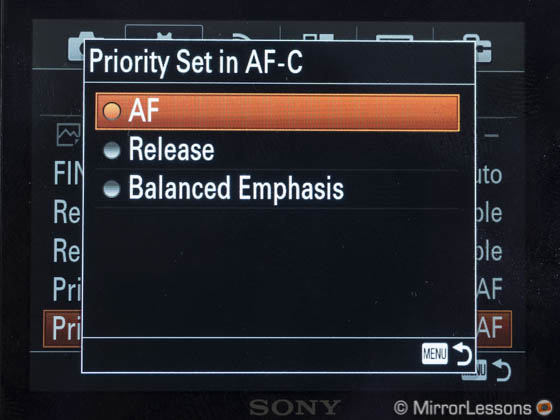
In the (sometimes) confusing menu system of the camera, there are other settings related to the AF that are very important. One of them is the Priority Set.
You can select AF (Focus priority), Release or Balanced Emphasis. Stick with the first option (Focus priority), otherwise you will end up with lots of out-of-focus shots, especially with non-native lenses. With FE lenses, Balanced Emphasis can work well but I apply the same rule as with the Wide Area mode: I don’t like it when the camera chooses everything. You will inevitably come across a situation where it doesn’t behave as expected and you might miss a good shot as a result.
Finally, you also have the option of activating Pre-AF which means that the camera will continue to focus even when you aren’t pressing the shutter release button. I didn’t notice any real improvement in performance with this function activated and it will only drain the battery life more rapidly.
Preface II: Camera’s customisation for the best AF user experience
The A7r II offers a good level of customisation thanks to the various C buttons. Below you can find a picture of the camera with my favourite settings. These settings give me quick and easy access to all the most important AF options. (Of course some of the buttons are configured to activate other relevant settings as well.) I hope my suggestions can be of help to you as well or at least become a starting point as you discover your own favourite customisation settings on the A7r mark II. Please note that they can also be a reference for the other second generation A7 cameras.
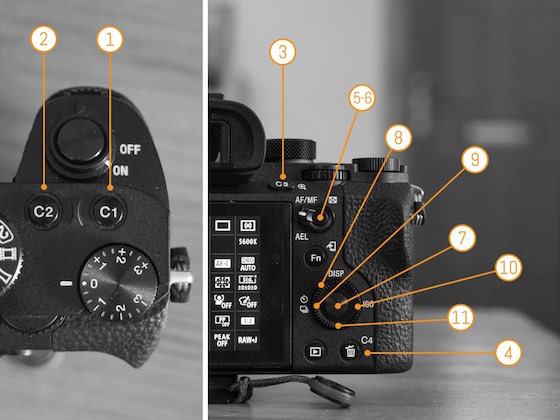
- C1: Focus Mode (AF-S, AF-C, etc.)
- C2: Center Lock-on AF On/Off
- C3: Steadyshot focal length (for manual focus lenses)
- C4: Steadyshot (IBIS) On/Off
- AF/MF: Eye AF, it is the most comfortable button to use for this function because of its placement, your thumb naturally reaches it
- AEL: focus magnifier, comfortable once again because of the button’s placement.
- Control Wheel Centre button: Standard (the quickest way to move the Flexible Spot area). When using Lock-On AF in S-AF with the Centre Area, it can be used to activate tracking.
- Control Wheel: ISO
- Control Wheel, left button: Drive mode
- Control Wheel, right button: ISO Auto Min. S.S.
- Control Wheel, down button: Focus Area
A7r II: Autofocus with FE lenses
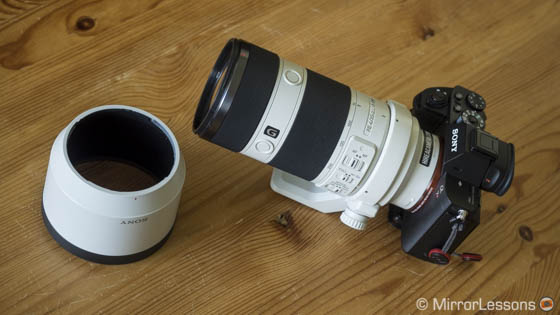
Lenses used so far
- Sony FE 28mm f/2
- Sony FE 55mm f/1.8
- Sony FE 70-200mm f/4
- Sony FE 24-240mm f/3.5-6.3
To assess the performance of the new A7r II in terms of autofocus, the test could only begin with the native full-frame E-mount lenses. Despite the relatively young age of the system, there is already a fair amount of choice in the range: 10 lenses in addition to the 4 lenses distributed by Zeiss (two of them, the Loxias, are manual focus). I believe that the “lack of native lenses” argument should soon become irrelevant, in part because Sony will announce 8 new lenses soon. We probably won’t see them right away but at least the company is showing commitment to its new system.
Regarding the Single AF mode, there is very little to complain about. It is fast, and is always accurate even in backlit/specular highlight situations where the other A7 cameras tend to struggle a little more. Generally I use the Centre or Flexible Spot point set to large or medium. This is the AF mode I find the most reliable especially in low-light conditions.
One of the most difficult tests I put the camera through was at the Lantern Parade in Aberdyfi. It was dark with very little light or contrast on the beach at the beginning.


The camera performed really well with the FE 55mm 1.8. The number of sharp shots I brought home was surprisingly high. In continuous AF, the camera was slightly slower but I rarely experienced any breathing and there weren’t many out-of-focus shots either. Note that I left the AF illuminator assist to Off.
For action and sports, Continuous AF and Lock-On AF are also excellent. Here again, the largest flexible point and Zone Area work well. The latter proved very accurate and the perfect solution when you want to follow one single subject because it gives you more room to compose. However, if you have lots of runners or cyclists bunched together, it will easily jump between someone at the front and someone else at the back or occasionally lose the focus completely.
Regarding the FE lineup, I did notice that some lenses are better than others. For example, I found the 24-240mm slower than the 70-200mm f/4 and surprisingly even the 55mm, and the camera had more trouble with focus accuracy.

An example where the Zone Area completely mis-focused.

Switching to the flexible large point, the performance improved but I often wound up with slightly soft results with this lens.
Below you can see a burst of 26 shots taken with the FE 70-200mm. As you can see from the results, the camera tracked the runner perfectly and only lost focus at the end when the subject reached the lens’ minimum focus distance.

Click on the image to see the entire sequence.
A7r II and Continuous Shooting capabilities
The camera can shoot up to 5fps even in Continuous AF. While it is a decent speed, it is perhaps one of the limits for sports and action. A faster burst also helps you to track your subject more effectively in the EVF because the frame rate is faster. I wish there were an option to choose a lower megapixel setting such as 20/24mp and shoot at 8fps. The APS-C mode lowers the resolution to 18MP but the speed remains the same.
The buffer works really well when set to JPG, even with Extra-Fine quality. Of course, when you shoot Raw, the performance decreases.
As I explained in the first preface, the camera automatically chooses between contrast or phase detection points with FE lenses. In Single AF, it always uses the first option and that triggers a quick back and forth movement of the lens elements before locking the AF point. It happens in a split second and it has never caused any problems even in low-light conditions. Curiously, the fact that you can manually choose phase detection with DSLR lenses means that the camera sometimes focuses somewhat faster in Single AF mode with adapted lenses than with its native glass! (Note that it also depends on the lens and adapter.)
In Continuous AF, the camera uses a mix of both. It will tend to use phase detection more with the Wide or Zone Areas and contrast detection with the centre or flexible spots. However, with the latter it focuses faster than in S-AF, even though it still uses contrast detection.
The moral of the story is that Continuous AF can often be the faster solution even if you subject is not moving.
Preface III: Things to know when using A-mount/EF mount lenses
When using an adapter and a Sony Alpha or third party DSLR lens, some of the AF modes and AF area settings aren’t available. These include:
- Zone Area, which is a shame because it can be really useful in Continuous AF
- Lock-On AF, so no 3D tracking
- Eye-AF, which would be very useful for portraits and lenses like the SAL 135mm 1.8
- AF-A and DMF although I find these two less of a problem.
There are also some important settings you should check when using DSLR lenses:
- Phase Detec. Area: it can be useful to display the area on the LCD/EVF.
- AF system: you can manually choose to use the contrast or phase detection points. Choose the latter at all times!
- Priority Set in AF-S/AF-C: even more important than with FE lenses, always choose focus priority (AF)!

With balanced emphasis, I had a hard time keeping the rider in focus once he was exiting the bend.

With AF priority, I got better results.
A7r II: Autofocus with A-mount lenses
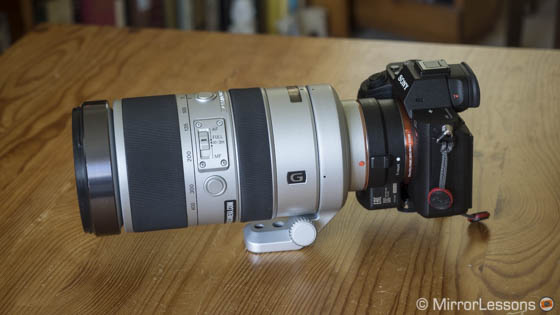
Lenses used so far
- Sony 24-70mm f/2.8 II
- Sony 135mm f/1.8
- Sony 70-400mm f/4-5.6 G SSM I
My first experience with A-mount lenses was during Sony’s press event in London for the launch of the camera. I had the chance to use some of their best lenses such as the Zeiss 24-70mm 2.8 and the 135mm 1.8. I was already surprised at the time because the camera focussed fast even in backlit situations, although not as fast as with the native FE lenses. Of course my testing time was limited but I got a good idea of the potential.
I decided to wait for the right opportunity to test an A-mount lens and I finally got the chance this past weekend during a few sports events. I rented the 70-400mm f/4-5.6 because it gives a zoom range that is not yet available for the FE mount.
Note about the A-mount lenses
The 70-400mm f/4-5.6 G SSM I that I used is now discontinued. There is a second version that is supposed to have a faster AF motor but unfortunately I couldn’t get my hands on a sample. Keep in mind that most of the A-mount zoom lenses now have a version II and that can positively impact the AF performance.
In Single AF, I find that the lens performs well overall. The AF is fast and accurate most of the time. I only ended up with a few mis-focused shots and there was hardly any back and forth movement from the lens elements. Even in difficult conditions it locked right away on the first attempt.

Flexible Spot medium on the pole. In this example, it is slightly out of focus but I kept the shot because the sun is perfectly centred. I have other examples where the pole is perfectly sharp.

Here the camera was still focusing fine while I was using the small Flexible Spot on the bright part of the moon.
I put the SAL70400G through its paces at the Wales in A Day cyclist race. We found a spot just outside the city of Newtown where the riders were sailing by very quickly. With fast moving subjects charging toward me, the AF couldn’t keep up. What’s interesting is that if you stand back and observe the camera tracking the subject without taking the shot, it seems to perform just fine. If you shoot in burst mode (5fps) however the camera will progressively lose its lock on the moving subject.

The first shot in the sequence already shows that the cyclist is not perfectly in focus.

Then it progressively lost focus. This could have been a great shot.
This could lead us to think that the performance for action is not great with A-mount lenses but this is not 100% true. I am sure that with the version II, things could be a little better.
At this point, I wanted to see if the lens would continue to deliver less than stellar performance in other situations. As such, the following day I went to Aberystwyth for the INTRtri Sprint Triathlon. The race started with a swim in the sea and I noticed that with more distant subjects, the lens performance was better probably because the change in focus distance was shorter between shots.

Click on the image to see the entire sequence.
Then, while maintaining the Continuous AF mode, I switched to single shot instead of continuous. By doing this, I had much better results even at the longest focal length.
Focusing was always fast and the camera only mis-focused a few times because of the difficulty of the situation. (The subjects were almost entirely submerged and the splashing could easily confuse the sensor). I brought home a good number of sharp images – probably around 60%.


For the running stage, I kept the same settings, and the camera tracked a little bit better. In this case again, the camera had to change the focus distance quickly because the subject was closing in on me. The results were a little bit better than on the first day (the cyclists) but still not perfect. In comparison, the camera coupled with the FE 70-200mm performed far better as shown in the dedicated chapter.

The last test was performed during the Red Kite feeding that took place at the Bwlch Nant yr Arian Natural reserve. The conditions weren’t ideal as the clouds moved in just before the event started. The bird hide allowed us to stay very close to the feeding area but there were trees in the way that made it impossible to follow the birds. Most of the time, I had to guess where they would fly before I could start tracking them. Here the lens performed better than expected. I would be lying if I told you that I brought back lots of good shots but I ended up with a fair amount (around 50%). Most of the time, the camera managed to lock the AF even though the birds were flying very fast.


About the A-mount to E-mount adapters
Since the Sony A7r mark II’s new autofocus system includes 399 phase detections points, you don’t need to use the LA-EA4 adapter, which is larger, more expensive and has a phase detection sensor inside. Instead, you can go with the LA-EA3 which is smaller and less expensive. Note that this only applies to the A7r mark II and not the other A7 cameras.
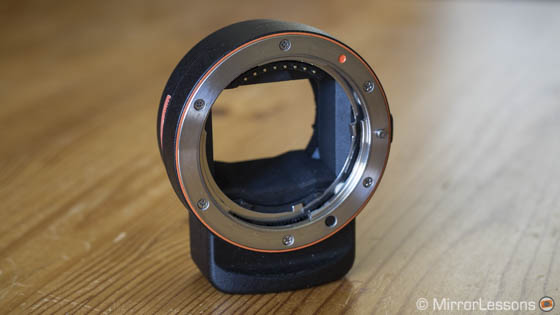
The LA-EA3 adapter works well but has some communication flaws. A few times, the camera switched to MF and I had to unmount the adapter and re-mount it to fix the problem.
So, overall my experience with A-mount lenses has been good but I would say that the best performance comes from the FE lenses, which is not surprising. Still, it is possible to use A-mount lenses and have good results.
A7r II: Autofocus with EF-mount lenses
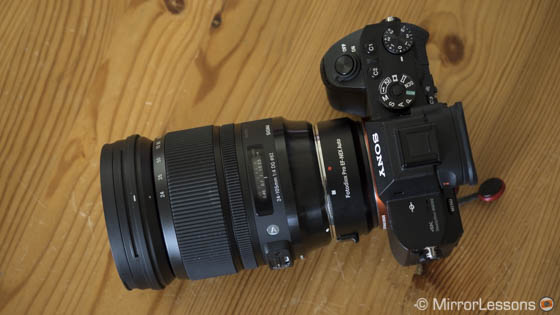
Let me start by saying that there are a lot of different lenses with an EF mount not only from Canon but also third party manufacturers such as Sigma and Tamron. Many lenses also exist in different versions and there are also different adapters available.
It is important to understand the following: the results will vary depending on the specific lens and adapter. Not everything will work as expected or in the same way.
Bear in mind that you are connecting three different pieces of equipment together designed by three different manufacturers. The lenses are not designed to work with Sony cameras in the first place. That said, the A7r II will give better results than any other camera. It is just a question of doing your research and if possible, trying before buying.
About the EF to E-mount adapters
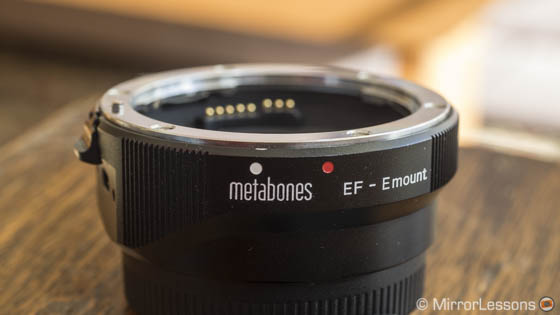
There are different adapters on the market and I am sure more will come. The best I’ve tried is the one that almost everyone is recommending: the Metabones EF-E Smart Adapter Mark IV. It is unfortunately the most expensive but has the advantage of a USB port to receive firmware updates, which happens often. It is worth the investment if you are planning to use various EF lenses, especially zoom lenses.
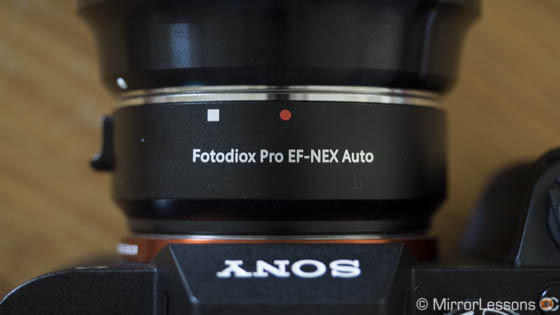
The Fodotiox Pro EF-NEX Auto is frustrating because it can actually deliver excellent AF results but has lots of bugs depending on the lens used. The best experience with it so far has been with the Sigma Art lenses. The only problem that occasionally occurs is that the camera freezes at the shortest focus distances, so I have to temporarily switch to MF, extend the focus distance, then go back to AF. With zoom lenses, it can cause the camera to close the shutter but fail to re-open it if you zoom in quickly and take the shot right away without waiting at least two seconds. The same thing can happen in MF when using the zoom magnifier. I guess you get the idea. I am sure that sooner or later the company will release a new version that is officially compatible with the A7r II.
I haven’t tried the Viltrox although reports say that it performs in a similar way to the Fotodiox. There are also other adapters such as the TechArt III but they aren’t always easy to find online so I don’t have any personal experience with them yet.
Up until now, my experience with EF lenses has been limited to Sigma products. It is important to highlight that most Sigma lenses are also available in A-mount. You might rightfully ask why I didn’t test the A-mount versions instead. The answer is actually very simple:
- Sigma A-mount lenses are not easy to find. Even Sigma UK doesn’t keep samples because photographers and press usually only ask for Canon and Nikon versions.
- It is more likely you’ll find Sigma EF lenses second-hand and if you are already using Canon gear, you might even own some. As such, you might be as interested to know how the EF versions perform.
Another reason to consider Sigma lenses is because I find their range very interesting and the prices very affordable. The Art series is perhaps the best example: optical performance that is as good as the Nikon/Canon/Sony versions but a lot more affordable. And if I add to the equation the fact that some of the native FE lenses aren’t that much smaller or lighter than the equivalent DSLR lenses (think about the Zeiss 35mm 1.4), then it makes even more sense to look at the Sigma catalog.
EF lenses used so far
- Sigma 24mm 1.4 Art
- Sigma 24-105mm f/4 Art
- Sigma 85mm f/1.4 EX DG HSM
- Sigma 150-600mm f/5-6.3 Contemporary
The Art series is very fast in Single AF mode. Actually, lenses like the 24mm 1.4 are even faster than the FE wide angles because I can manually choose the phase detection AF system.
I never had any problems even in backlit or low-light conditions. Regarding the latter, I had to focus on the town on the other side of the river at night to finally experience slower performance and some breathing issues. And that was using the Fotodiox Pro, which is not the best adapter.

Fast and accurate even wide open

Same result in a strong backlit situation


Locked on the first attempt (focus on the boat)
I had a similar experience with the 24-105mm and 85mm although I find the latter slightly slower probably because it is older than the Art lenses.
The EF lens I’ve had the most experience with so far is the 150-600mm. Again, I like to use lenses that don’t have a native FE equivalent. The contemporary version is smaller and lighter than the Sport version, making it a better match for the A7r II. I tested the 150-600mm C for sports events and wildlife. You can see a gallery and my complete report here.
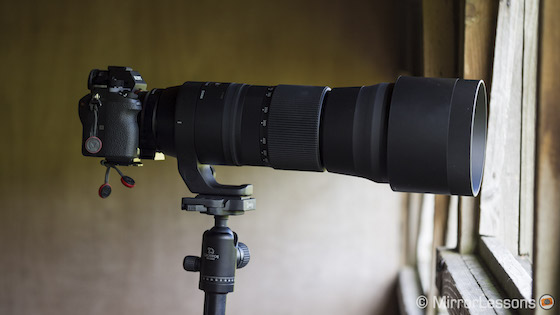

Here again I brought home a very good series of sharp images. It is not perfect and it probably doesn’t beat a Canon or Nikon high-end DSLR with the same lens but I find it excellent considering that I am using a Sony camera! In Continuous AF, I also noticed that the best performance can be achieved with the centre or Flexible Large Spot kept at the centre. If you move the spot to the left or right side, the performance decreases dramatically and the camera will almost always mis-focus. At 500mm and 600mm, some back and forth movements will occur as well.


Fortunately the motorcyclist was okay!
Note that at the time of testing, the Metabones IV worked well but had some issues when the optical stabilisation on the lens was activated (the camera would switch to manual focus). The issue might have been resolved with the latest firmware update (version 1.8).
Some lenses like the 70-200mm f/2.8 EX DG HSM won’t work with the EF mount at all. To have a general idea of which lenses are compatible with which adapters, I suggest that you have a look at Brian Smith’s guide on his blog. He spent two days testing most of the EF lenses at BHPhotoVideo with different adapters. Of course, they are not in-depth tests but I found that his results were accurate as far as the lenses I tested are concerned, so it is a good starting point.
A7r II: Autofocus for movies
Along with stills, I also tested the autofocus in video mode. Note that like all other Sony cameras, only MF and C-AF are available. I tested both FE and DSLR lenses in Continuous mode and only the FE version will give you good results. The camera only uses contrast detection in video mode so the performance is slower. I found the most useful setting to be Lock-On AF.
There are also two dedicated AF settings for video:
- AF Drive Speed: sets the focusing speed. You can choose between Fast, Normal and Slow.
- AF Track Sens: set the duration of AF tracking. You can choose between Normal and High.
Even by setting the two options above to Fast and High, the camera was still not able to track fast subjects such as a runner.
Below you can check out a few examples of the AF performance in movie recording mode (go to minute 14:55).
Conclusion: are non-native lenses worth using?
Having a mirrorless camera with a fast and reliable AF is nothing new to me. I’ve achieved great results with Olympus, Panasonic and Fujifilm cameras even in difficult situations such as a contemporary dance show or a night marathon. They might not be at a Nikon D4s or Canon 1Dx level yet but they are closing the gap quickly. The A7r mark II is living proof of this. It brings the A7 series to the same level as other mirrorless cameras, if not a step higher.
I can safely say that it is the best autofocus system I have tried on a CSC to date. It is reliable, accurate and fast in both good and low-light conditions. The cherry on top is its AF capabilities with third-party lenses.
It offers a more complete experience to customers, with more options and versatility. It is not as fast as with native lenses but with the right adaptor and lens, you can achieve good results even for sports/action. This is what makes this camera stand out from the crowd. The only other MILC I can think of is the Olympus OM-D E-M1 with its compatibility with Four Thirds lenses.

But all things considered, does it make sense to use DSLR lenses on the A7r II? My honest answer would be: it depends.
I started using mirrorless cameras because of their portability and this is what I continue to look for above anything else. I decided to test different DSLR lenses simply because the camera offers the possibility and because it is part of my on-going review but I am not sure how many of these lenses I would actually purchase for personal use. The bigger the lens, the more uncomfortable it is on the diminutive A7rII body. A vertical battery grip would help to improve the handling but it still wouldn’t be as good as with a DSLR.
The second point is that there is an adapter in the way and it adds a little bit of weight and length to the combo. As good it can be, there will always be a time when the adapter malfunctions and you waste time un-mounting and mounting it again. Plus, it does give you the sensation of a less solid and reliable connection between the camera and the lens, even if the adapter is well-built.

I see the AF capabilities with third-party lenses primarily as a transition opportunity.
As it happened with Olympus and the Four Thirds system, I wouldn’t be surprised if Sony abandons the DSLT system sooner or later and concentrates all its efforts on the mirrorless market. For a company that revels in the chance to challenge the market and innovate, it only makes sense. Not only, but the A-mount system didn’t really manage to compete equally against Nikon and Canon despite having good cameras and lenses. So, the A7r II can help those who use Sony’s DSLT cameras to switch to mirrorless as the OM-D E-M1 did for Olympus DSLR users. If you don’t own A-mount lenses, I wouldn’t recommend them because they are expensive, large and heavy. Plus, if Sony does drop the system, they won’t retain a high resale value on the second-hand market either.
For Canon users, things are a little different. It can be an opportunity for them to start using a mirrorless camera alongside their main system, knowing that they can interchange lenses easily. For those interested in switching to the FE system, it is possible to keep some lenses and use them on the Sony camera with good results. There is also the option to keep or buy specific lenses that can’t be found in the native FE catalog and might not appear for a long time.
The last test to perform will be with Nikon lenses as soon as the first adapters are on the market. It will be interesting to see if the same reasoning can be applied to Nikon users. Finally, concerning the autofocus performance as a whole, I would say that the A7r II is the best Sony has to offer in the mirrorless sector, but I wonder if the a6000 successor (if and when it comes) could be a true DSLR killer in this regard.
Do you have any experience using the Sony A7r II’s autofocus system? Your feedback would be highly appreciated!
Our Sony A7r II coverage:
- First Impressions (Sony’s press event)
- Lantern Parade (Low-light image gallery)
- Bird Photography (with the Sigma 150-600mm EF mount)
- Zeiss Milvus (Sample images)
- Voigtländer VM lenses (12mm f/5.6 & 21mm f/1.8 – 35mm f/1.7)
- Complete Autofocus Test (FE, A, EF lenses)
- Compressed vs uncompressed RAW
- A7r II vs A7s II comparison (with ergonomics/ease of use)
- Complete Image Quality test and final conclusion
