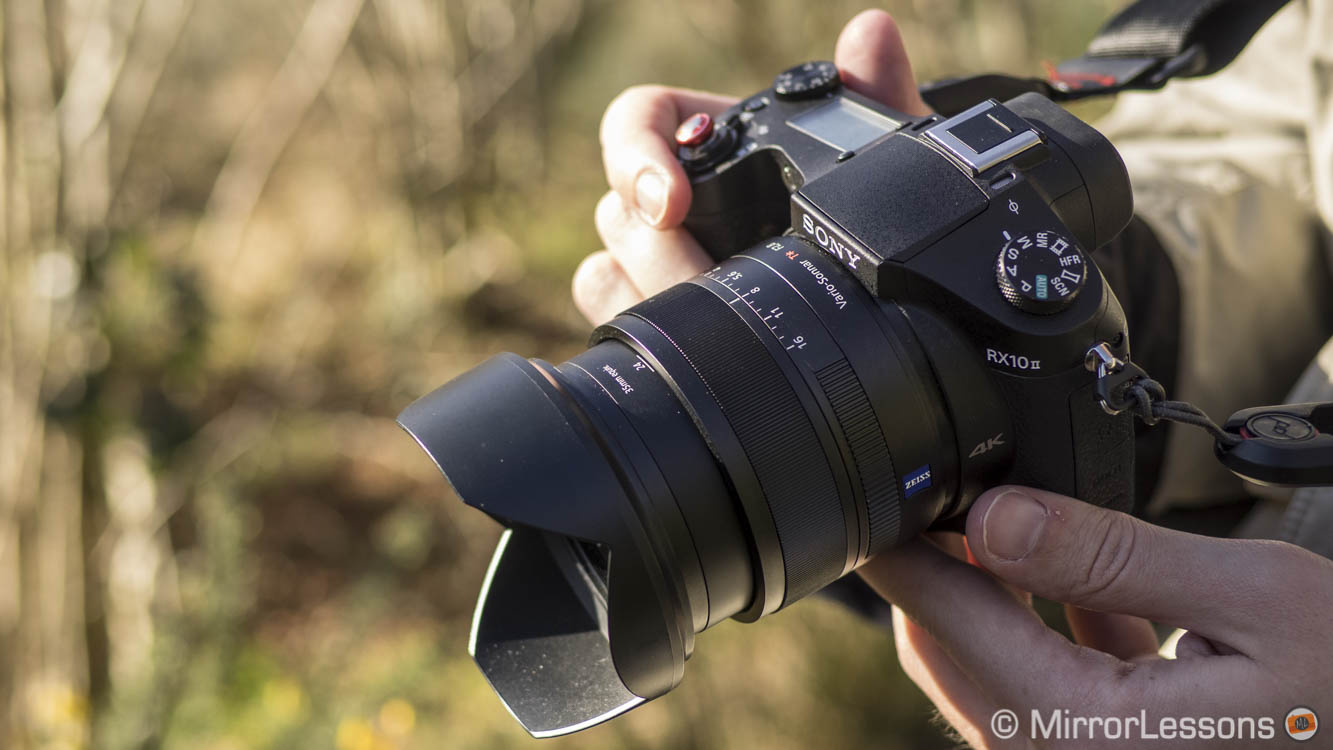
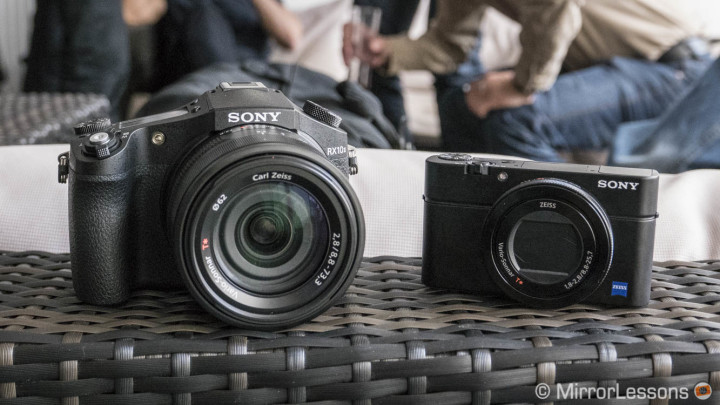
One of the most exciting advances in camera technology seen in the last year can be found on the Sony RX10 II and RX100 IV. And the improved performance has nothing to do with resolution, high ISO performance or dynamic range. Rather, it’s all to do with stacking a RAM memory behind the image sensor to process more data.
The Exmor RS CMOS sensor allows these two cameras to do a number of things.

Another interesting characteristic is the continuous shooting speed of 14fps with release priority (16fps on the RX100 IV) and a 5fps speed without any buffer limitation. And of course there are the slow motion capabilities that go up to 40x (1000fps).
The last feature is by far the most interesting specification. For our first slow motion video shot with the RX100 mark IV, I simply compiled a series of random actions and situations that looked interesting when seen in slow motion.
However I couldn’t help but wonder what it would be like to complete a specific project in slow motion. When I received the RX10 mark II to review, it became a good opportunity to put that into practice.
For our second video, I chose to concentrate on birds since there are many natural reserves where I live. I suggest that you watch the video before reading about how I achieve these results.
Editor’s note: the following explanations are valid for both the RX100 IV and the RX10 II.
Preface: what slow motion is and how it works
Those unfamiliar with slow motion video might like to know how it works.
In order for movements to appear natural in a motion picture, the scene must be recorded with a certain number of images per second. The standard is 24fps (this is what you see at the Cinema), 25fps (PAL regions like Europe) and 30fps (NTSC regions like North America). Since I live in the UK, I tend to use 25fps as my reference.
Any frame rate speed lower than 24fps will give you an impression of “accelerated” movement in the video. For example, the first film shot by the Lumières brothers in 1895 (Sortie des Usines Lumière à Lyon) was recorded at 16fps so it appears that the people walking have a slightly faster pace and less fluid movements than normal.
If you use a higher frame rate such as, for example, 50fps or 60fps, which are common by today’s standards, two things can happen:
- If you play back the footage at the same frame rate at which you recorded it, the movement will appear normal yet sharper and more fluid because you have more images per second
- If you watch the footage at 25fps, the movements will appear slower than normal
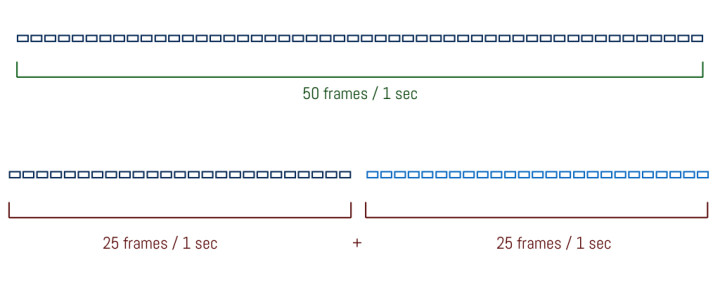
Slow motion happens because you are stretching the length of your clip. For example, 1 second recorded at 50 frames per second conformed to 25 frames per second will result in footage that is double the length (from 1s to 2s, or 2x slow motion).
From this, you can understand that the more frames you record per second, the more you can extend the duration of your clip. For example, a 1s video shot at 500fps would give us a 20 second duration when conformed to 25fps (you divide 500 by 25).
1. Choosing the right speed for your subject
The first thing to talk about is elementary but no less important. There must be something interesting to observe about the subject or situation you want to see in slow motion.
The beauty or complexity of a movement must be emphasised with slow motion.
Knowing the movement and speed of your subject is also important when choosing your frame rate.
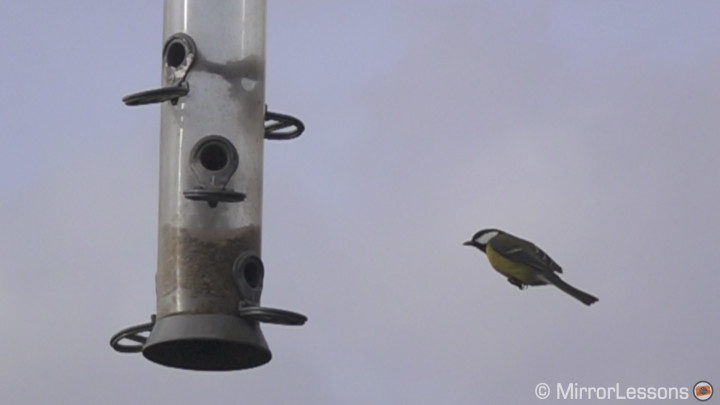
With the RX10 II, I decided to concentrate on birds to show how beautiful their movements can be. For example, small birds often stop flapping their wings for a few brief moments while soaring through the air. When seen in slow motion, it looks as if they are “floating” for a few seconds. That is something you wouldn’t perceive with your naked eye or at a normal frame rate.
There are a total of four speeds you can choose from. The first is available in the normal movie mode when the Full HD format is selected. The other three speeds are available with the HFR (High Frame Rate) mode.
- 100fps (120fps in NTSC)
- 250fps (240fps in NTSC)
- 500fps (480fps in NTSC)
- 1000fps (960fps in NTSC)
For small birds like robins that have smaller wings but flap them very fast, 500 or 1000fps works better. For larger birds like the red kites or seagulls, 500fps was the optimal speed but 250fps was often sufficient too.
With the two Sony cameras, choosing the frame rate is also a matter of image quality.
The higher the frame rate, the more the quality will decrease.
Full HD at 100fps and 120fps
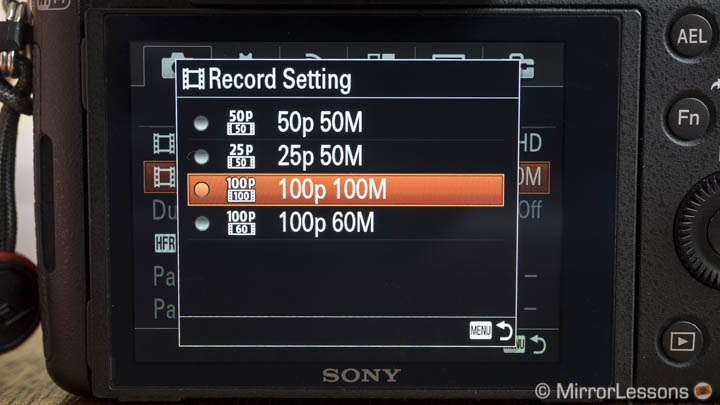
First let’s talk about 100/120fps. This is not a slow motion mode by default. The camera can shoot up to 100fps (PAL) and 120fps (NTSC) with the normal movie mode (in Full HD) which means it also uses a better codec (XAVC-S) and a better bitrate (100mbps). This is where you will get the best image quality.
Continuous AF is available while recording and you can also vary your exposure settings. The duration is limited to 30 minutes.
The camera will record both images and sound but won’t conform the footage to 25p. You will need to do it in post-production with an editing software. It is also important to get rid of the sound because it too will slow down and become distorted.
Although I took a few shots at 100fps, I mainly used the HFR mode because that is where the performance of the two cameras becomes unique and the slow motion starts to make a real difference. However, it is also more challenging to use.
High Frame Rate mode
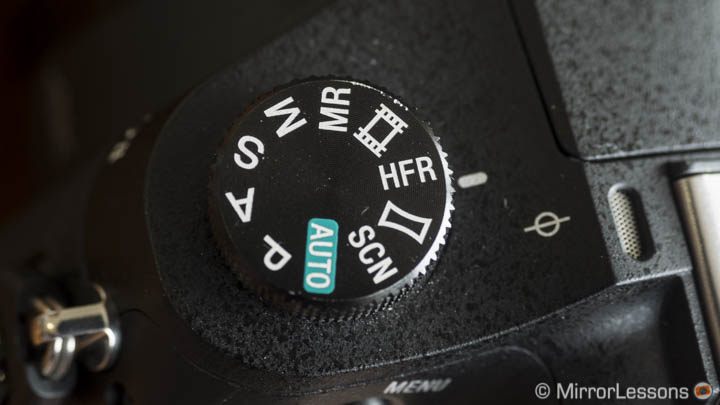
For the higher speeds, you have to select a specific shooting mode called HFR from the shooting mode dial. There is a dedicated HFR sub-menu with all the important settings. Let’s analyse the first three.
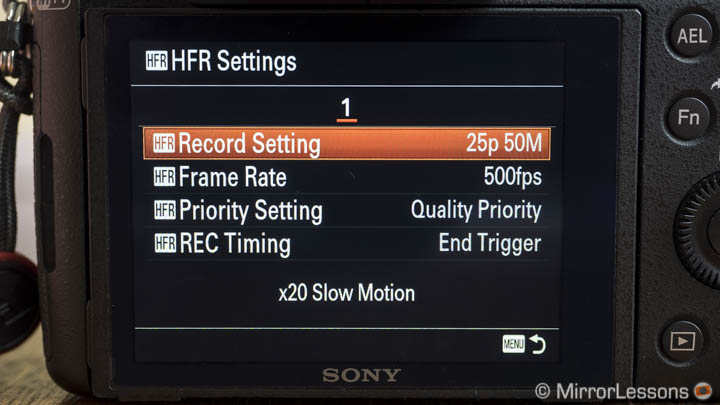
With Record Setting the camera will automatically save the footage conformed to 25fps or 50fps (30fps or 60fps in NTSC) depending on the one you choose. I always chose 25fps to get the slowest motion possible and an increased duration.
Then you can choose the frame rate. The higher the speed, the bigger the sensor crop and the fewer the pixels. This means that the quality decreases because the camera shoots at a lower resolution, then upscales the footage to Full HD. You can see the various resolutions used in the graph below.
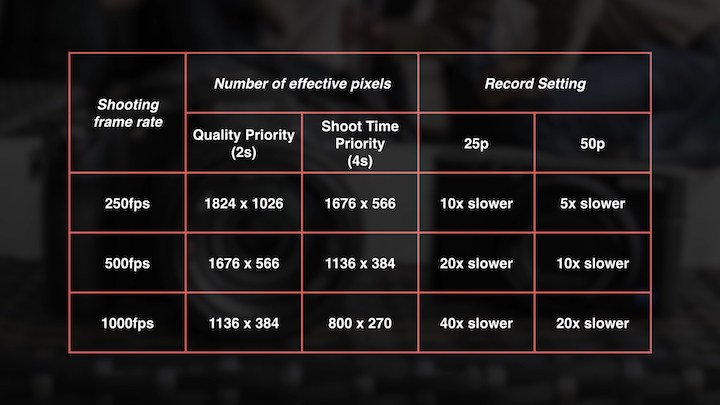
There are two durations available which correspond to the third item in the HFR Menu above called Priority Setting. With Quality Priority, the camera records for 2 seconds while with Time Priority, it records for 4 seconds. In HFR mode, you can’t record more than that. As you might have guessed, at 2 seconds the quality is better while at 4 seconds it decreases even more because the effective resolution is lower. This is why I always choose 2 seconds for my videos.
It should also be mentioned that the higher the frame rate, the more the camera crops the image. The inferior resolution also introduces aliasing and moiré. You can see a video below that shows you the difference in quality between the three frame rates and priority settings.
As you have certainly noticed, 1000fps can look pretty awful. However it can still give good results if you are close to the subject. If the subject is farther away, the results are less pleasant because the noise in the image becomes too invasive.
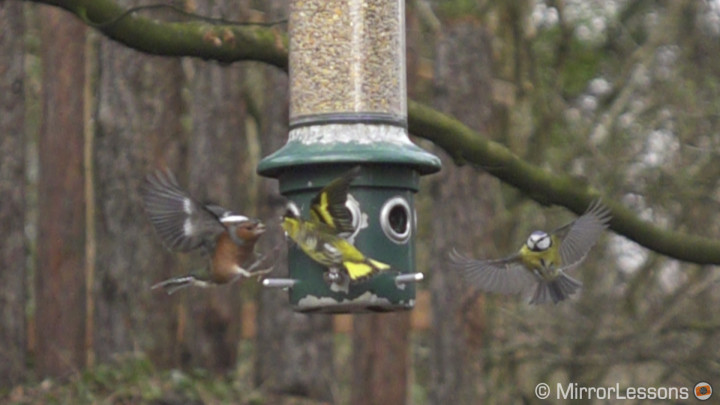
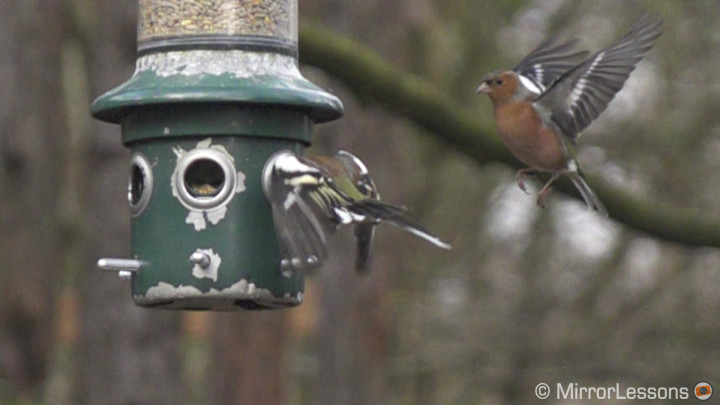
It is important to remember that such capabilities were unthinkable a few years ago and only available on very expensive cinema cameras.
So while the quality is not the best at 1000fps, it is hard to criticise if we think about the cost of these two cameras. Overall I find 500fps the most acceptable balance in many situations if you want to get a beautiful slow motion result and decent quality.
Note: I’ll explain the fourth item in the HFR Menu (REC Timing) in the third chapter.
2. Choosing the right camera settings
The higher the frame rate, the faster your shutter speed will be. They are actually inversely proportional: for 250fps, the minimum shutter speed is 1/250s and the same reasoning applies to the two other speeds:
- 500fps with min. 1/500s
- 1000fps with min. 1/1000s
This can be another important factor when choosing the frame rate. The faster it is, the more light you will need.
At 1000fps with a 1/1000s minimum shutter speed, you will have to use the fastest aperture of the lens and increase your ISO if it isn’t sunny. Given the fact that the quality at 1000fps is reduced, shooting at high ISOs can compound the noise.

At 1000fps, I wouldn’t go past 400 or 640 ISO. If you don’t have enough light, switch to 500fps.
The camera has specific picture profiles for video. These include various Cine gammas, the S-log2 gamma and other settings for colour, black and saturation. I don’t advise that you use S-log2 because the quality of the files isn’t good enough for heavy post production. The best option is to choose the settings that can match the final look of the image you desire.
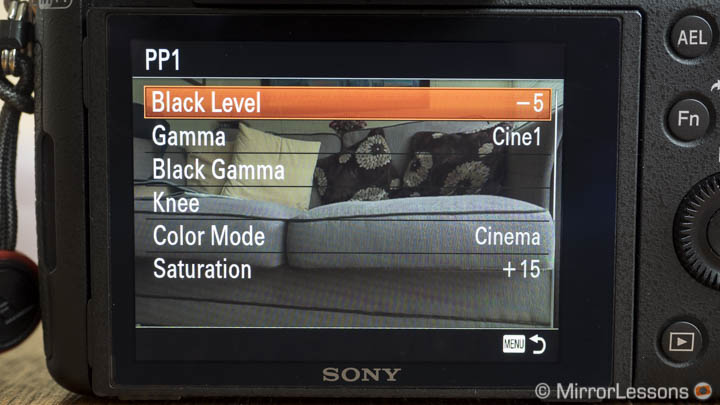
With the Sony picture profiles, I’ve always found the following settings good enough for the end result:
- Gamma: Cine1
- Color mode: Cinema
- Black level: -4
- Knee: Auto
- Black gamma: middle, -7
- Saturation: +17
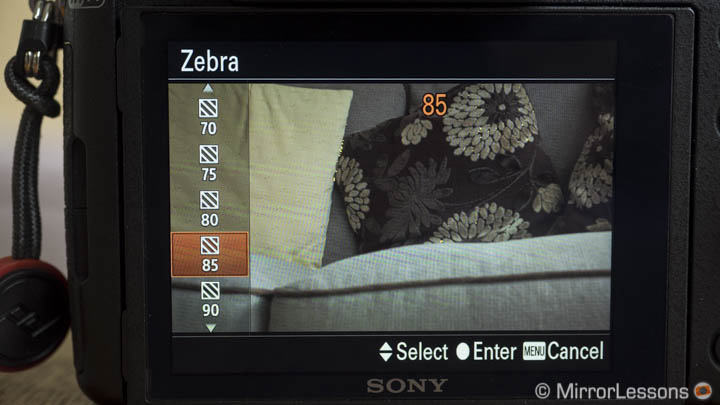
Exposure is also very important. Indeed, you need to correctly expose the shots at all times. Also keep in mind that in HFR mode the highlights are more easily clipped because the dynamic range is reduced. It is a good idea to activate the Zebra pattern on the display to see how overexposed your image is.
Finally, you might want to assign some settings to the Fn quick menu or custom buttons. For example I assigned the Frame Rate in the Fn quick menu so that I can quickly change it without going into the camera’s main menu.
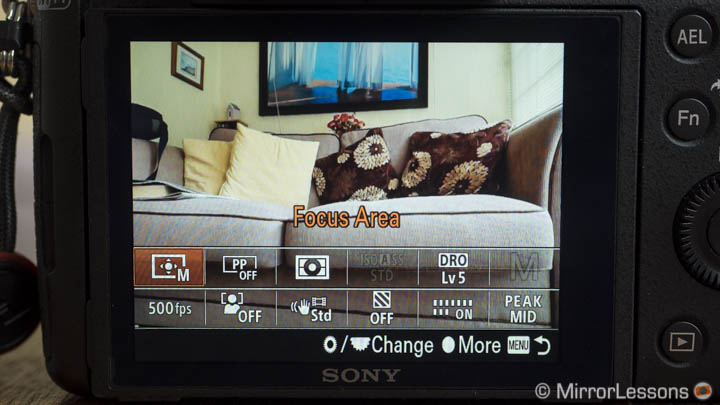
Keep in mind that the HFR mode is pretty useless in low light or indoors. Not only will the fast shutter speed darken your image but under artificial lights, you will also encounter banding issues.
3. Pre-focus and pre-compose
Another key aspect to understand about the HFR mode is that you can’t change any settings including exposure or focus once you are ready to record.

Once you have selected all the settings above, you need to press the centre button of the control wheel located on the rear to go into stand-by mode before being able to record. Once you are in stand-by mode, you cannot change any settings including aperture, focal length, exposure and focus. This means that continuous AF is not available and that if the light changes, you need to exit the stand-by mode again by pressing the same button. You then have to change your settings and enter the stand-by mode again.
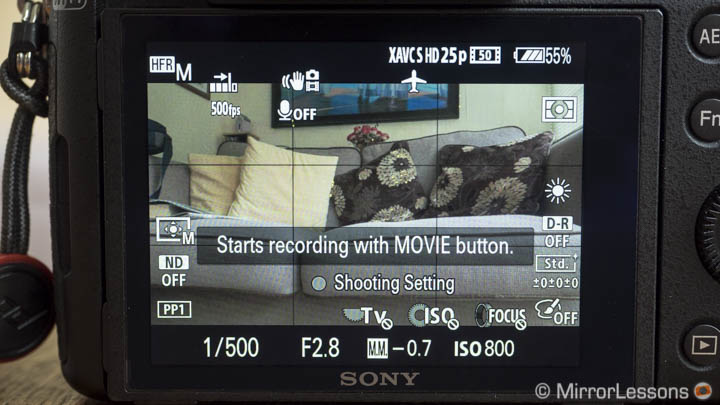
This can prove quite challenging in situations where the light is constantly changing. The solution is to plan what you want to shoot beforehand and wait for the right light. Let’s analyse a few examples.
For my video, I mainly recorded small birds near feeders. The small birds come and go very often so it is easy to observe their behaviour. For example, if I wanted to record one of them landing on the feeder, I would simply prepare my composition with the feeder in the centre, adjust my focus/zoom/exposure, then enter stand-by mode. As soon as I saw a bird land, the only thing I’d have to do is press the movie recording button.

Here comes also another important setting in the HFR menu (the fourth item). Because the camera will only record for 2 seconds, it is important to choose End Trigger for the Rec Timing.
This means that once you press the movie recording button, the camera will record the last 2s seen on the live view screen. This method is helpful as it ensures you’ll capture the action you want rather than trying to randomly predict when it will happen.
For birds in flight, I followed a similar procedure. With the small birds near the feeders, I first observed where they were passing and found that they often flew back and forth in the same area. So I set up my composition on an area I knew they would eventually fly into.
In this case, choosing a focus point can be more difficult as you can’t predict the distance of the bird from your position. The best thing is to use a smaller aperture like f/5.6 or f/8, choose your focus distance with the help of the nearest element like a branch or a leaf, then extend the focus distance a little.
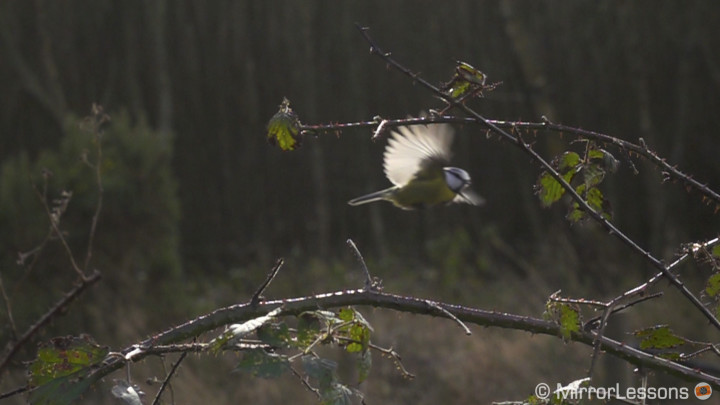
You can also calculate your depth of field. Unless you want to go in-depth using algebra calculations, you can use some online tools or even better, a Depth of Field calculator app on your mobile phone. For example, at f/8 with a distance of 8 metres and the longest focal length of the RX10 II (73.3mm, 200mm equivalent), I know that I’ll have a margin of 2.26m approximately.

For large birds flying in the sky such as Red Kites, I followed a similar procedure. Even without calculating the depth of field, I observed them to see how low they were flying, then focused at a similar distance on the ground.
Since the RX10 II has a 1 inch sensor, you also get more depth of field. This means that shooting at f/5.6 or f/8 is good enough to ensure a good level of sharpness, unless the bird surprises you and decides to fly lower than usual, which can happen.
It is impossible to achieve perfect focus all the time but this technique can help you to take usable shots.
It is also helpful to activate focus peaking so that you have an additional clue as to what is in focus when you are in stand-by mode. Bear in mind that the faster your frame rate, the more the file will be upscaled because the resolution used is lower. This will also reduce the overall sharpness of your image.

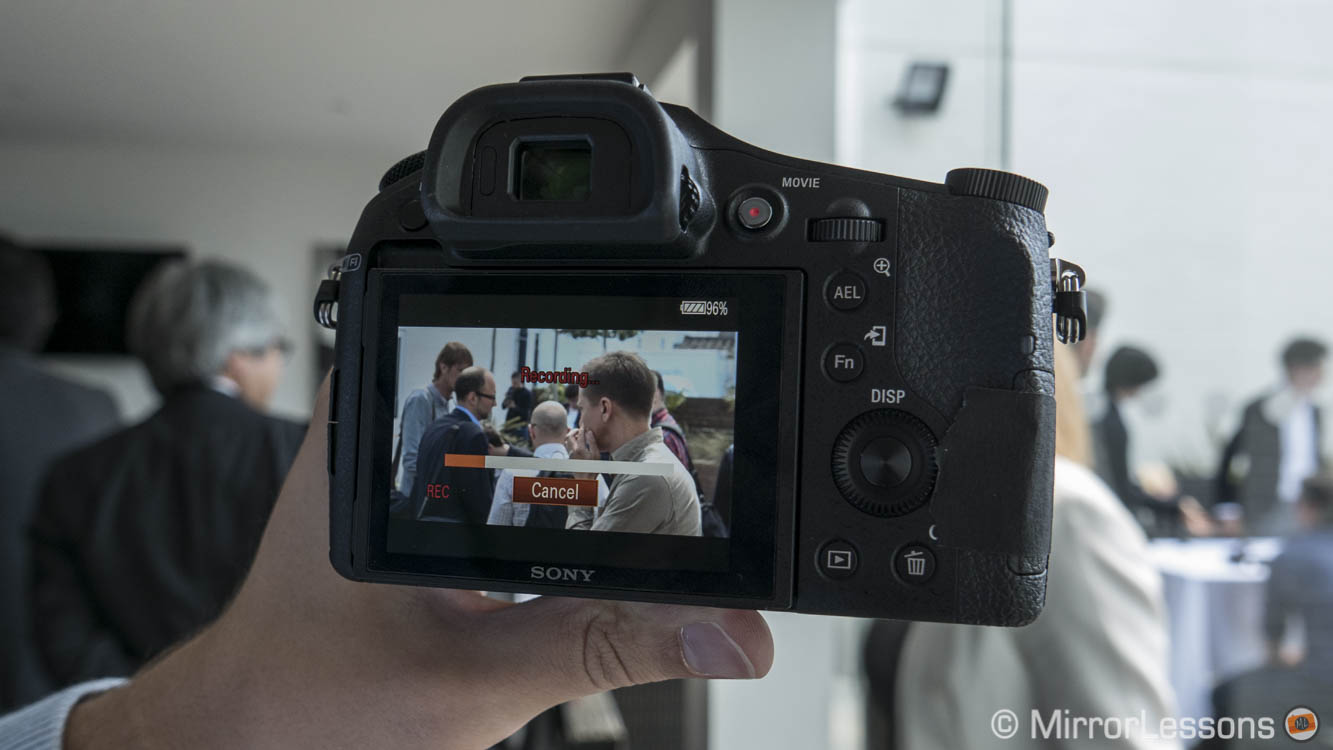
Once you hit the movie recording button, the camera will record for 2 seconds, then write the file onto the SD Card. Depending on the frame rate chosen, this can take some time. For example, for a 2 second shot a 1000fps conformed to 25fps, it will take the camera 80s before it is ready to shoot again. This can cause you to miss some interesting moments while you wait.
Fortunately while writing the file the camera gives you a preview of the slow motion result. If you see that what you recorded is not interesting enough or that you hit the record button too late, don’t hesitate to cancel the clip. It will still save what it has written so far and you can get ready to shoot again more quickly.
Because slow motion will slow down everything including camera shakes, you can take some shots hand-held. However my advice is to use a monopod to have more stability. I used mine for most of my shots and as you can see, they are fine. The only time I recorded hand-held was for the red kites you can see at the beginning. There I framed using the EVF because it was more comfortable to follow them with my arms and body.
Video Editing (Post Production)
This last chapter can require some knowledge of video editing. For the bird video, I didn’t perform a lot of colour correction because I wanted to show how the images were recorded in-camera. However I did apply some basic contrast to the final shots at the end of the video (sunset) to give them more “punch”.
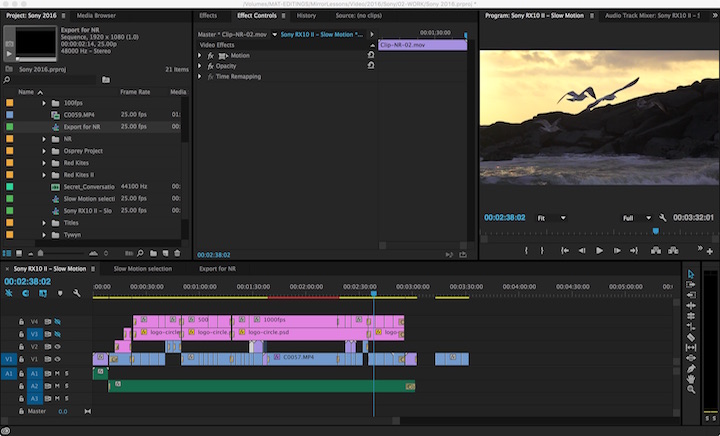
There is another shot at minute 1:10 where I had to raise the brightness a little because the recorded footage was slightly too dark. Doing so increased the amount of noise in the shadows but the result is still acceptable. It was recorded at 500fps. With 1000fps you can be very limited during the colour grading process if your exposure is not perfect.
You can see an example below. Despite the shot being underexposed, I deciced to keep it because the bird entering the frame looked like he had been fired by a cannon of some sort!
[twentytwenty]


[/twentytwenty]
Finally I tried to reduce some noise in some of the shots at 1000fps taken at high ISOs. There are several software prorgams that can deal with noise reduction for video.
Being subscribed to the Adobe Creative Cloud program, I used After Effects and the built-in Remove Grain effect. It is quite a powerful plugin and if you are not too aggressive with your settings, you can reduce the most annoying type of noise which is colour noise. You have to be careful to not create artefacts on the moving elements such as the birds’ wings. With some trial and error, you can achieve good results.
Remember that the goal must not be to get rid of noise completely but to make the footage more pleasant to watch. Remove too much noise and the image will start to lack sharpness and detail.
[twentytwenty]


[/twentytwenty]
Conclusion
Before writing the conclusion, I invite you to check out the video below, which was the first video shot in slow motion with the RX100 IV in July 2015.
As you can see, the RX10 mark II and the RX100 IV have lots of potential when it comes to slow motion video. The HFR mode can present some obstacles when it comes to maintaining good image quality and everything needs to be pre-visualised before hitting the record button. However, after some practice you can achieve fantastic results that aren’t possible with any other camera in this price range (or even higher).
The RX10 II feels like a more complete solution for this kind of work. The zoom lens is more versatile because it covers an equivalent focal range of 24-200mm (35mm format) with a constant f/2.8 aperture. Its ergonomics are also more comfortable for video shooting. With the RX100 IV and its 24-70mm equivalent lens, taking the same kind of bird footage would be far more difficult.
I hope that this in-depth tutorial can be of help for RX100 IV and RX10 II users. If you have any questions, don’t hesitate to leave a comment below or on one of the videos.
You might also be interested in the following reads:
