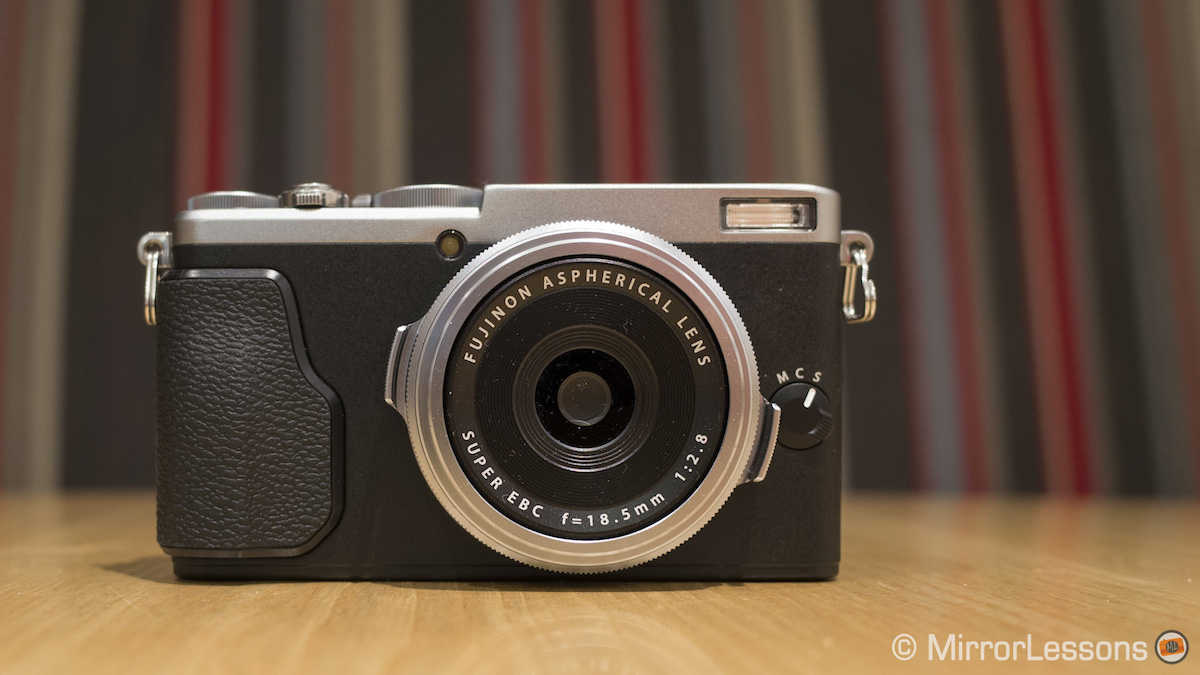
The short review (for those who already own the X100T): take away the hybrid viewfinder of the X100T, add a tilting touchscreen, shave off a few grams in weight, crunch it down to about 3/4 of the size, pop on a fixed 28mm equivalent lens and voila, you have the Fujifilm X70!
The long review (for those who are new to Fujifilm): Okay, okay, I knew I couldn’t get away with a one sentence review. After all, not only is the X70 Fujifilm’s smallest camera with an APS-C sensor, but it is also the first serious competitor for the venerable Ricoh GR. For these two reasons alone, it is worth serious consideration.
With that said, let’s take an in-depth look at this new member of the Fuji clan!
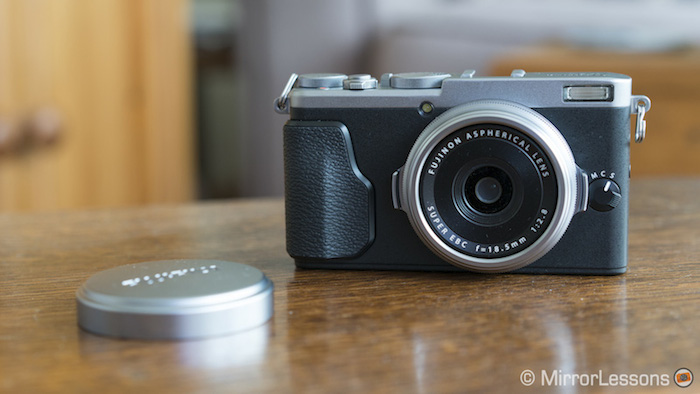
The Fujifilm X70 was announced alongside the X-Pro2 and at the time, was somewhat overshadowed by the hype surrounding its highly anticipated cousin. However, its characteristics soon caught the eye of photographers who loved the concept of the X100 series but either a) found it too large and expensive, or b) preferred something wider than the 35mm field of view. Most significantly, the X70 has:
- the same X-Trans II APS-C sensor found inside other second generation Fujifilm cameras
- a fixed 18.5mm (28mm equivalent) f/2.8 lens
- a tilting touchscreen, a first for a Fujifilm camera
The second point is probably the most relevant to me personally. I’ve never been a massive fan of the X100 series, not because I didn’t like the camera per se but because I never really got along with the focal length. Much of the time, I’d frame my composition, only to wish for something just a little wider.
The X70 has solved that problem, and I now find myself shooting more with this little Fuji than I ever did with any other, barring perhaps the excellent X-T1.
Note: We purchased the Fujifilm X70 to write this review. All opinions expressed here are our own.

[toc heading_levels=”3″]
Design and Ergonomics
The Fujifilm X70 bears a very close likeness to its big brother, the X100T. It has a sleek retro-styled body that comes in either silver and black or pure black. It is very light at only 340 grams with the battery, but lacks weather sealing.
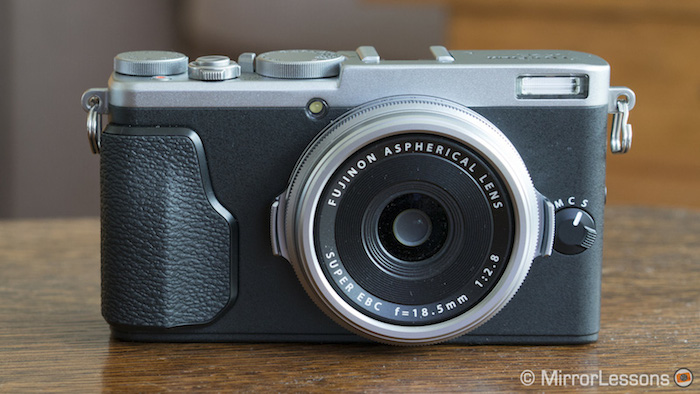
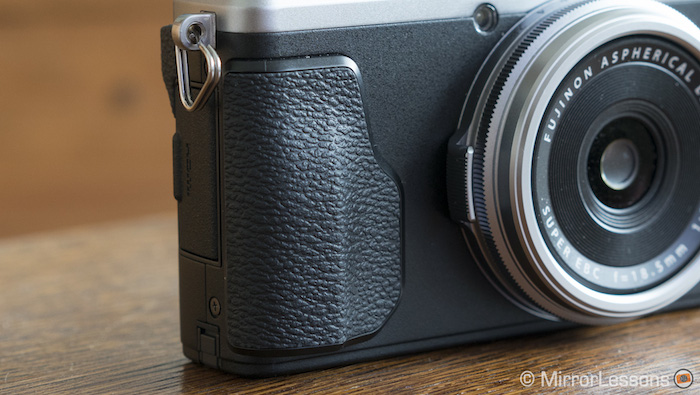
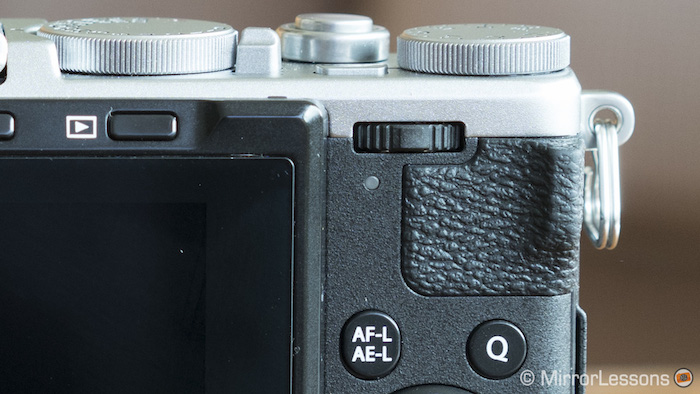
On the front, you will find a shallow rubber grip that is textured to improve your hold on the camera. Combined with the thumb rest on the back, I found the camera very comfortable to hold. However, I should mention that Mathieu, who has bigger hands than I do, felt it was a little too small for his liking.
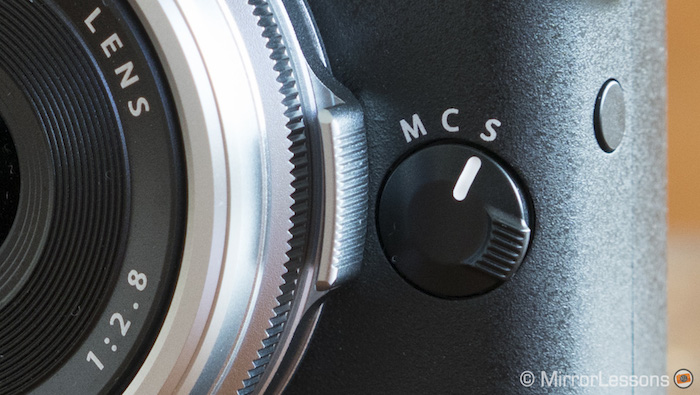
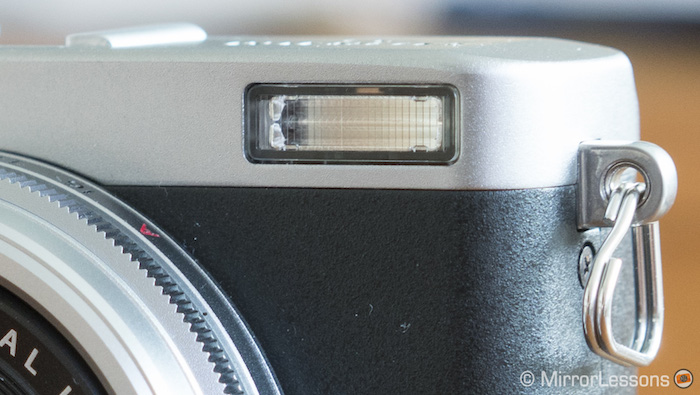
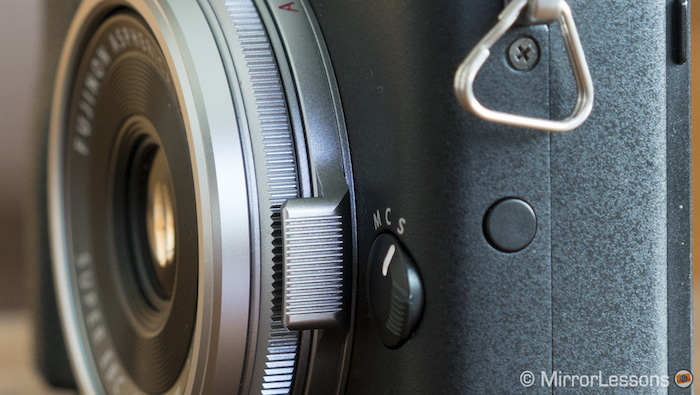
Also on the front is a round dial that lets you switch between S-AF, C-AF and MF. I like its placement but since it is a quite stiff, it can be difficult to turn. Above it is the built-in flash, slotting itself into the place of the hybrid viewfinder on the X100 series.
Around the fixed lens is a ribbed aperture ring that goes from f/2.8 to f/16 with an automatic option. Detent resistance is excellent, so much that I’ve never inadvertently changed my aperture, and the two tabs on either side help you to grip and turn the ring.
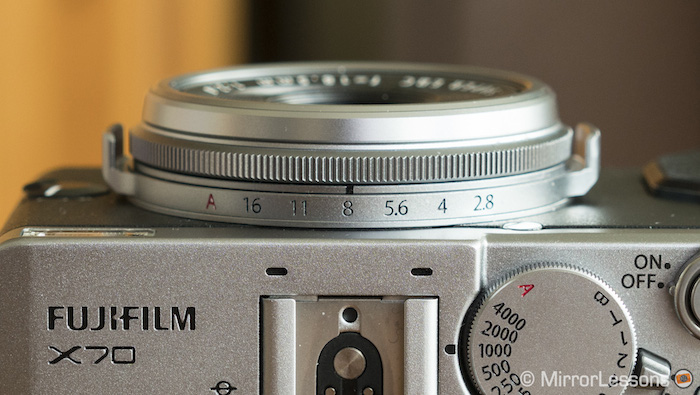
The lens also features a customisable control ring which, in all honesty, I find fiddly. It doesn’t turn in stops, so if you turn the ring too little, the settings won’t change, and if you turn it too far, you might skip an option by accident. Plus, if the aperture ring is set to f/8, the tabs block access to most natural place for your fingers to turn the control ring, which is on either side of the lens. It doubles up as a focus ring when in manual focus mode, which is the main reason it doesn’t turn in stops.
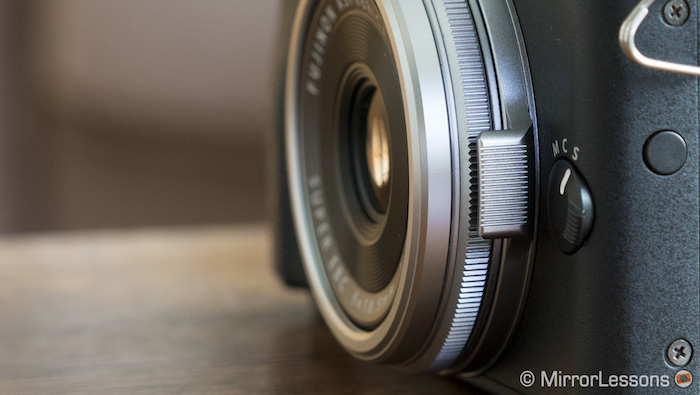
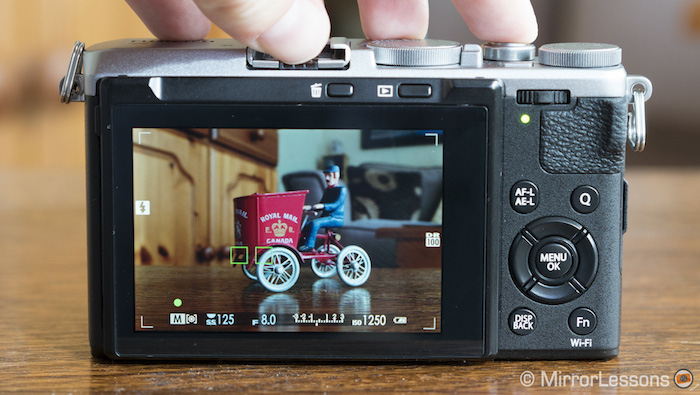
Turning to the rear, you’ll notice that most of the buttons and dials, including the control pad, AF-L/AE-L, Q Menu, Disp/Back, Fn buttons and jog-dial, are located on the right side of the body. This allows for easy one-handed operation of the camera. The only button that is harder to reach than the others is the Delete button, which is located at the top of the tilting touchscreen. The Playback button, sitting to its right, is easier to reach. Eight of these buttons are customisable.
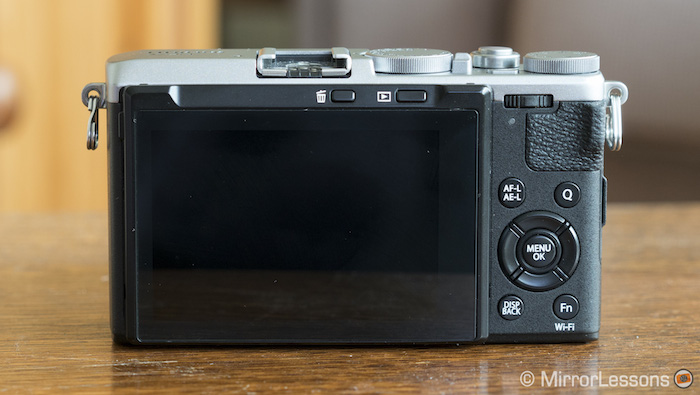
Speaking of customisable buttons, there is one that is so inconspicuous you may not even notice it. Function Button 7 (Fn7) protrudes very little and has no markings, but because it is located where your thumb sits when you support the camera with your left hand, it is actually quite useful. Natively, it changes the control ring settings but you can change it to your preferred function.
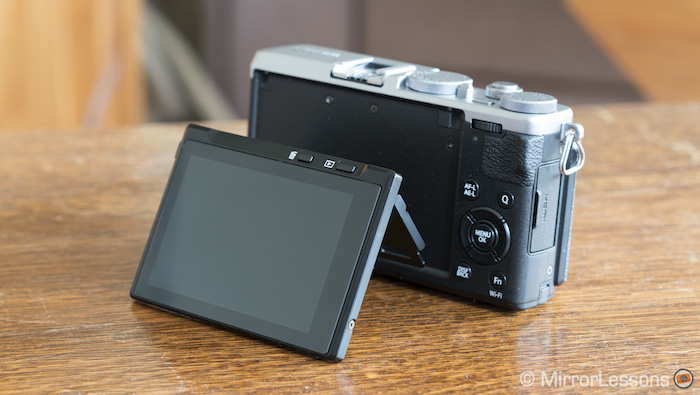
I’ve mentioned that the camera has a tilting touchscreen, and this is actually quite significant. Although the tilting function isn’t new, the X70 is the first Fujifilm camera to have touch functionalities. You can use the screen to choose your AF point, take a shot or you can deactivate it completely if touchscreens aren’t your thing.
Compared to other cameras with touch capabilities, I find the screen of the X70 just as reactive. However, the fact that you can only choose between 49 points in single point mode means that the AF point won’t always travel exactly to where your finger points. This isn’t a problem for landscapes but it isn’t ideal when you want to focus on a very precise point in your composition, such as a person’s eye for example. It is also unfortunate that the camera won’t lock focus when you choose the AF point on your screen in Focus mode.
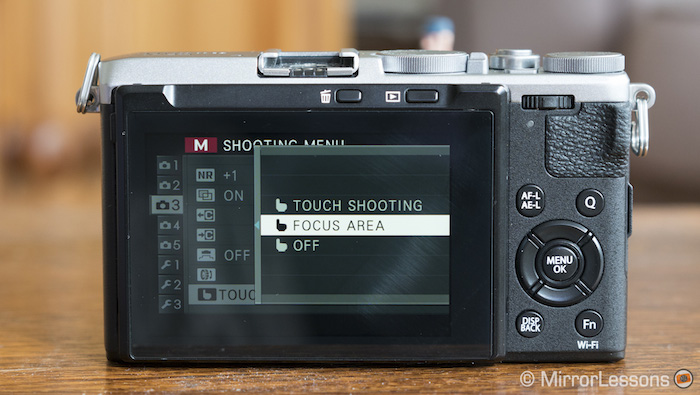
Note: The very first time you turn on the X70, the touchscreen will not be active, so you must first activate it from the menu (Set-up Menu 2). Once you’ve done this, you can choose between Focus, Shot and Off from a virtual tab on the right-hand side of the screen.
The tilting screen can be angled up or down or flipped up 180 degrees. Doing so activates a selfie mode, which is actually just face and eye detection. Unlike other cameras with more advanced selfie modes, you have to press the shutter button to take the shot. Still, it works like a charm!
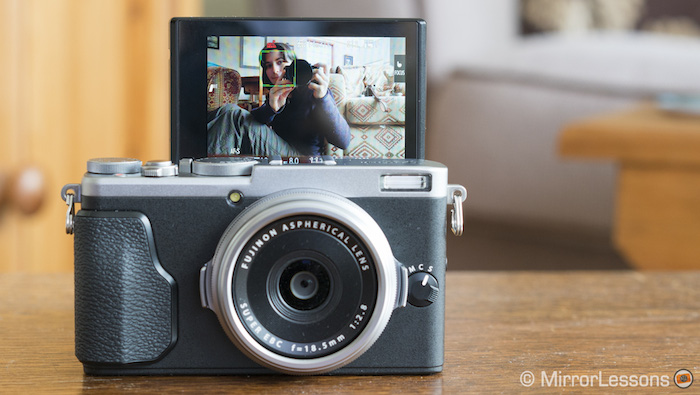
Selfies aside, the real benefit of a tilting screen is the ability to take photos at awkward angles. Think about the underbelly of a low-growing flower or a concert where everyone is a foot taller than you (the story of my life). There isn’t a day that goes by that I don’t use the tilting screen of the camera, and it actually makes up for the lack of a viewfinder because you can usually tilt it away from the glare of the sun.

If you do find yourself missing a viewfinder, however, there is the option of purchasing the VF-X21 optical viewfinder, which I hope to try out with the X70 soon.
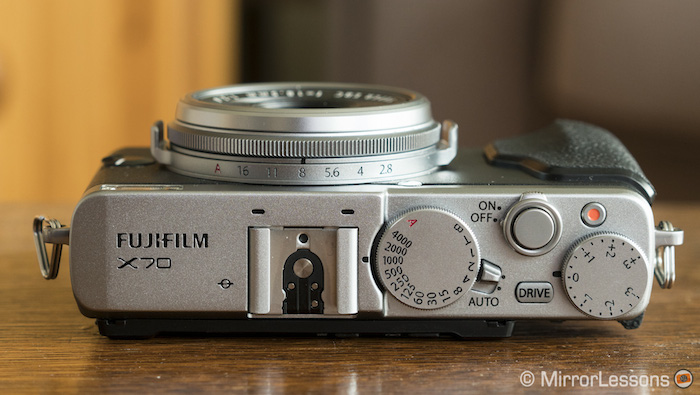
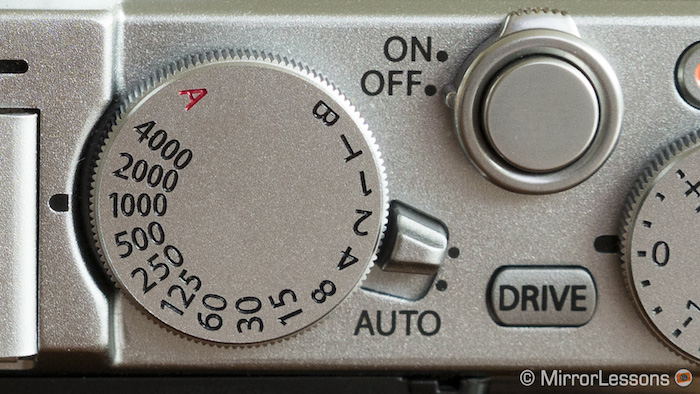
Finally, we come to the top of the camera. Here we have the same two dials found on the X100T: the shutter speed dial with a mechanical shutter speed of up to 1/4000 (1/32000 if you turn on the electronic shutter), Bulb, Time and Auto, and the exposure compensation dial with ±3 EV. You’ll also find the shutter button, Drive button, on/off switch, movie record button, Auto mode switch and hot shoe mount.
Ease of Use
Coming from the X100s and subsequently the X100T, X-T1 and X-T10, Mathieu and I are very used to Fujifilm bodies, dials, buttons and menus. But what about a newcomer to the system? Is the Fujifilm X70 easy to use right out of the box?
My impression is that it is certainly one of the easier cameras to approach. Thanks to its conspicuously placed Auto switch, you can easily put the controls into the camera’s capable hands if you find your confidence faltering. It will be especially straightforward for former or current users of film cameras to use because of the many external dials to control shutter speed, aperture and exposure compensation, and smartphone users will be comfortable with its touch functionalities.
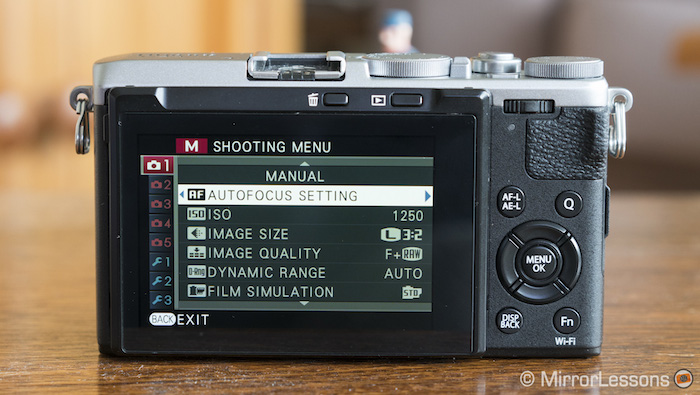
The menu is organised quite well, but it is too bad the touch functionalities didn’t carry over to the menu. I also dislike the fact that when the camera goes into sleep mode or when you turn it off, it doesn’t return to the last setting you accessed in the menu. Instead, it defaults back to the first option (Autofocus Settings) in the first menu. This can be annoying if you need to repeatedly access the same setting over and over, such as wireless communication located in the 5th shooting menu.
For quick access to the most important settings, you have the well-loved Q menu which you can customise, as well as seven custom menus to which you can apply your most frequently used settings.
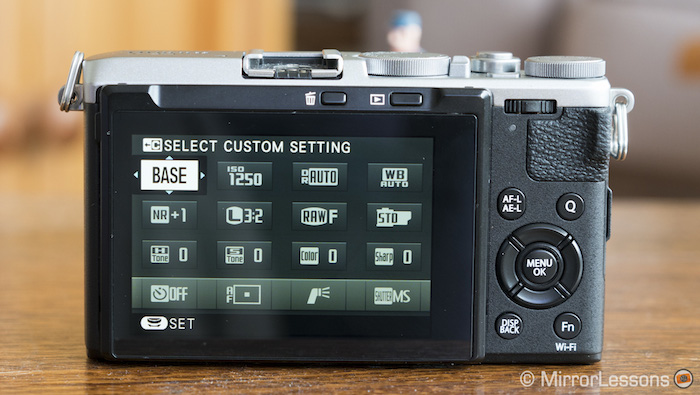
Image Quality – The Camera
Let me start by saying that those of you who already own one of the latest Fujifilm cameras should feel free to skip this section!
The Fujifilm X70’s 16MP X-Trans II APS-C sensor is identical to the one found inside the X100T and X-T1, as is its EXR Processor II. It differs from the traditional Bayer sensor in that it uses an irregular pattern of pixels to reduce moire without the need for an anti-aliasing filter. This pattern ensures that all horizontal and vertical lines of pixels contain at least one R, G and B pixel.
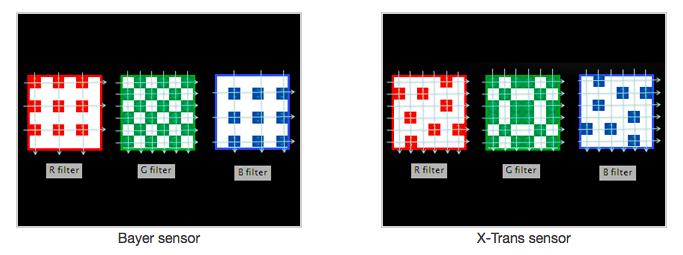
Another characteristic is the lack of a low-pass filter between the sensor and the light entering the lens. In plain English, this means better overall resolution and colour reproduction.
Mathieu and I are in agreement with much of the photographic internet when they say that the image quality and colours produced by Fujifilm are quite beautiful and somehow less digital-looking than those produced by other brands. This is especially true of the Film Simulation Modes (Fujifilm’s take on colour profiles) which use the names of certain popular films produced by Fujifilm such as Velvia and Provia. The X70 comes with the latest colour film simulation mode, Classic Chrome, which is my personal favourite for documentary photography because of its subtle palette.


Of course, the X70 also comes with all the so-called advanced filters you’ll find on any camera, such as pop colour, toy filter, high and low key, soft focus, and so on. I only ever use these when I have to show they exist for a review because they’re nowhere near as nice as the Film Simulation Modes. You can find them in the Drive menu.
The 16MP resolution of the X70 is more than enough for a variety of applications, from landscapes to portraits to street.
We’ve never come across any significant issues regarding sharpness or detail reproduction in the RAW files, although some users have complained that Adobe Lightroom doesn’t reproduce the greens in foliage as well as other software programs like Iridient Developer or PhotoNinja. Personally, we enjoy using Lightroom because it is easy to organise your images and it includes colour profiles that reproduce the look of Fujifilm’s film simulation modes, but you may feel differently.


As we’ve stated in previous reviews, the dynamic range is very flexible. You can usually recover ±3 EV from both the shadows and highlights in post-production. There is also a D-Range optimiser that lets you keep the same dynamic range of images taken between ISO 100 and 400 when you use higher ISO sensitivities. For example, if you take an image at ISO 1600, you can choose the dynamic range of an image taken at 100, 200 or 400. Note that it doesn’t work as well at the higher sensitivities as it does at ISO 800 because noise in the shadows increases.
Most of today’s mirrorless cameras perform well up to 3200 or 6400 ISO depending on your tolerance (with a few exceptions like the low-light monsters, the Sony A7s and A7s II), and the X70 is no exception. In low light, I generally feel comfortable pushing the files as far as 6400 ISO but I prefer to stay between ISO 1600 and 3200 if possible.

X70, 1/170, f/2.8, ISO 1600

If you want to use higher sensitivities (from ISO 12800 to 51200) – and generally I’d advise that you don’t – you must first switch to JPG mode in the menu. The same applies if you want to use other functions that only produce JPGs, such as film simulation bracketing.
Personally, I feel this extra step should be automated, as constantly switching between RAW + JPG and JPG is time consuming and frustrating. For example, if you have a certain setting activated (such as the electronic shutter, for example) that blocks access to the higher ISO sensitivities, you have to waste time digging through the menu to find out what the problem is.
A couple of other fun features are Panorama and Double Exposure, both of which are located in the Advanced section of the Drive menu. The former works well if you keep yourself steady and sweep at a good pace but you will encounter artefacts if there are moving subjects in the picture, such as the lady in red in the example below. You can sweep from side-to-side, top-to-bottom or bottom-to-top and select between a large or medium panorama. The latter simply creates a double exposure in camera. Curiously, both panorama and double exposure only produce JPGs but you don’t have to switch to JPG in the menu before being able to use them.


Finally, there is the Digital Teleconverter, a first on a Fujifilm camera. Whereas the default field of view is 28mm on the X70, the teleconverter performs an in-camera crop to 35mm and 50mm and upscales the crops to 16MP. Of course, this is a sensor crop so you could essentially achieve the same results by cropping and upscaling in post-production. This is one of the many functions that can be assigned to the control ring and can only be used in JPG mode. You can check out my in-depth article about the teleconverter here.
Image Quality – The Lens
One of the biggest differences between the X100T and the X70, and probably the main reason someone would switch from the former to the latter, is the fixed 18.5mm lens (28mm equivalent on 35mm format). It is officially the third premium compact with an APS-C sensor to feature a 28mm equivalent lens, following the Ricoh GR/II and the Nikon Coolpix A.
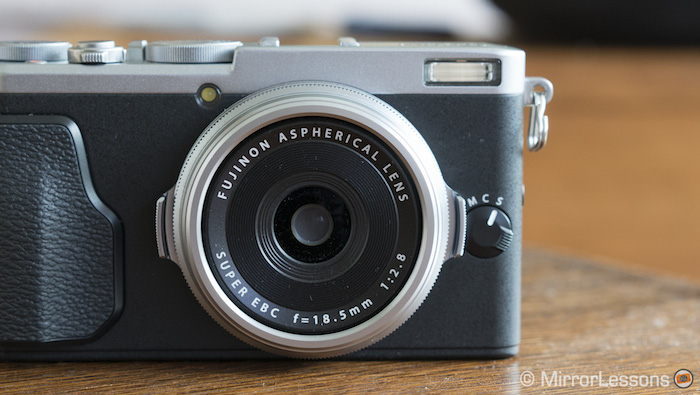
So far, I’ve really enjoyed the image quality coming from this lens.
Its fastest aperture is f/2.8, which is good enough to isolate subjects and generate a pleasant bokeh, and like the X100T, it has a close focus distance of 10cm, which further helps the bokeh rendering.

The sharpness thorough the aperture range is very good in the centre with peak performance occurring between f/4 and f/5.6. It is slightly softer at its fastest aperture, which is to be expected. The slowest aperture of f/16 is useable but noticeably softer than the other values.
The corners tell a slightly different story. Peak performance occurs at f/5.6 but f/4, f/8 and f/11 are also respectable. The fastest aperture, on the other hand, is noticeably softer much like the slowest aperture.
I didn’t notice any relevant distortion in my real-world samples and chromatic aberration is well-controlled as long as you don’t shoot wide open into the sun.

X70, 1/120, f/8, ISO 200

X70, 1/550, f/4, ISO 200
Flare, on the other hand, can be a pain if you don’t own a lens hood. It often occurs in the corner of your image in the form of a rainbow. Luckily, the inexpensive third-party lens hood we use on the X100T (the LH-X100 by JJC) is the perfect fit for the X70 because they have the same filter thread diameter. As soon as I started using it, flare became far less of an issue.
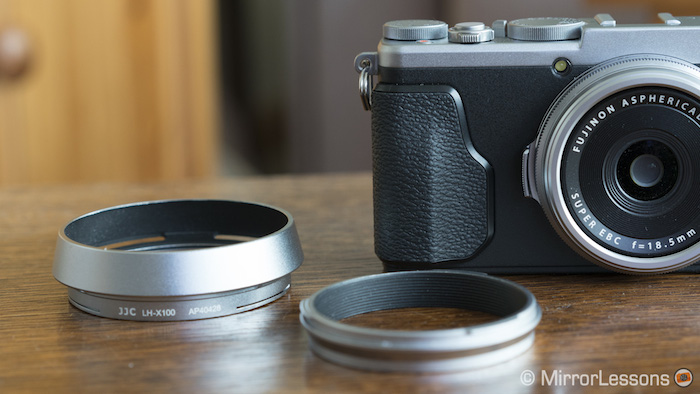

As for the focal length, my opinion hasn’t changed from when I posted our first X70 sample image gallery last week. I absolutely love shooting at 28mm for everything from landscapes to street to environmental portraits. I fully recognise that this is a personal perspective but I do believe it is one that many photographers share.
Autofocus, Manual Focus and Performance
Autofocus
The Fujifilm X70 has inherited the hybrid autofocus system of the X-T1 and X-T10, making it one of the quickest cameras in the line-up. Of course, given its fixed wide-angle lens, you won’t be using this camera for sports or wildlife, but it will certainly be put to use on the streets where quickly capturing fleeting moments is part and parcel of the genre.
Note: If you are interested in the AF capabilities of the X70, I highly suggest you read our in-depth article about the X-T1’s autofocus capabilities after firmware update 4.0. Everything written there also applies to the X70.
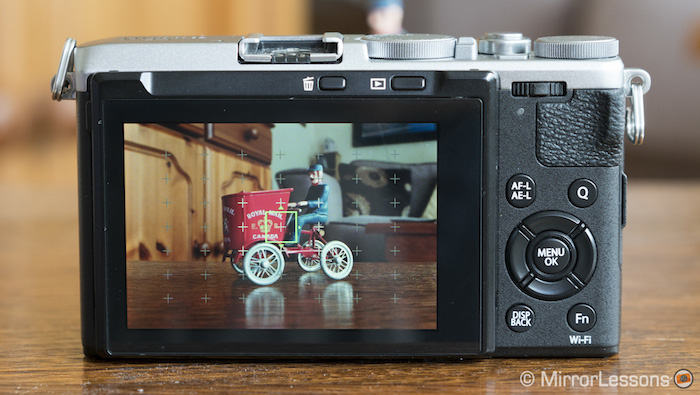
The X70 has 49 AF points (the central 9 are phase detection), 77 subdivided areas and three AF modes: Single Point, Zone and Wide/Tracking.
- Single Point – You can move the single AF point around the frame to any one of the 49 available points. The single AF point comes in five different sizes. It is very quick to lock as long as there is contrast in the scene but on rare occasions, will fail to lock in situations that don’t present much difficulty.
- Zone – You can select a group of 9 points (3×3), 15 points (5×3) or 25 points (5×5) out of the 77 subdivided areas. Once you’ve selected your area, the camera will automatically use one or more points to focus on your subject. These groups can be positioned anywhere in the frame.
- Wide/Tracking – The camera will automatically choose one or several points out of the 77 areas available. In this mode, you can choose where to start focusing and track your subject.
Though there is a time and a place for all three modes, the most useful tend to be Single Point (shown above) when you have to focus on a very specific detail, such as a person’s eye, and Zone when you have to focus on a subject that takes up a significant portion of the frame or group of subjects. We tend not to use Wide/Tracking for the simple reason that it hands over too much control to the camera and isn’t always accurate.
The X70 also comes with S-AF (single) and C-AF (continuous) modes, which are accessible from the round dial on the front of the camera. The former is for static subjects while the latter is for subjects in movement.
You can shoot at 8fps in High burst for approximately 10 JPG frames, or 3fps in Low burst for an unlimited number of frames. Keep in mind that only the central phase detection points will available if you shoot at 8fps in C-AF.
As I mentioned in my discussion about selfies, the camera comes with Face Detection and Eye Detection. They work well enough and could prove useful for street photography involving a prominent subject. Sometimes the Eye AF will lock on the wrong eye even when you set it to specifically choose either the right or left eye in the menu, but face detection is very accurate overall.
Manual Focus
Moving on to manual focus, the X70 gives you three manual assist options: Standard, Digital Split Image and Focus Peak Highlighting. All manual focus adjustments are carried out by turning the focus ring on the lens.
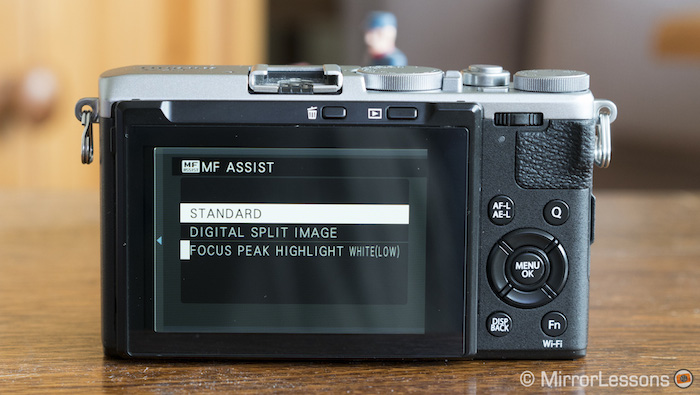
In standard mode, you can manually focus without any assists or if you wish, magnify your image by pressing the jog-dial. I find magnification to be the most accurate way of checking your focus but using it does mean that you lose sight of your overall composition.
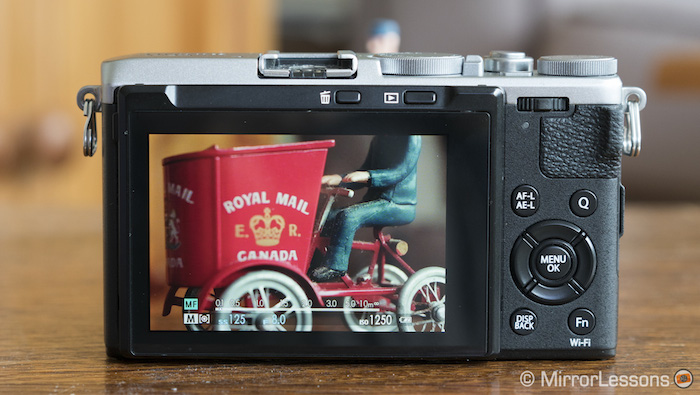
The second method is Digital Split Image, which splits the centre of the screen into four stripes that you have to align to achieve focus. The main advantage of this method is that it allows you to keep an eye on your composition while pinpointing your focus. However, depending on your subject, it isn’t always easy to see the stripes.
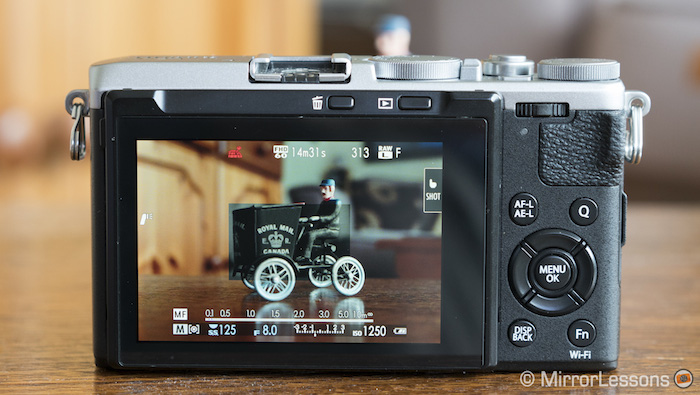
Finally, we have focus peaking. You can choose between High and Low intensity and three different colours (red, white and blue). I find this method the least effective in terms of focus accuracy, so it is better to use it when you aren’t picky about having a very specific element in focus.
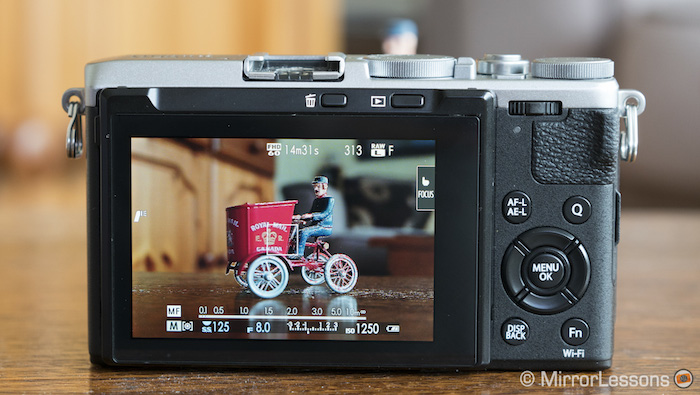
To assist you in manual focus mode, there is also the option of pressing the AF-L/AE-L button. It briefly activates autofocus so that you can bring the subject of interest into focus, and then manually perform minor adjustments afterwards. This works well for moving subjects such as animals, insects or plants swaying in the wind.
Performance
The first thing you’ll notice when you turn on the X70 is a prompt asking whether you want to use the camera in High or Low performance mode. In High mode, the AF is faster and the time it takes for the camera to restart is reduced. In Low mode, a power saving mode is activated to prolong the battery life.
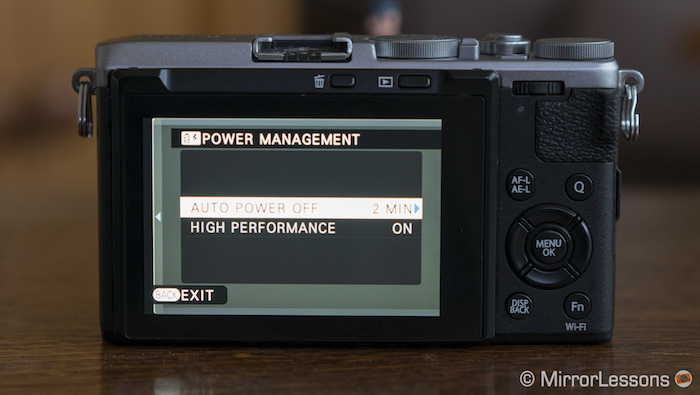
To be honest, I haven’t noticed an abysmal difference between the two. The camera’s AF seems quick regardless of the mode I choose, and it doesn’t bother me if I have to wait a few extra milliseconds for the camera to wake up. As such, I generally keep it on Low to eek as much life out of the battery as possible. With this camera, one battery will usually see you through 3-4 hours of intensive shooting.
The camera is also very silent in its operation thanks in no small part to its leaf shutter. The leaf shutter differs from a traditional focal plane shutter in that it is positioned in front of the lens iris. Not only is quieter but it also gives you the possibility to use flash with high shutter speeds (up to 1/4000s).
The only limitation concerns the bokeh rendering, which can become unpleasant at shutter speeds faster than 1/1000s at f/2.8. This is due to the leaf shutter failing to cover the large aperture fast enough. The X100T has a built-in ND filter (3 Ev equivalent) that counteracts the issue by reducing the shutter speed but unfortunately, the X70 has no such benefit.
Adding to the discreet nature of the camera is the electronic shutter, which makes it possible to shoot at speeds up to 1/32000 in complete silence. However, it disables the use of flash and the extended ISO values. As with any electronic shutter, rolling shutter may occur with fast-moving subjects and banding will be present in certain artificial light conditions.
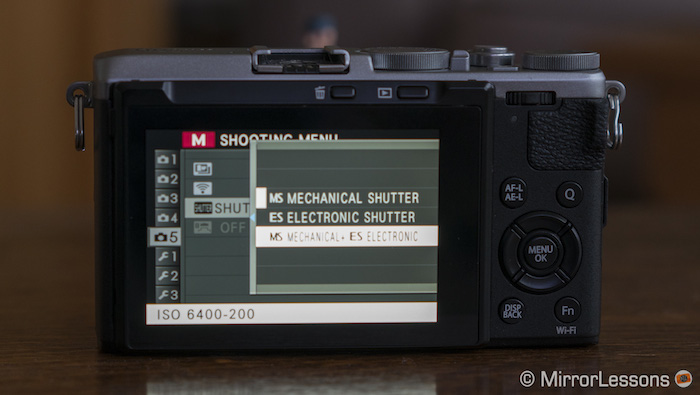
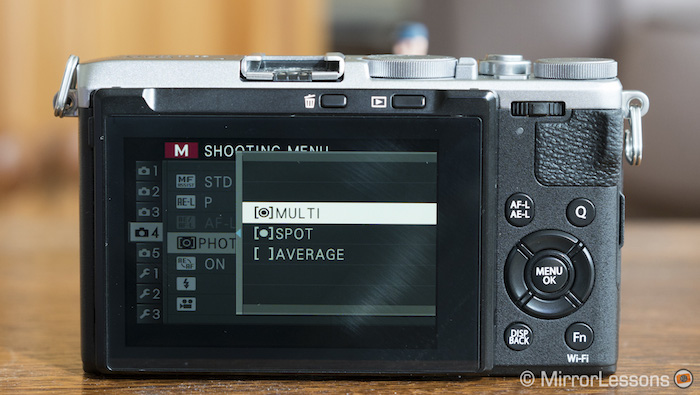
As for the camera’s metering, which is called Photometry in the menu, you have the choice between Multi, Spot and Average. I tend to stick with Multi as it works well for most situations, regardless of whether I’m in aperture or shutter speed priority.
The camera doesn’t feature any sort of stabilisation, optical or otherwise. As such, you should keep an eye on your shutter speed at all times when taking still images. Generally, I was able to take in-focus shots down to 1/15s if I kept myself steady.
Video
Since not even the flagship X-Pro2 has outstanding video capabilities compared to the competition, it would be unreasonable to expect the Fujifilm X70 to be any different.
The camera can shoot in Full HD at 60p with continuous recording up to approximately 14 minutes, and works best with Class 10 SD card or higher. Any one of the Film Simulation Modes can be applied when you record.
By default, the movie record button is found on the top plate but if you don’t do a lot of movie shooting, you can also assign it to another function. Personally, I find it quite hard to press because of its lack of responsiveness, size and close proximity to the exposure dial. For those who want to shoot movies with this camera, it might be more comfortable to assign the movie function to Fn7, which I mentioned in the design chapter.
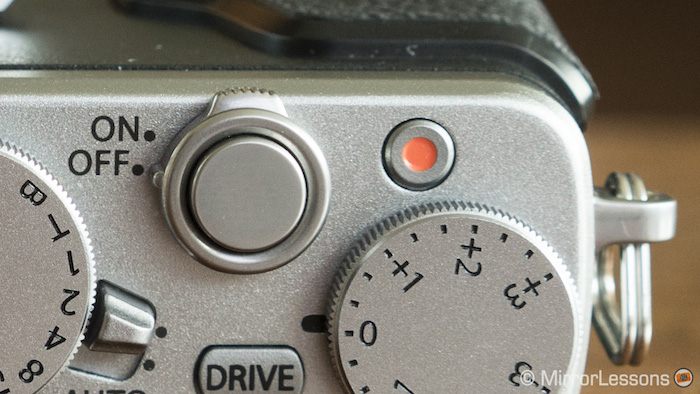
Before you start recording, it is a good idea to check out the Movie Set-Up menu. From there you can pick the quality, frame rate, movie ISO, microphone level adjustment and mic/remote release. It is possible to adjust shutter speed, aperture and exposure while you record but you cannot de-click the aperture ring, so whenever you make an adjustment to the aperture value, the camera will jitter. For this reason, it is better to work in full manual exposure mode (including ISO). In automatic or semi-automatic mode, any change in exposure while shooting will result in flickering and changes in brightness in the footage.
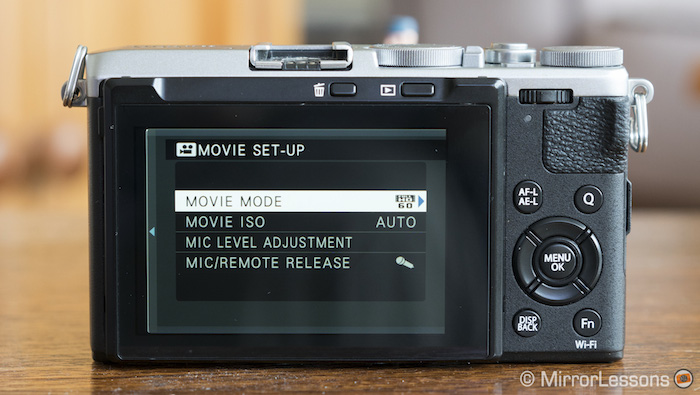
Continuous AF in movie mode is fairly reactive but the movement of the lens elements as they change from one focus point to another is quite audible and will surface in the audio of your recorded footage in a quiet setting.
Keep in mind that there isn’t any stabilisation (optical, sensor or software) so your hand-held footage may be shaky.
As with other Fujifilm cameras with a 16MP sensor, the video quality is decent for casual or amateur shooting but more demanding users should turn their gaze to the various 4K offerings from Panasonic and Sony.
Below you can see a short video taken during the Aberystwyth St. David’s Day Parade.
Other Features
Now it is time to talk about all the other features of the Fujifilm X70 that don’t really fit in anywhere else.
Bracketing, Interval Timer and Self Timer
The X70 has a number of bracketing modes, of which only AE Bracketing is available in RAW + JPG mode. The rest are only available as JPGs. They are as follows:
- AE Bracketing (±1/3EV, ±2/3EV, ±1EV)
- Film Simulation Bracketing (Any 3 types of film simulation selectable)
- Dynamic Range Bracketing (100% · 200% · 400%)
- ISO Sensitivity Bracketing (±1/3EV, ±2/3EV, ±1EV)
- White Balance Bracketing (±1, ±2, ±3)
I personally haven’t found much use for the final three on the list because in difficult conditions such as low light, high dynamic range or tricky artificial lighting, I tend to use the RAW files anyway.
As I already mentioned in my X70 gallery, I love the Film Simulation Bracketing mode because it gives me three different interpretations of a scene, and there is no denying the merits of AE Bracketing for HDR.

The Interval Timer Shooting mode is useful for time-lapse movies, though the camera will not compile the time-lapse itself. You can take up to 999 shots at intervals as short as 1 second or as long as 24 hours. There is also a Self Timer you can set to either 2 or 10 seconds.
Flash
The X70 comes with a built-in flash located in the same place as the viewfinder window of the X100T. Exposure compensation is ±2.0 and you have various options such as Forced Flash, Commander, Suppressed Flash, Slow Syncro and Red-Eye Reduction (available when Face Detection is set to on). There is also a hot shoe on which you can mount a (small) external flash if you wish.

Battery Life
As I mentioned above, the battery life isn’t bad if you use the camera in Low performance mode but it is still a good idea to carry at least two for a full day of shooting. It takes the same batteries as the X100T. Unfortunately, the camera doesn’t come with a battery charger, so your only options are to either charge it via USB or buy a separate charger.
Wireless Capabilities
Finally, we arrive at the wireless capabilities of the camera. The X70 uses the same mobile app as the X100T and all other Fujifilm cameras. It used to be called Camera Application but has been updated and renamed to Camera Remote.
Within the App menu, there are four sub-menus called: Remote Control, Receive, Browse Camera and Geotagging.
With remote control, you gain access to the most essential settings, from aperture and shutter speed (30s to 1/4000s) to ISO, film simulations, white balance, flash mode and self timer. You can select your AF point by tapping the screen (a bit of a laborious process as you have to double tap), switch between stills and video, play back your images once you’ve finished.
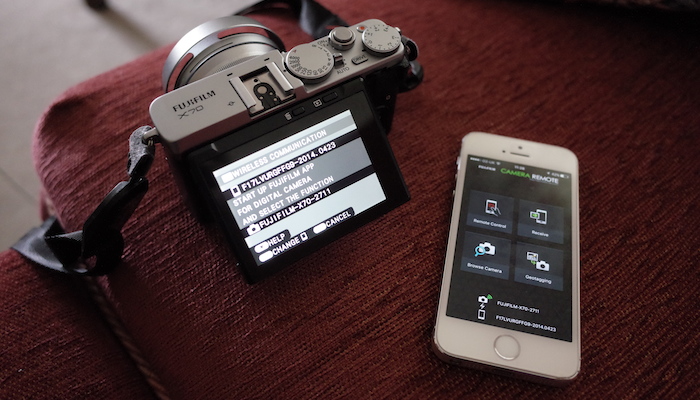
The app works well enough on our iPhone 5 but the two devices sometimes disconnect for no reason. Even more annoying is the fact that you cannot go back and enter a different sub-menu – say, for example, from Remote Control to Receive – without severing the connection first. For a company that makes such great cameras, it is a shame they haven’t put more time into perfecting the app.
Conclusion
If you’ve made it to the end of this review, you’ll have realised that my feelings about this camera are very positive.
It would be easy to label the Fujifilm X70 as superfluous to the X line-up due to there being other options that will give you the 28mm field of view, including an XF 18mm lens for the interchangeable series and a wide-angle converter for the X100 series. However, neither solution is even close to as compact as the X70. It really is the kind of camera you could place inside your bag and forget about until an interesting photographic moment arises because it takes up so little space.
Some of you may be wondering how it compares to its main rival, the Ricoh GR II. Well, we managed to get our hands on one for a couple of weeks and the comparison will be online very soon.
Of course, there is also the Fujifilm X100T, a camera which continues to interest many street shooters. We’ll be conducting a full comparison between these two models as well but for now, I can only echo the statement at the beginning of this review: the main differences are the size, weight, field of view, and the presence/lack of a viewfinder or touchscreen. In short, if you love the X100 series, and X series cameras in general, there is no reason you shouldn’t feel the same way about the X70.
 What I like about the Fujifilm X70
- The lightest, most compact X series camera with an APS-C sensor
- Inherits the same attractive retro-styling as the X100T
- Image quality is excellent with beautiful Film Simulation Modes
- The 28mm field of view is perfect for landscapes, street, environmental portraits and more
- Hybrid autofocus that is more than fast enough for street photography
- Lots of external dials and buttons and a good grip
- Nice tilting touchscreen implementation
 What I don’t like about the Fujifilm X70
- Control ring (a.k.a. manual focus ring) is somewhat imprecise and difficult to access
- Movie button is difficult to press and front focus dial is very stiff
- It would be nice if you could access the higher ISO sensitivities and other JPG-only functions without having to switch to JPG mode in the menu first
- It doesn’t come with a battery charger
 What can be debated about the Fujifilm X70
- The lack of a viewfinder may prove bothersome to some (but an external viewfinder is available)
- Not overly robust or weather-sealed (but this would add to the size and weight of the camera)
- Suffers from flare (but this can be mitigated with a lens hood)
What are your thoughts about the Fujifilm X70? Let us know in the comments section below!
You can also check out our Fujifilm X70 accessory recommendation article here!
