Don’t worry, there isn’t a typo in the title. I did indeed write OVF (a.k.a. optical viewfinder)!
Now you might think I’ve had too many pints or have a serious headache but rest assured, I am 100% healthy and yes, I am going to talk about shooting birds in flight with a telephoto lens using the optical rangefinder of the Fujifilm X-Pro2.
Crazy? Well, let me start by sharing the first image below.

Update: don’t forget to also check out our Fuji 100-400mm complete review!
Let’s rewind to a few days ago when I rented the new Fujinon XF 100-400mm f/4.5-5.6 from LensesforHire for one week. This lens can be considered Fuji’s first serious offering for wildlife photographers (the full review is coming soon). As usual, I went to my favourite testing ground Bwlch Nant yr Arian where the red kite feeding takes place.
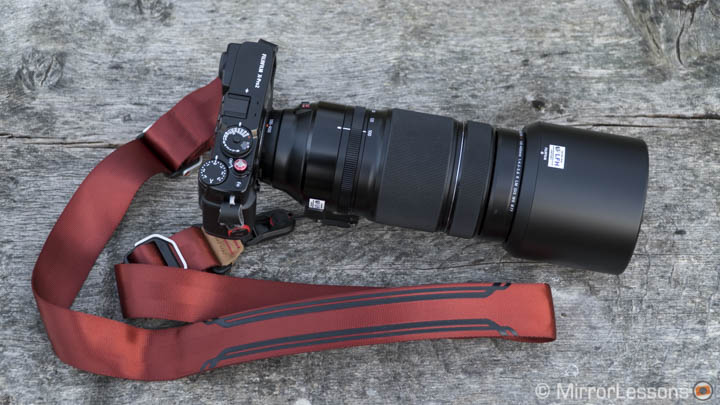
The red soft release button is by Lolumina.
While shooting, my mind jumped back to the Olympus EE-1 Red Dot Sight that I reviewed in January. It is a very useful accessory (compatible with most cameras – both mirrorless and DSLRs) designed to help you track birds more easily. Instead of the viewfinder, you use the dot sight to track your subject which allows you to keep a wider view of what’s happening around the bird.
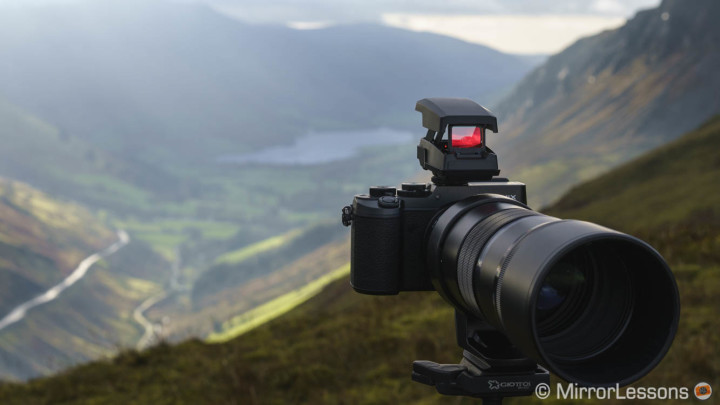
Suddenly, a question popped into my mind: is there any way I can use the optical viewfinder of the X-Pro2 in a similar way? Out of curiosity, I took a few shots with very low expectations and I ended up with an encouraging series of images.
I immediately thought: “Ok, Mat, that’s darn good luck right there!”


These results intrigued me, so I decided to go back to the red kites a second time and use just the OVF for the entire session.
And guess what, it actually works!
Why does the OVF sound inappropriate in the first place?
For those unfamiliar with the technology, the Fujifilm X-Pro2 features a hybrid viewfinder which is very similar to the one found on the X-Pro1 and X100 series. There are three options available that you can select with the dedicated lever on the front:
- Electronic viewfinder
- Optical viewfinder
- Optical viewfinder with ERF (electronic rangefinder)
Note: since the ERF is only available in single AF mode, I won’t mentioned it again as it is of little use in this case.
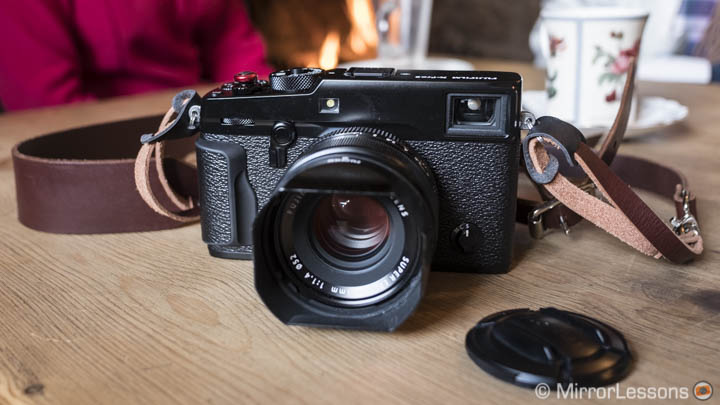
The lever on the left allows you to switch between EVF, OVF and ERF.
The electronic viewfinder is very good and is an improvement over the already excellent EVF found on the X-T1 (although not as large). Actually I can say it’s one of the best EVFs I’ve tested so far. However, when shooting at 8fps, the lag time is still present even when the Power Management is set to High Performance. That can make the tracking experience more difficult especially when dealing with fast birds that suddenly change direction.
The optical viewfinder is a reverse Galilean type. The frame you see is not through the lens or the sensor but through the finder itself as opposed to the electronic viewfinder that gets its live view directly from the sensor. This introduces the parallax effect: the perspective you see in the OVF is slightly different from the one seen through the lens/sensor. This difference can become more relevant depending on the focal length and focus distance.
The actual field of view of the OVF is always the same no matter which lens you mount. It corresponds to a 16mm lens approximately (24mm in 36×24 terms) which means it is slightly wider than what your eye can see when you are staring straight ahead without looking left or right. The X-Pro2 can display a “bright frame simulation” which shows a white rectangle inside the OVF corresponding to the real field of view of the lens used.
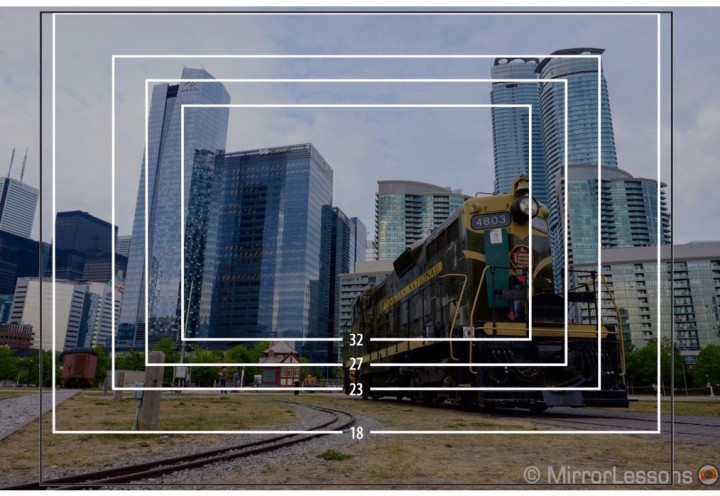
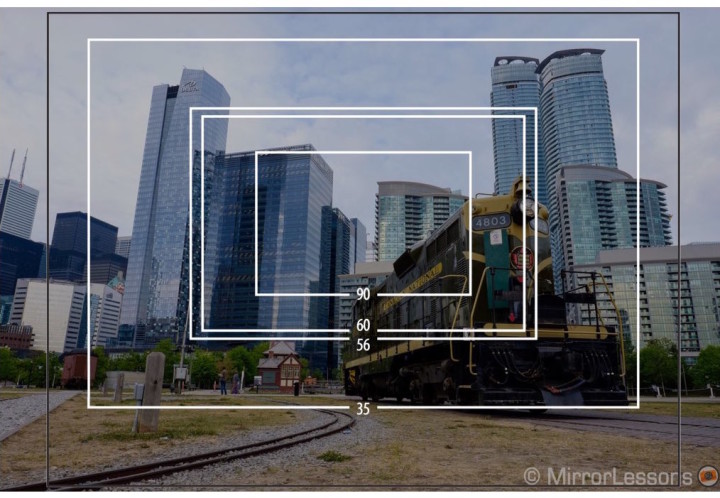
Because the OVF is also designed to be used with wide angle lenses, the longer your focal length, the smaller the white rectangle will be inside the OVF. Furthermore the bright frame simulation doesn’t go past 135mm.
Another small problem is that a larger lens like the 100-400mm will partially block the view in the OVF.
So far the description of the OVF suggests it is not really well-suited to wildlife photography and telephoto lenses. But…
Don’t leave yet as in the next chapter, I’m going to explain why these characteristics can be used at our advantage.
How to make the OVF usable for birds in flight
There are two main reasons you’ll want to try the OVF of the X-Pro2 for birds in flight. They are the same reasons that would lead you to try a red dot sight:
- You get a “real world” view of the scene without any lag, blackouts or slower frame rates in continuous shooting mode since the OVF is independent of the sensor/lens
- You get a larger view of the scene which helps you understand what’s going on around your subject and where your bird is going.
Let’s have a look at the settings I used for birds in flight. These apply regardless of whether you use the EVF or OVF:
- Continuous shooting: High (8fps)
- Continuous AF
- Zone AF with the area set to its largest
- Release priority set to focus to reduce the chance of taking out-of-focus shots.
- Power management: with the OVF, you could choose the standard mode as well since the AF performance shouldn’t be affected but I prefer to stick with High Performance. Note that the battery life drains more quickly with the latter.
Zone AF is important for two reasons. First it is the most reliable AF area mode for birds in flights. I use it for any situation featuring fast action actually, not just birds. The camera will detect the subject and use the appropriate AF points to track it. This also makes your tracking work easier: the camera will focus on the bird even if you don’t keep it precisely at the centre of the frame.
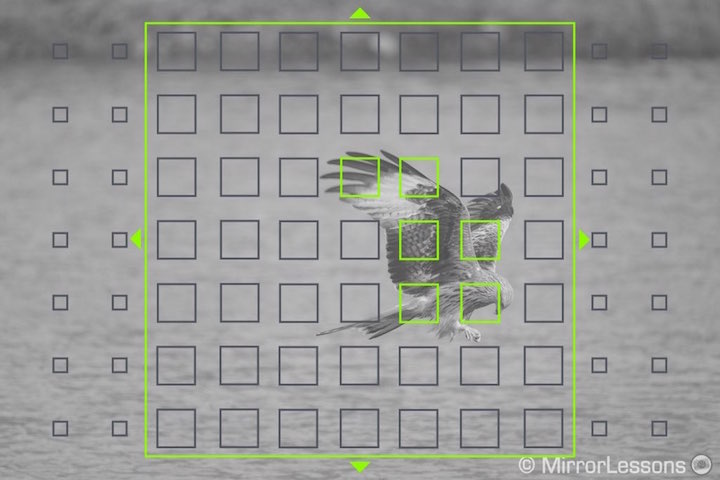
Second, when you select Zone AF, a white cross as well as the AF point area is displayed in the viewfinder (both EVF and OVF). These are our graphic reference to track the bird.
There is one more setting we need to check and that concerns the OVF. We want to turn on the “AF corrected frame” option: it will show the real AF points and the real bright frame position in the OVF (when you half press the shutter release button) by correcting the parallax difference.
Let’s see what it’s like to look through the OVF with the 100-400mm attached. In the first image below, my focal length is 100mm.
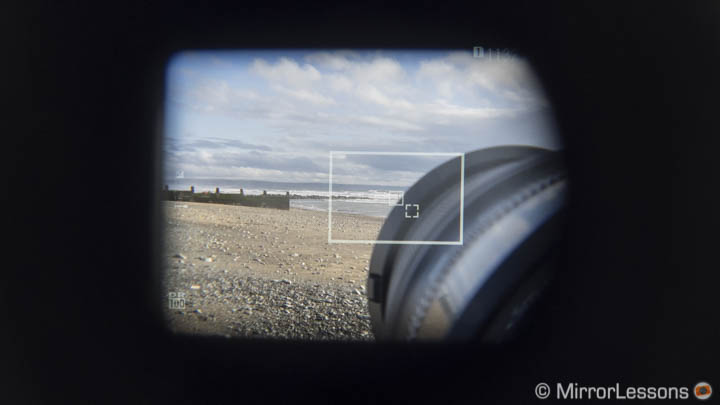
The first thing we notice is that it is better to take off the lens hood to have a better view. Of course the lens will still cover the bottom right but at least the center area is clearer.
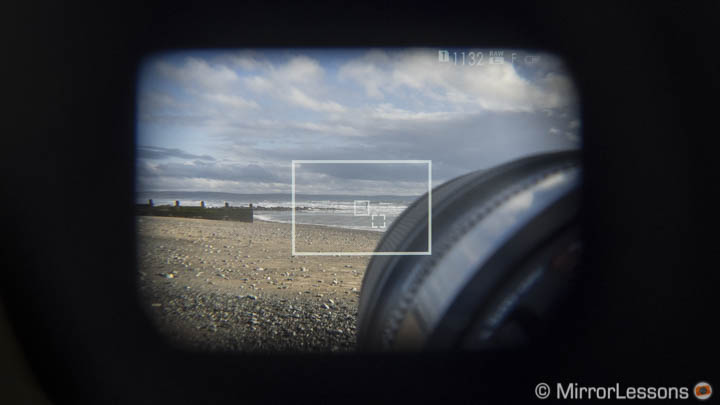
Now let’s select Zone AF and set our focal length to 400mm, which is likely to be the one we use most often. The good news is that the parallax issue is less present with long distance subjects.
In the two images below, you can see that I positioned the white cross exactly in the middle of the pole using the EVF. When I switch to the OVF, that same white cross is slightly to the left.
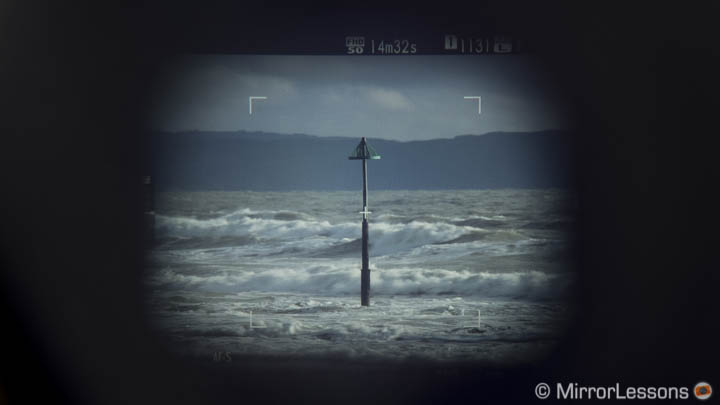
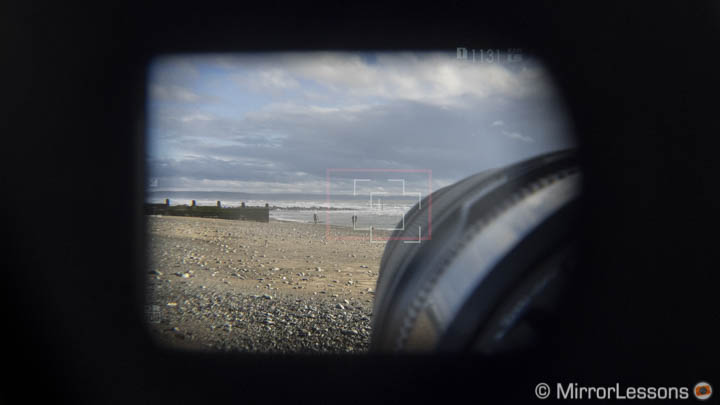
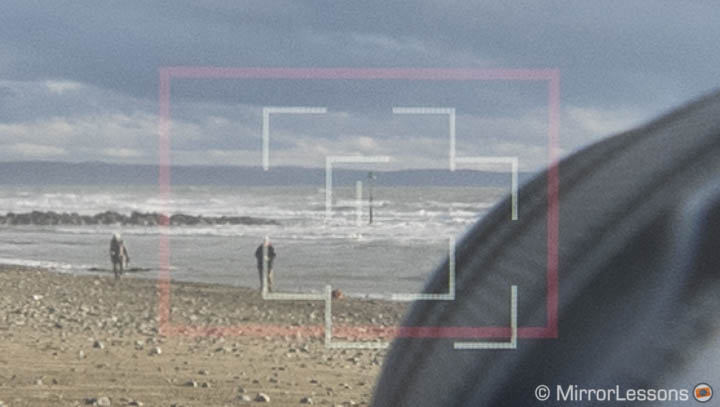
The rectangle frame is now red because the focal length used is beyond the field of view range the camera is able to display in the OVF. But what interest us in this case are the two smaller white frames.
You might wonder why two frames? That is the “AF corrected frame” option we activated before. It basically shows us (approximately) the zone in which our AF area can move depending on the focus distance. But again, with distant subjects, the parallax issue is minor so we need to keep an eye on the first white frame (top left).
Once we half press the shutter button to focus, the second rectangle below disappears and only the one that interests us remains.
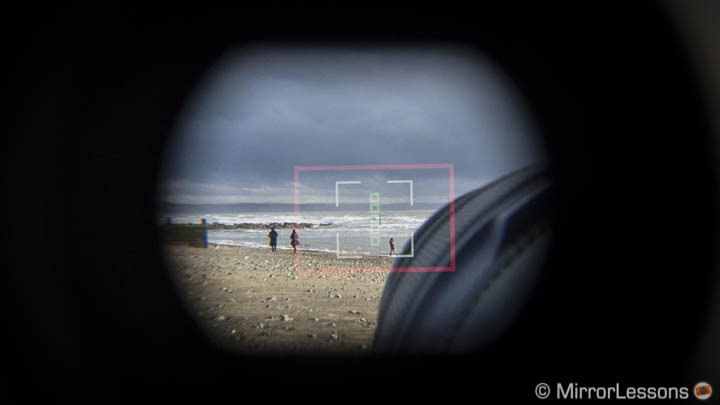
The X-Pro2 will also show the AF points in the OVF when the camera locks onto the subject. While they aren’t 100% precise, they give you an idea of what the camera is doing. If they don’t appear you know that the camera isn’t locking for some reasons. When you start the burst, the white frame will remain visible.
Our goal then is to keep the bird centered inside the white frame where the AF points are.
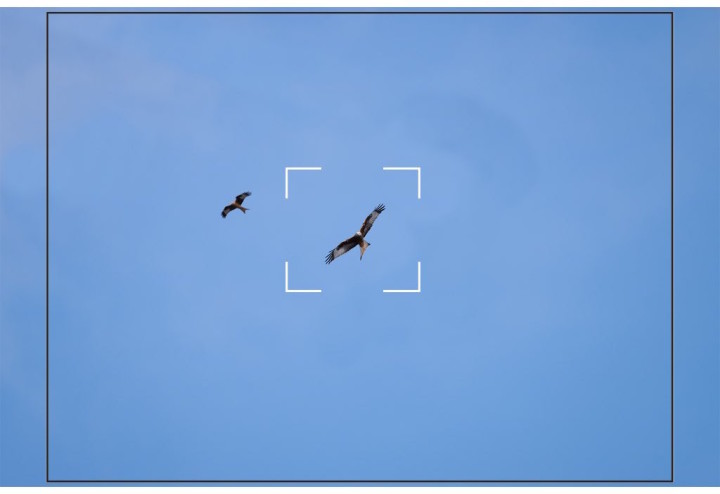
The Zone AF white frame will help us track the bird once we start the burst.
It goes without saying that to use the OVF, you must trust the AF capabilities of the camera and fortunately the X-Pro2 does quite well in this department (I’ll write more about the AF performance in our upcoming 100-400mm review).
Shooting BIF with the OVF: the results
Now that I’ve explained everything, let’s see some images. I will start with some of the best shots I got using the optical viewfinder.


Click on the image to open the full res version.

The shots above could make you think that it works like a charm but in reality there are some downsides to take into account. At the beginning of the article, I showed you a good tracking example where the kite is well-composed inside the frame most of the time. Now let’s see a less impressive example below:
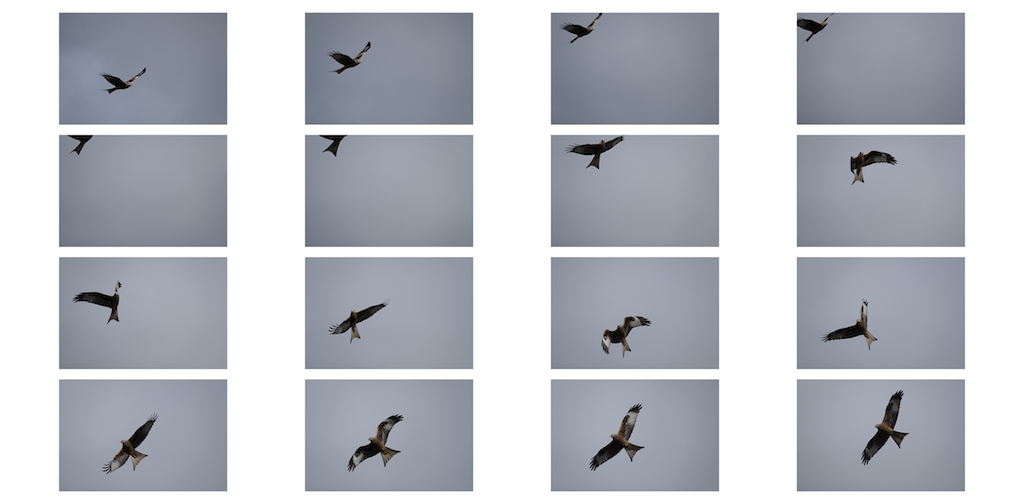
I have better examples but also worse examples than this as well. It happens for different reasons. First, I didn’t track well enough. Second, because the OVF is not as precise as the EVF, you will never know how accurate your composition is. Again, the best thing to do is to keep the bird centered inside the Zone AF frame as precisely as possible. If you succeed during an entire burst, the chance is high that you won’t cut the bird out of the frame. This is why I mentioned for every picture if I applied a crop in post-production. It gives you a better idea about the true results.
You could wonder why a photographer should use the OVF if there is the risk of less-than-perfect composition. Well, the answer is that it is difficult to get a perfect composition with the EVF as well because of the lag time.

With the OVF you don’t have any delay and you can follow the subject better. Of course this comes from someone like me who doesn’t have years of experience with birds in flight. It is interesting to note that my ability to accurately compose actually hasn’t decreased much since I started using the OVF.
A third factor that can negatively influence your results is the bird’s behaviour. Kites can change direction and speed towards you in a matter of seconds. Shorter distances are impacted by the parallax issue we talked about earlier so your composition can be less precise. Again, that white frame is your best bet.
Note that if the kite rapidly changes direction, it becomes difficult with the EVF as well. Because of the lag, you may realise that change of direction when it is already too late, causing you to waste shots while trying to get it back inside your frame. With the OVF your view is larger so it becomes easier to see where the bird is and frame it again. It also helps to switch from one bird to another if the latter is doing something more interesting.

Is there a difference in AF performance when using the OVF?
I haven’t noticed a drastic change but of course the inaccuracy of your composition can lead the camera to focus on the background or not focus at all.
In a few situations where the bird was farther away (so smaller inside the frame) and placed against a busy background (trees), the X-Pro2 did an excellent job at times but also failed at others.

Here the camera locked perfectly despite the busy background and the subject’s distance from the lens.

Here however the camera’s AF failed.
One thing that the X-Pro2 does well is keep the focus distance constant even when the subject is not within the AF zone area anymore. Of course if I don’t re-position it at the center it will eventually lose focus but it does seem to be an intelligent AF system and rarely goes beserck.

Here the camera held the focus well even though my composition was off.
Overall I haven’t noticed a drastic difference concerning the AF performance but the keeper rate can be lower as you have to trust the AF completely and you never know if the camera is mis-focusing until you play back your images.
Adding the 1.4x teleconverter into the craziness
Just because I hadn’t had enough, I threw the TC 1.4x teleconverter into the mix. It changes the angle of view to a 140-560mm equivalent which translates into a 210-840mm in 36×24 format terms. At 840mm, we have an even tougher challenge for the OVF.


Unfortunately this one came out slightly out of focus but I like the frozen action as the kite’s talons are submerged underwater grabbing the food.
Of course the TC 1.4x is an extreme test also because the AF performance decreases (something I’ve noticed while using the EVF too). The camera can fail to lock more frequently and can be less accurate when tracking.
Starting with the OVF and finishing with the EVF
Another solution (perhaps the one that gives you the best of both worlds) is to use both viewfinders.
For birds in flight, you usually start by observing the scene and when you spot a bird, you bring the camera to your eye, start following it and then take the burst. With the OVF, you can skip the “bring the camera to your eye” step.
Because the field of view is larger, you can observe the birds with the OVF, start following one of them by putting it at the centre of the white frame, then quickly switch to the EVF and take the shot. It takes less than 1 second for the camera to switch to the EVF but you still need to switch viewfinders at the right moment.
I tried this a few times and the best example is the one below. I started tracking the kite with the OVF. Then, when I realised he was approaching, I switched to the EVF to have better control over my composition. He flew closer to the water before going up again. I didn’t manage to capture him exactly at the centre of my frame but the result is good enough and a small crop did no harm.

Conclusion
As the title suggests, I consider this test more an experiment than a tutorial or tip for shooting birds in flight. It requires a bit of a learning curve and it certainly doesn’t make the X-Pro2 the perfect wildlife camera but I admit I was impressed by the number of good shots I brought home. To tell you the truth, I managed to capture some good close-ups for the first time since I started visiting the red kite feeding site. Granted, the more experience I gain, the better my results are going to be, but still I am still quite surprised.
What’s interesting is that I never gave the optical viewfinder of the previous X-Pro1 or the X100 series a fair chance.
Of course I took shots with it for my reviews but when I picked up the cameras for personal purposes, I often chose the EVF. This is the first time that I found a relevant purpose for the OVF on a Fuji camera.
Unfortunately, the 100-400mm lens that I rented must be returned tomorrow. Otherwise I would have definitely enjoyed gathering more experience with this unusual set-up. Plus, the Fujifilm X-Pro2 does quite well for this genre, though I found the viewfinder on the left more uncomfortable at times. As for the AF, it is definitely one of the best I’ve used in a mirrorless camera so far.
Our XF 100-400mm review is now online: motorbike races, soccer games and more birds!

