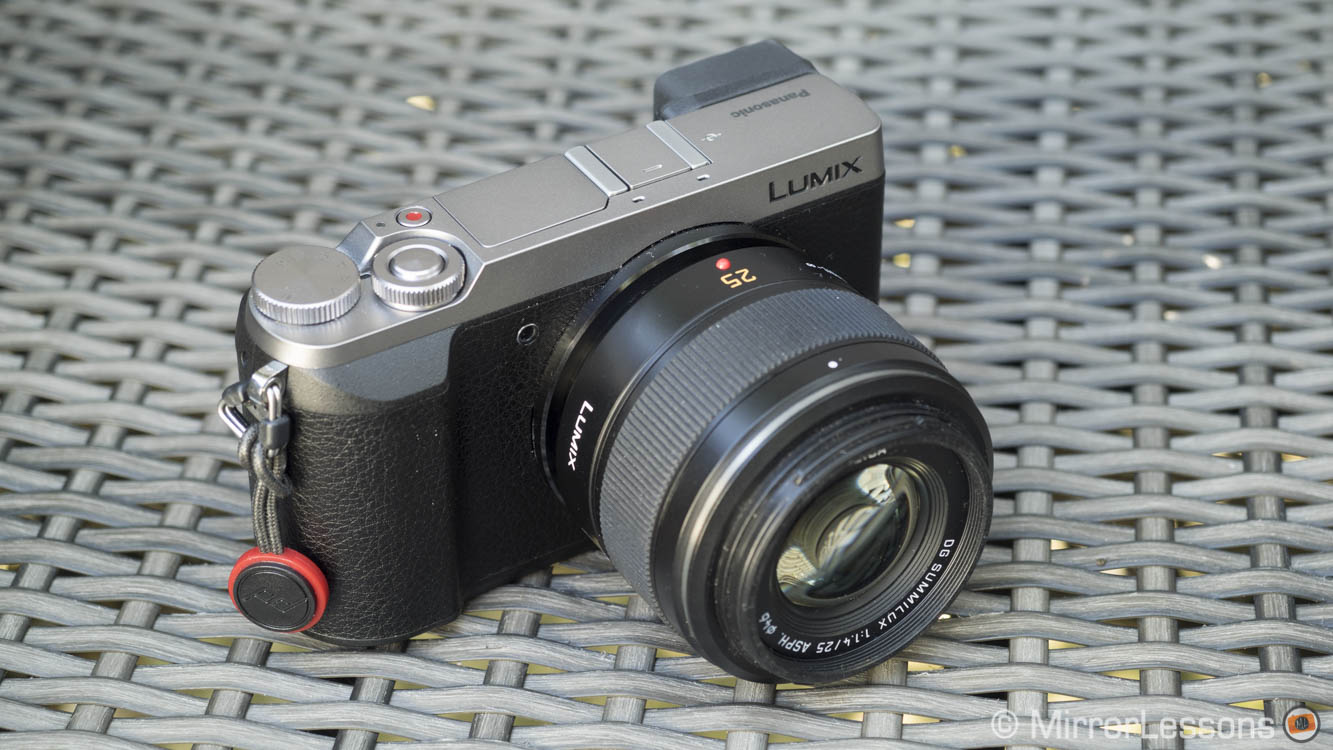
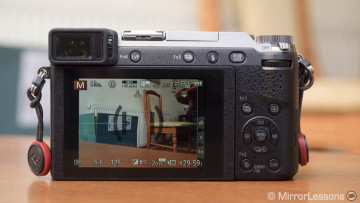
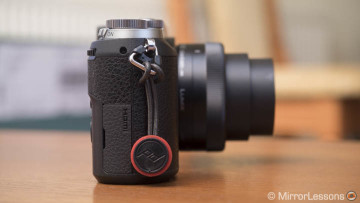
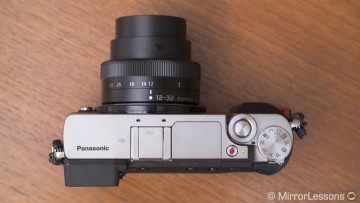
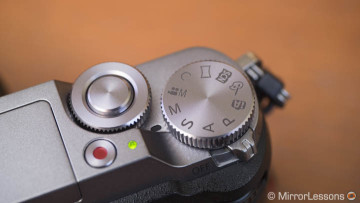
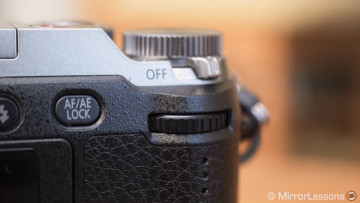
Sometimes you can just tell from the first tidbits of information that appear online that the camera is going to be good. Nothing replaces a thorough and in-depth test of course but right from the start, I was confident that the new Panasonic GX80 would not disappoint, and my three weeks of testing have confirmed that first feeling.
Panasonic found a great balance between the latest technology, advanced functionalities, a compact size and an affordable price. Honestly, most of the time I found myself having to nitpick to find relevant things to say “against” this camera.
The Panasonic GX80 is the successor to the GX7, a camera released almost three years ago that has long been one of mine and Heather’s favourites.
The improvements are considerable and the only real downside is that during the “upgrade” process, the design team renounced a few things that I liked about the GX7 along the way.


Panasonic Lumix GX85 / GX80 Main Specs
- Sensor: 16 MP Live Mos
- Lens system: micro four thirds
- Weatherproof: None
- Internal Stabilisation: Yes (5 axis)
- Autofocus: DfD contrast detection AF with 49 areas
- Continuous shooting: 8 fps (w/o live view), 6 fps (with live view)
- ISO Sensitivity: 200 – 25600 ISO (Pull 100)
- Shutter Speeds: 1/4000 to 60 seconds, up to 1/16000s with electronic shutter
- Viewfinder: Field sequential LCD electronic viewfinder with 2.764k dots (equivalent), approx. 100% FOV coverage and 0.70x magnification
- Rear monitor: tilting touch sensitive 3″ LCD screen (1040k dots)
- Movie recording: 4K up to 30fps, Full HD up to 60fps
- Built-in Flash: Yes
- Extra Features: WiFi, Panorama, Timelapse, 4K Photo, Focus bracket
- Dimensions: 122 x 70.6 x 43.9mm
- Weight: 426g (including battery and memory card)
[toc heading_levels=”3″]
Editor’s note: this review is based on a pre-production model made available for the press running firmware 0.1. Since Adobe Lightroom and Camera Raw is not yet compatible with the RAW files, I used Iridient Developer instead.
Video review
For those who prefer video reviews, I summarised all my findings in the one below.
What I like: Image stabilisation
Gone are the days when 5-axis stabilisation was a unique feature of Olympus cameras. First Sony, and now Panasonic are implementing this technology, and they’re doing it well. The GX80 has the most advanced image stabilisation system seen on a mirrorless camera and only the Olympus Sync IS (limited to one lens) can match it from a technical point of view.
If we rewind back in time, you’ll recall that the GX7 was the first Lumix camera to feature sensor stabilisation but it was limited to 2 axes and didn’t work for video. The GX8 (released last year) was an upgrade with 4 axes on the sensor and a new system called Dual IS. With select lenses, you can benefit from sensor and optical stabilisation working together. However there was still no sensor stabilisation for video. The GX80 solves this with 5 axes on the sensor and Dual IS, both of which are fully operational in video mode. This updated system is called 5-axis Dual IS (logical, isn’t it?).
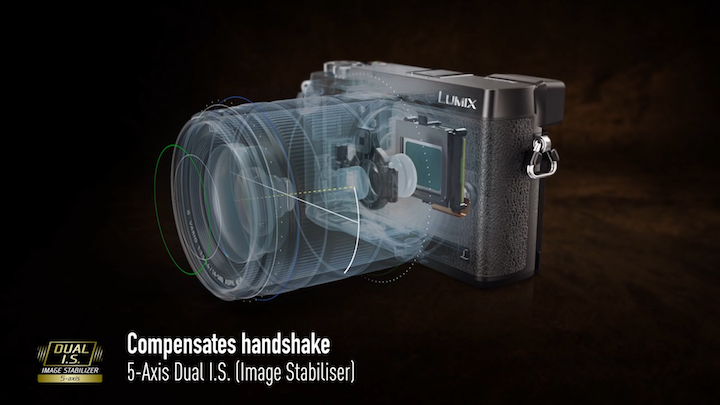
During my three weeks of testing, I found that the Dual IS is particularly effective with telephoto lenses.
I already shared the shot below in my first impressions article and it still remains the best result I got: almost 1s of exposure hand-held at 100mm (200mm equivalent by 35mm format standard).

Click to open the full res version

This image is slightly softer but still is a decent result!
Click to open the full res version
With wide-angle lenses, the good news is that the sensor stabilisation is effective on its own. This means that it will also work well with non Dual IS Panasonic lenses, Olympus and third party lenses.

Click to open the full res version
As you can see below, I achieved an acceptable result down to 2s with both a Lumix and Olympus wide-angle lens. It required several attempts of course as it is unlikely you will get it right the first time.

Click to open the full res version

Click to open the full res version
Just close your eyes for an instant and count for 2 seconds: the fact that the IBIS is able to compensate for such a long time is impressive.
These extreme examples are more for test purposes but I did find myself in a couple of situations in the past where having 5 axis stabilisation was a good alternative to not having a tripod on hand.
The less great news is that Dual IS doesn’t bring a substantial advantage with wide angle lenses. Of course I didn’t try every Lumix lens compatible with Dual IS so there may be some differences in the performance if one lens is more capable than another in terms of optical stabilisation. But if you are able to shoot sharp at 1s or even half a second, do you really need more than that?
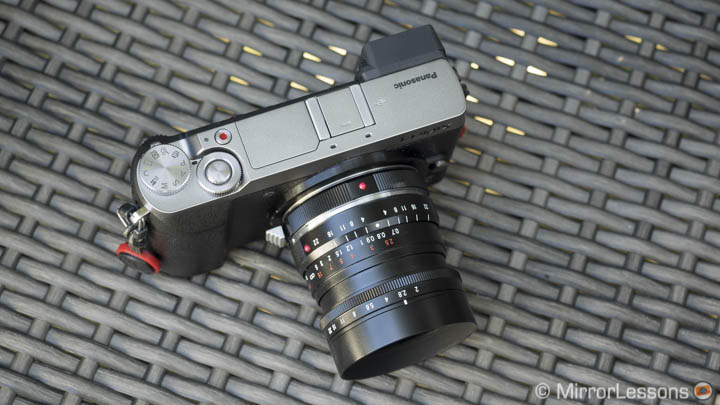
You can also use sensor stabilisation with adapted lenses: you just need to set the focal length manually. If the IBIS is activated when turning on the camera, it will automatically ask you if you want to set the focal length. Otherwise you will need to go into the shooting menu. Remember than when entering the focal length manually, you need to set the real length and not the 35mm format equivalent.
The performance is not as good as with native AF micro four thirds lenses probably because the lens can’t send additional information to the camera such as the focus distance. But I got a sharp result at 1/5s which is not bad at all.

Click to open the full res version
Image stabilisation also works for video and this is one of the major improvements made to the GX80.
You can use sensor stabilisation, Dual IS with select lenses and also add electronic stabilisation.
The best performance achieved is for static shots, especially when using Dual IS and electronic stabilisation: the results are almost perfect. The 5-axis system is also very effective with adapted lenses as you can see in the video below.
I also compared the IBIS performance with the Pen F which has the most recent hardware of Olympus cameras. The GX80 image stabilisation is better for static shots, is less effective when moving with the camera but produces less distortion.
A few criticisms about image stabilisation for video
While my findings are positive overall, there are some negative effects in video mode:
Dual IS can be jerky when panning: I wish you could select vertical stabilisation only as you can in still mode or simply select sensor stabilisation only instead of Dual IS when using a Dual IS compatible lens. These extra options would be helpful.
Even if it is less pronounced than on the Pen F, you can still get distortion and jello effects when moving with the camera because of rolling shutter. Sudden sideway shifts are also present, so for movements the results are not perfect. You can find more examples and information in the comparison video above.
The GX80 has more trouble stabilising the vertical shakes when walking with a medium focal length. You can see some examples in the two videos above.
What I like: 4K and video capabilities
Since the release of the GH4, Panasonic has made 4K one of its main features so naturally the GX80 has the same capabilities.
The 4K video quality is excellent with no aliasing or moiré. The footage is very sharp and holds well up to 3200 ISO (the max. sensitivity is 6400). Dynamic range is excellent but advanced filmmakers could miss dedicated video profiles as well as a microphone input (but concerning the latter I am not surprised given the small size of the body).
Note: you can see some video footage samples in the video review as well as the videos shown in the chapter above.
Like its siblings, the GX80 is packed with lots of extra video-related options.
You can find stop motion animation and time-lapse (that also saves a 4K video file). One new addition is 4K Live Cropping. The camera can create digital movements by cropping the 4K resolution and saving the file in Full HD.
It is a technique I often apply in my video editing when using 4K footage in a 1080p timeline. I used this feature for some of our upcoming YouTube videos and it can be quite useful, saving you some time in post-production if you have a precise shot list. For rushed situations, it is better just to record in 4K and decide how to crop later on.
Thanks to the 4K capabilities of the camera you also get all the options related to 4K Photo, a feature that allows you to extract an 8MP JPG from any frame of the 4K video footage. You can shoot at 30fps (4K burst) and there are some curious features like Post Focus where you select your focus point after taking the shot.
There is also a Light Composition mode but I found it a bit disappointing.
Because 4K photo is basically a 4K video special feature, you are in fact still recording a video clip. Light Composition can be useful for low-light scenes which means you often need good high ISO performance and to be able to use very slow shutter speeds (start trails is a good example).
With the GX80 the minimum shutter speed available with 4K photo is 1/2s. 3200 ISO can be enough but the 8MP JPG file is saved from compressed video footage. It will be fine for web usage but it lacks detail and dynamic range. You don’t have room for serious post-processing or better image quality.

Click to open the full res version

Click to open the full res version

Click to open the full res version
By contrast the Live Composite feature on Olympus cameras allows you to save JPG and RAW files in full resolution. I would have preferred to have a complete solution for stills rather than a 4K photo feature.
A few criticisms about 4K and video
The only real flaw of 4K video on the GX80 is rolling shutter which can be annoying. The Full HD footage has more aliasing and less sharpness (no full pixel readout).
Another annoying thing is the lack of a mic input. The built-in microphone also records the camera’s internal noise so you won’t get clean audio from your video footage. Your only option to record good audio quality is to use an external microphone and external recorder.
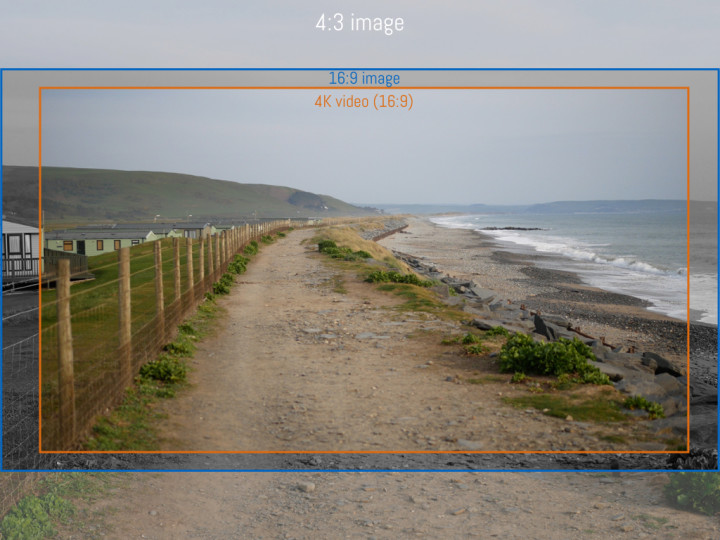
When recording 4K, the frame is slightly cropped (for full pixel readout and better IQ).
As stated further down in the AF chapter, Continuous AF in video mode is slower and unreliable with fast moving subjects.
The HDMI port outputs a 4:2:0 8bit signal only.
What I like: lots of extra features
The GX80 has a good number of extra functionalities that can satisfy various genres or photographic needs. I already covered 4K Photo in the chapter above but there are others features worth listing:
- Multiple exposure: you can merge up to 4 images and the process is very easy. You take the first image, then if satisfied, you go to the next one. The camera will overlay the images in the live view. You can also go back to the previous image and retake it. You can apply multiple exposure to images recorded previously with the “Overlay” mode.
- Panorama: accessible from the main dial, it will save the result in JPG only. You can set the direction and the angle of view which will affect the width or height of your panorama.
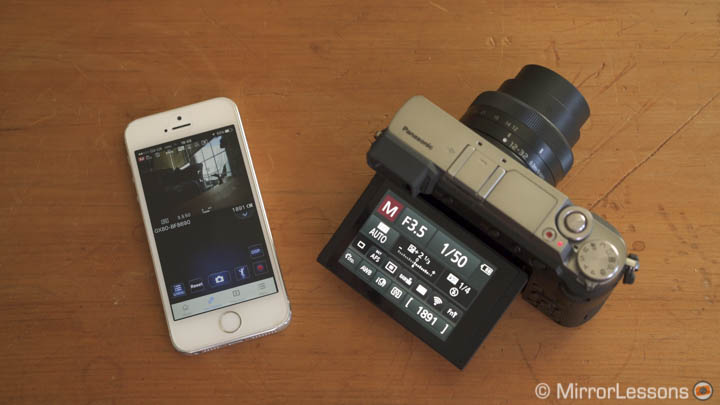
- Wifi: you can remotely control the camera and transfer images (JPG only) to a mobile device. The Panasonic Image app is very complete and easy to use without interruptions or other problems. You can also transfer video files when record with the Snap Movie function and edit them on your tablet. Finally you can play back your images wirelessly on a compatible TV screen.
- RAW processing: you can process a RAW image in-camera by varying the white balance, contrast, colour profile and other settings and save the result as a full sized JPG.
- Exposure bracketing: up to 7 images and 1Ev of difference. You can choose to take each picture manually or shoot the entire sequence with just one press of the shutter button.
- Aperture bracketing: You can choose a specified number of pictures or take pictures until the camera has used all the aperture values available (depending on the lens used of course). The camera will take the various pictures in an alternating pattern from the first aperture selected. For some weird reason, it works with Auto ISO only.
Following in the footsteps of Olympus, the camera now has a focus bracketing option found within the Bracket menu and it is one of the most interesting additions.
Although it doesn’t merge the images in-camera like the Olympus OM-D E-M1, it takes up to 999 shots (RAW & JPG) in steps from 1 to 5 which you can then merge in a program like Photoshop or Helicon Focus. (By contrast, Olympus cameras let you choose up to 10 steps.) These steps tell the camera how much distance you want between each shot.

10 shots, 5 steps
Click to open the full res version

15 shots, 3 steps
Click to open the full res version
To use focus bracketing, simply activate it within the menu, choose the number of steps and images, and press the shutter button to start the burst. Unlike Olympus cameras which start from your focus point and work backwards, the GX85 takes a series of shots in front of and behind the focus point in an alternating pattern. This means that you should begin by focusing at the center of the object you are photographing rather than on the point closest to you. The GX80 uses the mechanical shutter unlike Olympus cameras that switch to the electronic shutter.
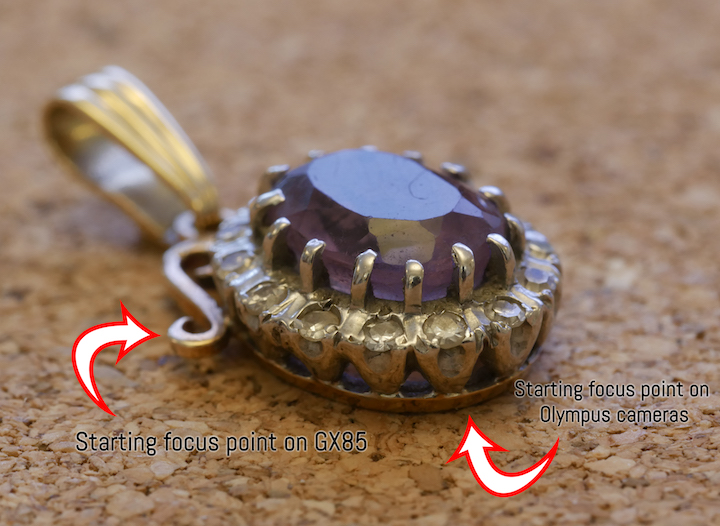
Overall, focus bracketing works very well on the GX80, though choosing the best initial focus point can take some getting used to.
As for the ideal number of steps and shots, you’ll need to experiment to achieve the right balance but there are a few important factors to keep in mind such as:
- how many subjects there are in the composition;
- how closely positioned they are to one another;
- how close you are to them;
- how much depth you have to cover.
Generally speaking, the smaller the subject, the lower the step number, and the more depth there is to cover, the more shots you’ll need.
Also remember that you can’t set a timer for focus bracketing, so if you have to use slow shutter speeds, it is best to start the burst via the Lumix app to avoid touching the camera and blurring the first image.
What I like: continuous shooting and shutter
The GX80 can shoot up to 8fps without live view (the camera shows the last picture taken in the EVF or LCD screen) or at 6fps and 2fps with live view (there are blackouts between shots).
Choosing between 8fps or 6fps depends on the action you are photographing and how fast your subject is. The faster burst is helpful with very fast subjects but without the live view it can be more difficult to follow the action if the subject moves in a less predictable direction.
At 6fps the live view allows you to follow the action better but the continuous blackouts can be annoying, especially if you have a light background or are shooting against the sky.
The buffer capabilities are very good and in JPG mode it basically never stops shooting even at 8fps.
These are the results I got with a Sandisk Extreme 64GB U3:
8fps
- JPG+RAW: 8s then slows down considerably
- JPG: after 30s the GX80 stills shoots at full power
6fps
- JPG+RAW: 10s then slows down
- JPG: after 30s still shooting at full power
3fps
- JPG+RAW: still shooting at full power after 30s
If you select the SH mode, the GX80 uses the electronic shutter and shoots at 40fps. However it only saves JPGs at a reduced size of 2MP and it stops after 3 seconds.
The electronic shutter allows you to go past the 1/4000s speed of the mechanical shutter and go up to 1/16000s. You can also activate the silent mode. You can select one or the other manually or set the Auto mode. As usual with the electronic shutter you need to be aware of rolling shutter issues with fast movements.
The GX80 introduces a new mechanical shutter with an electromagnetic drive to reduce shutter shock, an issue reported on other cameras like the GX7 and GX8 especially.
I’m glad to say that during my testing period I never encountered any shutter shock issues so the new mechanism seems to be very effective.
Plus the sound is more discreet than that of the GX7 or GX8 which is another welcome feature.
What hasn’t really changed: autofocus
The GX80 uses the Depth from Defocus technology that Panasonic introduced with the GH4 and subsequently with the LX100, GX8 and G7. It is a contrast detection system that selects the correct focus point by analysing 2 images with different depths of field in a fraction of a second.
I’ve never been 100% convinced by this technology. It is true that in some situations the AF is blazingly fast and locks very quickly. When I first tried it on the GH4 I found it very promising. However DfD still remains a contrast detection system and it suffers in backlight or scenes with less contrast.
On the GX80 I got good results overall which shows that DfD can indeed work. My keeper rate was approximately 65% during a marathon race which is a good AF testing ground.


It locks quickly, tracks well but sometimes also misfocused. The camera doesn’t always deliver constant performance.
The settings can influence the results. The 49 area mode (Multi) is reliable but it is better to select a custom area to reduce erratic behaviour. AF tracking is the mode I like the least as it behaves too erratically. Face and eye detection work but the camera can also confuse the parts of a person’s face.
The AF performance depends on the lens used. With Lumix lenses you will have better results while with Olympus lenses DfD won’t work. That can reduce the performance and the accuracy of the results.
In the example below I could have easily set my focus and locked it because the scene is expansive. I am shooting at 9mm and f/5.6 so everything is in focus. Still it’s interesting to note how with Continuous AF, several of these images ended up out of focus.

The picture is in focus…

…the next one is out of focus.
The performance in low light decreases and can be slow but most of the time I found it reasonable in Single AF.
For video, the performance is slower even with Lumix lenses. With moving subjects like runners, the camera simply can’t keep up and the subject progressively becomes blurry. Even when walking and following a subject, the continuous AF can focus on the background or misfocus especially if you are using an Olympus lens.
With static shots, going from one element to another can be quick when there isn’t much focus distance to correct but at times it can be slow as well.
I think that more than with stills, DfD shows its limits for motion picture.
That is where a phase detection system can give you better results as the recent Sony a6300 and Fuji X-Pro2 have shown.
AF and touch screen
Lumix cameras offer a complete touch screen experience. You can use the camera’s buttons and dials or use the touch screen even to navigate inside the main menu.
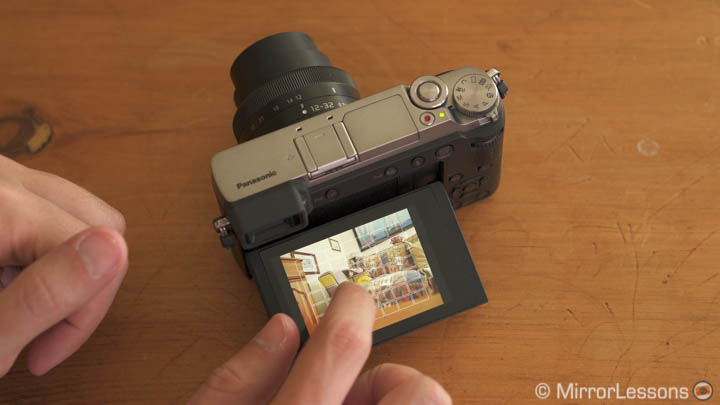
I found touch sensitivity very helpful in some situations combined with the AF options. You can create you own group of AF points with your finger, touch the screen to take a shot or move the focus area (with single point only). You can also use the LCD screen to move the AF point when using the EVF. Note however than if you need very precise results concerning the focus point position, the touch screen can be slightly imprecise.
What hasn’t really changed: image quality
The GX80 inaugurates a new sensor. The resolution remains the same (16MP effective) but there is no Anti-Aliasing filter anymore. Panasonic claims 10% additional sharpness in comparison to previous 16MP sensors.
I performed some side-by-side tests with the GX7 using different lenses and scenes and my conclusion is: there is no real difference.
In the first example below with the tree, it is almost impossible to recognise one from the other and the same applies to the second example where I used the M.Zuiko 60mm macro.

- Slide to the right: GX80 version (100% crop) – Full res here
- Slide to the left: GX7 version (100% crop) – Full res here
[twentytwenty]


[/twentytwenty]

- Slide to the right: GX80 version (100% crop) – Full res here
- Slide to the left: GX7 version (100% crop) – Full res here
[twentytwenty]


[/twentytwenty]
Only in the third example can we notice a small advantage from the GX80. So it really takes very fine textures to notice something but frankly, 99% of the time, you won’t notice a difference. I haven’t found any traces of moiré so the new Venus image processor takes care of that well.

- Slide to the right: GX80 version (100% crop) – Full res here
- Slide to the left: GX7 version (100% crop) – Full res here
[twentytwenty]


[/twentytwenty]
What you need to know is that the image quality of this camera is up to the standard of the most recent m4/3 cameras. It has good dynamic range (though you may find some limits for extreme post-production).


No post production

Post processed RAW – Click to open the full res version
The ISO performance is excellent up to 6400: without noise reduction applied, colour noise is visible but the overall quality is still decent. If I apply some NR on the RAW file, the file becomes very usable.

Click on the image to open the full res version.
- Slide to the right: 6400 ISO, NR Off (Iridient)
- Slide to the left: 6400 ISO, NR On (iridient)
[twentytwenty]


[/twentytwenty]
Note: you can check out the entire set from ISO 800 to ISO 25600 here.
The in-camera NR can cause a reduction in detail in the JPGs even when set to -5. I would avoid going past 0, as the loss in detail is too noticeable.

Panasonic’s colour profiles have never been my favourite. The look can often be cold especially when using AutoWB and the factory settings. With a few tweaks of the various settings available however the results can improve but I still prefer to work with the RAW files.

Lumix G 12-32mm at 12mm

Ultron 28mm f/2

Lumix G 12-32mm at 32mm

Lumix G 35-100mm f/2.8 at 100mm
The new L.Monochrome profile gives more contrast in comparison to the standard Monochrome profile. It’s a nice addition as it gives the black and white images a more interesting look. You can choose between four different filters (red, orange, yellow and green).

Lumix G 12-32mm at 12mm

Leica 25mm f/1.4
- Slide to the right: monochrome profile
- Slide to the left: L.monochrome profile
[twentytwenty]


[/twentytwenty]
What I don’t like: unnecessary downgrades from the GX7
My only real disappointment about the GX80 is that it lacks a few things in terms of ergonomics and usability that were present on the GX7.
If you’ve never tried the GX7, this chapter might not interest you but having owned and loved the GX7 myself, I simply don’t understand these downgrades.
When the GX7 came out, it replaced the GX1 and became the flagship model in the GX series. Now this segment has expanded: the GX8 takes the lead and the new GX80 is a step below. Panasonic had to create more differences between these two cameras; otherwise the more attractive price of the GX80 could have interfered with GX8 sales.
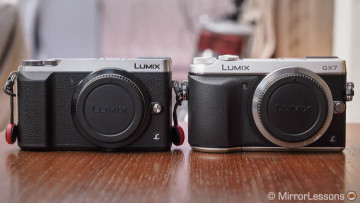
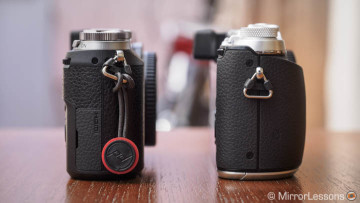
The first thing I dislike is the grip: it is smaller and less comfortable than the one on the GX7, whose grip was more rounded and prominent. This was more helpful with longer lenses.
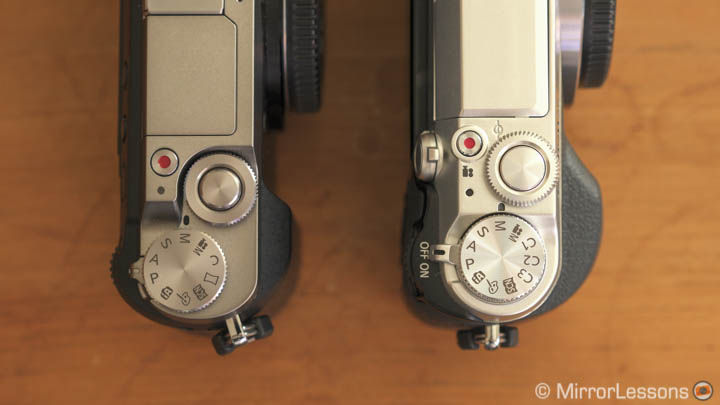
Then we have the EVF: both cameras share exactly the same unit. It has a 16:9 screen based on field sequential technology with a combined resolution of 2.764k and a decent 0.7x magnification. The perception of a higher resolution is welcome but against backlit situations it can produce a rainbow effect if you are panning quickly. For some users, this is a big problem but personally I never had any serious problems with it even when using the GX7.
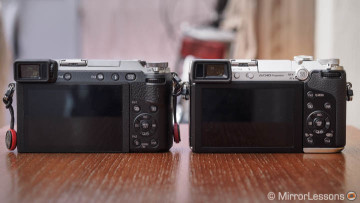
However the most important letdown is that the EVF on the new camera can no longer be tilted. That was a unique feature of the GX series and I find it useful in situations where you are shooting at a low angle but can’t rely on the LCD because of sunlight for example. I know that some users and reviewers found it unnecessary. For me it’s one of those features that is there if needed – otherwise you just keep it in the default position.
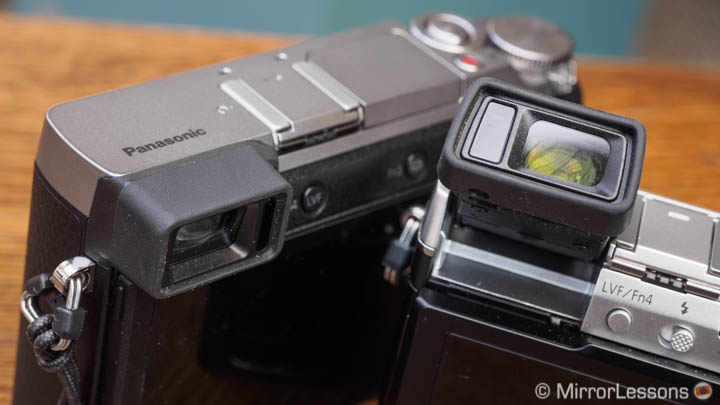
Since the EVF is exactly the same in terms of specifications and size, and the camera body has a similar design, I can’t see why it couldn’t be there, if not just to create an extra difference with the GX8. The only positive addition to the GX80 is the Live View option at 60fps, which is especially helpful in low light for both the EVF and LCD screen.
Another complaint is the disappearance of the AF/MF selector. This is another thing I like on all Panasonic cameras especially when shooting video. I often found it handy to switch quickly between AF and MF and that selector is perfect for that. Now you have to assign the AF mode to a custom button and scroll between fours options (AFS, AFF, AFC and MF) which isn’t as immediate.
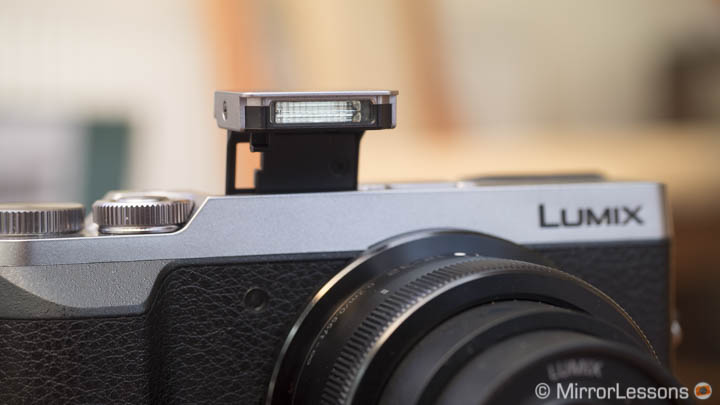
Finally the built-in flash on the GX80 won’t control other flash units wirelessly unlike the GX7. You need an external unit like the new FL200L. The supplied flash of the LX100 works as well. The new flash also has a slower max. sync speed (1/160s vs 1/320s on the GX7).
I realise I’m nitpicking here but if Panasonic had kept these options on the GX80 as well, for me the camera would have been almost perfect.
About the GX80 design and ergonomics
Except for the downgrades described below, overall the GX80 has a decent body design. The camera is light and comfortable to use especially with compact lenses.
There are four customs buttons plus 5 virtual buttons that can be accessed from right side of the LCD screen. I wish they had kept a separate button for the Quick Menu instead of assigning it by default to the Fn2 button.
The dials on top are comfortable to reach and use while the rear dial requires some getting used to. If you assign the “Dial Operation switch” to a function button, you can also temporarily use the dials for other settings such as AF mode, White balance, FLash mode and more.
The tilting LCD screen mechanism was a little stiff on my sample.
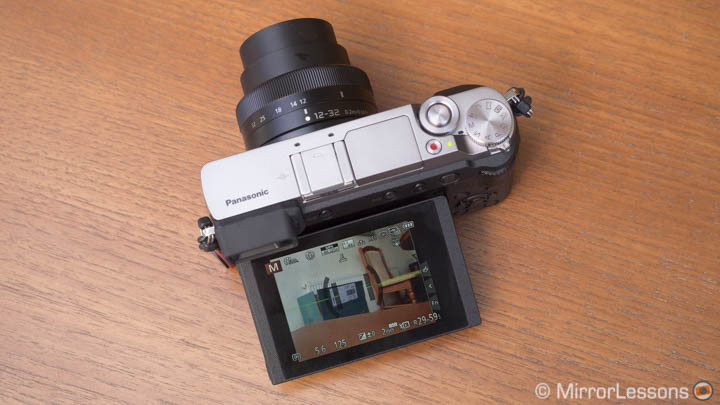
The body is mostly made of plastic but felt solid to me. It isn’t weather sealed but I guess this was done to keep the cost down and make the camera more affordable.
What I like the most: value for the money
I kept the aspect I like the most for the end as it also serves as my conclusion. So here we go:
The Panasonic GX80 is one of the best deals on a micro four thirds cameras, or even a mirrorless camera that you can find today.
For approximately $800, or €800 or £700 including the kit lens, you get a fine selection of the best features you can find on a mirrorless camera including one of the most advanced image stabilisation systems, excellent 4K video and tons of extra features.
Not everything is perfect: AF for video needs some improvements, the new sensor doesn’t bring a substantial difference and those who care about build quality could be disappointed by the lack of a more premium build quality.
The battery life was good overall. For light shooting you can get through the day with one. For extensive shooting and video recording you will need a spare battery.

To be honest, I had a hard time finding real flaws with this camera, and there certainly wasn’t anything that would prompt me to not recommend it. In fact, my only real disappointment is that a few features I liked on the GX7 have been removed.
Right now, especially for someone who wants to buy their first mirrorless camera without spending too much, I can’t think of any better deal especially considering the compact size and great selection of lenses within the micro four thirds system.
 What I like about the Panasonic GX80:
- One of the best image stabilisation systems
- 4K video quality is excellent
- Good continuous shooting speed and excellent buffer
- No shutter shock found with the new mechanism
- Tons of extra features including 4K photo, Focus bracketing and more
- Light and compact body
- Excellent value for the money
 What hasn’t changed / could be improved on the Panasonic GX80:
- The new sensor doesn’t bring substantial improvements
- The AF DfD technology is fast but can also lack consistency
 What I don’t like about the Panasonic GX80:
- AF is slow during video recording
- 5-axis Dual IS for video can generate distortion, jerking and sudden sideway shifts
- Rolling shutter in video mode can be annoying
- No mic input and the built-in audio is not clean (internal noise)
- Light composition would be much better as a full still image feature rather than a 4K photo feature
- Some downgrades from the previous model feel more like a marketing decision to stop the camera from competing with the high-end GX8
Additional nitpicking:
- The tilting LCD screen is stiff
- When recording video, the frame is slightly cropped
- The tactile experience of the rear dial isn’t great
About the Lumix G 12-32mm f/3.5-5.6 kit lens
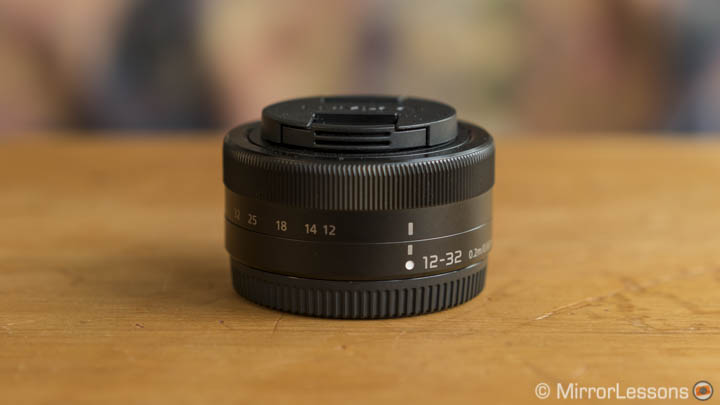
Since some of our readers asked about it, I am also giving you my two cents about the kit lens that comes in the box with the camera.
Obviously the nicest aspect is the very compact size and I also like that the zoom ring is mechanical rather than electronic.
Sharpness is good and peak performance is found at f/5.6 for both 12mm and 32mm. The corners however are softer. The lens also suffer from flare. A decent bokeh can only be obtained by focusing close at 12mm and f/3.5.

Click to open the full res version

Click to open the full res version

Click to open the full res version
You can notice a decrease in sharpness at the top right corner.

For a beginner, the lens is useful and good value to start with. The only drawback is the lack of a focus ring (probably to reduce the size of the lens). As your experience increases, the desire for a faster lens will definitely grow but the compact size makes this lens worth having when you want to travel as light as possible and have a useful zoom range.
