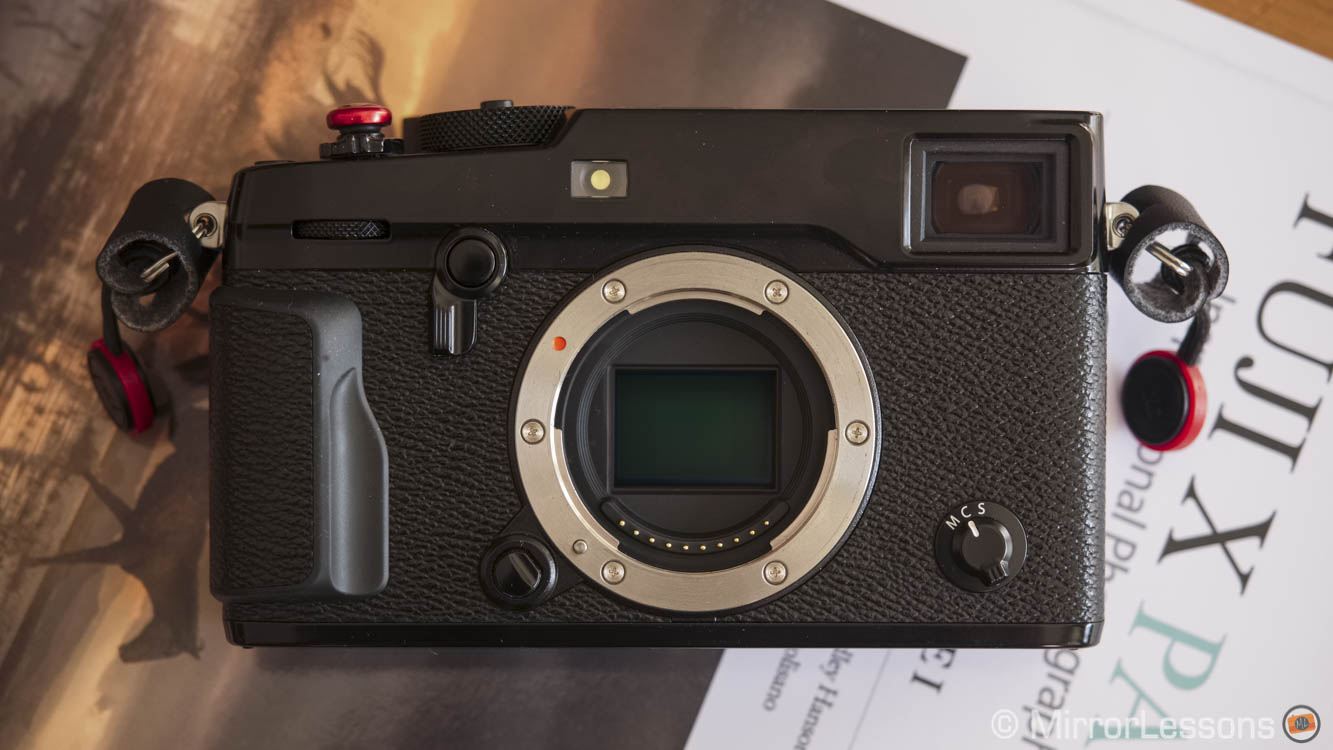
I am probably the last to finish the “race” to publish a review of the X-Pro2 since its announcement in January. I’m not sure if I did that on purpose or not. When we rent or receive gear on loan, there is a specific deadline to meet so it motivates you to finish everything earlier. When we buy the camera personally, we take our time because we know there’s no rush. Then you realise that “no rush” attitude can last longer than expected!
What’s interesting is that more time spent with a camera helps, but not necessarily in the way you’d think. It’s not just a question of taking more photos or testing it in every possible condition.
In this case, what really helped me was to stop using the X-Pro2 (mostly because I had other gear to review), and then coming back to it.

I realised that despite some weaknesses, this camera has something more that you won’t find on the specs list.
I could call it “soul” but that feels more like a marketing word. Cameras don’t have souls, they are just mechanics and electronics. What is true, however, is the effect they can have on the user. There are cameras you like more than others and it’s not always easy to explain why. I believe it is about “substance”.


Fujifilm X-Pro2 Main Specs
- Sensor: 24 MP APS-C X-Trans III CMOS
- Lens system: X-mount
- Weatherproof: Splash and dust and freeze proof (-10°C)
- Internal Stabilisation: None
- Autofocus: 77 phase detection and 195 contrast detection points
- Continuous shooting: 8 fps, 3 fps
- ISO Sensitivity: 200 – 12800 ISO (pull 100, push 25600 and 51200)
- Shutter Speeds: 1/8000 to 30 seconds
- Hybrid Viewfinder: 0.48-in TFT electronic viewfinder (2,359k dots, 0.59x magnification), reverse galilean optical viewfinder (92% field coverage, 0.36x/0.6x magnification)
- LCD Screen: fixed 3″ LCD monitor (1.62 million dots)
- Movie recording: Full HD up to 60fps
- Built-in Flash: No
- Extra Features: WiFi, Time-lapse, Multiple exposure
- Dimensions: 140.5 x 82.8 x 45.9mm
- Weight: 495g (including battery and memory card)
[toc heading_levels=”3″]
Note: the magazine you see below the X-Pro2 in some product shots is the brand new Fuji X Passion printed magazine.
What I like the most: Autofocus and continuous shooting
When Fujifilm started the X series, the AF performance was its Achilles heel.
In four years, the company managed to improve the performance and close the gap with other mirrorless brands to the point that today, the X-Pro2 has the best autofocus performance of a mirrorless camera along with the Sony a6300.
The Sony camera has something more but the difference is negligible when it comes to real world use. Because of Fujifilm’s effort, the autofocus is the aspect I appreciated the most about this camera.
Additional read:

In Single AF, the performance is excellent even with older XF lenses. The one I’ve been using the most is the 4-year-old XF 35mm f/1.4 which has a slower focus motor but performs well with the X-Pro2 in both Single and Zone mode. With more recent lenses such as the XF 90mm f/2, the response is faster.


The single AF point can be enlarged or reduced in 5 steps depending on the subject and the situation. For example, in a backlit composition, a smaller point can be more precise and avoid confusion for the AF system.

Here the smallest AF point helped me securing perfect sharpness on the lady’s eyes.
Clearing the confusion about the number of AF points
Concerning the number of AF points, the way Fujifilm does the math is a little bit confusing. The official specs mention 77 points with 49 phase detection points that cover 40% of the sensor surface. In reality you can have more than that depending on the AF mode selected. Confused? Then keep reading!
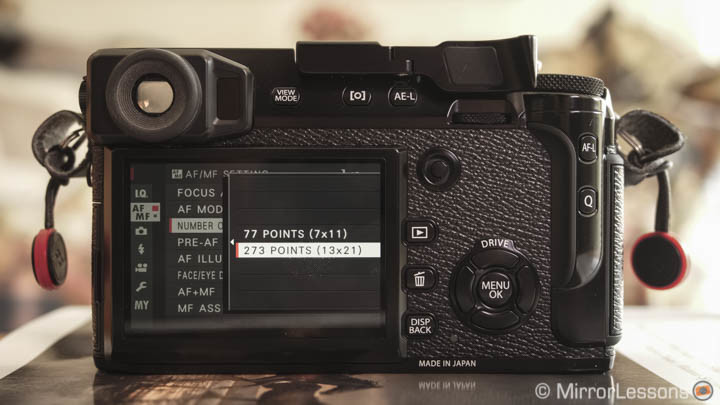
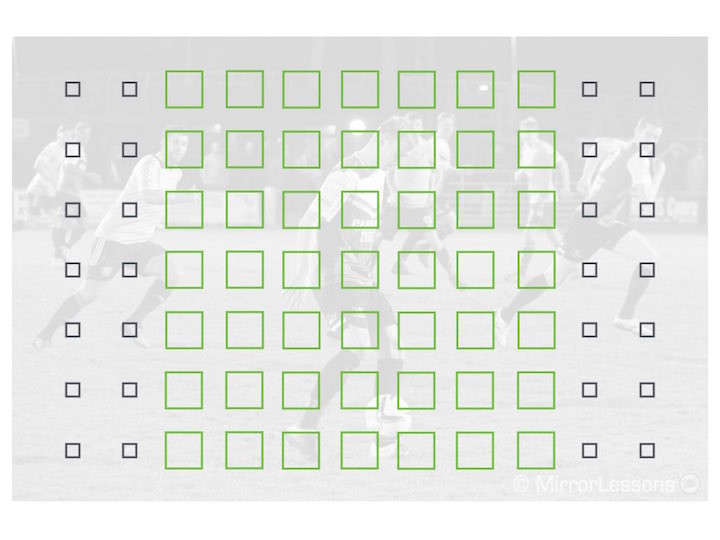
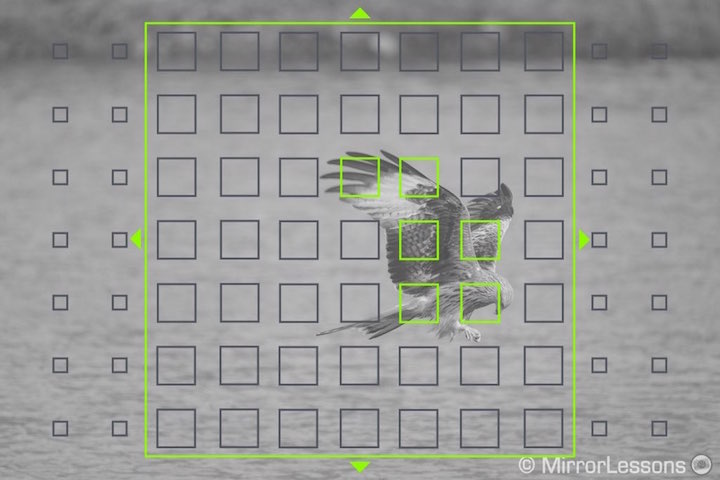
First you have the option of choosing between a 7 x 11 (77 points in total) or 13 x 21 (273 points) grid. The 7 x 11 grid displays 49 phase detection points at the centre and 28 contrast detection points divided between the left and right sides of the frame.
The 13 x 21 grid displays 169 phase detection points and 104 contrast detection points divided on the left and right.
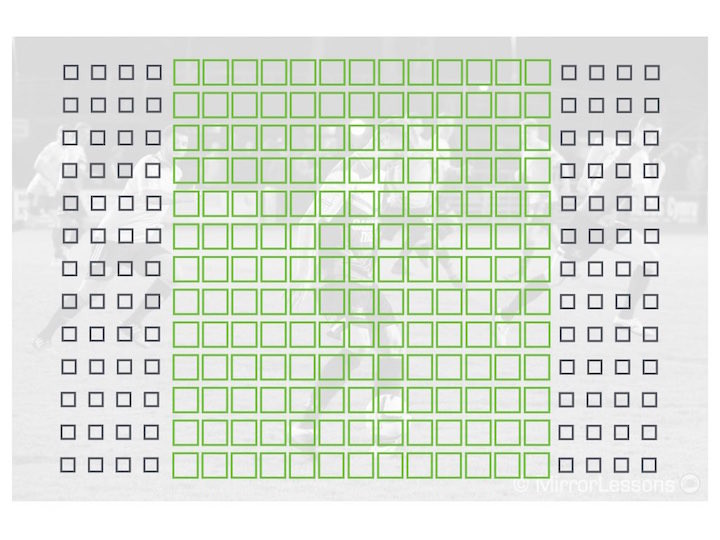
To make a long story short, the second option gives you more focus points if you need to fine-tune your AF in a precise area of the frame (useful for macro for example). Note that at 8fps (High burst), only the 169 phase points are used.
However the grid option is available in Single AF only. If you choose AF Zone or Wide/Tracking the camera automatically switches to the 11 x 7 grid and the option in the menu becomes grayed out. If you want to shoot in C-AF and High burst, only the 49 phase detection points are available.
Why all these different numbers? Simply the software subdivides the 77 points mentioned at the beginning according to the settings used. This is no different to what Firmware 4.0 did on the X-T1 (article here).
In continuous AF, the X-Pro2 behaves well in all sorts of situations: wildlife, motorsports and running to name a few.
My average keeper rate with this camera is around 80%.


The sepia thumbnails indicate out of focus shots.


The best example was definitely the evening soccer game. Despite shooting in low light at 12800 ISO and f/5.6 most of the time, the performance didn’t decrease and my keeper rate stayed around 80%. The AF always had consistent behaviour and the camera reacted well in most situations even when my composition and tracking abilities were less precise.


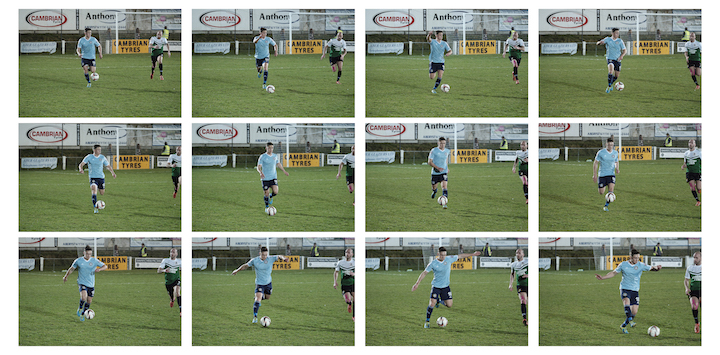
Only with birds in flight did the keeper rate decrease to around 60% but this is also a more difficult genre to photograph and user error can have a more significant impact on the performance.


AF settings: what you need to know
- C-AF and continuous shooting on High (8fps): with these two options, only the 49 central phase detection points are available so you can’t place your focus point at the edges of the frame.
- Zone AF is by far my favourite mode for everything involving action and continuous AF. The camera automatically selects the appropriate number of focus points within the selected zone. Most of the time I use the largest area (7×7 grid) for birds in flight, the largest or medium area (5×5 grid) for motorbikes and football, and the smallest for single runners (3×3 grid).
- Power management / High Performance: it improves the reactivity and also gives you the 85fps refresh rate in the EVF. Be aware that the battery life will drop more rapidly.
- Release/Focus priority: I choose Focus for birds in flight, motorbikes or runners for example, Release for football or action when there can be more confusion or the groups of people change often. Note that with release priority, the camera is more prone to take a shot when the image is out-of-focus like in the example below.

A sporadic negative effect with Release priority
- Pre-AF: I always leave it to Off to stop the camera from focusing when I’m not shooting (it also saves some battery life).
- AF+MF: if turned On, you can manually adjust focus with the focus ring on the lens in Single AF mode. If you also activate Focus Check, turning the focus ring will automatically activate the MF assist selected (magnification or peaking).
- Interlock Spot AE and Focus area: an option I find quite useful for portraits. The camera will meter the exposure on the AF point when Spot Metering and Single AF are selected.
So overall the AF performance of the X-Pro2 is excellent. Of course not everything is perfect: the camera can occasionally misfocus, or confuse the subject with the background when using Zone AF but I’ve seen this with all mirrorless cameras.

An example of mis-focused shot. Fortunately it doesn’t happen often.
The camera also does really well for movie recording and again the performance is close to the Sony a6300, which is the absolute reference when it comes to Continuous AF for video. You can see a simple example in the video below at minute 1:31.
Two criticisms concerning AF: Face/Eye detection and Wide/Tracking modes
I don’t find that Face and Eye detection have really improved in comparison to the X-T series. Eye detection especially often confuses the eyes with other parts of the face (the nose or even the head). It should also be avoided if the person is wearing a hat of any sort because the camera can shorten the focus distance, leaving the eyes looking slightly blurry. You can see two relevant examples below.

Here the smoke or the hat (or both) might have confused the face/eye detection system.

Here the backlit situation might have challenged eye detection.
Wide/Tracking allows you to lock and track a subject by using a 7×11 grid on the whole frame. However if you use the High burst at 8fps, only the 49 points at the centre can be used. This mode can work well in some situations when shooting with the single or Low burst but otherwise I find Zone AF more interesting and effective.
In the example below, I used the Low burst. Since I was panning quickly from a low angle and the X-Pro2 doesn’t have a tilting screen, using wide/tracking helped to keep the focus on the subject even in a less precise composition. As you can see some results are good while others are out of focus.


What I like: Design and ease of use
To me, the X-Pro2 feels like one of Fujifilm’s greatest achievements when it comes to design and ease of use. The camera is very simple and straightforward to use, but isn’t perfect because of two flaws that I decided to describe separately later on.
Despite these two weaknesses, I still enjoyed using it and it helped to remind me that a camera isn’t necessarily bad or unusable just because it lacks something.
After all, we all know the classic quote “no camera is perfect”.
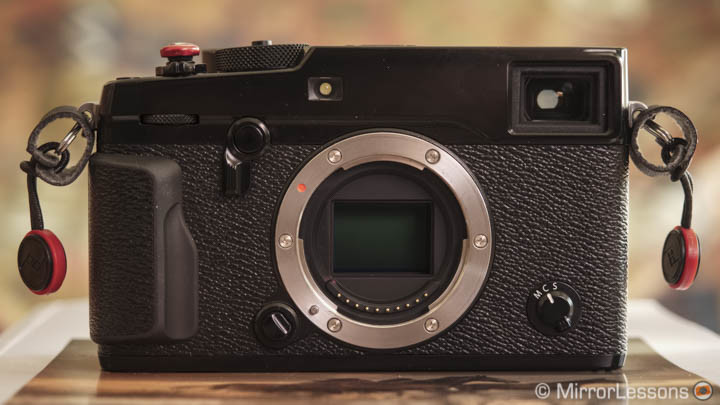
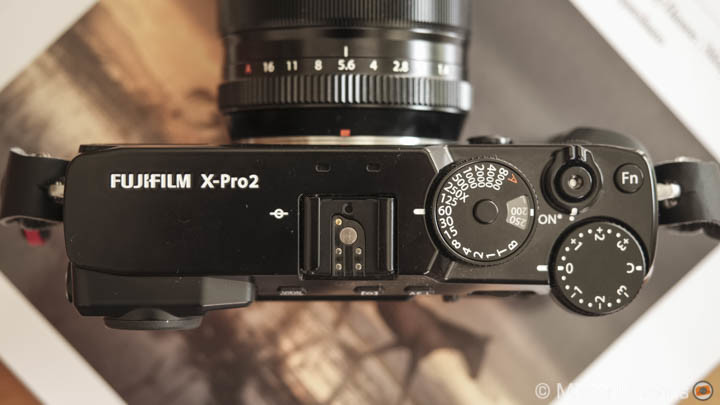
So let’s talk about what is good and what is great. The design is very simple and minimalistic like the X-Pro1. I’m glad Fuji didn’t change that. Placing the brand and camera name on top instead of on the front is an elegant touch (like the Leica MP series).
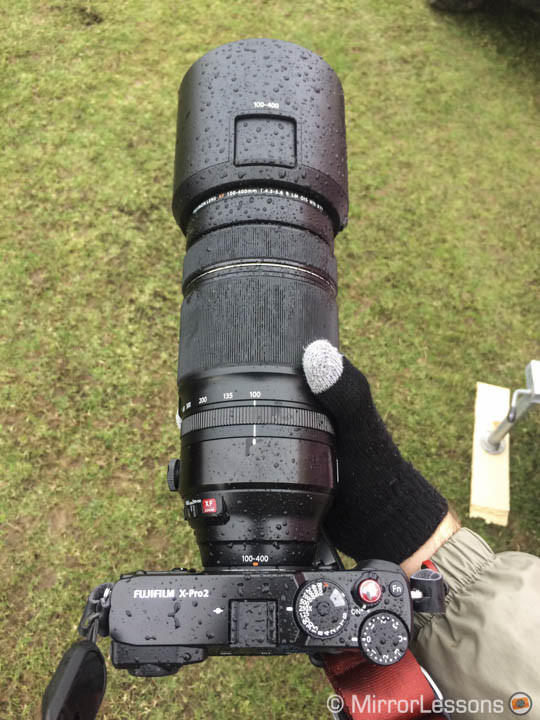
The X-Pro2 is completely weather-sealed and during my XF 100-400mm review period, I had the chance to assess that in person. It stood up to rain, hail and dust so it won’t disappoint. The only part that feels a little weaker is the SD card door. If it rains intensively I would keep that side protected somehow (even just by not having it face up).
Speaking of SD cards, the X-Pro2 becomes the second mirrorless camera after the Leica SL to feature a Dual slot. The first is compatible with the UHS-II standard while the second one goes up to UHS-I only (which doesn’t really matter in the end).
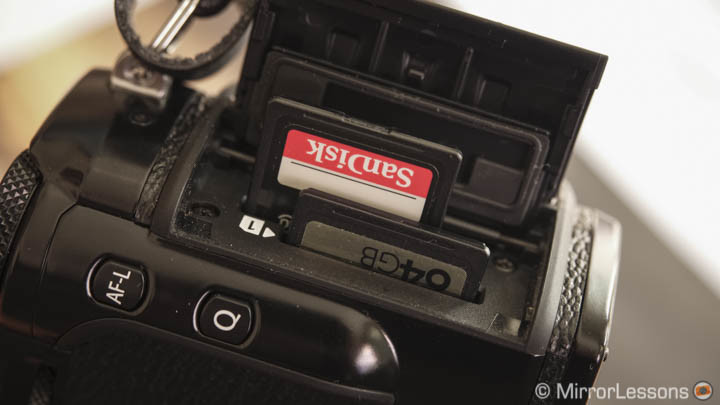
I know many professionals prefer to have this option and it clearly shows whom this camera targets. You can choose to:
- Continue to shoot on the second card once the first is full
- Back up what is recorded on the first to the second
- Record RAW files on one and JPGs on the second.
Personally I only took advantage of it once while shooting a motorbike race. Actually this is the first camera with a Dual card slot I’ve ever owned. Because I’m so used to only one slot, I didn’t use it more than that.
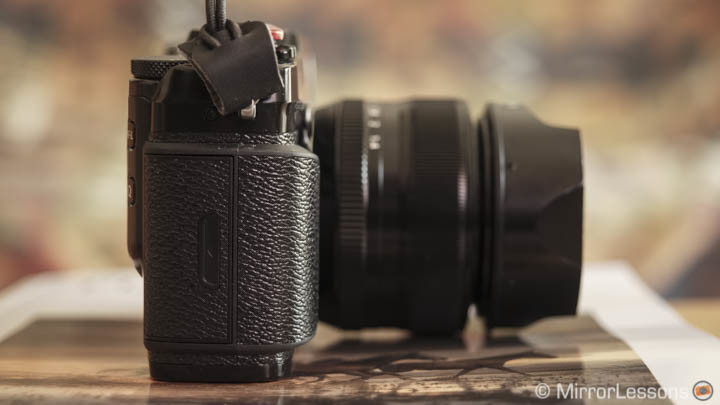
The camera is large and depending on the pictures you see on the Internet it can appear bigger than it is in realty. The body is larger than the X-T1 but remains light with a good grip even if it is not prominent.
Enhancing the X-Pro2 grip
Overall the X-Pro2 grip is comfortable with small and medium sized lenses. If you are planning to use the camera with larger lenses like the XF 50-140mm or the XF 100-400mm you might want to consider the optional MHG-XPRO2 hand grip.
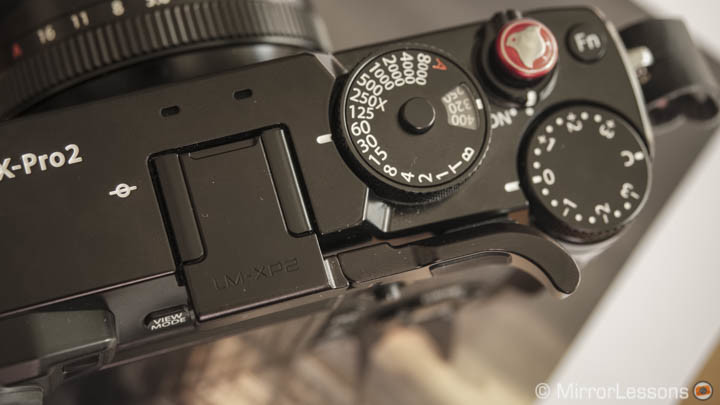
If you just want to add a bit of extra grip without increasing the size or weight, the Lensmate LM-XP2 thumb rest is an excellent solution (our review here). I’ve been using this product on other X cameras such as the X-T1 and X100T and I love it on the X-Pro2 as well. However it can be uncomfortable if you use on-camera flashes often since it occupies the hot-shoe.
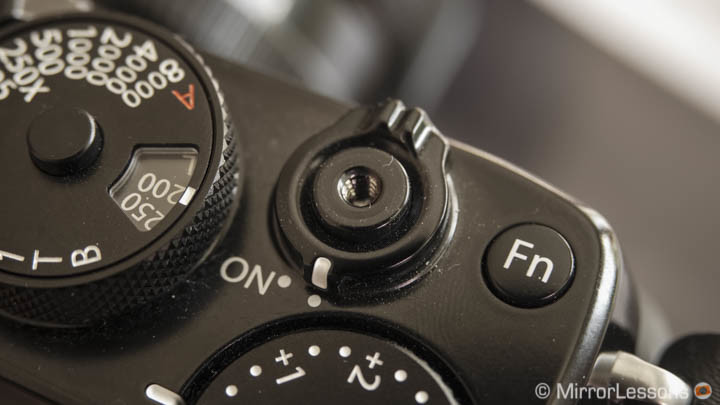
The shutter button is threaded and you can mount a soft release button (in some photos here you can see a red one from Lolumina). I like the option and it enhances the tactile experience.
What I also really like about the X-Pro2 is that despite the larger size of the body, there aren’t an excessive number of buttons or dials.
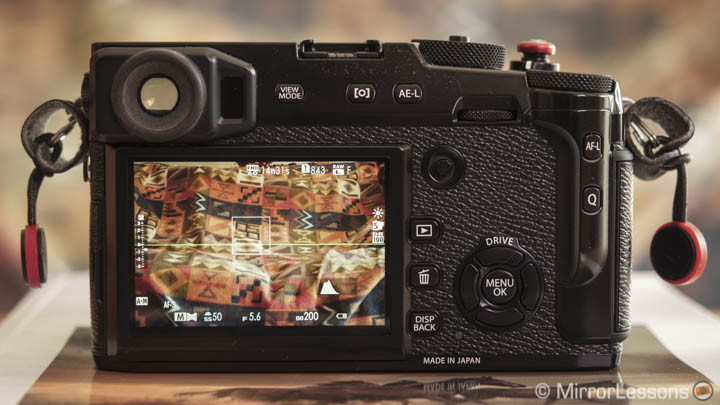
You get exactly what you need and they are all well-placed with enough space between them to make the tactile experience good even when looking through the EVF. The only one I sometimes press inadvertently with the palm of my hand is the Q button.
The exposure compensation dial is comfortable, works in ±3 Ev (1/3 steps) and has an additional C step. With the latter selected, you can adjust the exposure compensation with the front dial instead and for a maximum of ±5 Ev. This solution is becoming my favourite when I work in aperture priority because it is very quick and intuitive, especially if you use the real exposure preview on the EVF/LCD. By pressing the front dial, you can lock the exposure to prevent any accidental changes.
Adding a function button to the front lever was a very clever idea, as was the addition of an AF joystick. Since I started using it, I began to wish that every flagship mirrorless camera could have one (Olympus, Panasonic, Sony: please take note). It’s nothing new since DSLRs have it but you just realise: how come no one thought about this before?
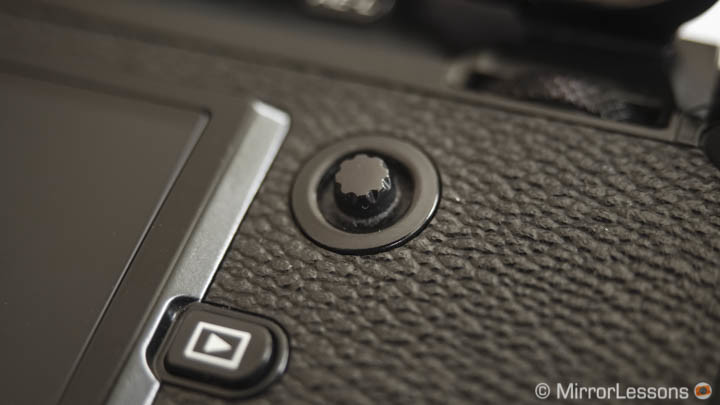
You can also configure the AF joystick behaviour. If you press and hold it, you can switch between three options:
- Turn it Off
- Unlock it with one press before moving the AF point
- Turn it On
The latter is interesting when shooting sports and action. Being able to instantaneously change the AF point by simply moving the joystick is the first reason it makes sense to have it there. Otherwise I choose the second option: when carrying the camera with a strap around my chest, the AF point moves inadvertently all the time because the AF joystick is too sensitive.
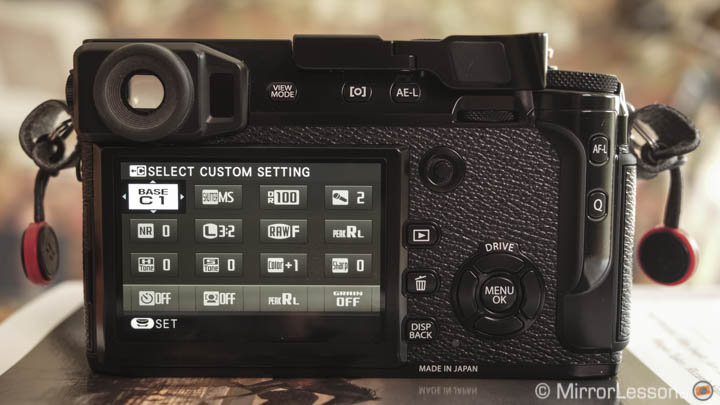
Another positive thing is the level of customisation. There are 6 function buttons (25 options to select from) and a Quick Menu with 16 settings that can be re-assigned and re-arrange on the screen. You can also save up to 7 custom settings that you can access quickly with the Q button.
The menu system has been completely re-designed and it’s one of the best I’ve ever used.
I can count the number of times I had to go looking for something in the menu on one hand. Other brands should take note.
A small disappointment: My Menu
The X-Pro2 inaugurates a new My Menu interface. It doesn’t replace the Quick Menu or the Custom settings but rather allows you to create shortcuts to settings you can find in the menu system and that you need to access often. Once you start adding items to it, it will display first everytime you press the Menu button.
However not every setting is available and those that are interesting unfortunately cannot be selected.
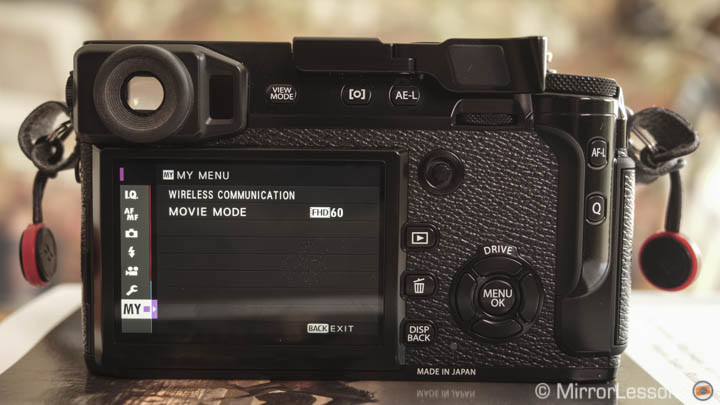
For example, the option that lets you switch from one slot to the other is not easy to find at first (Set UP menu / Save Data Set UP) and you can’t assign it to a Fn button or the Quick menu. The perfect place would have been the My Menu section, and the same applies to formatting the memory card or assigning the ISO value to the H step of the dial.
I added a few things that couldn’t fit in the Q Menu like the Movie mode quality, self-timer and wireless communication but I hope that Fujifilm will expand its utility with a firmware upgrade.
What I like: image quality
The new sensor and the new processor are a welcome upgrade to the Fuji X series. It’s not about the specs themselves because 24MP for APS-C is not news anymore. What is positive is that everything from the dynamic range to the high ISO performance to the pictures profiles is well-balanced and designed to deliver excellent results.
First the camera comes with some needed improvements in comparison to the previous generation.

In addition to the increase in megapixels, we have a vaster native ISO range and more importantly, we can finally shoot at the extended ISO values with both RAW and JPGs. The X-Pro2 becomes the best Fuji X camera for low-light shooting for this reason alone.
For example I find ISO 12800 totally usable and I relied on it for an evening soccer game because of the slow aperture range of the 100-400mm. What is also interesting is that colour noise remains contained up to ISO 12800 even with the NR set to -4 for both JPG and to 0 for RAW files (Lightroom).

Click on the image to open the full res version.

Click on the image to open the full res version.
From 25600 to 51200 you use the extended values meaning it’s the camera software that increase the brightness and you can see the difference: colour noise is more present while up to 12800 it is almost non-existent, which gives the images a lovely look with more “organic” noise. 51200 is underexposed by 1Ev for the RAW files which means that the brightness is boosted for the JPG only.
[twentytwenty]


[/twentytwenty]
With the OOC JPG, you can set the noise reduction between -4 and +4. Up to 12800, colour noise is hidden even with the NR set to -4 and that is in general my favourite setting for a ready-to-use JPG. Noise isn’t invasive and you get more details.
[twentytwenty]


[/twentytwenty]
Note: you can check out a full ISO set in full resolution here.
For very slow shutter speeds, the sensor works well even with the Noise Reduction for long exposures turned off. The noise is contained and there isn’t anything particular to declare.

Click on the image to open the full res version.

Click on the image to open the full res version.
The dynamic range is also excellent: the amount of shadows you can recover without adding noise is impressive and there is room for good highlight recovery too.
This is a camera that I can use often without the help of AE bracketing and still get very clean HDR look-a-like images.

Click on the image to open the full res version.

Click on the image to open the full res version.

Click on the image to open the full res version.
The camera gives you the option to choose between uncompressed and lossless compressed RAW files. The difference is difficult to detect and in 99% of cases, you will be fine with the lossless version. I would choose uncompressed only for heavy post processing to be sure to work with the highest quality file possible. Otherwise the lossless version will also save some space on your hard drive: the uncompressed file is around 50MB while the lossless version around 25/30MB.
Demosaicing the X-Pro2 RAF files
One of the criticisms about the previous generation of X-Trans sensor was a lack of details in certain situations (green foliage mainly) especially when using Adobe softwares.
To my eyes, the new X-Trans III sensor of the X-Pro2 improves this aspect also thanks to the increased resolution. Overall I find the results good in Lightroom.
If we want to pixel peep, we can notice that in some cases a software like Iridient Developer can still render details slightly better especially if it concerns detailed foliage in the background like short grass or trees at a distance.
[twentytwenty]


[/twentytwenty]
Then we have the picture profiles, or Film Simulation modes as they are called. I’ve never hidden my love for them: they are my favourite aspect about the X series. Colours are lovely, natural and depending on the profile selected you get a nice balanced look to your images. The Auto White Balance does a fine job most of the time and you can fine-tune it to have warmer or cooler tints.


With the X-Pro2, Fujifilm introduced a new monochrome profile called Acros and I immediately liked it. The camera is definitely one of the best mirrorless cameras for monochrome photography. The only other camera that managed to surprise me as much in this regard was the Olympus Pen F.

However an area where the X-Pro2 really stands out for monochrome photography is at the higher ISOs.
Thanks to the fine and pleasant noise rendering, the monochrome results are really excellent at high sensitivities. I can see black and white photographers considering this camera just for this aspect.

Click on the image to open the full res version.

Additional reads:
The JPG engine is also excellent with good detail rendering and the camera offers a good set of customisation options concerning shadows, highlights and other aspects. For those who want a result straight out-of-camera, the X-Pro2 is quite capable and it is worth spending time to find the optimal settings.

One flaw in the image quality: grid artifacts in backlight
One problem reported by several users is a grid (or textile look-a-like) artifact that can appear in a backlit situation especially if there is purple flare involved. It appears in both the RAW and JPG files and can be more or less noticeable depending on the amount of backlight and flare involved.


I think most of the time the solution is simply to control the flare and make sure it is not too invasive. If we have a look at the second set of images below, tilting the camera down slightly solved the problem completely.
[twentytwenty]


[/twentytwenty]
The situation can also vary from composition to composition. In the third example below, the problem doesn’t occur because the flare is not on Heather’s face.

Is this a real problem? Well, I admit I didn’t notice it until someone mentioned it on Facebook. However if you like to shoot a lot in backlight for portraits or weddings, this can be something worth researching before buying the camera.
I close this chapter with one last thought. Fujifilm has been developing the X-Trans technology for more than four years now but I start to wonder where the real advantage really lies.
When it was created, one of the main reasons was to get rid of the Anti-Aliasing (or low pass) filter to increase the resolution without moiré artefacts. But now the lack of an AA filter is less exciting because other brands managed to get rid of it while managing to contain moiré with the image processor (E-M1, GX80, NX1 and A7r II to name a few). Even in our a6300 vs X-Pro2 comparison, we found that the former gave very similar results (and it has an AA filter!).
So if there isn’t much of an advantage for sharpness, we are left with colour reproduction. The different array of the red, blue and green pixel suggests that the X-Trans sensor performs better. We often associate Fuji cameras with better colour rendition but most of the time this is related to the Film Simulation modes, which are colour profiles assigned to the JPGs (and the RAW file with compatible softwares). I’d be curious to know if Fujifilm is able to reproduce the same quality of Film simulation modes with a Bayer sensor.
Perhaps the most relevant advantage of X-Trans technology is noise at high ISOs. There isn’t as much colour noise and colour artefacts in the native sensitivity range even if the overall image brightness is lower compared to a camera with a Bayer sensor (see our a6300 vs X-Pro2 comparison once again).
But this is more a geek curiosity than anything else. As long as the quality is like this, it doesn’t really matter what type of sensor the camera has.
What I like: hybrid viewfinder
The X-Pro2 features a new hybrid viewfinder that has been updated and includes most of the characteristics found on the one inside the X100T. As you may know, the lever on the front allows you to switch quickly between an optical viewfinder, an electronic VF and an ERF (electronic rangefinder).
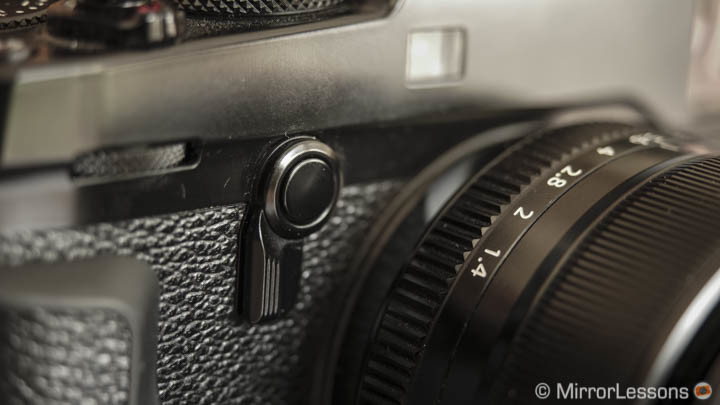
The EVF is the one I use most of the time for different reasons. First, I like to be able to preview my exposure in real time, as well as see a preview of the film simulation chosen (helpful for black and white especially). Second, with very wide or long telephoto lenses the electronic viewfinder gives you more precision.
The EVF is smaller than the one on the X-T1 (0.48 vs 0.5 inches), has a lower magnification (0.59x vs 0.77x) but keeps the same resolution of 2.36 million dots. It isn’t an OLED panel but a TFT panel.
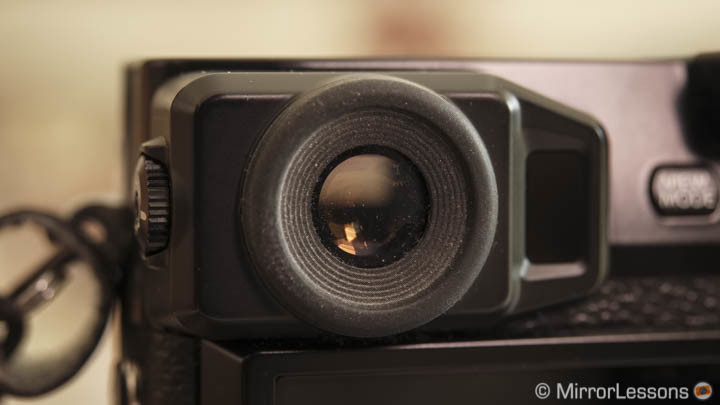
One advantage however is the faster refresh rate of 85fps when you set the Power Management to High Performance. It is really helpful in low light situations.
The lag time is also really short (0.005s) as well as the shutter response and the blackout when taking a picture (0.15s).
When shooting in continuous mode at 8fps, the display shows the last picture taken so you don’t have real view on your scene. This introduces some delay for fast action and unpredictable movements so you have to learn to anticipate them (like football for example). At 3fps, you get live view with blackouts.
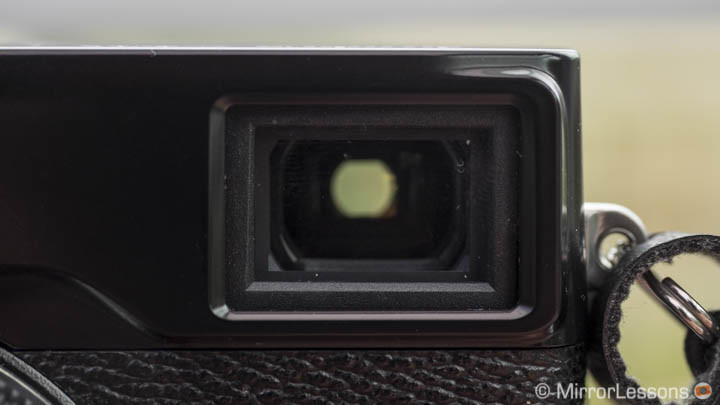
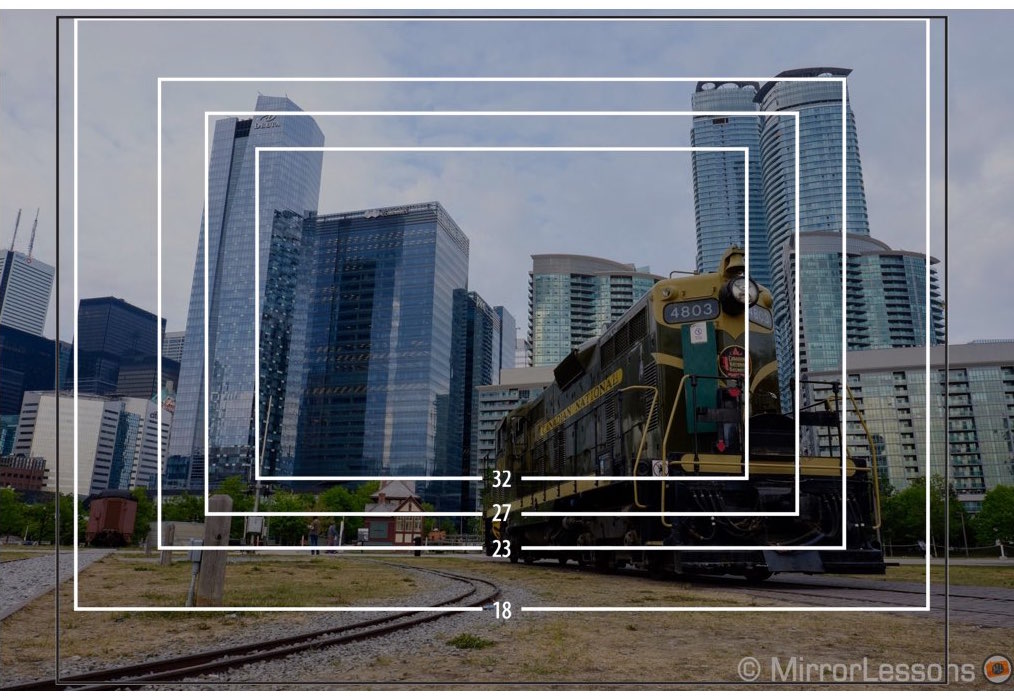
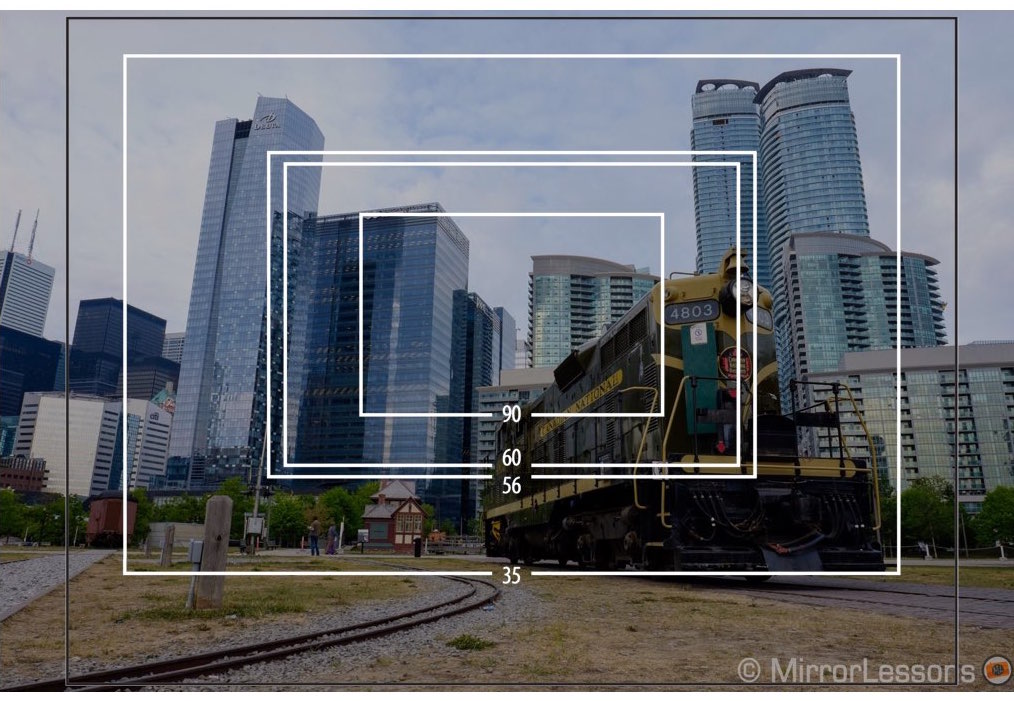
The optical viewfinder is not my primary choice but in certain situations I admit it is useful and it also gives you a different user experience. It is a Reverse Galilean type and has a field coverage of 92%. It has an equivalent field of view of 24mm approximately (35mm format terms) which means that with shorter focal lengths you won’t see the entire frame (like the Touit 12mm for example).
The camera displays a bright white rectangle inside to show you the edges of your real field of view. This becomes useful for street photography as you are also able to see outside your frame.
[twentytwenty]
[/twentytwenty]
Officially the field of view available with the bright frame goes up to 90mm (APS-C terms). However I was successful in using the OVF to track birds in flight with the 100-400mm which means it has more applications than you might think at first.
This is what’s special about this camera, because no other can do this except the previous X-Pro1 or the X100T series.
Additional read:
Once criticism about the ERF
An additional feature found on the X-Pro2 and introduced in the X100T is the ERF (Electronic rangefinder). It is a small electronic panel that can be activated at the bottom right corner of the OVF (available in Single AF only). It can display either a magnified portion of your frame (where the focus point is) or the entire frame (you press the rear dial to change it).
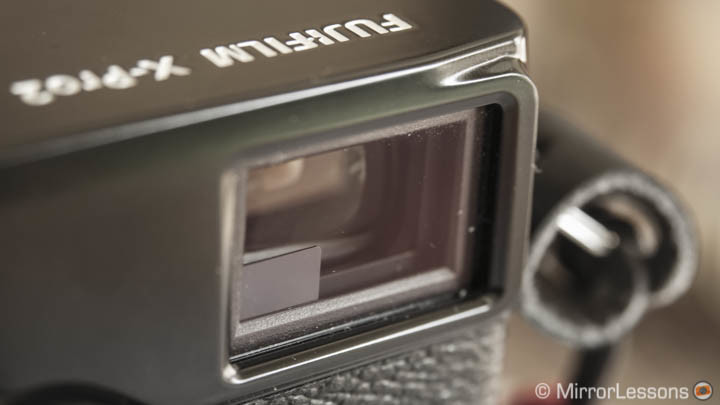
You can use it for several things: manual focus with the OVF (impossible otherwise) with the help of peaking or the Digital Split Image mode. Or you can check the brightness of your frame to have an additional reference for your exposure.
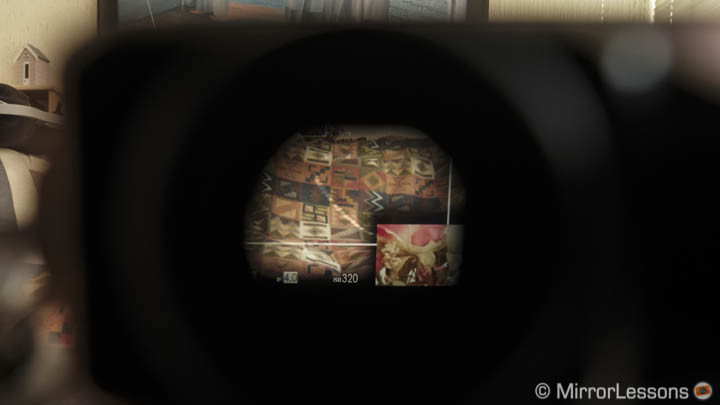
While I appreciate the effort to make the OVF more advanced, I simply find the ERF useless. The screen is way too small and requires lot of concentration at the extreme corner of the viewfinder which distracts you from the main subject. In over 3 months with this camera, I’ve never used it.
What could be better: video capabilities
The X-Pro2 features a relevant improvement in video quality compared to the rest of the X-series. Aliasing and moiré is greatly reduced and the sharpness of the footage is way better. I admit I find some of the recorded video interesting because of the film simulation modes. Even shooting monochrome with the Acros profile gives excellent results.
Despite the increase in quality, the camera is still not designed for serious video shooting.
There isn’t a dedicated picture profile for video that can give the footage more dynamic range. Unfortunately the shadows/highlights setting is not effective. The best solution is to select the Pro Neg standard profile but we are still far from the technology seen on Panasonic and Sony cameras.
There is also a lack of options like timecode, zebra pattern, etc. The audio control is way too limited (4 steps only). The mic input is a 2.5mm type which requires an annoying adapter.
Finally the lack of a proper movie mode means you don’t have a way of previewing the image before starting to record. You can change the shutter speed or aperture while recording but not the ISO. At least the ISO dial works for both stills and video and you don’t have a separate ISO setting for movies anymore.
Note that for some reason, you can only record video on SD card slot number 1. If your card is in the second slot, the camera will show a warning message indicating that Slot 1 is empty.
What could be better: battery life
The battery life on the X-Pro2 will vary a lot depending on the settings used. If you need the camera at full power for sports or other situations, it will drain very quickly. For example at the football game I shot with the High performance set to Power management (85fps for the EVF), continuous AF and 8fps. After 90 minutes and approximately 2000 pictures, I was using my third battery.
If you set the power management to standard, shoot in single mode with a more moderate number of shots, the camera can last longer with just one battery. It is possible to bring back home 400 shots on a single charge.
A useful tip is to deactivate the eye sensor and choose the view mode with the dedicated button. I found that when carrying the camera on a strap, the eye sensor constantly activates/deactivates the EVF.
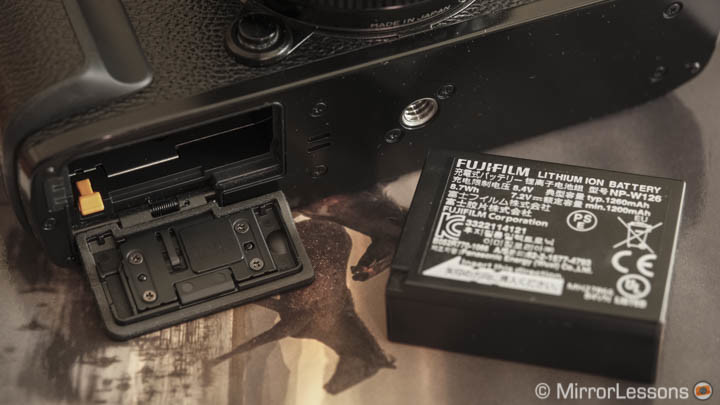
I found it a little bit surprising that Fujifilm didn’t release a new, larger battery for the camera. Since the body is larger than the other X cameras, it is a shame it can’t house a better battery like the one for the Panasonic GH series or Samsung NX1. I guess the lack of a proper front grip makes this more difficult to achieve.
There is also no battery grip available which is another disappointment if you intend to use the camera for sports. You could say that this is not a sports camera, yet Fujifilm put in a lot of effort to demonstrate the contrary.
What I don’t like: ISO dial
This chapter and the following highlight the two aspects I don’t like about the design of this camera; two aspects that stopped me from stating that it is the most well-designed camera I’ve ever used.
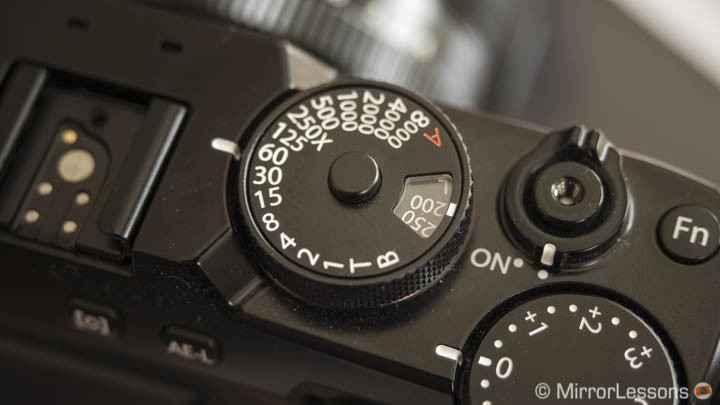
I have a love/hate relationship with the ISO dial. When I first unboxed the camera and played with it, I liked the idea. Then after a few minutes, I started to realise that it wasn’t the most comfortable solution in the world and this was confirmed when I started using the camera.
The ISO dial is built into the shutter speed dial. To change the speed, you just rotate the dial as you normally would. For the sensitivity, you lift the external ring and rotate it.
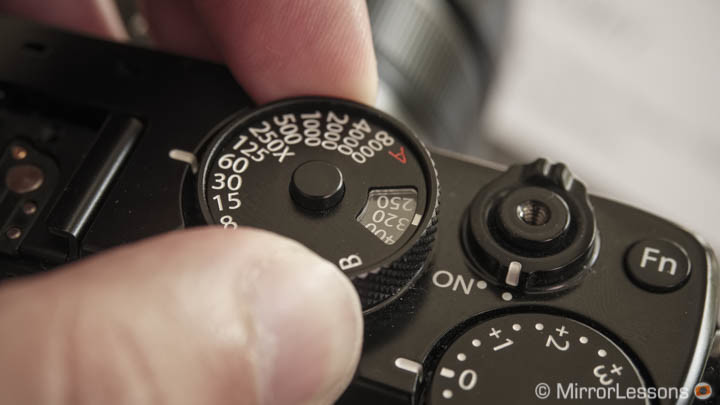
If you have time for it, it works well. If you are in a rush, like working at an event or wedding, it can become very frustrating.
Most of the time you will end up turning the shutter speed dial instead because you haven’t lifted the ring high enough. Plus, depending on the shutter speed used, the ISO values are sometimes shown upside-down.
So during my three months of testing, I constantly switched between liking and hated it. I like the idea of a physical dial for the ISO, but the one on the X-T1 is simply better. This one is not practical enough.
What’s interesting is that I showed the camera to an experienced photographer who shot a lot with film in the past for weddings and news. He had no problem with it whatsoever probably because he’d seen this type of solution in the past on film cameras. I guess it is a more personal call here.
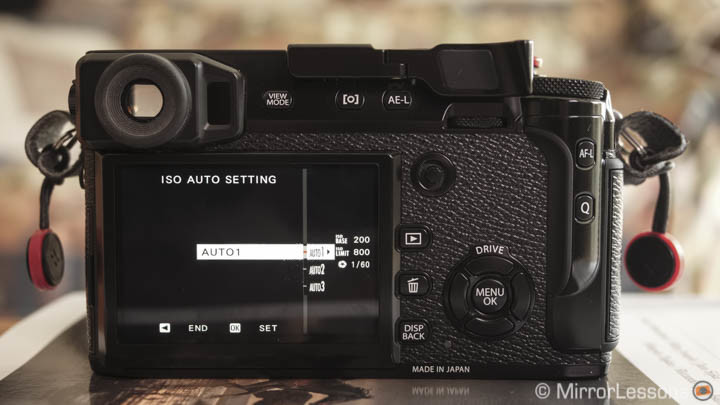
Another small issue is that this dial can’t be de-activated and you can’t assign the ISO to a function button. So when I don’t want to deal with it, I set it to Auto and choose one of the three Auto ISO options depending on my needs. The camera’s metering works really well and the image quality at most ISO values is great so I don’t have to worry about it.
What I don’t like: lack of tilting/touch screen
Nowadays the rear screen of a mirrorless camera is one of the most banal aspects you can talk about, yet it’s one that can raise many discussions. Some prefer a fixed one; some want it tilting, touch sensitive or both.
The X-Pro2 has a fixed rear LCD panel. I prefer a tilting solution not because it is cool or modern but because it is useful. Some X-Photographers mentioned that Fuji justified its choice by saying that it didn’t want to increase the size of the camera, nor compromise its robustness.
Another series of discussions highlighted that some faithful X-Pro1 customers didn’t want a tilting/touch screen and would even pass on the camera if it had one. On the other hand, other potential customers renounced the camera because it lacks one!
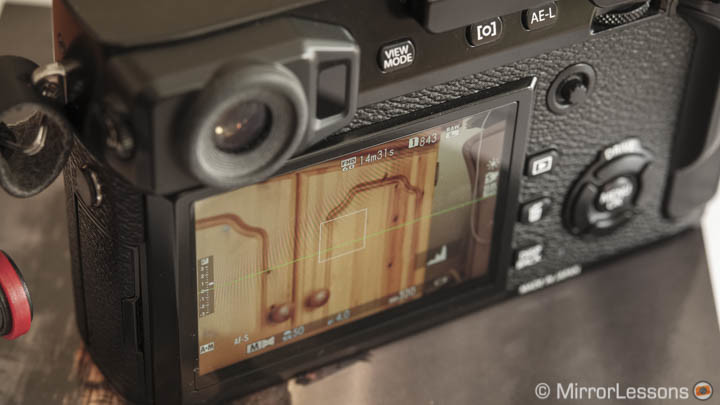
Now, allow me to share my brutal and honest two cents about this matter:
- A tilting screen can also not be tilted, so those who don’t like a titling screen can simply choose not to move it from the default position. It is as simple as that, like drinking a glass of water. But it gives the option to those who like one. The same reasoning can be applied to touch sensitivity. You just need an option to turn it off. Everybody wins.
- There are robust, completely weather-sealed mirrorless cameras with tilting/touch screens, and some of them are smaller than the X-Pro2.
- Once you give it a go in a concrete situations, you suddenly realise it is not that bad.
- If the reason was really not to mess with the classic/pure photography approach of the camera, then why include Wifi, movie recording or partial colour filters?
There isn’t a lot to talk about. A tilting screen is useful. Deciding to exclude it means giving less to the customer.
You could argue that most pro DSLRs don’t have a tilting screen and I honestly think it’s time they started receiving them (actually, it’s happening, slowly).
Of course I managed to survive fine without it which means you can as well. When shooting landscapes at a low angle, I wished many times for a tilting screen but still managed to bring back the shot, which is something I can also say about one of my favourite Fujifilm cameras, the X100T.
Nitpicking: lack of improvements to secondary features
The X-Pro2 is not the richest camera when it comes to extra features. Although I wouldn’t consider this something totally negative, I wish that at least some of the options could be more complete.
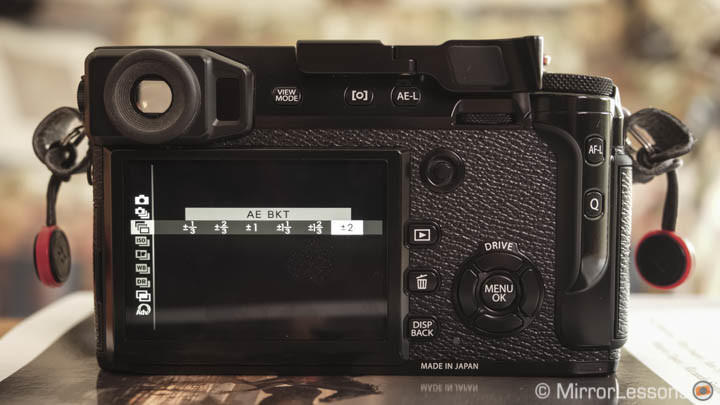
For example, the bracketing mode is still limited for HDR. I can now choose between 1Ev to 2Ev of difference but still only for 3 shots. What is the mysterious limit that is stopping us from having 5 or even 7 shots like basically every other mirrorless camera? Granted, you can do all that manually but since the options are there, why not make them better? Perhaps Fujifilm believes their RAF files are so good that you don’t need more than 3 shots and I confirmed this in the image quality chapter above. Still, more options usually make customers happier (and this is the nitpicking chapter anyway!).
The X-Pro2 has Wi-Fi capabilities and as usual, you can remotely control it, geo-tag your pictures, browse and transfer images to your mobile device with the dedicated app (Camera Remote).
The remote control part is well done, the layout of the app is easy to use and you can access most of the settings, and record photos or video. In playback mode you can switch between the two SD card slots.
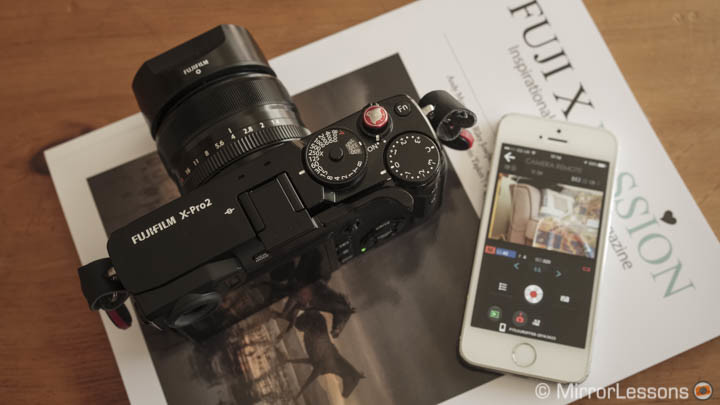
However I wish that the connection could be faster (you have to confirm multiple times on the camera before the connection is established). You can save the JPGs at a lower resolution (2MP) or at full resolution (Set Up / Communication settings / Wireless settings ) on your mobile device.
Another option that seems to be missing is tethered shooting, something that is available with the X-T1. For such a professional camera, it is a feature that could prove useful for studio work (and it has been advertised as such too). You can use a desktop software via Wifi but the options are more limited and it won’t transfer RAW files.
Multiple exposure is another one and here is something that hasn’t been improved on any mirrorless camera really. Why not give more blending options (like on Canon DSLRs) instead of just a 50% opacity blend? It would give more creative possibilities in-camera, as well as being able to record more than 2 images.
Extra features worth mentioning
Among the other features worth mentioning on this camera we find interval shooting for time-lapse or star trails with basic functionalities (interval time and number of shots).

There is an electronic shutter option that allows you to shoot in silent mode up to 1/32000s. The camera also has lots of MF assist options including peaking (4 colors available), magnification and Digital Split Image. I find peaking to be very accurate.
Conclusion: X-Pro2 identity and the X-T2 ghost
If I put aside the precision and professionalism required to test a camera and speak from the heart instead, I admit I am quite fond of the Fujifilm X-Pro2. It isn’t a cheap camera by any means and perhaps is slightly overpriced but it can give you lots of satisfaction.
It has some flaws (the lack of tilting screen being the most frustrating one) but it is also very well designed in almost every other way. I understood this while testing other cameras, then coming back to it. So I somehow forgive what the X-Pro2 lacks because most of the time the shooting experience is pleasant, the image quality is excellent and the AF is second only to the a6300.
Another thing the X-Pro2 lacks is sensor stabilization. I had to remember that even 1/60s can be too slow sometimes while it isn’t a problem with several micro four thirds or A7 II cameras. However I don’t consider this to be a real flaw. There are many cameras out there without in-body stabilization. I prefer to consider it an added bonus on those products that have it.
What I also like is that the X-Pro2 doesn’t have crazy specifications when it comes to megapixels or AF points. It has a perfect mix of performance and image quality, and I wouldn’t hesitate to call it the best high-end APS-C mirrorless camera you can find right now. You get substance over specs.

But with all that said I can’t help but notice that many users are waiting for the next camera.
Fujifilm advertised the new X-Pro2 in every possible way, showing it could excel in all weather conditions, for landscapes, wildlife, weddings, portraits, sports, fashion, street and basically any genre you can think of (maybe I’m missing still life and macro but we still need more lenses for that). But the wait for the X-T2 seems to have priority.

Even without rumour sites leaking all sorts of information and images, it is still very logical to expect the X-T1 successor to have the same characteristics found on the X-Pro2 (hybrid viewfinder aside). I am sure it will have a tilting screen (touch as well perhaps since Fuji has the technology now?). And let’s not forget that the X-T1 is the most popular X camera to date.
My impression is that, tilting screen or not, many people are waiting for this new camera and the X-Pro2 is just here to preview its potential. This is a shame because the X-Pro2 is so much more and while I have no doubt it will find its niche of customers like the X-Pro1 did, one of its (unwanted) roles might be to clear the red carpet before the X-T2’s arrival. A flagship camera, released after four years, should be more than that. It should be a camera that everyone wants.
Maybe I’m just meditating too much on this. After all, the X cameras consist of two series, with the rangefinder and SLR design being the main difference. The X-Pro2 and X-T2 will probably follow the same path. Perhaps releasing them at the same time would have given customers the choice right from the start.
 What I like about the Fujifilm X-Pro2:
- Minimalistic, robust and weather-sealed design
- Excellent ease of use concerning buttons, most dials, customisation
- The best menu system seen on a mirrorless camera
- Excellent image quality with beautiful colour profiles
- Color noise is absent up to 12800 ISO and the low light performance in black and white is the best you can find
- Most of the time, the dynamic range and RAW file versatility is enough to not bother with AE bracketing
- The AF system is second to the Sony a6300 only
- One of the best EVFs on the market and the bonus of the hybrid viewfinder
 What I don’t like about the Fujifilm X-Pro2:
- The lack of a tilting/touch screen reduces the usability in some situations
- The ISO dial can be very frustrating
- Some key settings can’t be assigned to My Menu
- A new battery type with a longer lifespan would have been appreciated
- Face and eye detection are not reliable
- Grid artifacts in backlit shots can be annoying
- Video quality has improved but is still limited for serious shooting
Nitpicking:
- The ERF is not really useful but it won’t harm anyone
- For pixel peepers, Adobe’s software is still not the best solution to maximise details in some situations
- Some secondary features like AE bracketing still lack more options
- Connecting the camera to a mobile device via wifi requires multiple confirmations
